Exercise - Build a basic Dataverse data model
Important
This hands-on lab assumes that you have a Dataverse instance that you can work with. If you don't have an instance you can work with, you can obtain a 30-day Power Apps trial plan here.
Important
If you sign up for a Power Apps trial using your company email address, and your company is already using Power Apps, your trial will be added to your organization's current tenant. If your current Microsoft account doesn't already have the necessary permissions, you may not be able to add tables to your trial. In these instances, you can sign up for a new trial account that doesn't use your work or school account. You can find instructions on how to do this here.
Contoso Real Estate wants to be able to keep track of the properties they sell in Dataverse so that the data can be easily used in canvas and model driven applications. To introduce you to how to build a table in Microsoft Dataverse, you're creating basic table in an existing Dataverse instance to store real estate properties.
The table includes five columns:
- Property Name
- Asking Price
- Bedrooms
- Bathrooms
- Client (This field is a lookup field that can either look up an Account or Contact.)
Open a web browser and navigate to https://make.powerapps.com.
Using the navigation on the left, select Tables.
Select + New table and choose Set advanced properties.
On the New Table screen, complete as follows:
Display Name: Real Estate Property
Plural Name: Real Estate Properties.
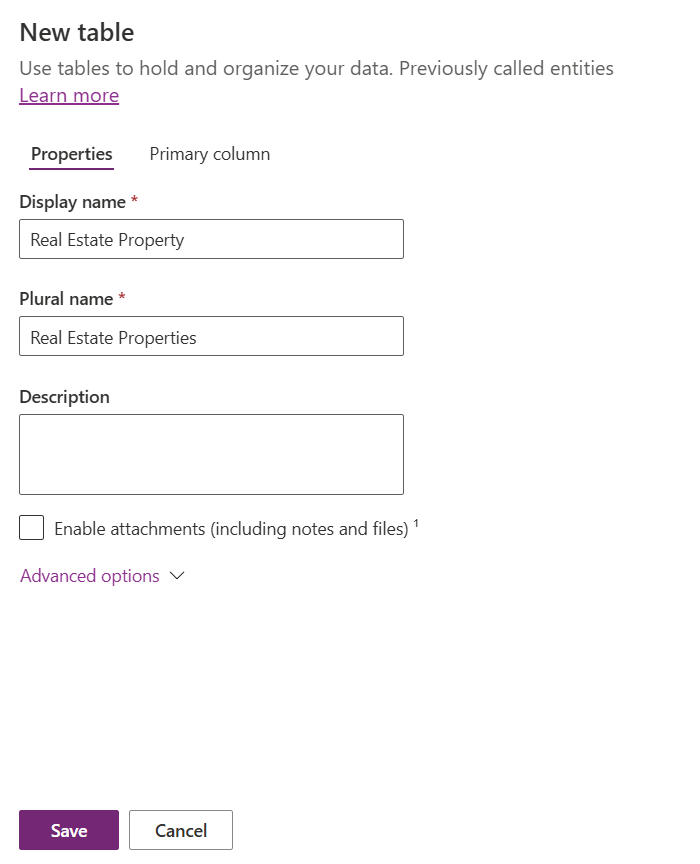
Select the Save button.
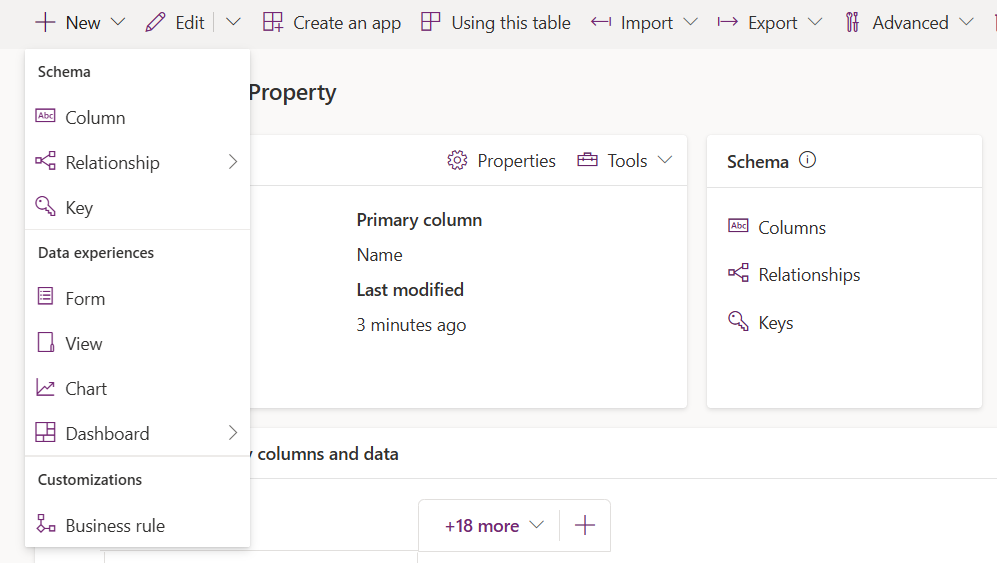
Select the drop-down menu next to + New and select Column.
Change the Display name to Property Name.
Select the Save button.
Select the drop-down menu next to + New and select Column.
Configure your new column as follows:
Display name: Asking Price
Data Type: Currency
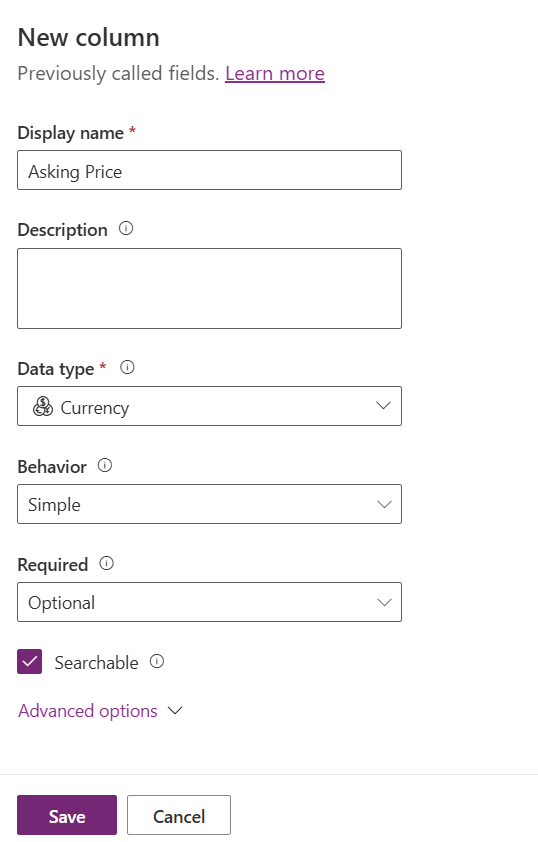
Select the Save button.
Select the drop-down menu next to + New and select Column again.
Configure your new column as follows:
Display Name: Bedrooms
Data type: Whole Number (Number > Whole Number)

Select the Save button.
Select the drop-down menu next to + New and select Column again.
Configure your new column as follows:
Display Name: Bathrooms
Data type: Whole Number (Number > Whole Number)
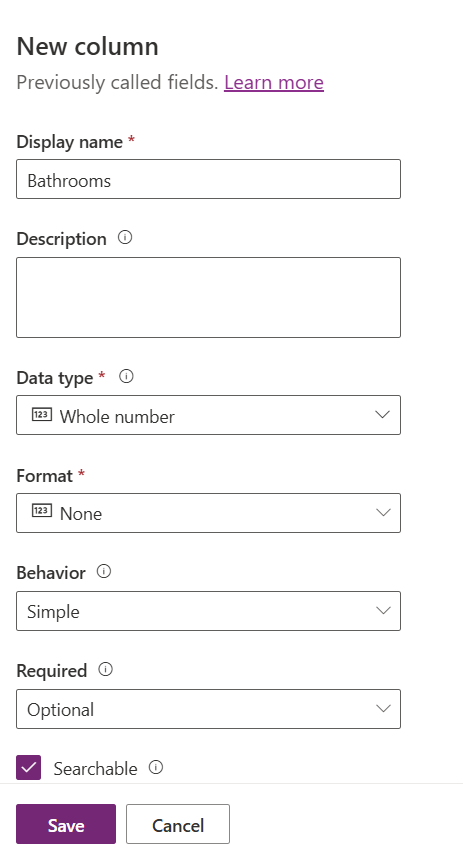
Select the Save button.
Select the drop-down menu next to + New and select Column again.
Configure your new column as follows:
Display Name: Client
Data type: Customer (Lookup > Customer)
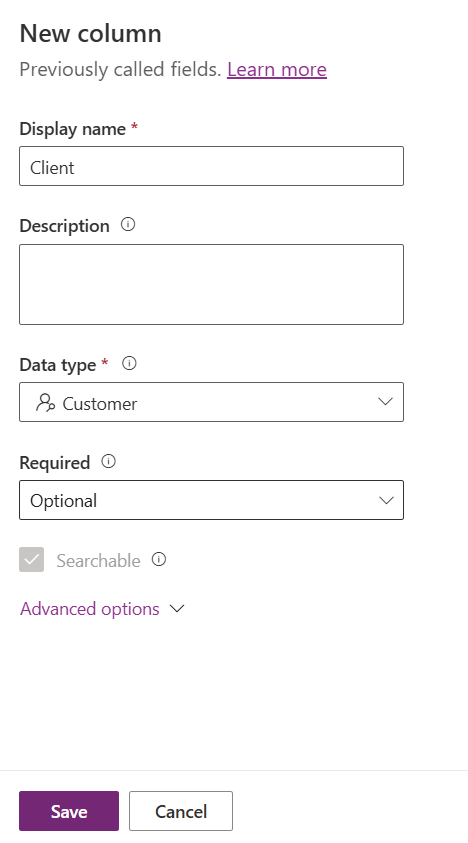
Select the Save button.
Congratulations, you successfully created a table in Dataverse. From this table, you can build forms and views based that could be used in model-driven applications, or you could connect to the table in a canvas application.