Deploy and configure Azure NAT Gateway
Deploying and configuring the Azure NAT Gateway service isn’t a complex task. However, it requires some preparation. You should create a virtual network, subnets, and public IP address resources before you start deploying the Azure NAT Gateway service.
When it comes to public IP addresses, you also need to make sure that you use a standard SKU public IP address. Also, make sure that your Azure VMs or other Azure resources are placed in a virtual network and subnet that you plan to assign to Azure NAT Gateway.
Deploy the Azure NAT Gateway service by using the Azure portal
If you want to add the Azure NAT Gateway service to your Azure network environment, you can do so in the Azure portal by performing the following steps:
Navigate to the Azure portal.
Select Create a resource, and then in the search box, enter NAT Gateway.
Select the NAT gateway item, and then select Create to start the creation wizard.
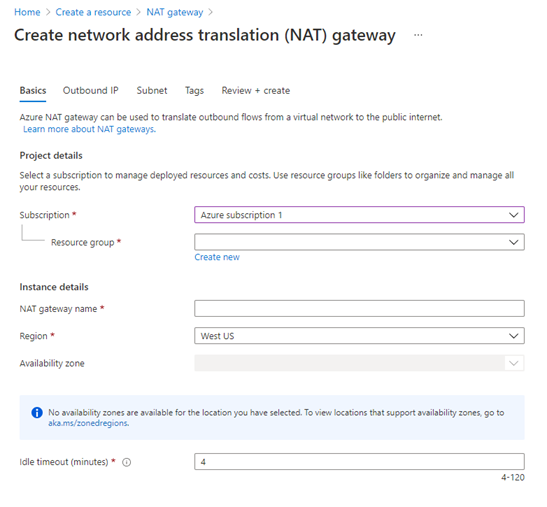
In the first step in the wizard, in the Subscription field, select your Azure subscription. This subscription is charged for this service, so make sure that you select the correct one.
In the Resource group field, either select an existing resource group or select Create new.
Note
Most likely, you'll have a resource group already created for existing Azure resources, but you can also create a new one if you want.
Provide a NAT gateway name and Region where this service should be located.
Note
You can also select the Availability zone for the NAT gateway. This is optional, but if you have other Azure resources that you plan to use with this NAT gateway, it’s recommended that you match the zone of those resources. Otherwise, you should just leave this field at the default value.
Select Idle timeout (minutes) to determine when NAT gateway removes idle flows.
After you configure the basic settings, you need to configure the outbound IP settings by configuring public IP addresses or public IP prefixes. If you don’t have these objects already created, you can create new ones. Ensure that you select the public IP prefix with enough public IP addresses allocated. For simple scenarios, it's probably appropriate to select the /31 or /30 prefix to have two or four IP addresses. But, make sure you first check that it's suitable for that particular scenario.
After you configure public IP settings, you need to select a virtual network and a subnet to use with this NAT gateway. You must select at least one subnet. You can add and remove subnets after creating the NAT gateway. Optionally, you can add tags to Azure NAT Gateway objects and download a template for automation before you select the option to create the Azure NAT Gateway gateway.
When you create an instance of the Azure NAT Gateway service, your subnet is reconfigured so that it sends all outbound traffic to the NAT gateway service. There’s no need to create routes, because it happens automatically.
If you don’t want to use the Azure portal to create an instance of the Azure NAT Gateway service, you can use Azure PowerShell to perform this task. Use the New-AzNatGateway cmdlet to create an instance of the Azure NAT Gateway service. You should then use cmdlets to configure your subnet to use this service.
Deploy the Azure NAT Gateway service by using an Azure Resource Manager template
For automation purposes, you can create Azure NAT Gateway by using an Azure Resource Manager template. With Azure Resource Manager templates, you can automatically deploy a virtual network, a NAT gateway resource, and a VM.
An Azure Resource Manager template is a JSON file that defines the infrastructure and configuration for your project. The template uses declarative syntax. In declarative syntax, you describe your intended deployment without writing the sequence of programming commands to create the deployment.