Exercise - Use the .NET Aspire eShop
We can use the latest eShop reference application, which includes the .NET Aspire stack, to illustrate a complete and complex cloud-native app.
Imagine you work for an outdoor clothing and equipment company. Your development team has been working with .NET Aspire to create a new eShop web app for the main customer-facing site. You want to understand the architecture of this app and test its functionality before you deploy it.
In this unit, you'll install .NET Aspire and its prerequisites and then use the eShop app to investigate and run .NET Aspire.
Install prerequisites
The prerequisites for this .NET Aspire exercise are:
- .NET 8
- Visual Studio 2022 Preview
- Docker Desktop
- .NET Aspire workload in Visual Studio
If you've already got these installed, you can skip ahead to explore the eShop application.
Install .NET 8
Follow this .NET 8 link, and select the correct installer for your operating system. For example, if you are using Windows 11, and a modern processor, select the x64 .NET 8 SDK for Windows.
After the download is complete, run the installer and follow the instructions. In a terminal window, run the following command to verify that the installation was successful:
dotnet --version
You should see the version number of the .NET SDK you installed. For example:
8.0.300-preview.24203.14
Install Visual Studio 2022 Preview
Follow this Visual Studio 2022 Preview link, and select Download Preview. After the download is complete, run the installer and follow the instructions.
Install Docker Desktop
Follow this Docker Desktop link, and select the correct installer for your operating system. After the download is complete, run the installer and follow the instructions. For the best performance and compatibility, use the WSL 2 backend.
Open the Docker Desktop application and accept the service agreement.
Install the .NET Aspire workload in Visual Studio
Install the .NET Aspire workload using the .NET CLI:
Open a terminal.
Update .NET workloads with this command:
dotnet workload updateYou should see a message that the workloads are updated successfully.
No workloads installed for this feature band. To update workloads installed with earlier SDK versions, include the --from-previous-sdk option.
Updated advertising manifest microsoft.net.sdk.ios.
Updated advertising manifest microsoft.net.workload.mono.toolchain.net6.
Updated advertising manifest microsoft.net.sdk.android.
Updated advertising manifest microsoft.net.workload.emscripten.net7.
Updated advertising manifest microsoft.net.workload.emscripten.net6.
Updated advertising manifest microsoft.net.sdk.macos.
Updated advertising manifest microsoft.net.workload.emscripten.current.
Updated advertising manifest microsoft.net.workload.mono.toolchain.current.
Updated advertising manifest microsoft.net.sdk.maui.
Updated advertising manifest microsoft.net.workload.mono.toolchain.net7.
Updated advertising manifest microsoft.net.sdk.maccatalyst.
Updated advertising manifest microsoft.net.sdk.tvos.
Updated advertising manifest microsoft.net.sdk.aspire.
No workloads installed for this feature band. To update workloads installed with earlier SDK versions, include the --from-previous-sdk option.

Successfully updated workload(s): .
Install the .NET Aspire workload with this command:
dotnet workload install aspireYou should see a message that the .NET Aspire workload has been installed.
Installing Aspire.Hosting.Sdk.Msi.x64 ...... Done
Installing Aspire.ProjectTemplates.Msi.x64 ..... Done
Installing Aspire.Hosting.Orchestration.win-x64.Msi.x64 ............. Done
Installing Aspire.Hosting.Msi.x64 ..... Done
Installing Aspire.Dashboard.Sdk.win-x64.Msi.x64 ....... Done

Successfully installed workload(s) aspire.
Verify that the .NET Aspire workload is installed with this command:
dotnet workload listYou should see the details of the aspire workload.
Installed Workload Id      Manifest Version      Installation Source
---------------------------------------------------------------------------------------------
aspire                     8.0.0/8.0.100         SDK 8.0.300-preview.24203, VS 17.10.34902.84

Use `dotnet workload search` to find additional workloads to install.
Explore the .NET Aspire eShop code
Let's use the eShop reference application to demonstrate the .NET Aspire stack. We'll clone the code from GitHub and examine it in Visual Studio:
In the command line, browse to a folder of your choice where you can work with code.
Execute the following command to clone the eShop sample application:
git clone https://github.com/dotnet/eShop.gitStart Visual Studio and then select Open a project or solution.
Browse to the folder where you cloned eShop, select the eShop.Web.snlf file, and then select Open.
Examine the solution structure in Solution Explorer. At the top level, the eShop code includes folders for tests, GitHub actions, and solution items. Expand the src folder, which contains source code for the microservices:
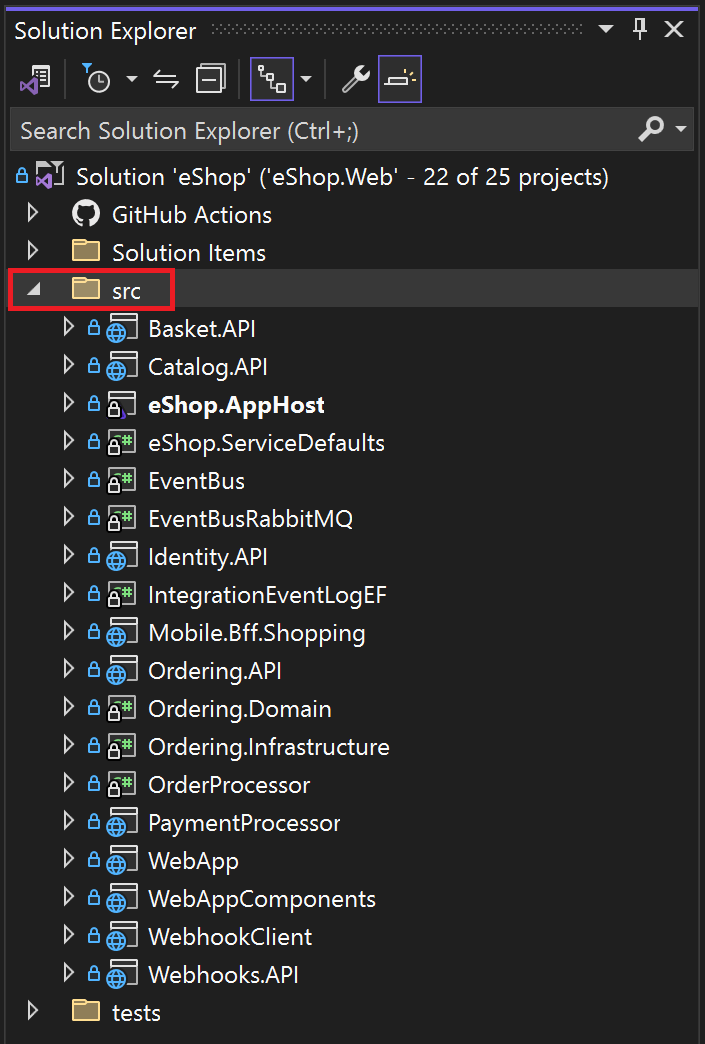
Notice that:
- The src folder includes the .NET Aspire AppHost and ServiceDefaults projects.
- The AppHost project is set as the startup project for the solution.
Expand the AppHost project, and then select the eShop.AppHost/Program.cs file.
In the Program.cs file, notice that:
- Components of the application are added to a
DistributedApplicationBuilderobject namedbuilder. - Backing services, such as a Redis cache, a RabbitMQ messaging service, and a PostgreSQL database, are added to the builder. Each will be provisioned in a Docker container.
- Each microservice is added to the builder by using the
builder.AddProject()method. - References to the backing services are injected into each microservice by using the
.WithReference()method.
- Components of the application are added to a

Edit code in the .NET Aspire eShop
We'll make a simple change in the source code to test when we run the app:
In Solution Explorer, expand the src/WebApp/Components/Pages/Catalog folder, and then select the Catalog.razor page.
Locate this line of code:
<SectionContent SectionName="page-header-subtitle">Start the season with the latest in clothing and equipment.</SectionContent>Replace the line with this text, or create your own subtitle for the page:
<SectionContent SectionName="page-header-subtitle">Bringing you the latest in clothing and equipment.</SectionContent>
Run the .NET Aspire eShop
Let's run the app and use the .NET Aspire dashboard to examine a request:
In Visual Studio, press F5 or on the Debug menu select Start Debugging. Visual Studio builds the containers for the eShop.
If the Start Docker Desktop dialog appears, select Yes.
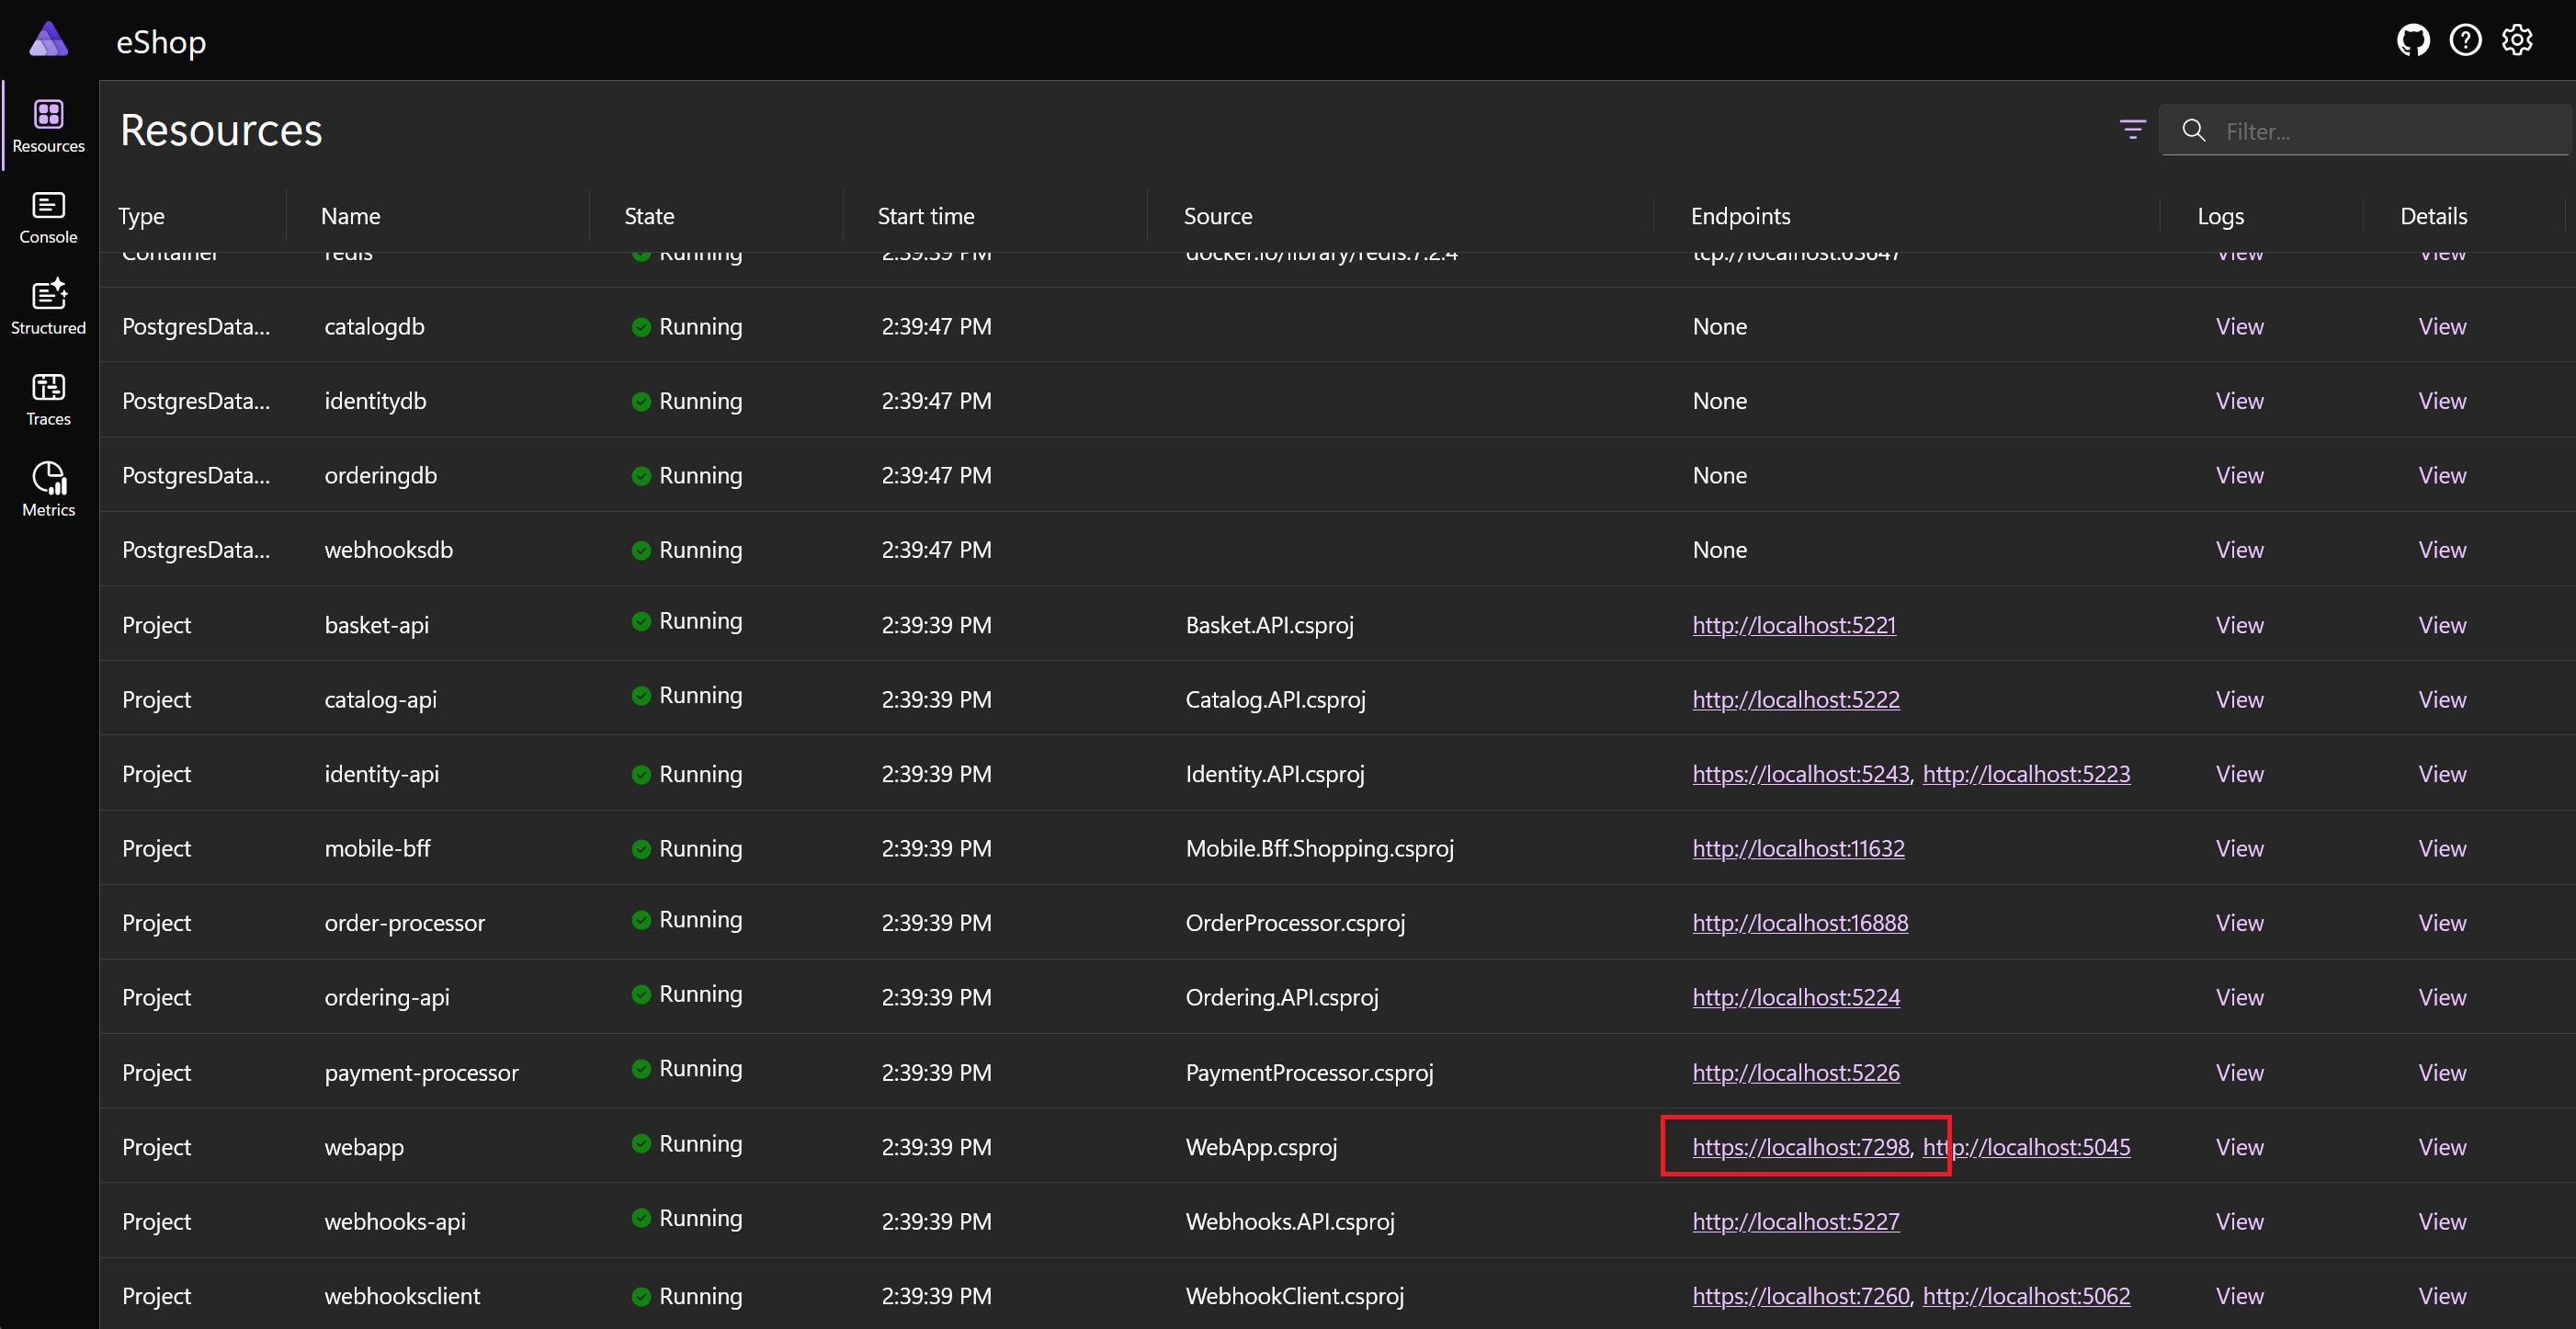
When the eShop is built and deployed to Docker, the .NET Aspire dashboard is displayed in the default browser.
To browse to the homepage, in the row for the webapp project, select the https://localhost:<port> link:
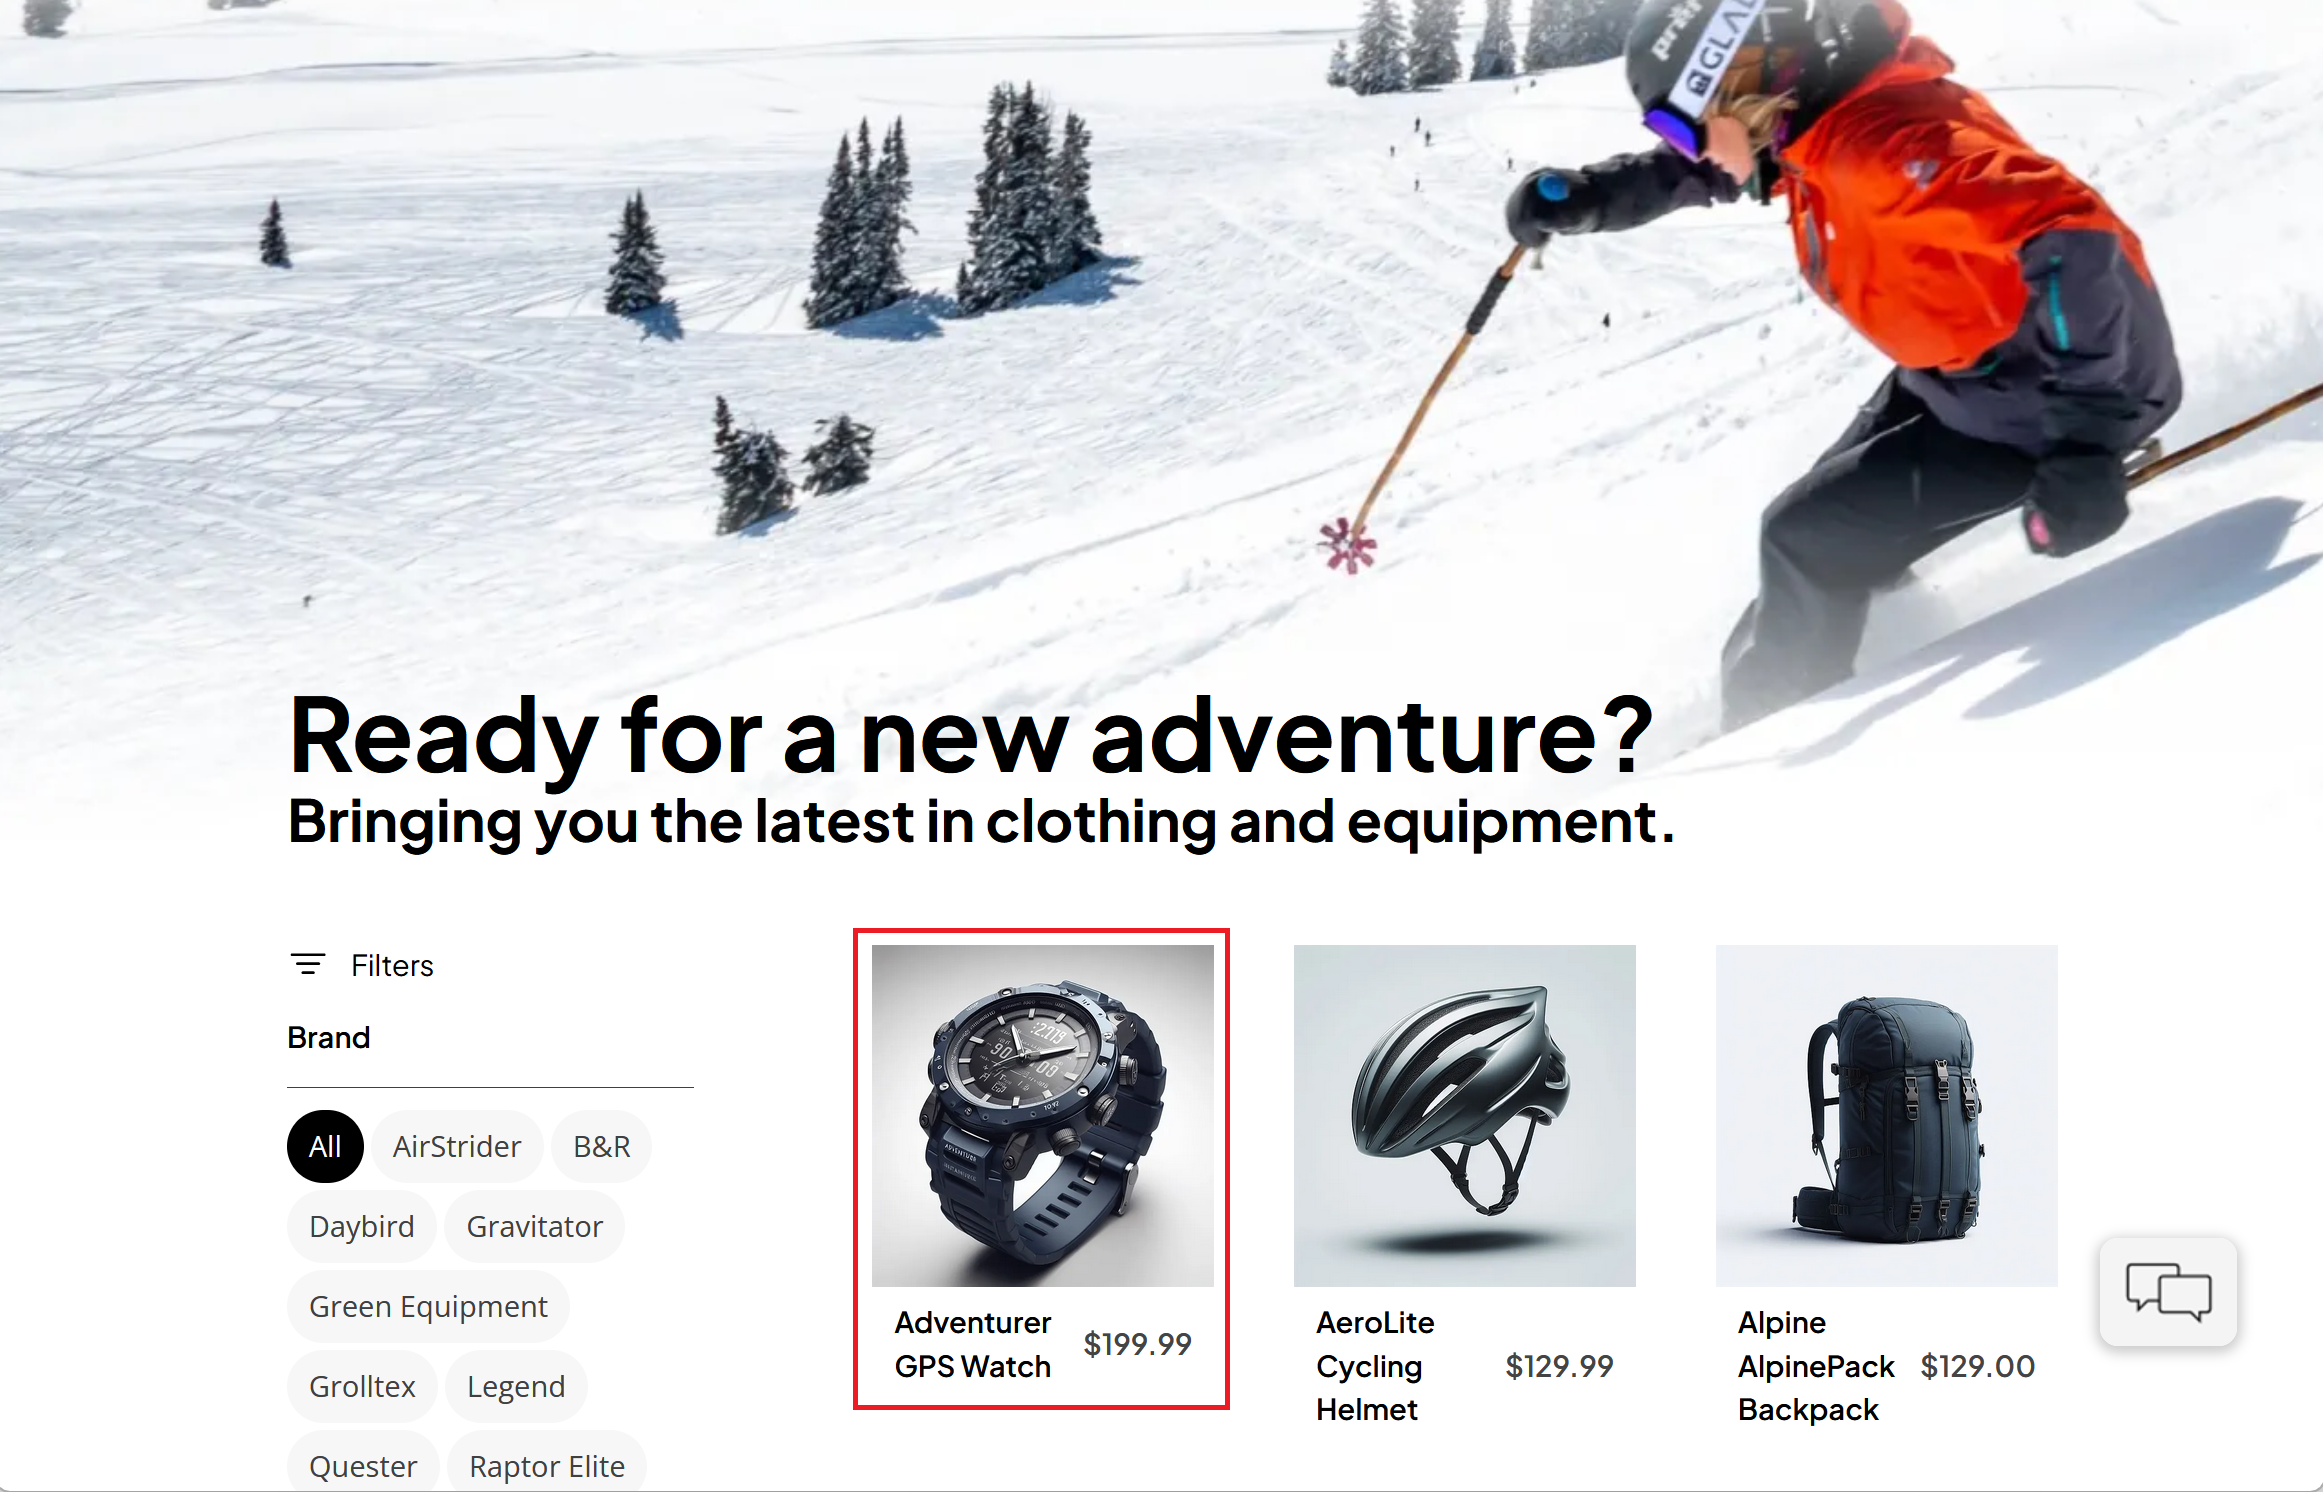
The eShop homepage is displayed in a new browser tab. Notice that your subtitle is displayed.
Select the Adventurer GPS Watch product:
Switch to the browser tab that displays the .NET Aspire dashboard, and then in the left menu, select Traces.
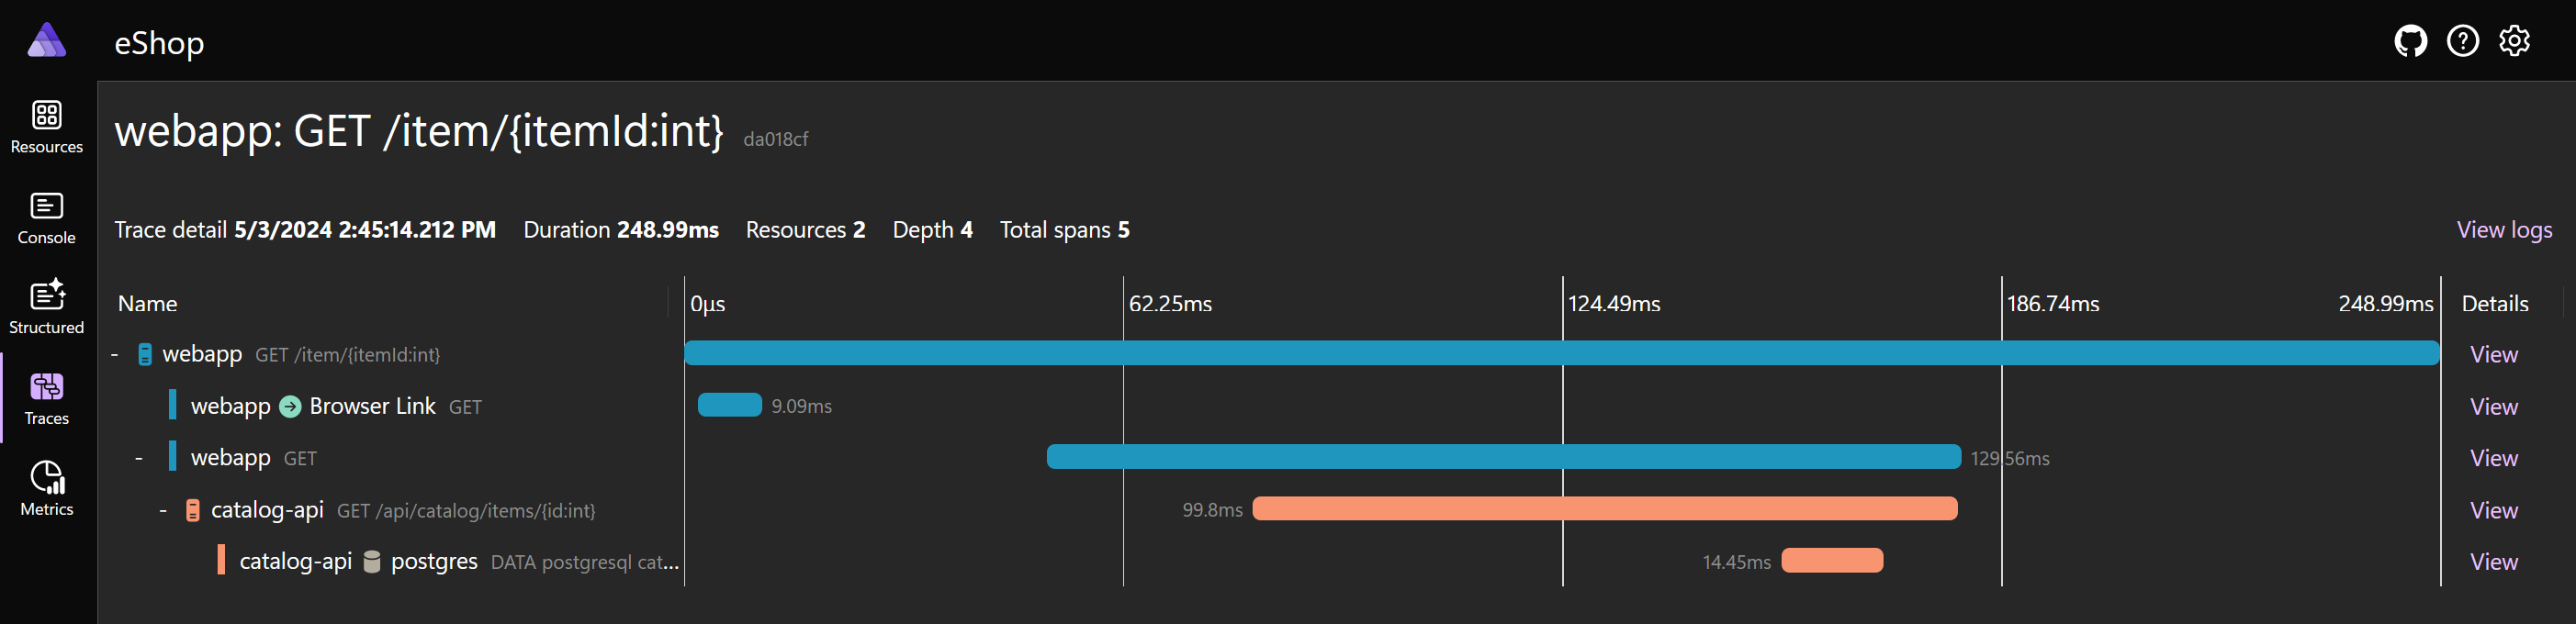
Scroll to the bottom of the page and locate a trace with the name webapp: GET /item/{itemId:int}.
In the Details column, select View:
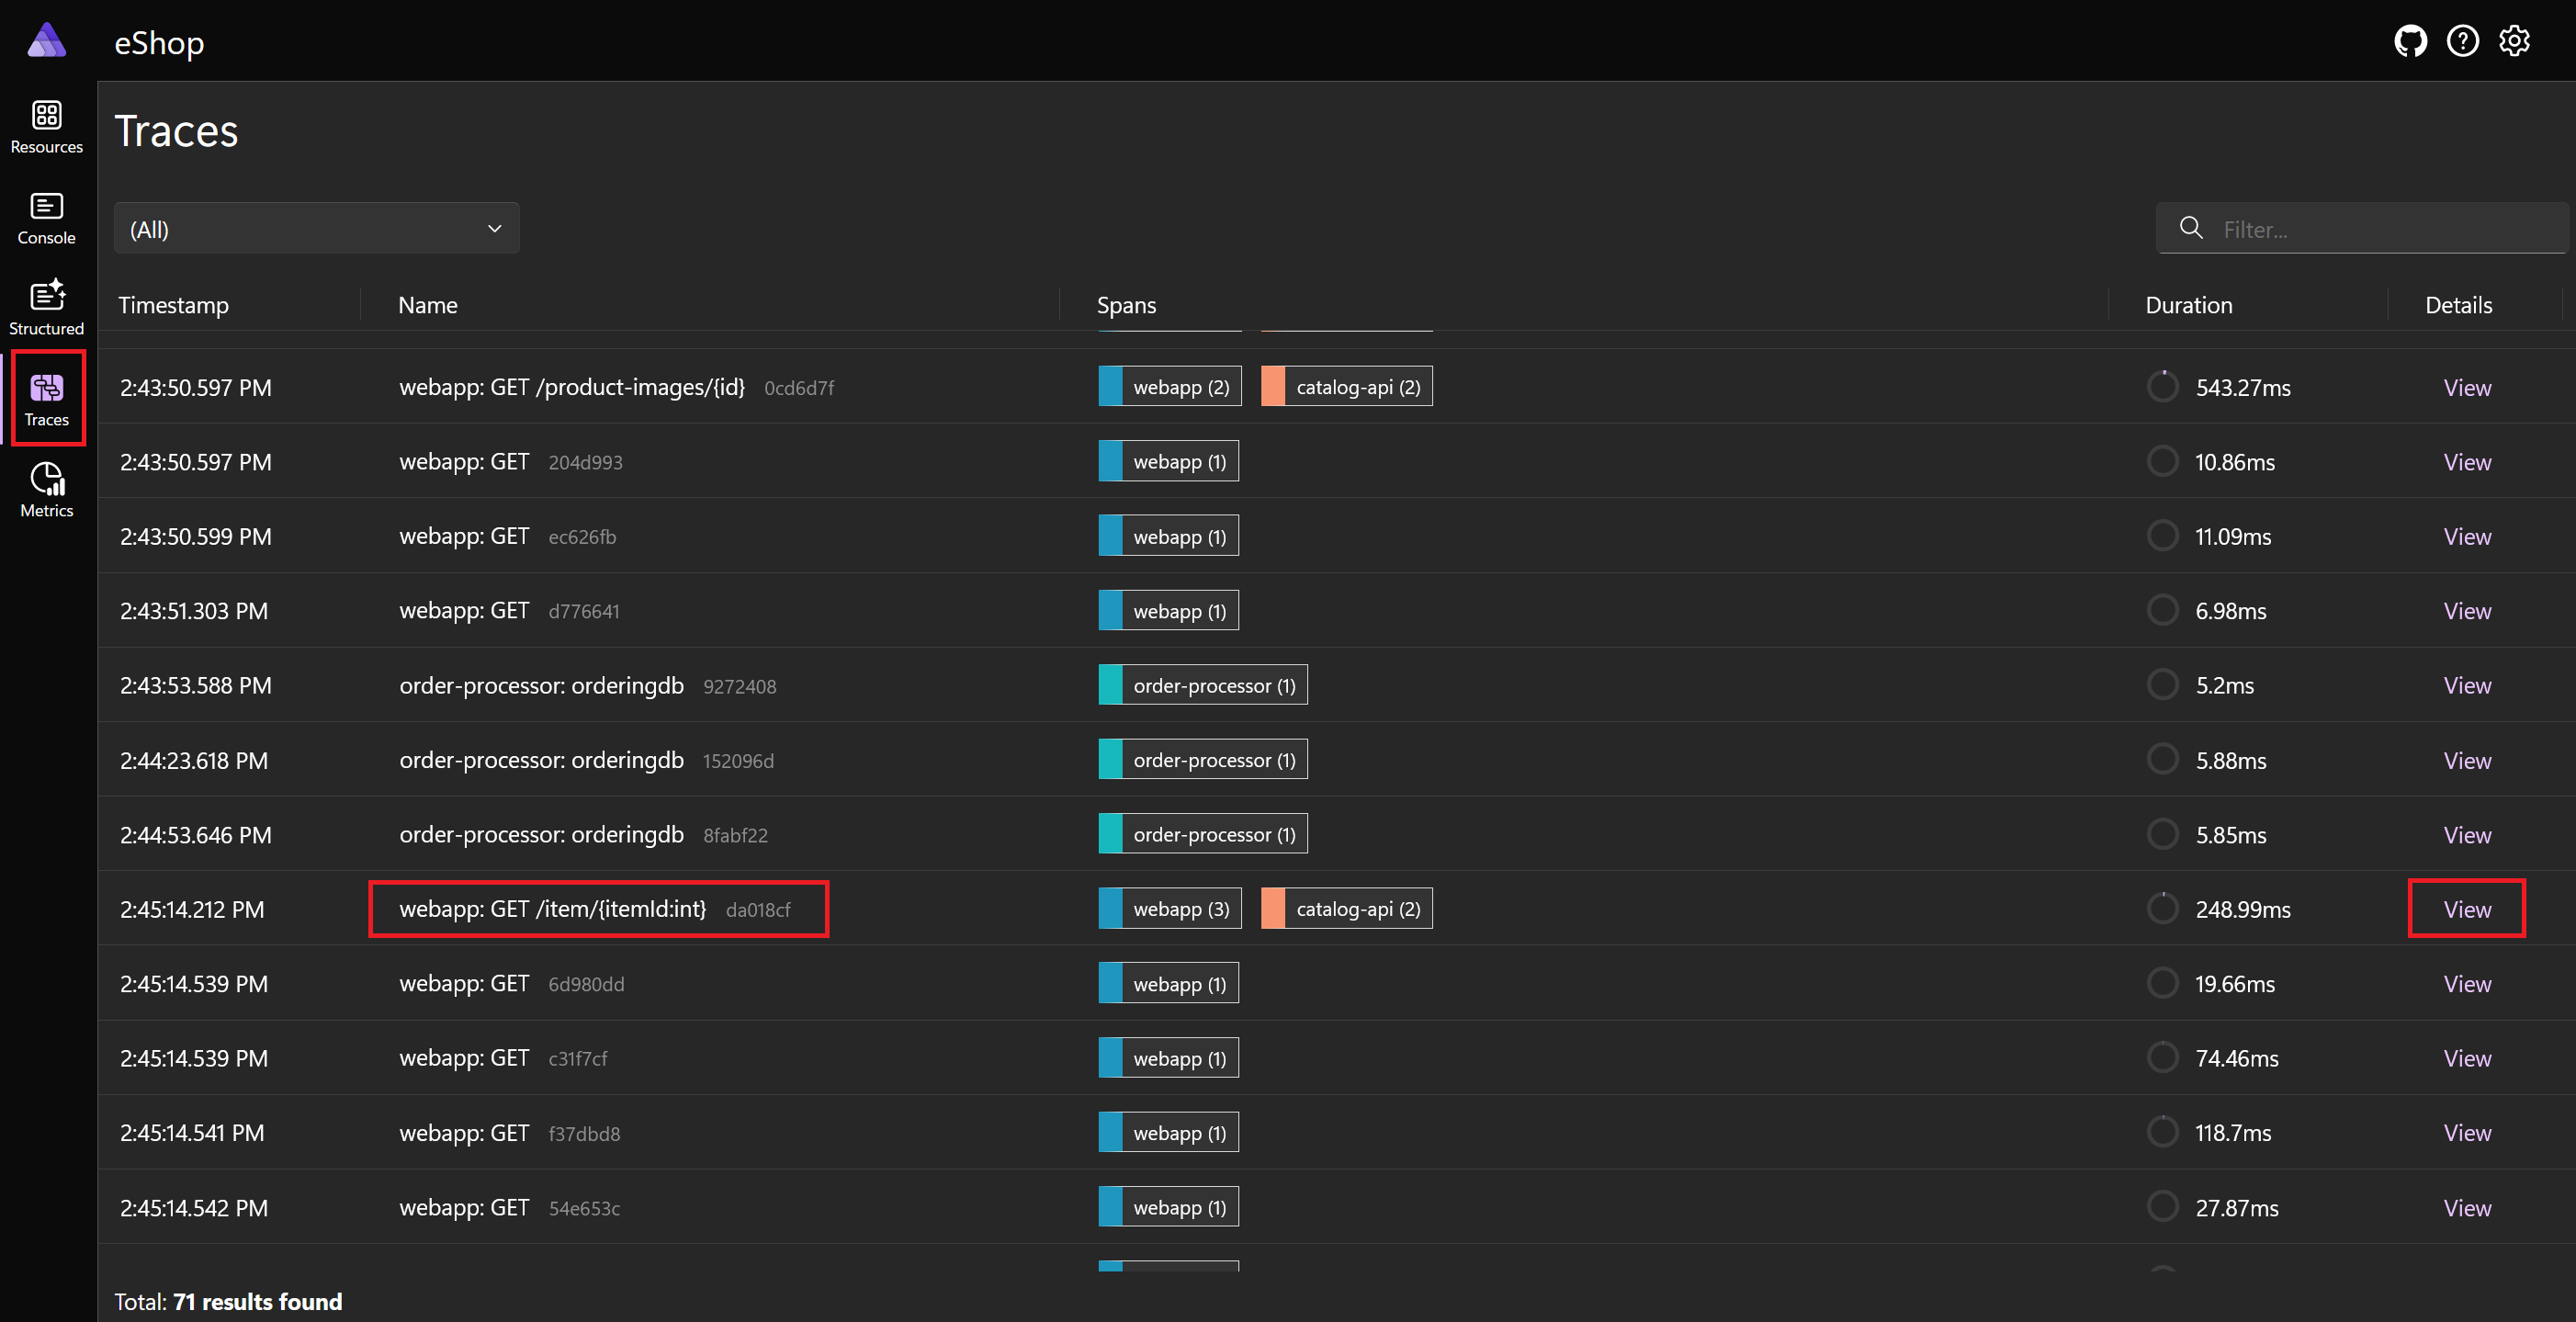
The dashboard displays the trace for the Adventurer GPS Watch, which includes a call to the catalog microservice:
To stop the debugging session, in Visual Studio, press Shift + F5 or on the Debug menu, select Stop Debugging.
Close Visual Studio.


