Exercise - Add multiple environments to your pipeline
Now you're ready to update your pipeline to deploy to both your test and production environments. In this unit, you'll update your pipeline to use templates so that you can reuse the stages across the environments.
During the process, you'll:
- Add a pipeline template for the lint stage.
- Add a pipeline template that defines the stages required to deploy to any environment.
- Update your pipeline to use the templates.
- Run your pipeline and view the results.
Add a pipeline template for the lint stage
The lint stage happens only once during the pipeline run, regardless of how many environments the pipeline deploys to. So, you don't really need to use templates for the lint stage. But to keep your main pipeline definition file simple and easy to read, you decide to define the lint stage in a template.
In Visual Studio Code, create a new folder named pipeline-templates inside the deploy folder.
Create a new file in the pipeline-templates folder named lint.yml.
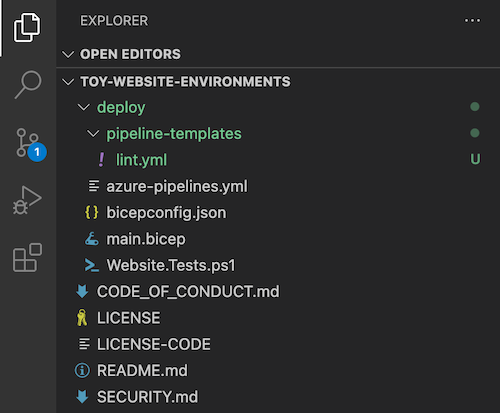
Paste the following pipeline template definition into the file:
jobs:
- job: LintCode
  displayName: Lint code
  steps:
    - script: |
        az bicep build --file deploy/main.bicep
      name: LintBicepCode
      displayName: Run Bicep linter
The lint stage is the same as the lint stage already in the pipeline, but now it's in a separate pipeline template file.
Save your changes and close the file.
Add a pipeline template for deployment
Create a pipeline template that defines all of the stages required to deploy each of your environments. You use template parameters to specify the settings that might differ between environments.
Create a new file in the pipeline-templates folder named deploy.yml.
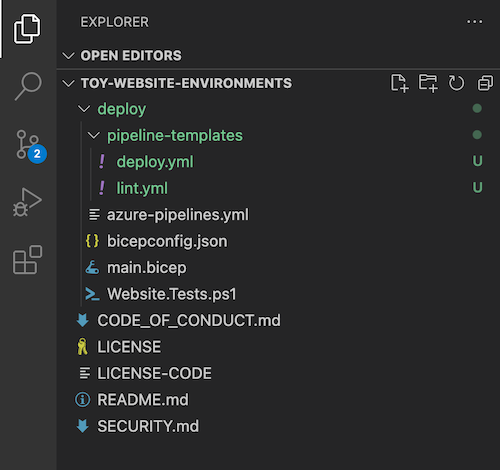
This file represents all of the deployment activities that run for each of your environments.
Paste the following pipeline template parameters into the file:
parameters:
- name: environmentType
  type: string
- name: resourceGroupName
  type: string
- name: serviceConnectionName
  type: string
- name: deploymentDefaultLocation
  type: string
  default: westus3
Note
When you start to work with your YAML file in Visual Studio Code, you might see some red squiggly lines telling you there's a problem. This is because the Visual Studio Code extension for YAML files sometimes incorrectly guesses the file's schema.
You can ignore the problems that the extension reports. Or if you prefer, you can add the following code to the top of the file to suppress the extension's guessing:
# yaml-language-server: $schema=./deploy.ymlBelow the parameters, paste the definition of the validation stage:
stages:

- ${{ if ne(parameters.environmentType, 'Production') }}:
  - stage: Validate_${{parameters.environmentType}}
    displayName: Validate (${{parameters.environmentType}} Environment)
    jobs:
    - job: ValidateBicepCode
      displayName: Validate Bicep code
      steps:
        - task: AzureResourceManagerTemplateDeployment@3
          name: RunPreflightValidation
          displayName: Run preflight validation
          inputs:
            connectedServiceName: ${{parameters.serviceConnectionName}}
            location: ${{parameters.deploymentDefaultLocation}}
            deploymentMode: Validation
            resourceGroupName: ${{parameters.resourceGroupName}}
            csmFile: deploy/main.bicep
            overrideParameters: >
              -environmentType ${{parameters.environmentType}}
Notice that a condition is applied to this stage. It runs only for non-production environments.
Also notice that the stage identifier includes the value of the
environmentTypeparameter. This parameter ensures that every stage in your pipeline has a unique identifier. The stage also has adisplayNameproperty to create a well-formatted name for you to read.Below the validation stage, paste the definition of the preview stage:
- ${{ if eq(parameters.environmentType, 'Production') }}:
  - stage: Preview_${{parameters.environmentType}}
    displayName: Preview (${{parameters.environmentType}} Environment)
    jobs:
    - job: PreviewAzureChanges
      displayName: Preview Azure changes
      steps:
        - task: AzureCLI@2
          name: RunWhatIf
          displayName: Run what-if
          inputs:
            azureSubscription: ${{parameters.serviceConnectionName}}
            scriptType: 'bash'
            scriptLocation: 'inlineScript'
            inlineScript: |
              az deployment group what-if \
                --resource-group ${{parameters.resourceGroupName}} \
                --template-file deploy/main.bicep \
                --parameters environmentType=${{parameters.environmentType}}
Notice that this stage has a condition applied too, but it's the opposite of the validation stage's condition. The preview stage runs only for the production environment.
Below the preview stage, paste the definition of the deploy stage:
- stage: Deploy_${{parameters.environmentType}}
  displayName: Deploy (${{parameters.environmentType}} Environment)
  jobs:
  - deployment: DeployWebsite
    displayName: Deploy website
    environment: ${{parameters.environmentType}}
    strategy:
      runOnce:
        deploy:
          steps:
            - checkout: self

            - task: AzureResourceManagerTemplateDeployment@3
              name: DeployBicepFile
              displayName: Deploy Bicep file
              inputs:
                connectedServiceName: ${{parameters.serviceConnectionName}}
                deploymentName: $(Build.BuildNumber)
                location: ${{parameters.deploymentDefaultLocation}}
                resourceGroupName: ${{parameters.resourceGroupName}}
                csmFile: deploy/main.bicep
                overrideParameters: >
                  -environmentType ${{parameters.environmentType}}
                deploymentOutputs: deploymentOutputs

            - bash: |
                echo "##vso[task.setvariable variable=appServiceAppHostName;isOutput=true]$(echo $DEPLOYMENT_OUTPUTS | jq -r '.appServiceAppHostName.value')"
              name: SaveDeploymentOutputs
              displayName: Save deployment outputs into variables
              env:
                DEPLOYMENT_OUTPUTS: $(deploymentOutputs)
Below the deploy stage, paste the definition of the smoke test stage:
- stage: SmokeTest_${{parameters.environmentType}}
  displayName: Smoke Test (${{parameters.environmentType}} Environment)
  jobs:
  - job: SmokeTest
    displayName: Smoke test
    variables:
      appServiceAppHostName: $[ stageDependencies.Deploy_${{parameters.environmentType}}.DeployWebsite.outputs['DeployWebsite.SaveDeploymentOutputs.appServiceAppHostName'] ]
    steps:
      - task: PowerShell@2
        name: RunSmokeTests
        displayName: Run smoke tests
        inputs:
          targetType: inline
          script: |
            $container = New-PesterContainer `
              -Path 'deploy/Website.Tests.ps1' `
              -Data @{ HostName = '$(appServiceAppHostName)' }
            Invoke-Pester `
              -Container $container `
              -CI

      - task: PublishTestResults@2
        name: PublishTestResults
        displayName: Publish test results
        condition: always()
        inputs:
          testResultsFormat: NUnit
          testResultsFiles: 'testResults.xml'
Notice that the
appServiceAppHostNamevariable definition incorporates theenvironmentTypeparameter when it refers to the stage that published the host name. This parameter ensures that each smoke test stage runs against the correct environment.Verify that your deploy.yml file now looks like the following example:
parameters:
- name: environmentType
  type: string
- name: resourceGroupName
  type: string
- name: serviceConnectionName
  type: string
- name: deploymentDefaultLocation
  type: string
  default: westus3

stages:

- ${{ if ne(parameters.environmentType, 'Production') }}:
  - stage: Validate_${{parameters.environmentType}}
    displayName: Validate (${{parameters.environmentType}} Environment)
    jobs:
    - job: ValidateBicepCode
      displayName: Validate Bicep code
      steps:
        - task: AzureResourceManagerTemplateDeployment@3
          name: RunPreflightValidation
          displayName: Run preflight validation
          inputs:
            connectedServiceName: ${{parameters.serviceConnectionName}}
            location: ${{parameters.deploymentDefaultLocation}}
            deploymentMode: Validation
            resourceGroupName: ${{parameters.resourceGroupName}}
            csmFile: deploy/main.bicep
            overrideParameters: >
              -environmentType ${{parameters.environmentType}}

- ${{ if eq(parameters.environmentType, 'Production') }}:
  - stage: Preview_${{parameters.environmentType}}
    displayName: Preview (${{parameters.environmentType}} Environment)
    jobs:
    - job: PreviewAzureChanges
      displayName: Preview Azure changes
      steps:
        - task: AzureCLI@2
          name: RunWhatIf
          displayName: Run what-if
          inputs:
            azureSubscription: ${{parameters.serviceConnectionName}}
            scriptType: 'bash'
            scriptLocation: 'inlineScript'
            inlineScript: |
              az deployment group what-if \
                --resource-group ${{parameters.resourceGroupName}} \
                --template-file deploy/main.bicep \
                --parameters environmentType=${{parameters.environmentType}}

- stage: Deploy_${{parameters.environmentType}}
  displayName: Deploy (${{parameters.environmentType}} Environment)
  jobs:
  - deployment: DeployWebsite
    displayName: Deploy website
    environment: ${{parameters.environmentType}}
    strategy:
      runOnce:
        deploy:
          steps:
            - checkout: self

            - task: AzureResourceManagerTemplateDeployment@3
              name: DeployBicepFile
              displayName: Deploy Bicep file
              inputs:
                connectedServiceName: ${{parameters.serviceConnectionName}}
                deploymentName: $(Build.BuildNumber)
                location: ${{parameters.deploymentDefaultLocation}}
                resourceGroupName: ${{parameters.resourceGroupName}}
                csmFile: deploy/main.bicep
                overrideParameters: >
                  -environmentType ${{parameters.environmentType}}
                deploymentOutputs: deploymentOutputs

            - bash: |
                echo "##vso[task.setvariable variable=appServiceAppHostName;isOutput=true]$(echo $DEPLOYMENT_OUTPUTS | jq -r '.appServiceAppHostName.value')"
              name: SaveDeploymentOutputs
              displayName: Save deployment outputs into variables
              env:
                DEPLOYMENT_OUTPUTS: $(deploymentOutputs)

- stage: SmokeTest_${{parameters.environmentType}}
  displayName: Smoke Test (${{parameters.environmentType}} Environment)
  jobs:
  - job: SmokeTest
    displayName: Smoke test
    variables:
      appServiceAppHostName: $[ stageDependencies.Deploy_${{parameters.environmentType}}.DeployWebsite.outputs['DeployWebsite.SaveDeploymentOutputs.appServiceAppHostName'] ]
    steps:
      - task: PowerShell@2
        name: RunSmokeTests
        displayName: Run smoke tests
        inputs:
          targetType: inline
          script: |
            $container = New-PesterContainer `
              -Path 'deploy/Website.Tests.ps1' `
              -Data @{ HostName = '$(appServiceAppHostName)' }
            Invoke-Pester `
              -Container $container `
              -CI

      - task: PublishTestResults@2
        name: PublishTestResults
        displayName: Publish test results
        condition: always()
        inputs:
          testResultsFormat: NUnit
          testResultsFiles: 'testResults.xml'
Save your changes to the file.
Update the pipeline definition to use the templates
Open the azure-pipelines.yml file.
Update the file to use the new templates by replacing the contents with the following code:
trigger:
  batch: true
  branches:
    include:
    - main

pool:
  vmImage: ubuntu-latest

stages:

# Lint the Bicep file.
- stage: Lint
  jobs:
  - template: pipeline-templates/lint.yml

# Deploy to the test environment.
- template: pipeline-templates/deploy.yml
  parameters:
    environmentType: Test
    resourceGroupName: ToyWebsiteTest
    serviceConnectionName: ToyWebsiteTest

# Deploy to the production environment.
- template: pipeline-templates/deploy.yml
  parameters:
    environmentType: Production
    resourceGroupName: ToyWebsiteProduction
    serviceConnectionName: ToyWebsiteProduction
This pipeline runs the lint stage once. Then it uses the deploy.yml template file twice: once per environment. This keeps the pipeline definition clear and easy to understand. Also, the comments help explain what's happening.
Save your changes.
Commit and push your changes to your Git repository by running the following commands in the Visual Studio Code terminal:
git add .
git commit -m "Add pipeline templates"
git push
View the pipeline run
In your browser, go to Pipelines.
Select the most recent run of your pipeline.
Notice that the pipeline run now shows all the stages that you defined in the YAML file. You might need to scroll horizontally to see them all.

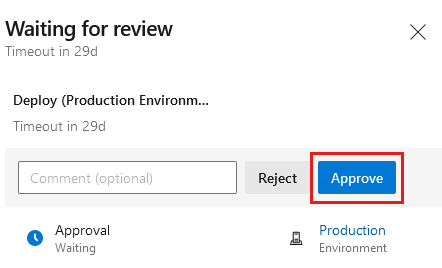
Wait for the pipeline to pause before the Deploy (Production Environment) stage. It might take a few minutes for the pipeline to reach this point.

Approve the deployment to the production environment by selecting the Review button.
Select the Approve button.
Wait for the pipeline to finish running.
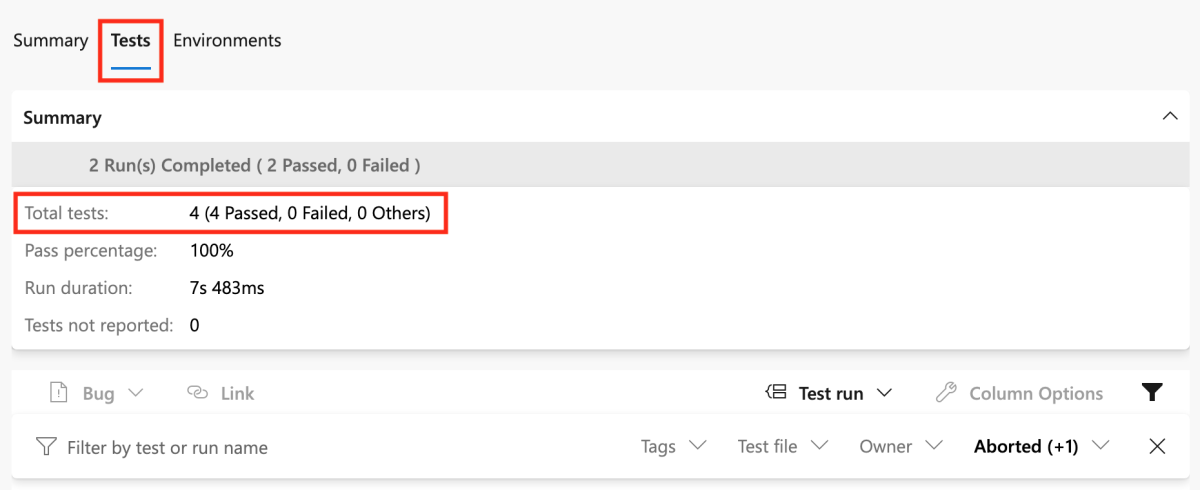
Select the Tests tab to show the test results from this pipeline run.
Notice that there are now four test results. The smoke test runs on both the test and production environments, so you see the results for both sets of tests.
Select Pipelines > Environments.
Select the Production environment.
Notice that on the environment details screen, you see an overview of the production environment's deployment history.

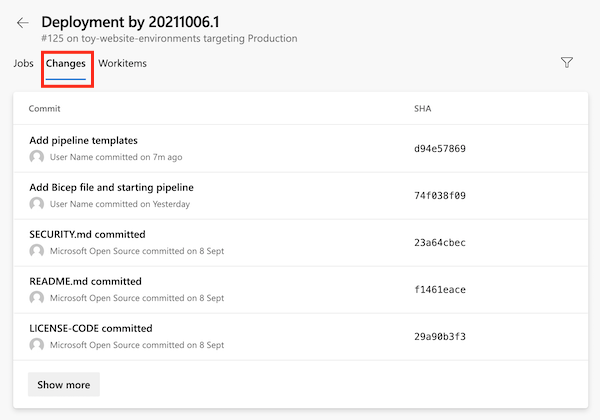
Select the deployment, and select the Changes tab.
Notice that Changes tab shows you the list of commits included in the deployment. This information helps you to see exactly what has changed in your environment over time.
In your browser, go to the Azure portal.
Go to the ToyWebsiteProduction resource group.
In the list of resources, open the Azure App Service app.

Notice that the type of App Service plan is S1.
Go to the App Service app in the ToyWebsiteTest resource group.
Notice that the type of App Service plan is F1. The two environments use different settings, as you defined in your Bicep file.