Working in Visual Studio
This unit explains how to check in code, merge code, resolve conflicts, and roll back changes in Visual Studio.
Get the latest version and check in code
When working with multiple developers or projects, you should validate that your code includes the latest source control's version. To avoid conflicts and ensure that the code is developed correctly, checking the source is mandatory.
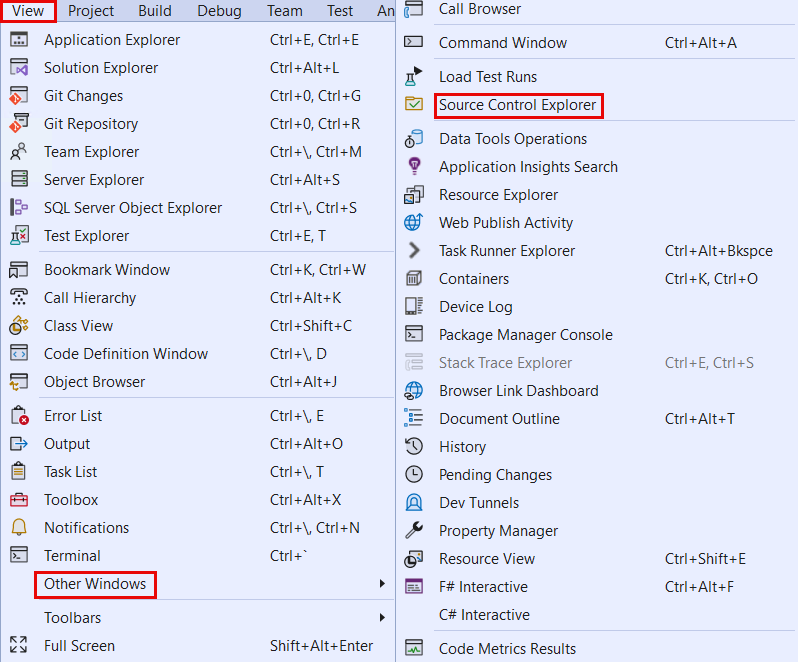
The Source Control Explorer is the view for all the code and objects that are checked into source control.
To open the Source Control Explorer, follow these steps:
Select View on the menu bar of Visual Studio.
In the drop-down menu, select Other Windows.
From the available options, select Source Control Explorer.
To make sure that you are looking at the most recent checked-in version of objects in the Source Control Explorer, right-click on the objects and select Get Latest Version. Alternatively, you can do this at the folder level to get all the updates.
You should always get the latest files from the branch that you are working in before checking in new changes. If someone else also pushes changes to the file that you are editing, this gives you an opportunity to reconcile your changes with theirs and make sure that all the features are working before the resulting changes are checked in.
To perform the check-in process, follow these steps:
- Select Pending Changes from the Team Explorer window.
- Enter a check-in comment.
- Select Check In.
Merging code and resolving code conflicts
Sometimes, when you get the latest code from a branch into Visual Studio, the code stored on the server has changes that are different from the changes that you made locally. This is a merge conflict.
When Visual Studio encounters a merge conflict, it attempts to resolve it automatically. Any such resolution is in the output log. If any conflicts fail to resolve automatically, they appear in a new window that prompts you to tell Visual Studio what it should do for each conflicting file.
The Resolve Conflicts window gives you the following options for each file:
- Take Source - Use the file that you pulled from source control, erasing all your local changes.
- Keep Local - Keep your local file, losing any changes that are present in source control.
- Merge using Merge Tool - View both versions of the file side by side, choosing to keep or discard each change in either version, one at a time.
You can't check in a changeset until there are no unresolved merge conflicts, so mastering these tools is key to your success as a member of a development team.
Roll back changes in Visual Studio
Everybody makes mistakes, and sometimes you need to roll back changes that are checked into a source control branch.
In Visual Studio, this is simple to accomplish from the Source Control Explorer. Right-click the branch that you want to roll back changes from and select View History. This selection opens a new window, where you can see all the changesets that have been checked in to this branch. To roll back a changeset, right-click the changeset and select Rollback Entire Changeset.

