Exercise - Connect to your database and add sample data
Before you connect the database to your app, you want to verify that you can connect to it, add a basic table, and work with sample data.
We maintain the infrastructure, software updates, and patches for your Azure SQL database. You can treat your Azure SQL database like you would any other SQL Server installation. For example, you can use Visual Studio, SQL Server Management Studio, Azure Data Studio, or other tools to manage your Azure SQL database.
How you access your database and connect it to your app is up to you. To get some experience working with your database, let's connect to it directly from the portal, create a table, and run a few basic CRUD operations. Here, you learn:
- What Cloud Shell is and how to access it from the portal.
- How to access information about your database from the Azure CLI, including connection strings.
- How to connect to your database using
sqlcmd. - How to initialize your database with a basic table and some sample data.
What is Azure Cloud Shell?
Azure Cloud Shell is a browser-based shell experience to manage and develop Azure resources. Think of Cloud Shell as an interactive console that runs in the cloud.
Behind the scenes, Cloud Shell runs on Linux. But, depending on whether you prefer a Linux or Windows environment, you have two experiences from which to choose: Bash and PowerShell.
Cloud Shell is accessible from anywhere. Besides the portal, you can also access Cloud Shell from shell.azure.com, the Azure mobile app, or from Visual Studio Code.
Cloud Shell includes popular tools and text editors. Here's a brief look at the az, jq, and sqlcmd utilities, which are three tools that you use in this exercise.
azis also known as the Azure CLI. It's the command-line interface for working with Azure resources. You use this interface to get information about your database, including the connection string.jqis a command-line JSON parser. You pipe output fromazcommands to this tool to extract important fields from JSON output.sqlcmdenables you to execute statements on SQL Server. You usesqlcmdto create an interactive session with your Azure SQL database.
Get information about your Azure SQL database
Before you connect to your database, it's a good idea to verify that it exists and is online.
Here, you use the az utility to list your databases and show some information about the Logistics database, including its maximum size and status.
Visit shell.azure.com, or from the Azure portal, select the Cloud shell button from the global controls of the Azure portal window.
If given the option, choose Bash for this learning exercise.
On the Getting started popup, select No storage account required. Select your subscription from the Subscription drop down. Select Apply. The new Cloud Shell terminal loads.
The
azcommands you run require the name of your resource group and the name of your Azure SQL logical server. To save keystrokes, run thisazure configurecommand to specify them as default values.Replace
[server-name]with the name of the Azure SQL logical server you created and[resource-group]with the resource group you used for your server.Tip
To paste into a Cloud Shell, use
Ctrl+Shift+Vinstead ofCtrl+V. UseCtrl+Cto clear the current command from the terminal.az configure --defaults group=[resource-group] sql-server=[server-name]Note
Depending on the pane you are on in the Azure portal, your SQL server name is displayed as a Fully qualified domain name (FQDN) (for example,
servername.database.windows.net) or standalone (servername). For this command, you only need the logical name without the.database.windows.netsuffix.Run the following
az sql db listcommand to list all databases on your Azure SQL logical server:az sql db listYou get a large block of JSON as output.
Because we want to get only the database names, run the command a second time. But this time, pipe the output to
jqto display only the name fields.az sql db list | jq '[.[] | {name: .name}]'You should get this output:
[ { "name": "Logistics" }, { "name": "master" } ]Logisticsis your user database. Like in SQL Server, themastersystem database includes server metadata, such as logins and system configuration settings.Run the following
az sql db showcommand to get details about theLogisticsdatabase:az sql db show --name LogisticsAs before, you see a large block of JSON as output.
Run the command a second time. This time pipe the output to
jqto limit output to only the name, maximum size, and status of the Logistics database.az sql db show --name Logistics | jq '{name: .name, maxSizeBytes: .maxSizeBytes, status: .status}'You see that the database is online and the maximum amount data that the database can store.
{
  "name": "Logistics",
  "maxSizeBytes": 2147483648,
  "status": "Online"
}
If you chose the Azure SQL Database Free offer, the serverless database automatically pauses to conserve your free vCore seconds, so you could see your
Logisticsdatabase with the Paused status after a period of inactivity.
Connect to your database
A connection string contains all the information needed for an application to connect to your database. While you're still in the Cloud Shell, let's start by getting your connection string there.
Connection string from Cloud Shell
Run the following az sql db show-connection-string command to get the connection string to the Logistics database in a format that sqlcmd can use:
az sql db show-connection-string --client sqlcmd
Your output resembles the following example. Copy this output for use in the next step.
"sqlcmd -S tcp:<server-name>.database.windows.net,1433 -d Logistics -U <username> -P <password> -N -l 30"
Connection string from the Azure portal
The Azure portal provides connection strings for various data providers for your Azure SQL database easily accessible.
- In the Azure portal, navigate to your SQL database.
- In the service menu of your SQL database, under Settings, select Connection strings.
- Choose the data provider and connection method desired.
Connect to your database with Visual Studio Code
Let's use a graphical tool to connect to your new Azure SQL Database. Visual Studio Code is a popular, open-source code editor for Linux, macOS, and Windows. It supports extensions, including the mssql extension. You can use the extension for querying SQL Server, Azure SQL Database, Azure SQL Managed Instance, SQL database in Fabric, and other platforms.
Download and install Visual Studio Code.
In Visual Studio Code, open the Extensions view by selecting the Extensions icon in the Activity Bar on the side of the window. Search for mssql and select Install to add the extension. and the mssql extension to your local workstation.
Tip
For future application project development of your database objects, also use the SQL Database Projects extension for Visual Studio Code. This tool allows you to work with your database in source control, capture existing database schemas, design new objects, and publish to databases.
In the extensions list, choose the SQL Server extension.
Under CONNECTIONS, select Add Connection.
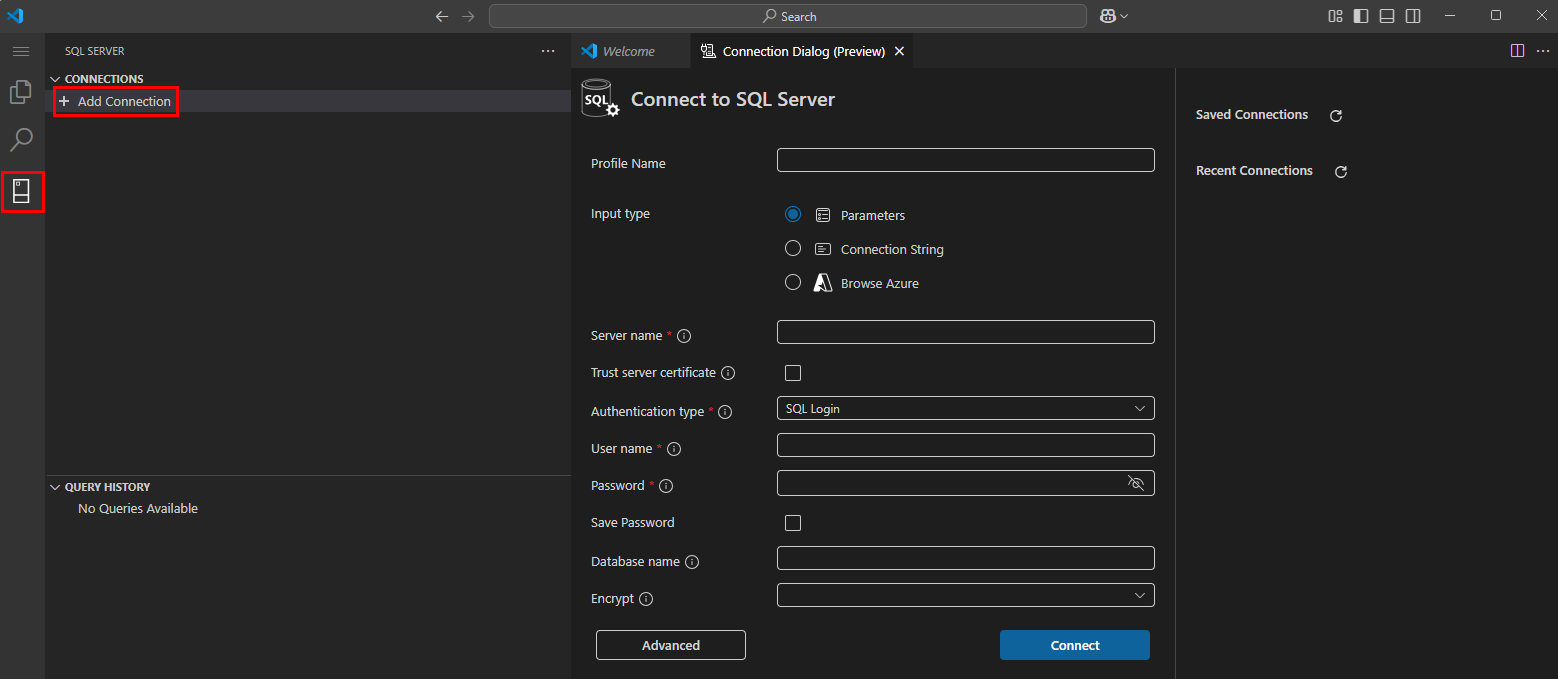
Give your new connection a custom memorable name in Profile name.
You have multiple ways to provide the connection information:
- Choose Parameters to manually enter the Azure SQL logical server name, database name, user name, and password.
- Choose Connection string to paste in the connection string for your database, then add your user name and password.
- Choose Browse Azure to connect to your Azure subscription in VS Code and select your new Azure SQL Database from a list.
For this learning exercise, choose Browse Azure. Connect to your Azure subscription from VS Code.
Select your Subscription from the list.
Select your Resource Group from the list.
Select your Server and Database from the list.
With Authentication type set to SQL Login, provide the User name and Password we created in the last module.
Select Connect.
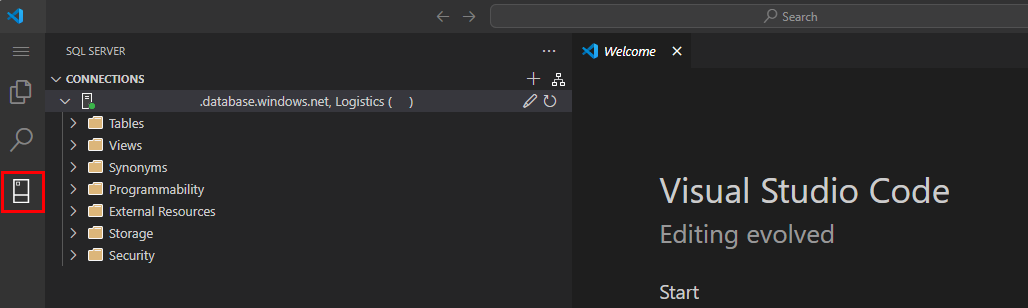
When you connect successfully, the Add connection dialogue disappears. It's replaced by your server connection and an object explorer of Tables, Views, etc.
Query your database with Visual Studio Code
Let's run a series of commands to perform basic CRUD (Create, Read, Update, Delete) operations in your Azure SQL Database.
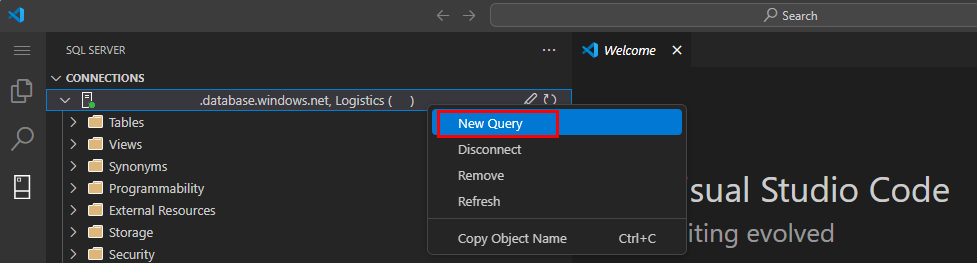
Right-click on the server name line under CONNECTIONS and select New Query.
In the new query window, let's create our first database object by pasting in the following command to create a new table called
Drivers.CREATE TABLE Drivers (DriverID int IDENTITY(1,1), LastName varchar(255), FirstName varchar(255), OriginCity varchar(255)); GOThe table contains four columns: a unique identifier, the driver's last and first name, and the driver's city of origin.
Select the Execute Query button to run the T-SQL commands in the query window.
Tip
To execute a single T-SQL command among many in a query window, drag and select the desired query, then Execute.

Like almost anything in Visual Studio Code, keyboard shortcuts can be customized in Visual Studio Code. In Windows, the default keyboard shortcut for Execute is
Ctrl + Shift + E.Next, run the following T-SQL statements to verify that the
Driverstable exists, by querying database metadata:SELECT name FROM sys.tables; GOIn the Query Results tab, under Results, you should see that
Driversexists in the list of tables.name ------- DriversLet's add a row to our table. Run the following T-SQL statements to add a sample row to the table:
INSERT INTO Drivers (LastName, FirstName, OriginCity) VALUES ('Zirne', 'Laura', 'Springfield');
GO
This output indicates the operation succeeded:
3:14:01 PM
Started executing query at Line 7
(1 row affected)
Total execution time: 00:00:00.044
To see the row we inserted, run the following T-SQL statements to list the
DriverIDandOriginCitycolumns from all rows in the table:SELECT DriverID, OriginCity FROM Drivers; GOYou get one result with the
DriverIDandOriginCityfor the row you created in the previous step.DriverID OriginCity ----------- -------------------------- 1 SpringfieldLet's update the row and change the
OriginCity. Run the following T-SQL to change the city of origin from "Springfield" to "Boston" for the driver with aDriverIDof1:UPDATE Drivers SET OriginCity='Boston' WHERE DriverID=1; GOYou should get a message confirming the query execution in the Query Results window:
3:14:29 PM
Started executing query at Line 13
(1 row affected)
Total execution time: 00:00:00.031
Run the following T-SQL statements to list the
DriverIDandOriginCitycolumns again:SELECT DriverID, OriginCity FROM Drivers; GOYou should now get the following output. Notice how the
OriginCityreflects the update to Boston.DriverID OriginCity ----------- -------------------------- 1 BostonFinally, let's remove that row by running the following T-SQL statement to delete the record:
DELETE FROM Drivers WHERE DriverID=1;
GO
3:15:00 PM Started executing query at Line 16 (1 row affected) Total execution time: 00:00:00.017Run the following T-SQL statements to verify the
Driverstable is empty:SELECT COUNT(*) FROM Drivers; GOYou see that the table contains no rows.
-----------
          0
Now that you have a general idea for working with Azure SQL Database from Cloud Shell and in Visual Studio. You can use the connection string for your favorite SQL management tool, including SQL Server Management Studio, Visual Studio, or custom applications.
Cloud Shell makes it easy to access and work with your Azure resources of any kind. Because Cloud Shell is browser-based, you can access it from Windows, macOS, or Linux; on any system with a web browser.
You gained some hands-on experience running T-SQL commands in Visual Studio Code and practiced your T-SQL skills.
In the next unit, we wrap up this module and describe how to tear down your database.