Exercise - Publish a module to a registry
In your toy company, you've been publishing your Bicep modules into a registry. You've been running the publishing process manually from your own computer. Now, you want to create a pipeline to handle the publishing process.
In this exercise, you'll:
- Create a container registry for your Bicep modules.
- Add a lint stage to the pipeline.
- Add a pipeline stage to publish the module to your registry.
- Verify that your pipeline runs successfully.
- Check the published module in your registry.
Create a container registry
Before you can publish modules, you need to create a registry for your organization to use. Here, you use the Azure portal to create a registry.
In your browser, create a new container registry within the Azure portal.
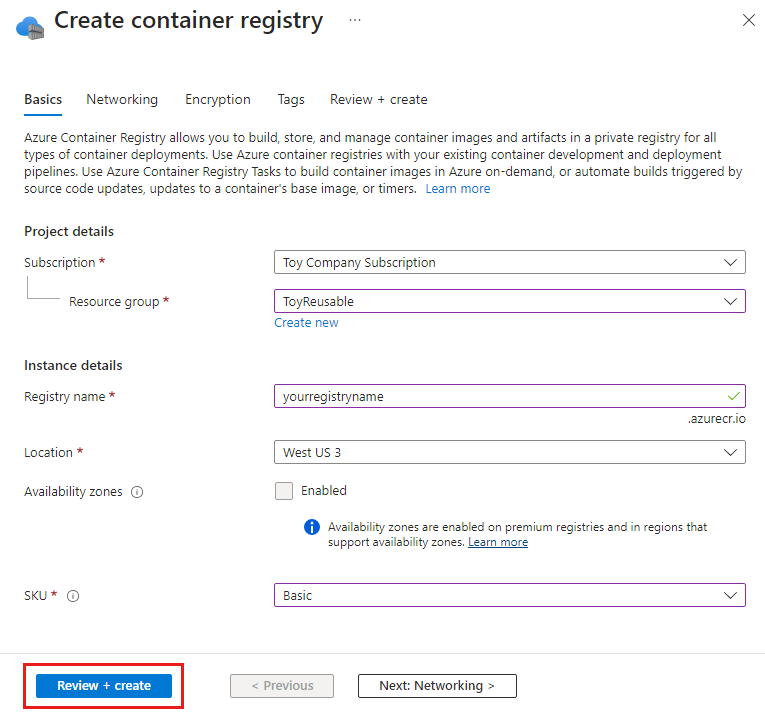
On the Basics tab, select your target subscription and the ToyReusable resource group that you created earlier.
Enter a name for your registry and a location that's close to you.
Important
The registry name must be unique within Azure and contain 5-50 alphanumeric characters. A check mark next to the registry name indicates that the name you chose is available.
For SKU, select Basic.
Leave the default values for the other configuration settings.
Select Review + create.
Review the settings show Validation passed and then select Create.
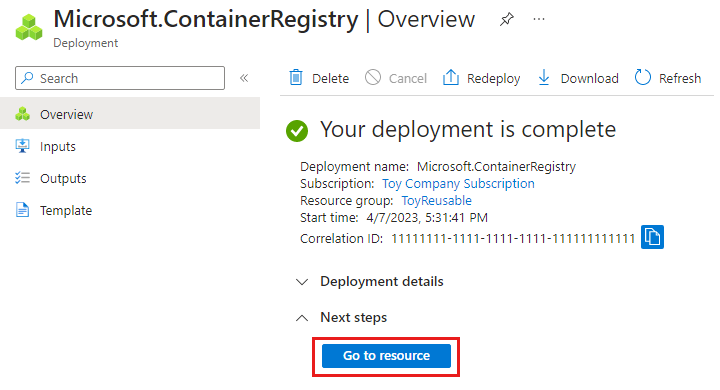
Wait for the deployment to finish, which usually takes 1-2 minutes.
When the Deployment succeeded message appears, select Go to resource to open the container registry.
In the container registry's Overview area, note the value of the Login server setting. It will be something like yourregistryname.azurecr.io.
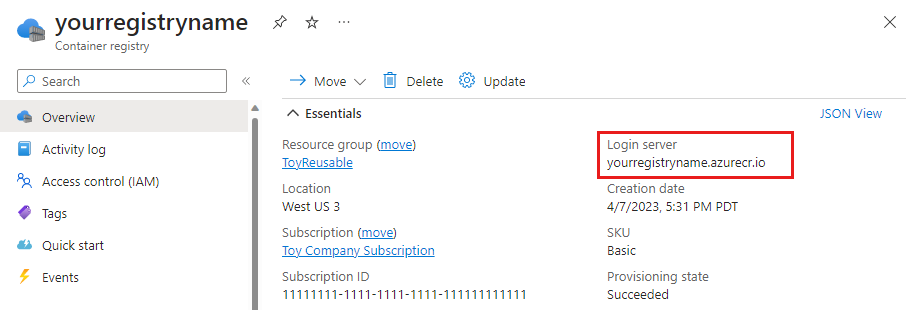
You'll need this value shortly.
Add a module metadata file
In the preceding unit, you learned about the importance of having a versioning strategy for your modules. You also learned how to use module metadata files to specify the major and minor version number of your module within a pipeline. Here, you add a metadata file for your storage account module.
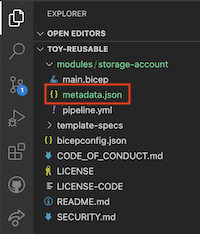
In Visual Studio Code, expand the modules/storage-account folder in the root of your repository.
Create a new file named metadata.json.
Add the following content to the file:
{
  "version": {
    "major": 1,
    "minor": 2
  }
}
Notice that in the metadata file, you separately define the major and minor version numbers. Your pipeline combines these numbers, along with the pipeline's build number, into a complete version number each time the pipeline runs.
Save your changes to the file.
Update your pipeline definition and add a lint stage
Your repository contains a draft of a pipeline that you can use as a starting point.
Open the pipeline.yml file in the modules/storage-account folder.
Update the value of the
ModuleRegistryServerenvironment variable to your container registry's server name. You copied that name earlier in this exercise.For example, if your registry's login server is yourregistryname.azurecr.io, it will look like this:
- name: ModuleRegistryServer
  value: yourregistryname.azurecr.io
At the bottom of the file, for the
# To be addedcomment with the following lint stage definition:stages: - stage: Lint jobs: - job: LintCode displayName: Lint code steps: - script: | az bicep build --file $(ModuleFilePath) name: LintBicepCode displayName: Run Bicep linter
Add a publish stage to your pipeline
Now, you can add a second stage to publish the module to your container registry.
At the bottom of the pipeline.yml file, define the Publish stage, and add a step to read the version number from your module's metadata.json file and set it as a pipeline variable.
- stage: Publish
  jobs:
  - job: Publish
    steps:
      - script: |
          majorMinorVersionNumber=$(jq '(.version.major | tostring) + "." + (.version.minor | tostring)' $(ModuleMetadataFilePath) -r )
          versionNumber="$majorMinorVersionNumber.$(Build.BuildNumber)"
          echo "##vso[task.setvariable variable=ModuleVersion;]$versionNumber"
        name: GetModuleVersionNumber
        displayName: Get module version number
The step runs a script that uses the jq command-line application to parse the JSON file.
Below the step that you created, add a step to publish the module to the registry.
- task: AzureCLI@2
  name: Publish
  displayName: Publish module
  inputs:
    azureSubscription: $(ServiceConnectionName)
    scriptType: 'bash'
    scriptLocation: 'inlineScript'
    inlineScript: |
      az bicep publish \
        --target 'br:$(ModuleRegistryServer)/$(ModuleName):$(ModuleVersion)' \
        --file $(ModuleFilePath)
Notice that this step constructs the value of the
--targetargument dynamically. It combines the value of the registry server, the module name, and the version number.Save your changes to the file.
Verify and commit your pipeline definition
Verify that your storage_account_module.yml file looks like the following example:
trigger:
  batch: true
  branches:
    include:
    - main
  paths:
    include:
    - 'modules/storage-account/**'

variables:
- name: ServiceConnectionName
  value: ToyReusable
- name: ModuleName
  value: storage-account
- name: ModuleRegistryServer
  value: yourregistryname.azurecr.io
- name: ModuleFilePath
  value: modules/storage-account/main.bicep
- name: ModuleMetadataFilePath
  value: modules/storage-account/metadata.json

pool:
  vmImage: ubuntu-latest

stages:

- stage: Lint
  jobs:
  - job: LintCode
    displayName: Lint code
    steps:
      - script: |
          az bicep build --file $(ModuleFilePath)
        name: LintBicepCode
        displayName: Run Bicep linter

- stage: Publish
  jobs:
  - job: Publish
    steps:
      - script: |
          majorMinorVersionNumber=$(jq '(.version.major | tostring) + "." + (.version.minor | tostring)' $(ModuleMetadataFilePath) -r )
          versionNumber="$majorMinorVersionNumber.$(Build.BuildNumber)"
          echo "##vso[task.setvariable variable=ModuleVersion;]$versionNumber"
        name: GetModuleVersionNumber
        displayName: Get module version number
      - task: AzureCLI@2
        name: Publish
        displayName: Publish module
        inputs:
          azureSubscription: $(ServiceConnectionName)
          scriptType: 'bash'
          scriptLocation: 'inlineScript'
          inlineScript: |
            az bicep publish \
              --target 'br:$(ModuleRegistryServer)/$(ModuleName):$(ModuleVersion)' \
              --file $(ModuleFilePath)
If it doesn't, update it to match this example, and then save it.
Commit and push your changes to your Git repository by running the following commands in the Visual Studio Code terminal:
git add .
git commit -m "Add lint and publish stages to storage account module pipeline"
git push
Immediately after you push, Azure Pipelines starts a new pipeline run.
Monitor the pipeline
In your browser, select Pipelines > Pipelines.
Select the active pipeline run.
The pipeline run is displayed.
Wait for the pipeline run to finish. The Bicep module is published to your container registry.
Note the pipeline's build number, which includes today's date and a unique revision number.
Review the module in the registry
You can also view the published module in the Azure portal.
In your browser, go to the Azure portal.
Go to the ToyReusable resource group.
Select the container registry that you created previously.
Select the Repositories pane from the menu. Then, select the modules\storage-account repository, which represents the module that your pipeline published.
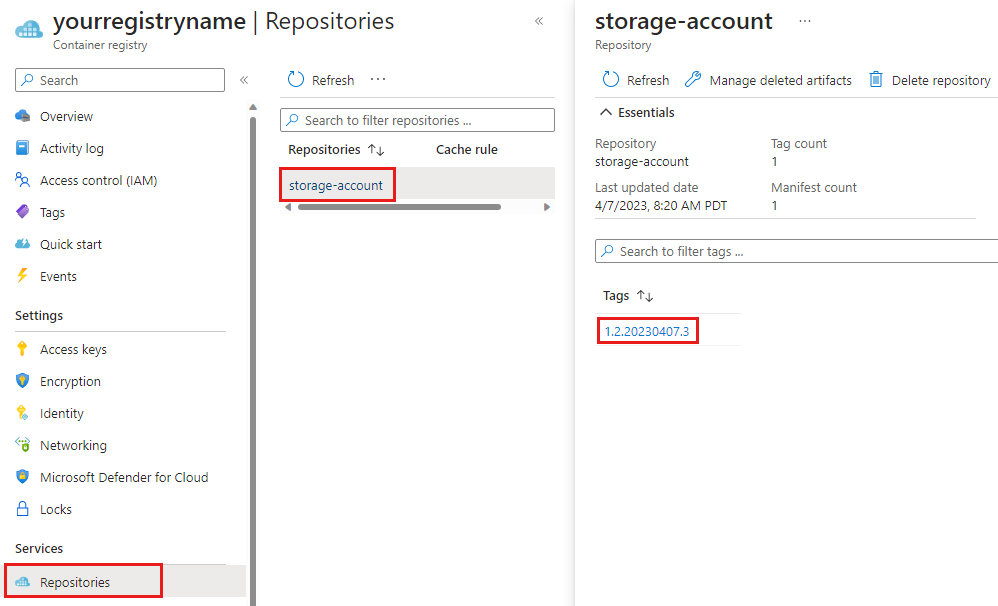
Notice that there's a single tag, which matches the version number of the module that your pipeline published. The major version (1) and minor version (2) match the version numbers that you defined in the metadata.json file. The revision number (20230407.3) matches the pipeline's build number.
Clean up the resources
Now that you've completed the exercise, you can remove the resources so you aren't billed for them.
In the Visual Studio Code terminal, run the following command:
az group delete --resource-group ToyReusable --yes --no-wait
The resource group is deleted in the background.
Remove-AzResourceGroup -Name ToyReusable -Force
You can also remove the service connection and Azure DevOps project.
Service connection
- From the Azure DevOps project, select Project settings > Service connections.
- Select ToyReusable.
- In the upper-right corner, select the three dots for More actions.
- Select Delete and confirm the deletion.
Azure App registration
- From the portal home page, search for Microsoft Entra ID and select it from the list of Services.
- Go to Manage > App registrations.
- In Deleted applications select toy-reusable.
- Select Delete permanently and follow the prompts.
Azure DevOps project
- From the Azure DevOps project, select Project settings > Overview.
- From Delete project select Delete.
- Enter the project name and confirm the deletion.