Exercise - Protect your main branch
Your team is working on a Bicep template that already contains a website and a database. You've deployed the components to your production environment. Now, you need to update your Bicep template to add your order processing queue.
In this exercise, you'll create a feature branch for your change. You'll also protect your main branch and only allow changes to be merged to the main branch after they've been reviewed. Before that, though, you need to make sure that your environment is set up to complete the rest of this module.
During the process, you'll:
- Set up a GitHub repository for this module.
- Clone the repository to your computer.
- Add branch protection to your repository's main branch.
- Create a local feature branch for your change.
- Try to merge your feature branch into main.
- Set up an Azure DevOps project for this module.
- Clone the project's repository to your computer.
- Add branch policies to your repository's main branch.
- Create a local feature branch for your change.
- Try to merge your feature branch into main.
Get the GitHub repository
Here, you make sure that your GitHub repository is set up to complete the rest of this module. You set it up by creating a new repository based on a template repository. The template repository contains the files that you need to get started for this module.
Start from the template repository
Run a template that sets up your GitHub repository.
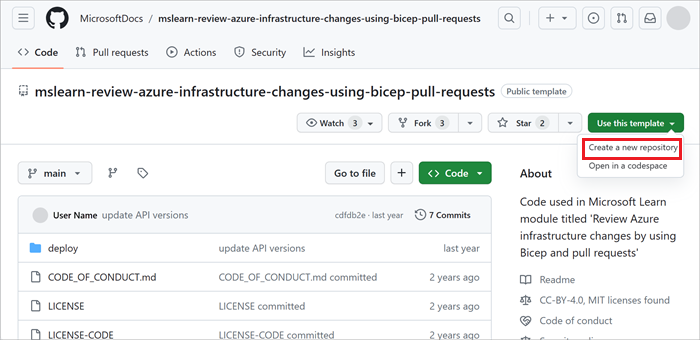
On the GitHub site, follow these steps to create a repository from the template:
Select Use this template > Create a new repository.
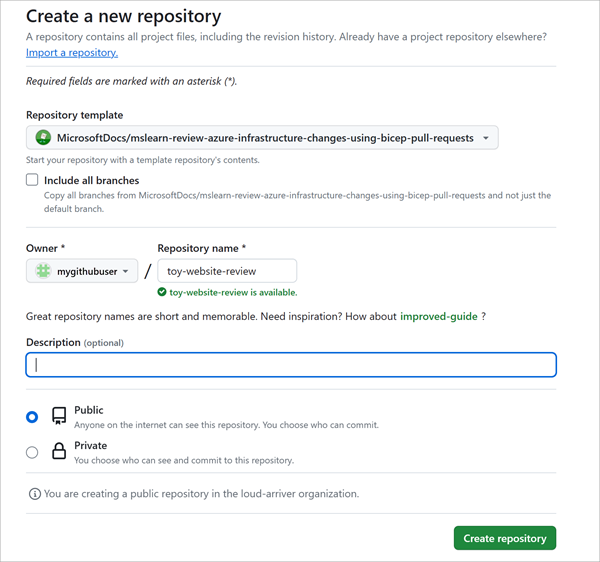
Enter a name for your new project, such as toy-website-review.
Select the Public option.
When you create your own repositories, you might want to make them private. In this module, you'll work with features of GitHub that work only with public repositories and with GitHub Enterprise accounts.
Select Create repository from template.
Get the Azure DevOps project
Here, you make sure that your Azure DevOps organization is set up to complete the rest of this module. You set it up by running a template that creates a project in Azure DevOps.
On the Azure DevOps Demo Generator site, follow these steps:
Select Sign In and accept the usage terms.
On the Create New Project page, select your Azure DevOps organization. Then enter a project name, such as toy-website-review.
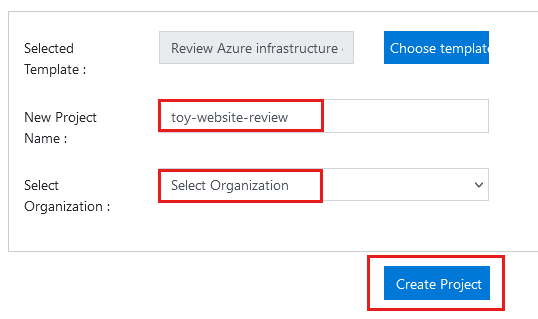
Select Create Project.
The template takes a few moments to run. It automatically creates a pipeline and Bicep file that you'll use in later exercises.
Select Navigate to project to go to your project in Azure DevOps.
Clone the repository
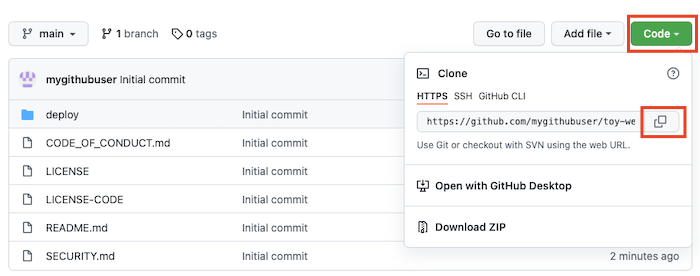
You now have a copy of the template repository in your own account. Clone this repository locally so you can start working in it.
Select Code, and then select the Copy icon.
Open Visual Studio Code.
Open a Visual Studio Code terminal window by selecting Terminal > New Terminal. The window usually opens at the bottom of the screen.
In the terminal, go to the directory where you want to clone the GitHub repository on your local computer. For example, to clone the repository to the toy-website-review folder, run the following command:
cd toy-website-reviewType
git cloneand paste the URL that you copied earlier, and then run the command. The command looks like this:git clone https://github.com/mygithubuser/toy-website-review.gitReopen Visual Studio Code in the repository folder by running the following command in the Visual Studio Code terminal:
code -r toy-website-review
You now have a project in your own account. Clone this repository locally so you can start working in it.
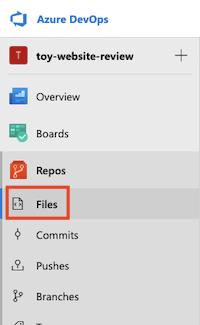
Select Repos > Files.
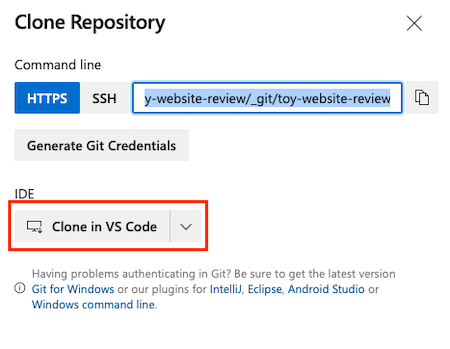
Select Clone.

If you're using macOS, you need a special password to clone the Git repository. Select Generate Git credentials and copy the displayed username and password to somewhere safe.
Select Clone in VS Code. If you're prompted to allow Visual Studio Code to open, select Open.
Create a folder to use for the repository, and then choose Select Repository Location.
You're using this repository for the first time, so you're prompted to sign in.
If you're using Windows, enter the same credentials that you used to sign in to Azure DevOps earlier in this exercise.
If you're using macOS, enter the Git username and password that you generated a few moments ago.
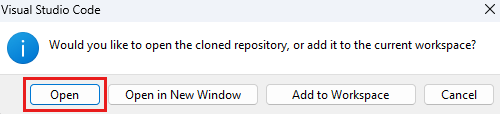
Visual Studio Code prompts you to open the repository. Select Open.
Add branch protections
Configure your Git repository to prevent direct pushes to the main branch.
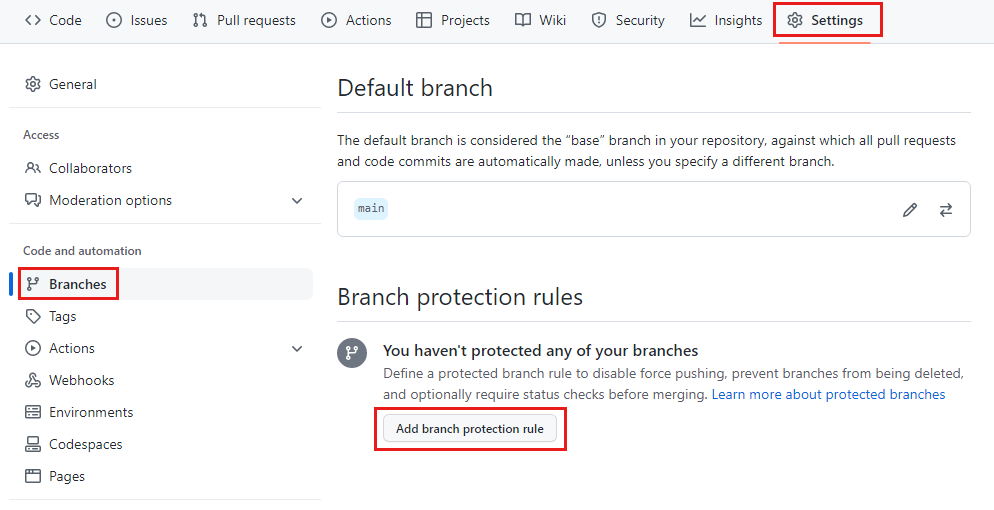
In your browser, select Settings.
Select Branches.
Select Add branch protection rule.
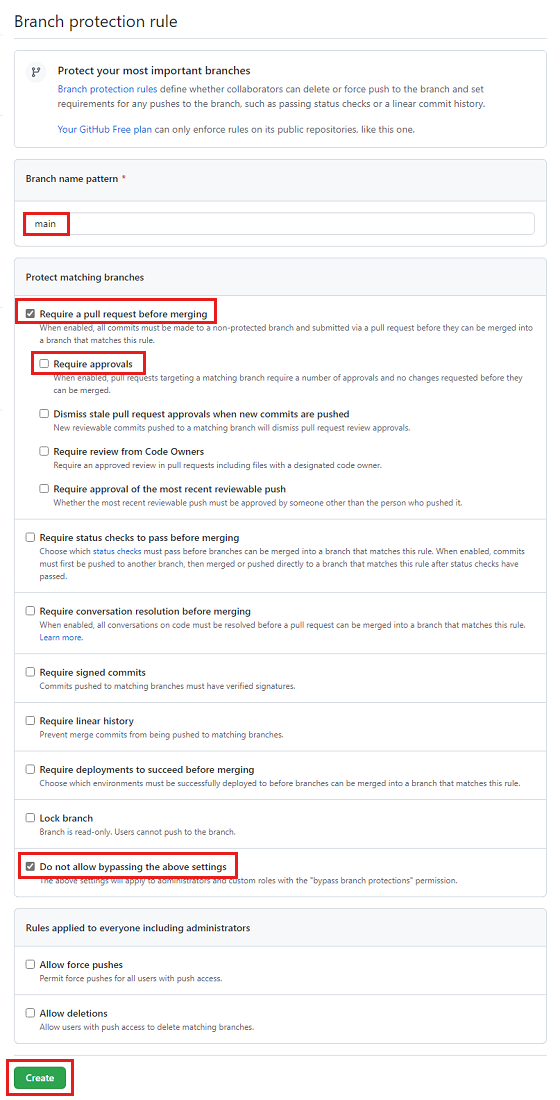
In the Branch name pattern text box, enter main.
Select Require a pull request before merging.
Clear Require approvals. Normally, you'd select this option. But in this example, you're going to merge your own pull request, and the Require approvals option prevents you from doing so.
Select Do not allow bypassing the above settings.
You select this setting as an example to show how
git pushtomainfails later in this exercise. In a production environment, you might not want to restrict direct merges tomainfor administrators or repository owners.Near the bottom of the page, select Create.
GitHub might ask you to sign in again to confirm your identity.
Add branch policies
Configure your Git repository to prevent direct pushes to the main branch.
In your browser, go to Repos > Branches.
Hover over the main branch, and select the three dots.
Select Branch policies.

In the Branch policies window, change the Require a minimum number of reviewers setting to On.
Change the minimum number of reviewers to 1, and select the Allow requestors to approve their own changes option.
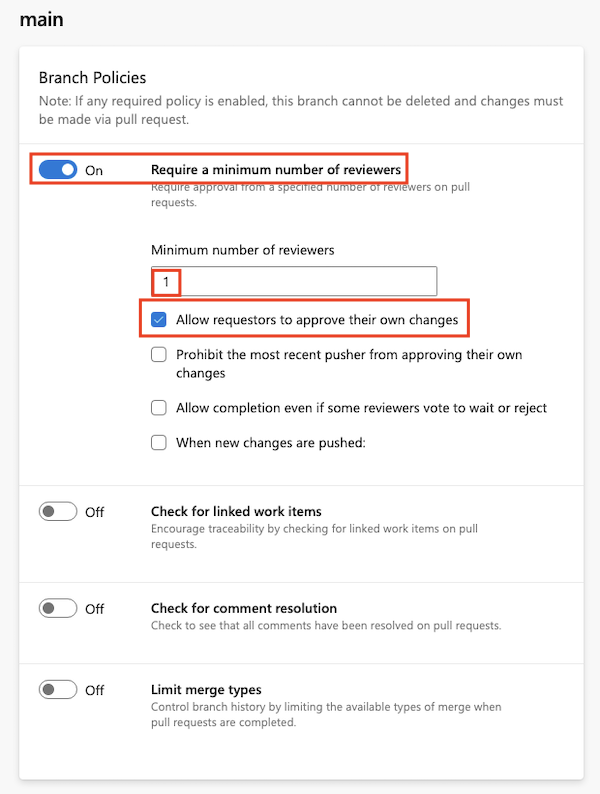
Note
Here, you enable the Allow requestors to approve their own changes option. In these exercises, you're working on your own, so you need to both create and approve your changes. But in a real team environment, you might not want to enable this option.
Create a local feature branch
In the Visual Studio Code terminal, run the following statement:
git checkout -b add-orders-queueThis command creates a new feature branch for you to work from.
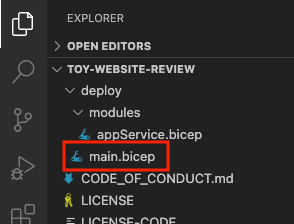
Open the main.bicep file in the deploy folder.
Below the parameters, add a new variable for the name of the queue:
var storageAccountSkuName = (environmentType == 'prod') ? 'Standard_GRS' : 'Standard_LRS'
var processOrderQueueName = 'processorder'
Within the storage account resource, add the queue as a nested child resource:
resource storageAccount 'Microsoft.Storage/storageAccounts@2022-09-01' = {
  name: storageAccountName
  location: location
  sku: {
    name: storageAccountSkuName
  }
  kind: 'StorageV2'
  properties: {
    accessTier: 'Hot'
  }

  resource queueServices 'queueServices' existing = {
    name: 'default'

    resource processOrderQueue 'queues' = {
      name: processOrderQueueName
    }
  }
}
In the
appServicemodule definition, add the storage account and queue names as parameters:module appService 'modules/appService.bicep' = { name: 'appService' params: { location: location appServiceAppName: appServiceAppName storageAccountName: storageAccount.name processOrderQueueName: storageAccount::queueServices::processOrderQueue.name environmentType: environmentType } }This code enables the application to find the queue where it will send messages.
Save the main.bicep file.
Open the appService.bicep file in the deploy/modules folder.
Near the top of the appService.bicep file, add new parameters for the storage account and queue names:
@description('The Azure region into which the resources should be deployed.')
param location string

@description('The name of the App Service app to deploy. This name must be globally unique.')
param appServiceAppName string

@description('The name of the storage account to deploy. This name must be globally unique.')
param storageAccountName string

@description('The name of the queue to deploy for processing orders.')
param processOrderQueueName string

@description('The type of the environment. This must be nonprod or prod.')
@allowed([
  'nonprod'
  'prod'
])
param environmentType string
Update the
appServiceAppresource to propagate the storage account and queue names to the application's environment variables:resource appServiceApp 'Microsoft.Web/sites@2022-03-01' = { name: appServiceAppName location: location properties: { serverFarmId: appServicePlan.id httpsOnly: true siteConfig: { appSettings: [ { name: 'StorageAccountName' value: storageAccountName } { name: 'ProcessOrderQueueName' value: processOrderQueueName } ] } } }
Commit and push your feature branch
Commit your changes and push them to your GitHub repository by running the following commands in the Visual Studio Code terminal:
Commit your changes and push them to your Azure Repos repository by running the following commands in the Visual Studio Code terminal:
git add .
git commit -m "Add orders queue and associated configuration"
git push --set-upstream origin add-orders-queue
The feature branch is pushed to a new branch, also named add-orders-queue, in your remote repository.
Try to merge the feature branch to main
You've learned why it's not advisable to push directly to the main branch. Here, you try to break that guideline so you can see how your main branch's protection prevents you from accidentally pushing your changes to a protected branch.
In the Visual Studio Code terminal, run the following statements to switch to the main branch and merge the add-orders-queue branch into it:
git checkout main
git merge add-orders-queue
The command worked, but you merged the add-orders-queue branch into your main branch in only your local Git repository.
Run the following statement to try to push your changes to GitHub:
git pushNotice that your push fails with an error message that looks like this one:
Total 0 (delta 0), reused 0 (delta 0), pack-reused 0
remote: error: GH006: Protected branch update failed for refs/heads/main.
remote: error: Changes must be made through a pull request.
To https://github.com/mygithubuser/toy-website-review.git
 ! [remote rejected] main -> main (protected branch hook declined)
error: failed to push some refs to 'https://github.com/mygithubuser/toy-website-review.git'
The error message tells you that pushes to the main branch aren't permitted, and that you must use a pull request to update the branch.
Undo the merge by running the following statement:
git reset --hard HEAD~1This command tells your local Git repository to reset the state of the main branch to what it was before the last commit was merged in, and not to save your changes. The add-orders-queue branch isn't affected.
You've learned why it's not advisable to push directly to the main branch. Here, you try to break that guideline so you can see how the branch policies prevent you from accidentally pushing your changes to a protected branch.
In the Visual Studio Code terminal, run the following statements to switch to the main branch and merge the add-orders-queue branch to it:
git checkout main
git merge add-orders-queue
The command worked, but you merged the add-orders-queue branch into your main branch in only your local Git repository.
Run the following statement to try to push your changes to Azure Repos:
git pushNotice that your push fails with an error message that looks like this one:
Total 0 (delta 0), reused 0 (delta 0), pack-reused 0
To https://dev.azure.com/mytoycompany/toy-website-review/_git/toy-website-review
! [remote rejected] main -> main (TF402455: Pushes to this branch are not permitted; you must use a pull request to update this branch.)
error: failed to push some refs to 'https://dev.azure.com/mytoycompany/toy-website-review/_git/toy-website-review'
The error message tells you that pushes to the main branch aren't permitted, and that you must use a pull request to update the branch.
Undo the merge by running the following statement:
git reset --hard HEAD~1This command tells your local Git repository to reset the state of the main branch to what it was before the last commit was merged in, and not to save your changes. The add-orders-queue branch isn't affected.