Master planning considerations and set up
This unit provides an overview of the main considerations, prerequisites, and setups that are necessary for using the Master planning module. It also contains a summary of the ways in which master planning results are handled.
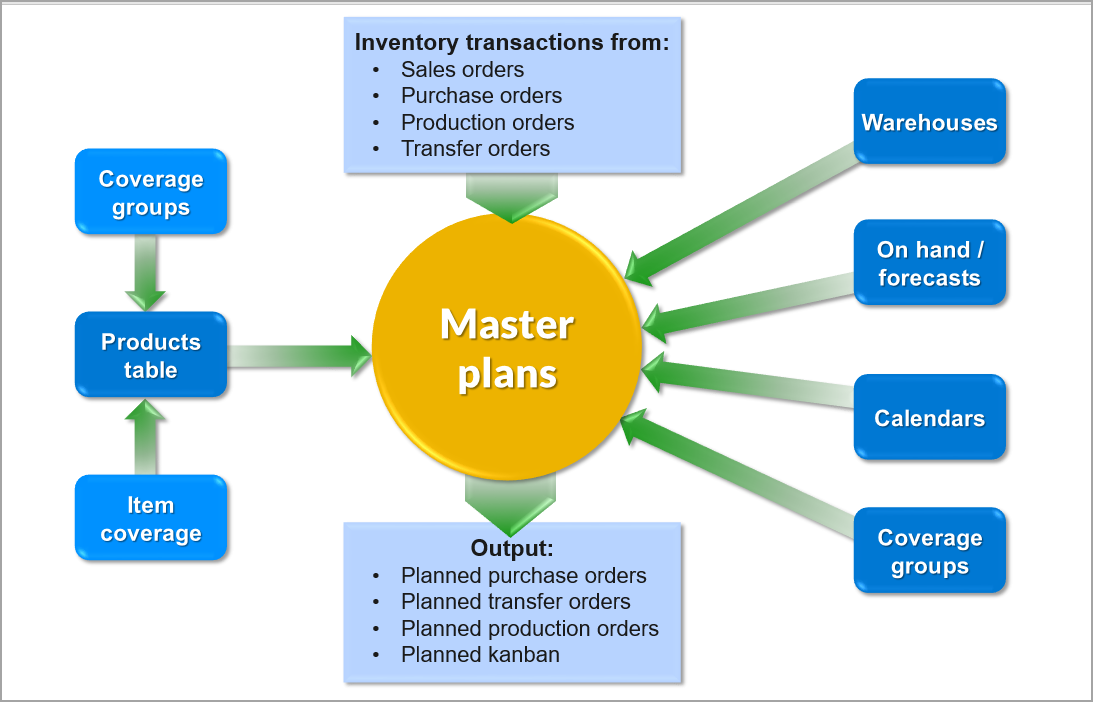
The following figure illustrates the interaction of information that affects master planning in Supply Chain Management and provides a brief list of the resulting output.
Use forecast planning
One of the first considerations that a company should take is assessing whether forecast planning must be used, because forecast planning is run before you run master planning. A forecast must be included in the master plan to be valid.
To include a forecast plan, the company must consider the extent to which it can forecast future orders. If orders can be forecasted with relative accuracy, the Forecast planning process can make sure that all items are purchased and produced when it's necessary, and ensure that enough capacity is available at the appropriate time to meet the delivery dates.
The ability to accurately forecast material and capacity needs can also help in the negotiations of pricing and terms (trade agreements) with vendors.
Overview of Supply and Demand forecast lines
There are two types of forecast lines:
Supply forecast lines - The supply forecast lets you create a plan for items that must be purchased. It tells procurement and sourcing clerks what they're expected to order. You can enter a supply forecast by item, item group, item allocation key, vendor, and vendor group.
The upper part of the Supply forecast page provides a grid of supply forecast lines and a set of tabs that you can use to view and set more information about a selected forecast line. The lower part of the page provides an Allocation grid.
Demand forecast lines - The demand forecast lets you enter or generate demand for a customer. It helps sales and marketing clerks inform master planning clerks about the expected demand during the upcoming forecast period. You can enter a demand forecast by item, item group, item allocation key, customer, and customer group.
For more information, see Inventory forecasts
Item coverage settings
When setting up master planning, a business must also consider how it handles the level of inventory it maintains. How the inventory is handled influences choices about coverage planning parameters for the master planning process.
Additionally, when setting up master planning, companies can consider inventory levels of each item individually, based on item characteristics that are important to their business. For example, you can manage inventory by stocking certain items or change the default order to production, transfer, or Kanban orders.
Master planning uses item coverage settings to calculate item requirements.
Coverage group
You can create a coverage group that contains settings for all products that are linked to the coverage group. Select Master planning > Setup > Coverage > Coverage groups to create a coverage group.
You can link a coverage group to a product. If the link is specific to a site, warehouse, or product dimension, use the Coverage group field on the Item coverage page. If the link is generic, regardless of the product dimensions, use the Coverage group on the Plan FastTab on the Product details page.
If you don't link a coverage group to a product, master planning uses the General coverage group that is specified on the Master planning parameters page as the default.
Specify coverage settings for a product
You can create coverage settings for a specific product. Select Product information management > Products > Released products and then select the product, and then on the Action Pane, in the Plan tab, in the Coverage group, select Item coverage to open the Item coverage page.

If the product is already linked to a coverage group, you can override the coverage group settings by using the Override coverage group settings field. The coverage settings on the Item coverage page take precedence over the settings on the Coverage group page.
You can specify coverage settings for the following:
A product, by using a wizard. The wizard is a step-by-step guide to help you set up the primary item coverage parameters. On the Item coverage page, select Wizard to open the Item coverage wizard. You can learn more about the wizard in Master planning setup wizard.
A dimension group. Select Product information management > Common > Released products. On the Released product details page, on the General tab, in the Administration group, select the Storage dimension group link. On the Storage dimension group page, select the Coverage plan by dimension field to create the coverage settings for a dimension in the storage dimension group. All product dimensions, such as configuration, color, size, and style, must have the Coverage plan by dimension field selected.
Minimum keys
You can use minimum keys to handle seasonal fluctuations in demand.
For example, if you want to set up a minimum key that accounts for increased seasonal demand during the spring and summer months, go to Master planning > Setup > Coverage > Minimum/maximum keys and follow these steps:
Create 12 lines and assign a number from 1 to 12 to the lines in the Change field.
In the Unit field, select Months.
In the Factor field, enter the values that are described in the following table.
| Line | Enter this value | Result |
|---|---|---|
| 1-3 | 1 | Minimum inventory is based on the setting for January to March on the Item coverage page. |
| 4-5 | 2 | Minimum inventory is multiplied by a factor of 2 for April to May. |
| 6-8 | 2.5 | Minimum inventory is multiplied by a factor of 2.5 for June to August. |
| 9-12 | 1 | Minimum inventory reverts to the setting for September to December on the Item coverage page. |
Min/Max coverage code
If the coverage code is Min/Max, you can also specify the Maximum inventory quantity that you want to maintain for the item. The value is also expressed in inventory units. If the projected available inventory falls below the minimum quantity, master planning generates a planned order to fulfill all open requirements and brings the available inventory up to the specified maximum quantity. Just like when you set up Minimum, you must define all other planned coverage dimensions before defining the Maximum field.
For example, the minimum quantity is 10, and the maximum quantity is 15. Current on-hand inventory is 4. This gives a minimum quantity requirement of 6. However, because the maximum quantity is 15, master planning generates a planned order for 11 items.
For items that follow seasonal demands, you might need to maintain different maximum levels. To do that, you need to define Maximum keys by going to Master planning > Setup > Coverage > Minimum/maximum keys. Fill in the Maximum key field on the Item coverage page. You can view the information about the safety stock levels, which are defined by minimum keys on the Min/Max tab, on the Item coverage page. You need to make sure that, for a certain period, the minimum and the maximum values are kept in sync.
Safety stock fulfillment for items
Safety stock indicates that an extra quantity of an item is held in inventory to reduce the risk that the item is out of stock. Safety stock is used as a buffer stock in case sales orders come in and the supplier is unable to deliver the extra items to meet the customer's requested ship date. When safety stock is used to fulfill a sales order, the safety stock is reduced. You can use Master planning to automatically bring the inventory back to the safety level.
Safety stock is set up as part of item coverage on the Item coverage page under Released products > Plan > Coverage.
In the Minimum field, enter the safety stock level that you want to maintain for the item. The value is expressed in inventory units. If you leave the field blank, the default value is zero. This field is available when you select Period, Requirement, or Min/Max in the Coverage code list. The safety stock level limit applies to the available inventory, which means that reservations and markings might trigger safety stock replenishment before the physical quantity goes below the specified minimum level.
Note
You must define all other planned coverage dimensions before you can define the Minimum field. This prevents an invalid record from being used during master planning. This situation can occur if, for example, a dimension group is extended with an additional planned coverage dimension for which the minimum and maximum inventory quantities are not yet defined.
Fulfill minimum
The Fulfill minimum parameter allows you to select the date or the period during which the inventory level must meet the quantity that you specified in the Minimum field. This field is available when you select Period, Requirement, or Min/Max in the Coverage code list.
If minimum keys are used, select the Minimum periods check box to fulfill the minimum inventory level for all the periods that are set up in the minimum key. If you clear the check box, the minimum inventory is fulfilled for the current period only.
The Fulfill minimum parameter is fulfilled at:
Today's date + procurement time - The specified minimum quantity is met on the date when master planning is run, plus the purchase or production lead time. This time includes any safety margins.
If the item carries a trade agreement, and the Find trade agreements check box is selected on the Master planning parameters page, the delivery lead time from the trade agreement isn't considered. Lead times are taken from the item's coverage settings or from the item.
This fulfillment mode creates plans with fewer delays and planned orders, regardless of the coverage group that is set up on the item.
Plan safety stock replenishment for First Expired, First Out items
At any time, the inventory receipt with the latest expiry date is used for safety stock to allow real demand, such as sale lines or BOM lines, to be fulfilled in the First Expired, First Out (FEFO) order.
Scenario
When planning is run, it covers the first sales order from the existing on-hand inventory and another purchase order for the remaining quantity. A planned order is created to make sure that the available inventory is brought back to the safety limit. When the second sales order is planned, the previously created planned order that covers the safety stock is used to cover this quantity; hence, the safety stock is constantly rolling. Finally, another planned order is created to cover the safety stock. All batches expire accordingly, and planned orders are created to refill the safety stock after it has expired.
How master planning handles the safety stock constraint
Your safety stock is some item quantity that is held in inventory should you run out of stock on the item. If the demand from sales orders is more than you planned for final goods or if a supplier can’t deliver more units in the expected timeframe, safety stock gets used.
The system prioritizes preventing the accumulated quantity of an item from falling below its respective safety stock limit. If the system detects that this will fall below the respective minimum, it creates a planned order to replenish that item and it schedules the order to arrive prior to the date at which the minimum threshold is crossed. In other words, the safety stock is fulfilled on today’s date plus the procurement time of the item. If during this planning, you receive some actual demand, the system puts this against a planned order for the replenishment stock. Another planned order then gets created to make up the amount covered by the demand.
Safety stock journals
Safety stock journals provide useful issue history statistics for an item that helps calculate a new minimum inventory level based on reliable metrics. But even when the intent isn't to calculate a new minimum, safety stock can provide a structure in which to regularly review issues related to item history and changing conditions.
To work with the safety stock journals, items need to have at least three months of historical data. With less, the calculation of new minimum isn't considered meaningful.
Safety stock journal lines
Safety stock journal lines can be created for the items that must be checked. After that, proposals for inventory levels can be calculated in the Item coverage journal page. Minimum inventory journal lines can also be created or updated on the Item coverage journal lines page.
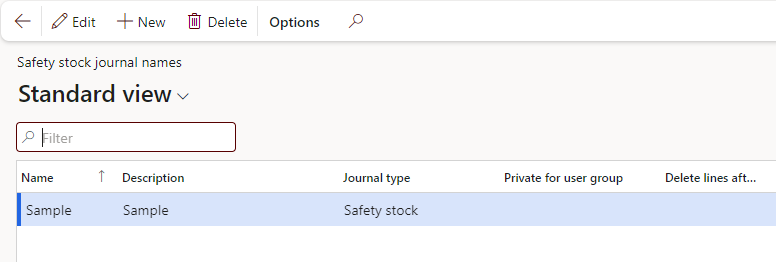
Master planning > Setup > Safety stock journal names
Use safety stock journal to update minimum coverage
This demonstration shows how to calculate minimum coverage proposals based on historical transactions and then update the item coverage with the proposals. The demo data company used to create this task is USMF. This task is intended for the production planner, to help maintain minimum coverage.
Create safety stock journal name
- Navigate to Master planning > Setup > Safety stock journal names.
- Select New.
- In the Name field, type 'Material'.
- In the Description field, type 'Material'.
- Close page.
Create safety stock journal
- Navigate to Master planning > Master planning > Run > Safety stock calculation.
- Select New.
- In the Name field, enter or select a value. Select the safety stock journal name that you previously created, for example, Material.
- Select Create lines.
- In the From date field, enter a date.
- In the To date field, enter a date.
- Select OK. Once completed lines are created for the dimensions that have inventory transactions.
Calculate proposal
- Select Calculate proposal.
- Select the Use average issue during lead time option.
- Set Multiplication factor to '10'. The Multiply factor is used to adjust the proposal. Because demo data only has a few transactions, you need to set the factor to get a realistic proposal.
- Select OK. Scroll down to find M0002 and M0003. View the Calculated minimum quantity column.
Update minimum quantity
- In the list, find and select the desired record. For example, you can select M0002 that has warehouse 12.
- In the New minimum quantity field, enter a number. Update the New minimum quantity to match the value in the Calculated minimum quantity. If the Calculated minimum is zero, you can enter the desired future value. For example, you can enter the Calculated minimum quantity in this field for M0002 that has warehouse 12.
Post new minimum quantity and validate result
- Select Post.
- Select OK.
- Select to follow the link in the Item number field.
- On the Action Pane, Select Plan
- Select Item coverage. Notice that the Minimum quantity has been updated with the new minimum quantity from the safety stock journal.
Delays
A delayed date is a realistic due date that a transaction receives if the earliest fulfillment date that master planning calculates is later than the requested date.
Master planning can calculate the earliest fulfillment date for a transaction, based on lead times, material availability, capacity availability, and various planning parameters.
If master planning calculates an order date that precedes the current date, the order can't be fulfilled on time. Therefore, the order is delayed. In this case, master planning forward-plans the order from the current date and includes lead times. These lead times start with any lower-level component items. The order then receives a delayed date, which is a realistic due date, based on the current data. Master planning also calculates the number of delay days.
In some situations, you might choose not to calculate delays, such as when users know that they can expedite lead times by selecting alternative modes of delivery.
You can configure how delays are calculated for a coverage group. You can then attach the coverage group to an item later.
On the Master planning parameters page, you can set the start time for the calculation of delays. If an order is fulfilled after this time, a delay of one day is added to the delay date of the order.
Use tracing for explosion
By enabling tracing, you can view information about factors that contributed to the outcome of the explosion of an order. The following examples show how you can use the tracing information:
View relations between the actions on planned orders to optimize the supply chain and inventory reservations.
View relations to orders that are already approved. You can focus on automatically firming derived requirements and then prioritize orders more accurately.
Simulate planning results to determine whether the planning parameters are optimal.
Identify how information such as production dates, quantities, and priorities for an order were determined.
You can view details about futures and actions for a selected order. On the Explosion page, tracing information is available on the Explanation tab in the upper pane. Tracing occurs when you explode an order. To start tracing for the order, select Update and then select the Enable trace check box. You can use the Find text field to search the log for specific information. Search results are highlighted in the tree.
Make to order supply automation
You can now automate your order taking and related supply process for your make-to-order (MTO) scenarios. You can enable long-term evaluation of your resource capacity load by viewing your capacity load for a user-defined period. You can also set a delay tolerance for your master plans, thus improving your Capable-to-promise (CTP) accuracy. That alongside available configurations to specify product availability and component flexibility, your company can better track and streamline supply chain decision-making in your MTO scenarios.
Period templates
You can create a period template and use it to display the master planning requirements, for example. The requirements are then distributed and displayed according to the periods that you define. The format of the period template gives structure and visibility to a potentially large volume of requirements data.
Use the Period templates page in Organization administration > Common > Calendars to create and set up a period template. You can use a period template to filter and display existing data in predefined periods.
The period template provides an overview of large amounts of data that may extend over a long time.
The period template only displays data. There's no effect on the data itself or on data generation in Supply Chain Management. Therefore, you can also delete a period template when you want to stop using it.
The following tables and list provide descriptions for the controls in the Period templates page.
Tabs
| Tab | Description |
|---|---|
| Advanced settings | Set parameters for the selected period template. |
| Periods | Create and define the periods for the period template. |
| Simulation | The run-time–generated periods that you define on the Periods tab. |
Buttons
| Button | Description |
|---|---|
| Move up | Move the selected line up one line in the list. |
| Move down | Move the selected line down one line in the list. |
Fields
- Legal entities - Select the company to which the period template applies.
- Name - Enter a unique identifier for the period template. You must complete this field.
- Default - Define the period template as the default template.
- Fixed start - When you use the Day period, you can select the day of the week on which the period starts. The selection in this field can also affect the length of the period that is defined.
- Working time template - Select a working time template to use. If you leave the field blank, Supply Chain Management uses a seven-day work week.
- Period - Select the period that you want to set up.
- Number of periods - Enter the number of periods that you want to set up. The field contains the default value of 1, but you can change it for the Day, Week, Month, Quarter, and Year periods. For the Backlog and Outlook periods, the number of periods that is shown is always 1.
- Create lines - Create multiple periods that correspond to the number of periods that you define. If you don't select the check box, one period is created to cover the number of periods that you define.
- Period description - A description of the period that you define. When you select a period, Supply Chain Management fills in this field automatically with normal text and system values that correspond to the period that you select. The text and values are returned at run time when you access and use a period template. The system values are as follows:
- %1 – The name of the starting day.
- %2 – The name of the ending day.
- %3 – The number of the starting week.
- %4 – The number of the ending week.
- %5 – The name of the starting month.
- %6 – The name of the ending month.
- %7 – The name of the starting year (calendar year).
- %8 – The name of the ending year (calendar year).
- Calculation date - The date when the period template is calculated. The default setting is the current date, but you can change it.
- Direction - Define whether the period template is calculated for a future period or a past period. The options are as follows:
- Forward – The period template is calculated from the calculation date and forward in time.
- Backward – The period template is calculated from the calculation date and backward in time.
- From date - The start date of the defined period. This date is the same as the calculation date.
- To date - The end date of the defined period.
- Open days - The number of working days that occur during the defined period.
Demonstration - Create working time templates
Working time templates define the working hours throughout a week and are used to generate working times for a specified timeframe. This procedure shows you how to define a working time template using working time scheduling properties for categorizing working time intervals. You can walk through this demonstration in the demo data company USMF or using your own data.
- Go to Workspaces > Resource lifecycle management.
- Select Working time templates.
- Select New to create a working time template.
- In the Working time template field, type a value.
- In the Name field, type a value.
- Expand the Monday section.
- Select Add.
- In the From field, enter a time.
- Specify the time when work begins in the morning.
- In the To field, enter a time.
- Specify the time when workers break for lunch.
- Select Add.
- In the From field, enter a time.
- Specify the time when work resumes after lunch.
- In the To field, enter a time.
- Specify the end of the workday.
To replicate working times to all weekdays, follow these steps:
- Select Copy day.
- Copy the working times definitions from Monday to Tuesday.
- Select OK.
- Select Copy day.
- Copy the working times definitions from Monday to Wednesday.
- In the To weekday field, select an option.
- Select OK.
- Select Copy day.
- Copy the working times definitions from Monday to Thursday.
- In the To weekday field, select an option.
- Select OK.
- Select Copy day.
- Copy the working times definitions from Monday to Friday.
- In the To weekday field, select an option.
- Select OK.
To define time slots for special operations, follow these steps:
- Expand the Friday section.
- In the list, find and select the desired record.
- In the Property field, enter or select a value.
- In the list, find and select the desired record.
- In the Property field, enter or select a value.
To mark weekend days as closed for pickup, follow these steps:
- Expand the Saturday section.
- Select Yes in the Closed for pickup field.
- Expand the Sunday section.
- Select Yes in the Closed for pickup field.