Install the dashboard and connect to your organization's data
Before installing the dashboards, you need to ensure that you have the Power BI Pro license assigned to you.
Exercise: Install the Emissions Impact dashboards
In this exercise, you install the Emissions Impact dashboards and connect to your data.
Task: Deploy the dashboards from the Solution Center
In this task, you sign in to the Microsoft Cloud Solution Center and deploy the Microsoft Cloud for Sustainability dashboard solutions.
Open a browser in InPrivate or Incognito mode and then go to https://solutions.microsoft.com.
Use the credentials with your Power BI Pro license install.
After sign-in is complete, on the Home page of Microsoft Cloud Solution Center, select View all solutions on the Microsoft Cloud for Sustainability tile.
From the available capabilities, select Report impact and progress.
From the available solutions list, select Emissions Impact Dashboard for Azure and Emissions Impact Dashboard for Microsoft 365 with the Added checkbox and then select Deploy.
Provide the name for your deployment, select the terms of service and then select Next.
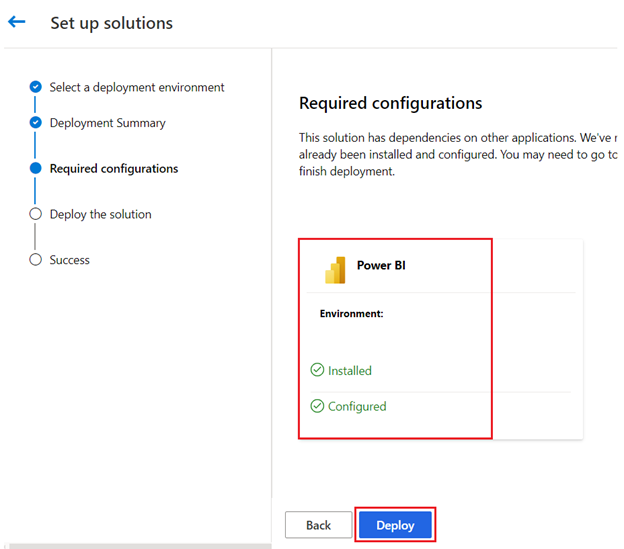
Verify that the pre-deployment dependencies are installed and set up. Select Deploy.
Wait for the deployment to show as successful. You're notified about the deployment start and success through email. Select Close.
Go to Microsoft Power BI, select the Apps on the left navigation pane. You see the Emissions Impact Dashboard for Microsoft 365 and Emissions Impact Dashboard for Azure listed on the Apps page.
You successfully installed the Emissions Impact Dashboard for Azure and Emissions Impact Dashboard for Microsoft 365 applications.
Task: Connect to Data
In this task, you connect your organization's data into the Emissions Impact dashboards for Azure and Microsoft 365.
Prerequisites
The prerequisites are different for the Azure dashboard and the Microsoft 365 dashboard.
Azure
The prerequisites for the Emissions Impact Dashboard for Azure are:
You should have an admin role with read/write permissions on the organization's Azure tenant. If you don't have these permissions, contact your Microsoft Entra ID admin who has read/write permissions.
The Emissions Impact Dashboard for Azure is supported for EA Direct, MCA, and MPA accounts with direct billing relationships with Microsoft.
For an EA Direct account, you need a Billing Account Administrator (formerly known as an Enrollment Administrator) account with read or write permissions. You also need to have the company's billing account ID (formerly known as the enrollment number).
For an MCA or MPA and direct billing relationship with Microsoft, you need a Billing Account Administrator account with a role as Billing Account Reader/Contributor/Owner, and you need to have your company's billing account ID.
Microsoft 365
The prerequisites for the Emissions Impact Dashboard for Microsoft 365 are:
You need to have the tenant ID of your organization, which has a business, enterprise, or education subscription for Microsoft 365 or Microsoft Office 365. Your Microsoft Entra ID administrator can provide the tenant ID.
You need to have one of the following Microsoft 365 admin roles:
Exchange admin
Skype for Business admin
SharePoint admin
Report reader
Connect your data for Azure
To connect your data for Azure, follow these steps:
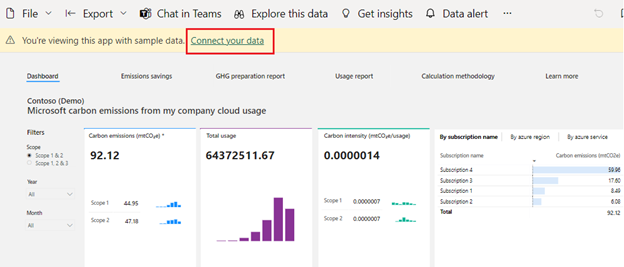
In the Emissions Impact Dashboard for Azure, select the Connect your data option.
In the Connect to Emissions Impact Dashboard dialog, under EnrollmentID or BillingAccountID, enter your billing account ID (formerly known as the enrollment number) for EA Direct customers, or enter the billing account ID for MCA/MPA. In the Advanced options, you can enable automatic refresh of data for this report. When you're done, select Next.
Connect your account to the dashboard by using the following settings:
For Authentication method, select OAuth2.
For Privacy level setting for this data source, select Organizational.
Select Sign in and connect.
During sign-in, use the credentials that have access to the EnrollmentID/BillingAccountID and the required admin role to the Billing account/Enrollment based on the Azure account type.
Now, you successfully connected your Microsoft Azure billing account to the Emissions Impact Dashboard. Wait for 24 hours to view your Microsoft Azure services emissions data in the report.
Connect your data for Microsoft 365
To connect your data for Microsoft 365, follow these steps:
In the Emissions Impact Dashboard for Microsoft 365, select Connect your data.
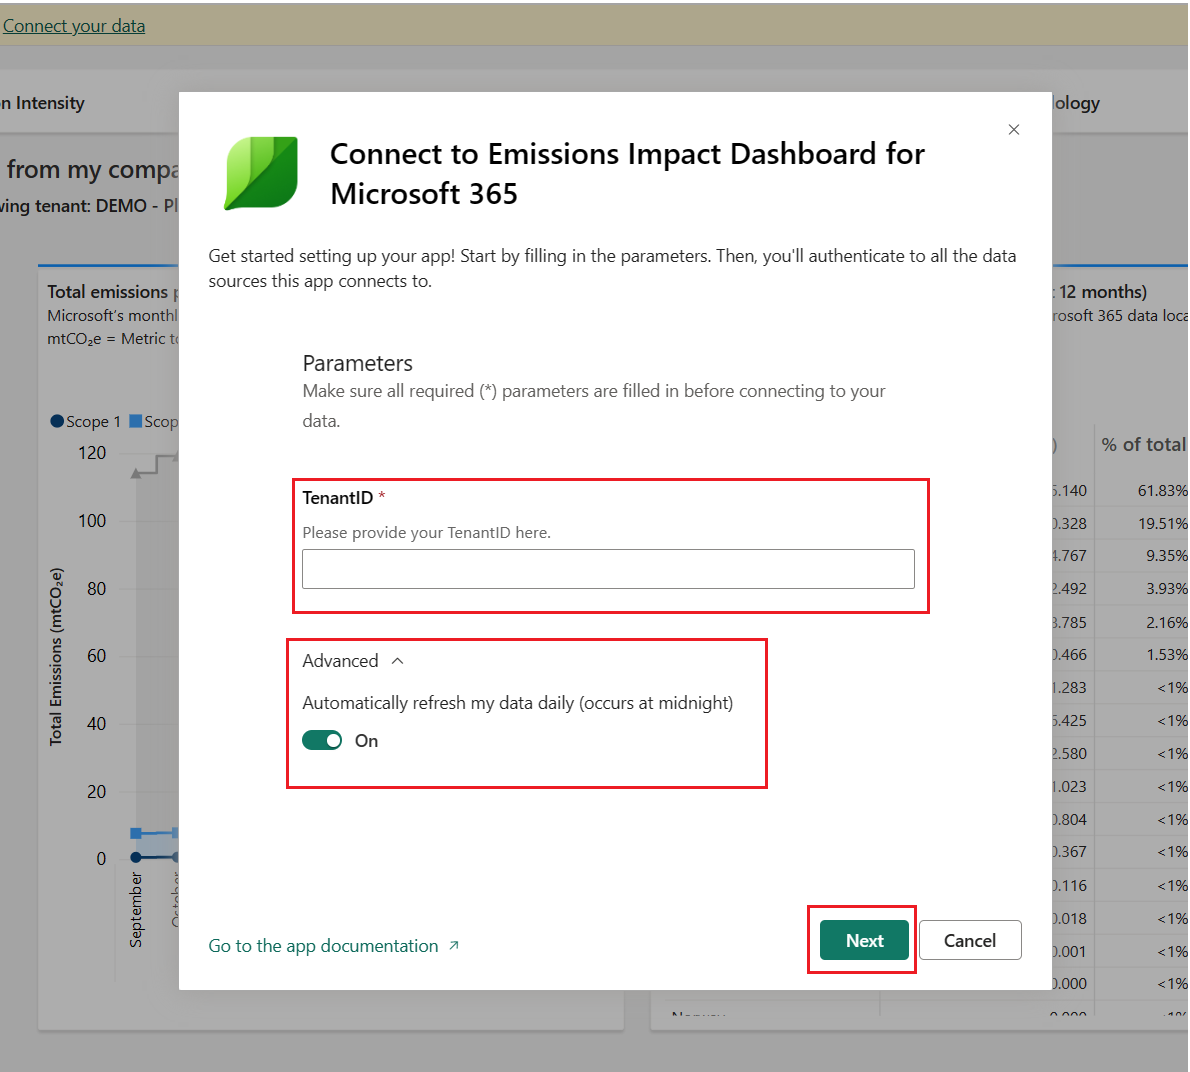
In the Connect to Emissions Impact Dashboard for Microsoft 365 dialog, enter your Microsoft 365 tenant ID. In Advanced options, you can enable automatic refresh of data for this report. When you're done, select Next.
Connect your account to the dashboard by using the following settings:
For Authentication method, select OAuth2.
For Privacy level setting for this data source, select Organizational.
Select Sign in and connect.
During sign-in, use the credentials that have the appropriate admin access to your Microsoft 365 tenant, as mentioned in the prerequisites.
You successfully connected your Microsoft 365 tenant to the Emissions Impact Dashboard for Microsoft 365. Wait for 24 hours to view your tenant emissions data in the report.


