Deploy an ASP.NET container to a container registry using Visual Studio
Docker is a lightweight container engine, similar in some ways to a virtual machine, which you can use to host applications and services. This tutorial walks you through using Visual Studio to publish your containerized application to an Azure Container Registry.
If you don't have an Azure subscription, create a free account before you begin.
Prerequisites
- Install the latest version of Visual Studio 2019 with the "ASP.NET and web development" workload.
- Install the latest version of Visual Studio 2022 with the "ASP.NET and web development" workload.
- Install Docker Desktop for Windows.
Create an ASP.NET Core web app
The following steps guide you through creating a basic ASP.NET Core app that you use in this tutorial. If you already have a project, you can skip this section.
In the Visual Studio start window, select Create a new project.
Select ASP.NET Core Web App, and then select Next.
Enter a name for your new application (or use the default name), specify the location on disk, and then select Next.
Select the .NET version you want to target. If you're not sure, choose the LTS (long-term support) release.
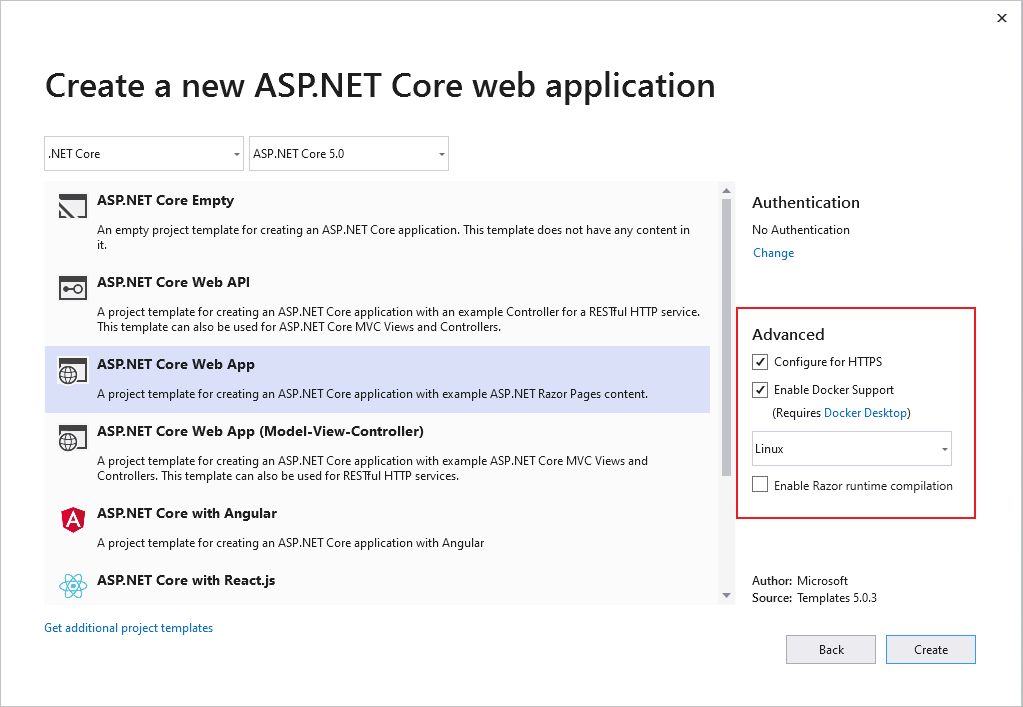
Choose whether you want SSL support by selecting or clearing the Configure for HTTPS checkbox.
Select the Enable Docker Support checkbox.
Use the dropdown list to select the type of container you want: Windows or Linux.
Select Create to complete the process.
In the Visual Studio start window, select Create a new project.
Select ASP.NET Core Web App, and then select Next.
Enter a name for your new application (or use the default name), specify the location on disk, and then select Next.
Select the .NET version you want to target. If you're not sure, choose the LTS (long-term support) release.
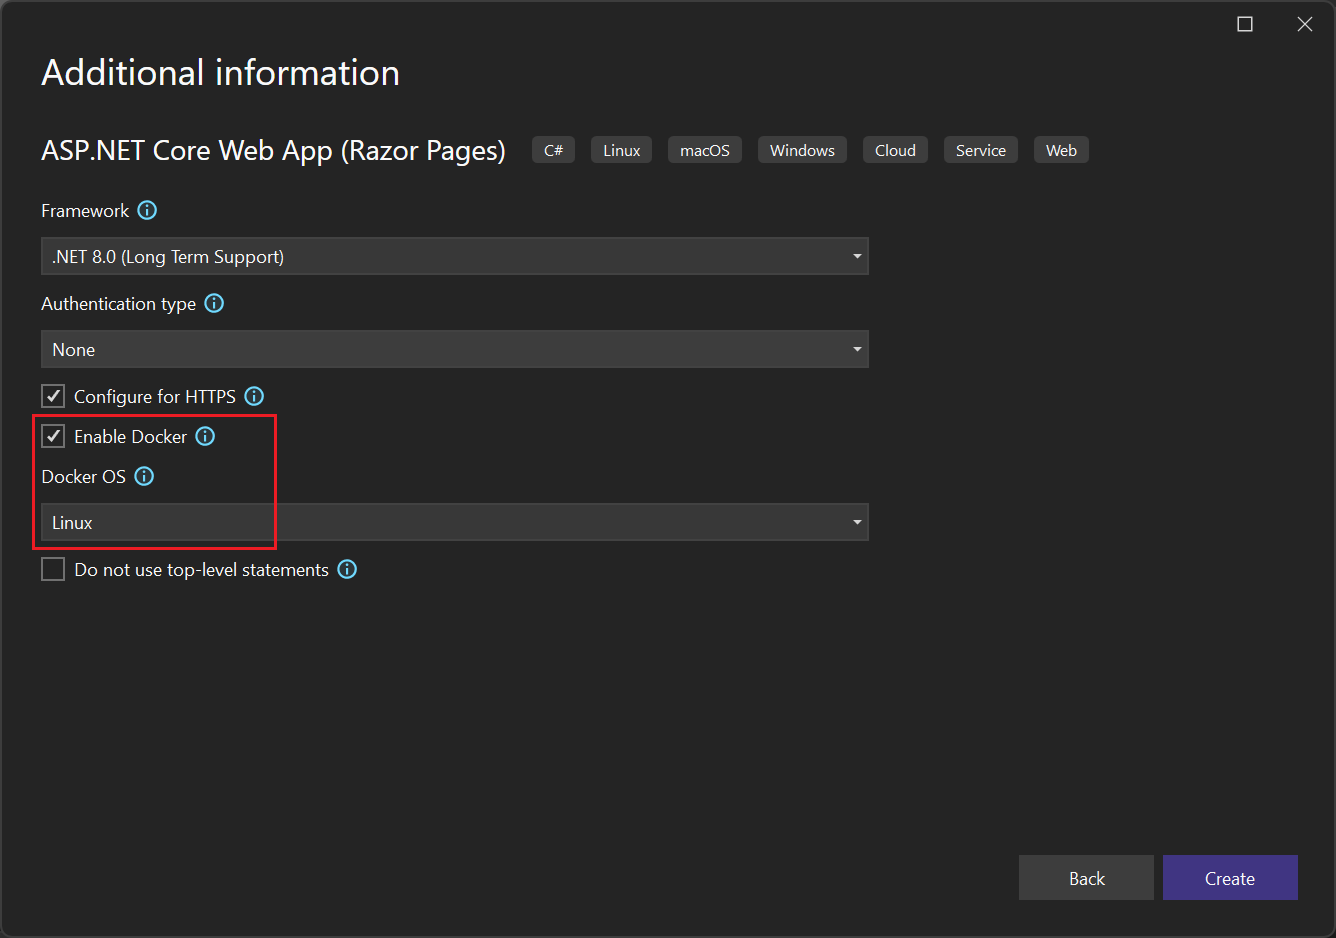
Choose whether you want SSL support by selecting or clearing the Configure for HTTPS checkbox.
Select the Enable Docker checkbox.
Use the Docker OS dropdown list to select the type of container you want: Windows or Linux.
Select Create to complete the process.
Publish your container to Azure Container Registry
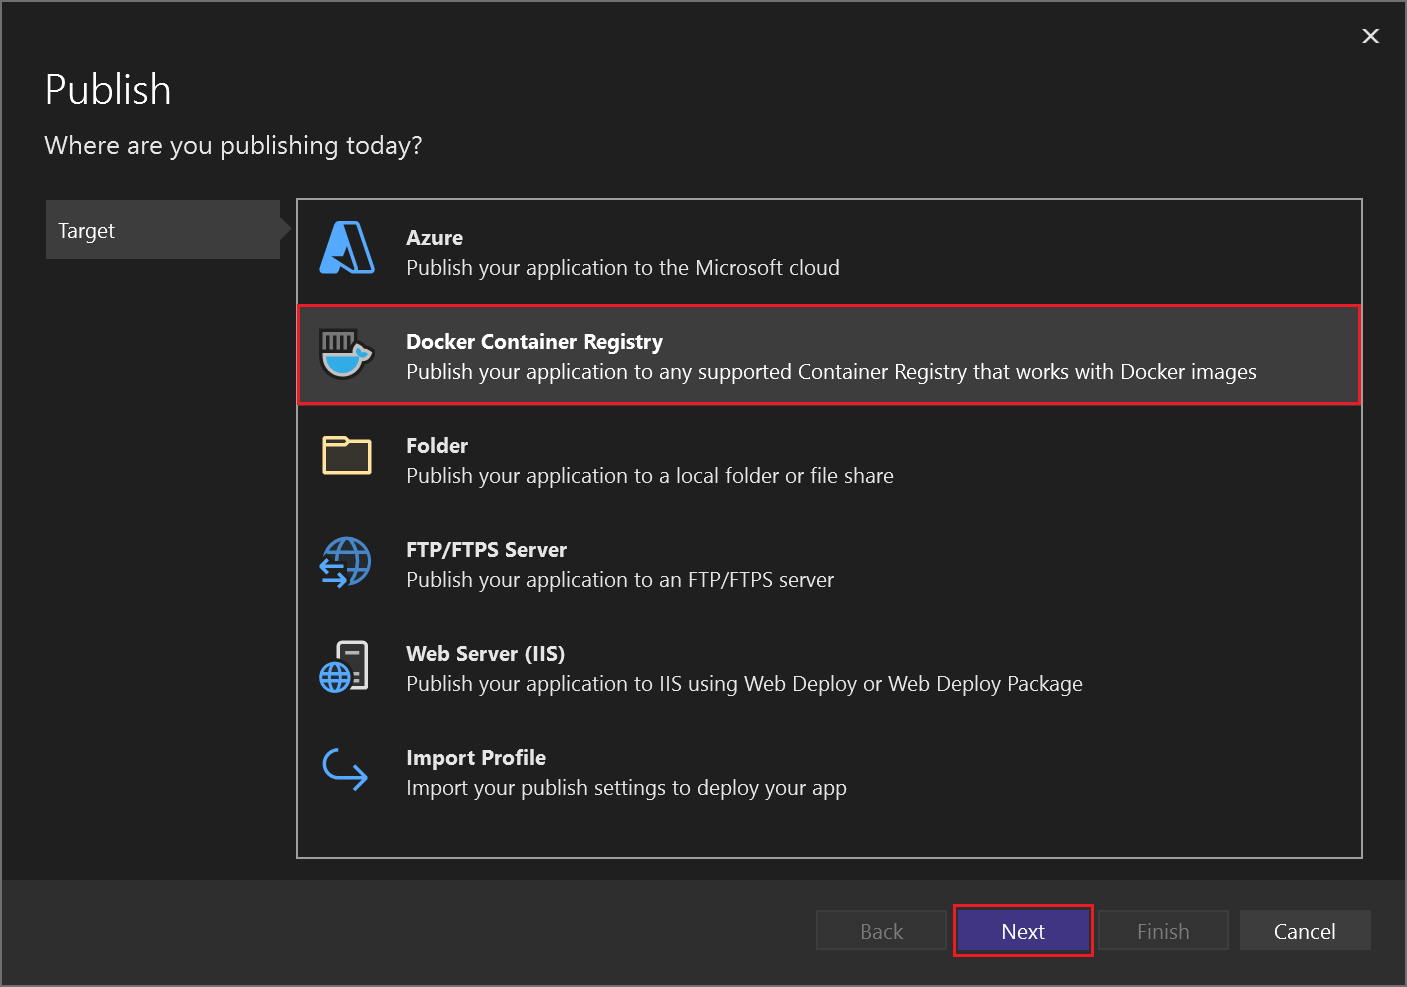
Right-click your project in Solution Explorer and choose Publish. The Publish dialog opens.
On the Target tab, select Docker Container Registry, and then select Next.
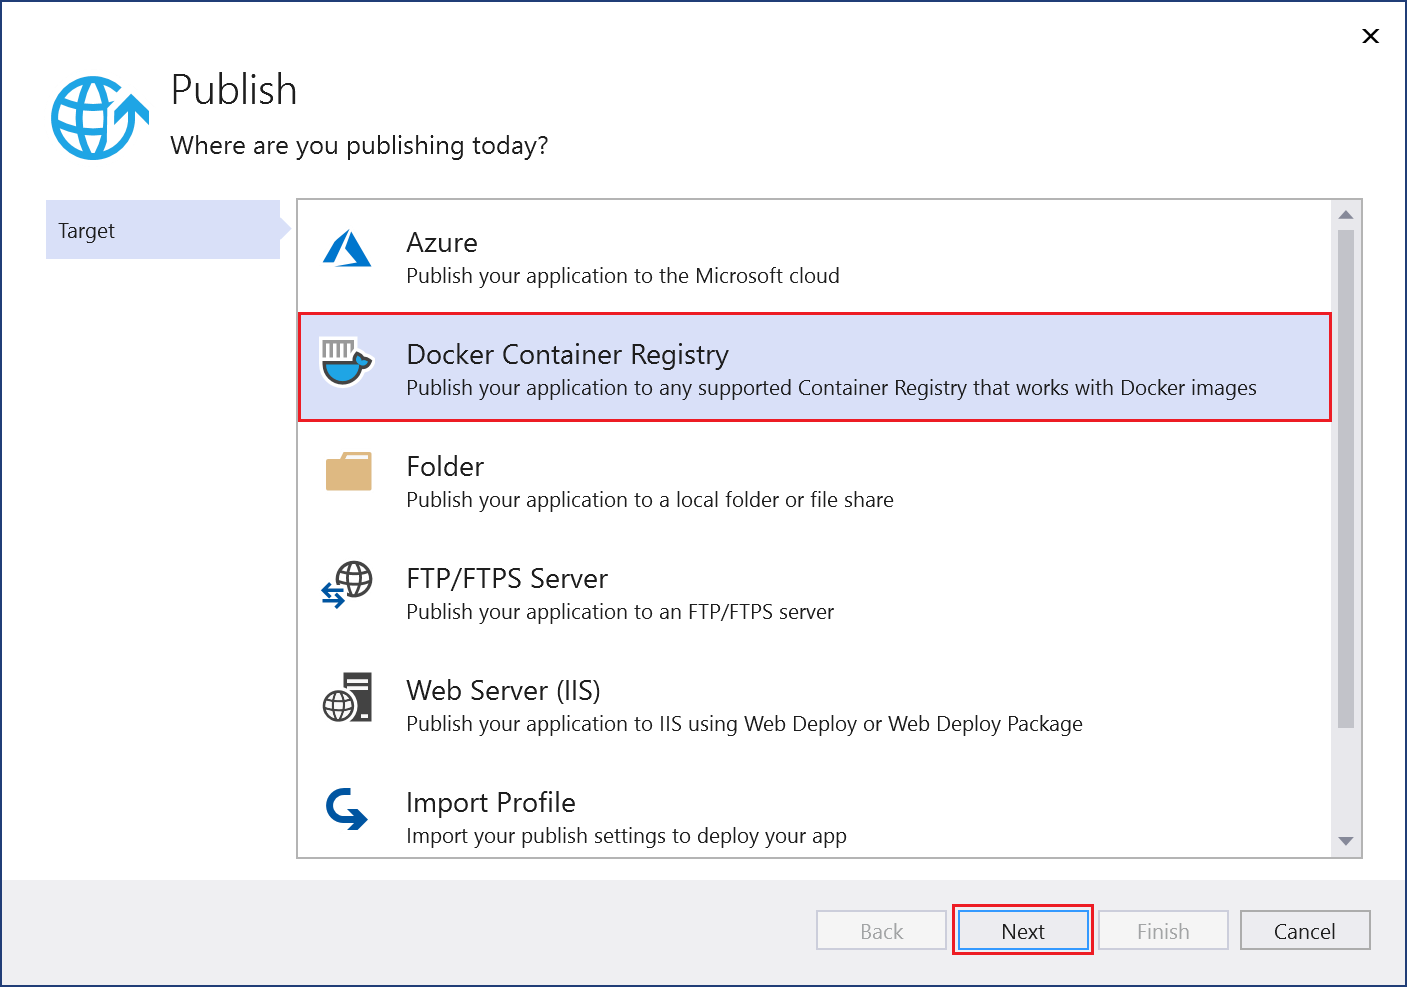
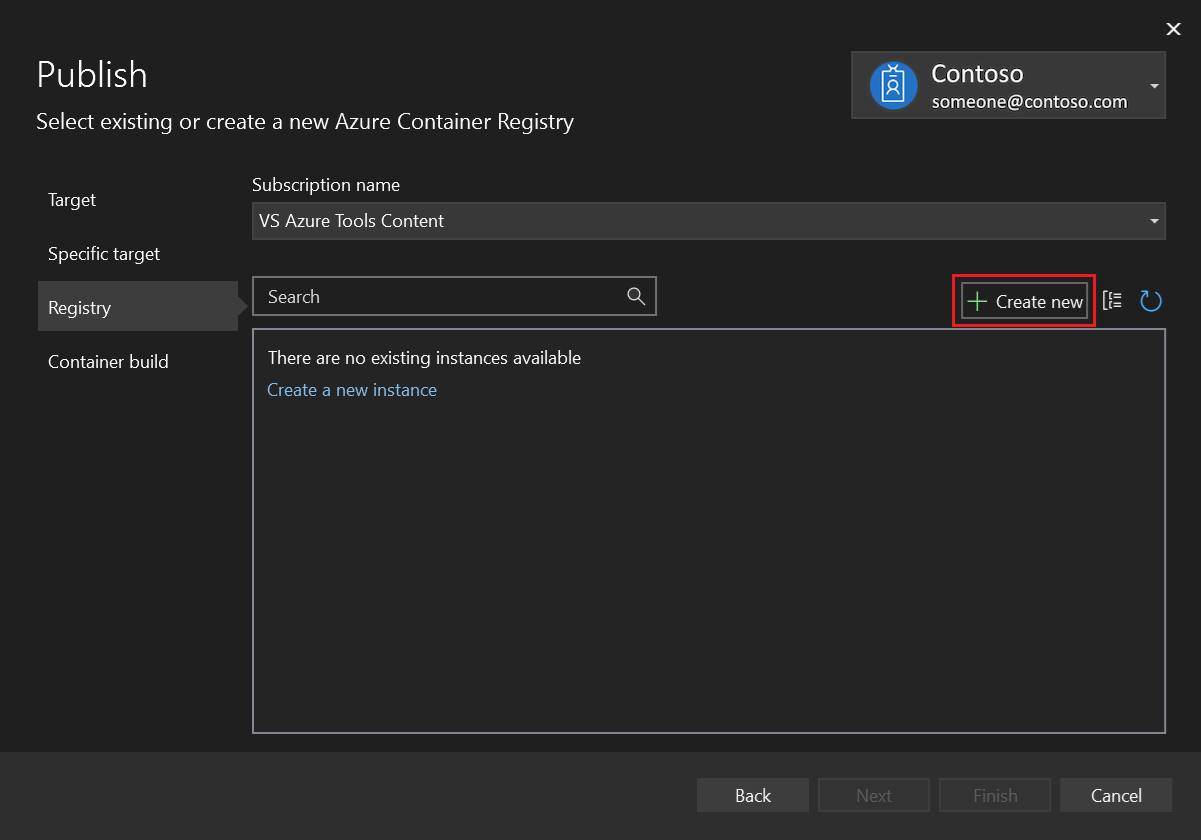
On the Specific target tab, select Azure Container Registry, and then select Next.
On the Container Registry tab, select the Create a new Azure Container Registry option at the bottom:
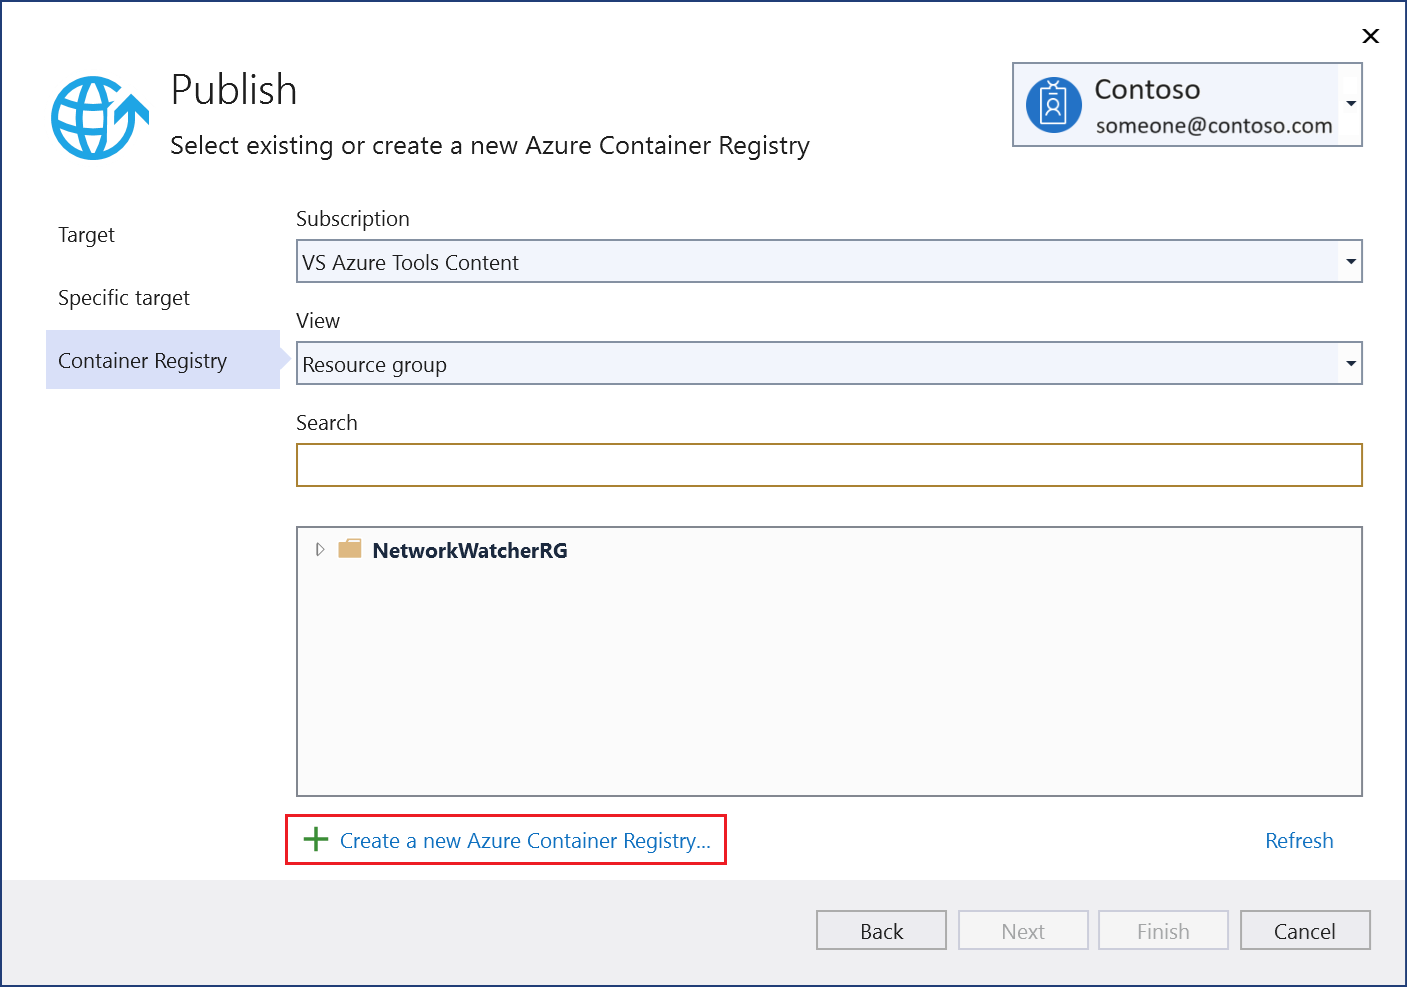
On the Azure Container Registry page, enter your values for the new resource:
Setting Suggested value Description DNS Prefix Globally unique name Name that uniquely identifies your container registry. Subscription Your subscription The Azure subscription to use. Resource Group Your resource group Name of the resource group in which to create your container registry. Select New to create a new resource group. SKU "Standard" Select the service tier of the container registry. Registry Location A nearby location Choose a location in a region close to you or close to other services that you expect to use the container registry. 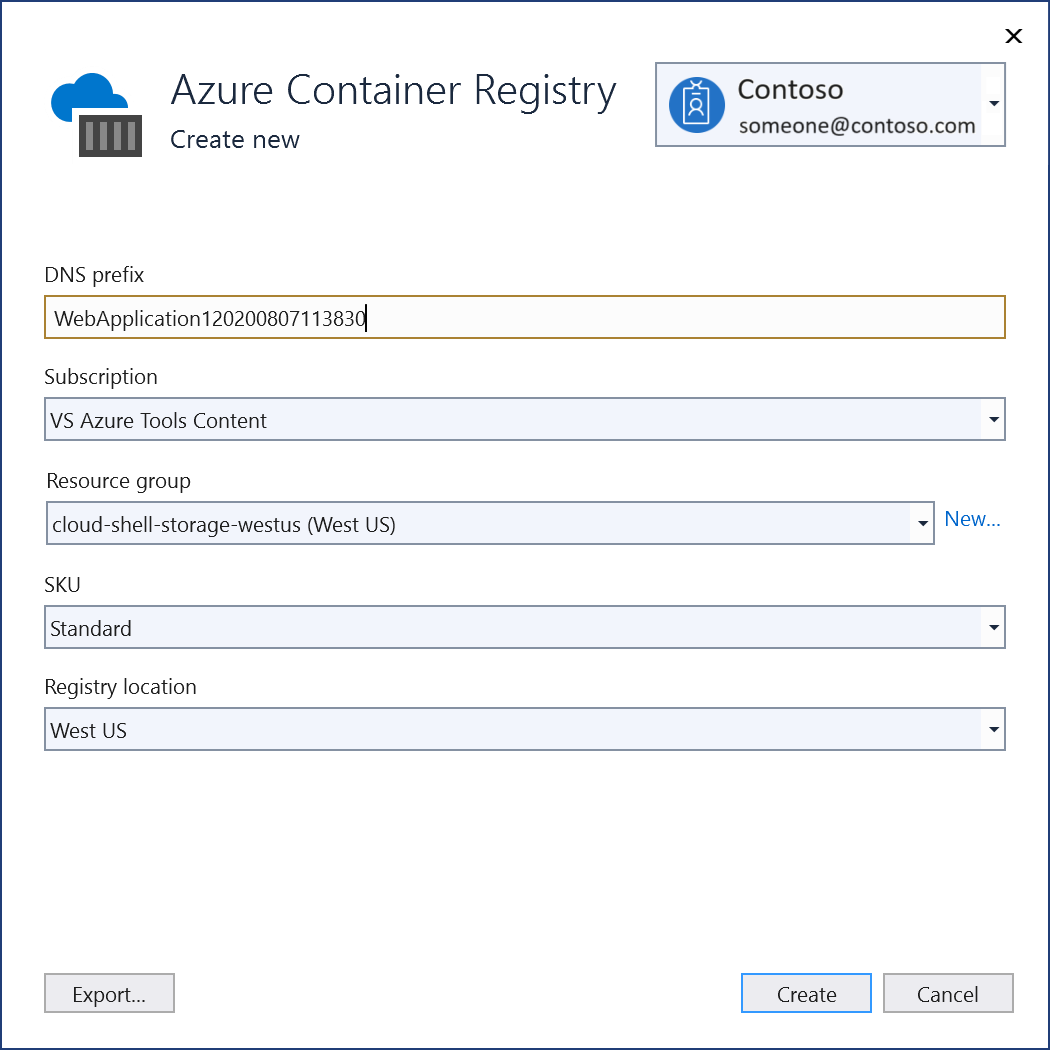
After you enter the resource values, select Create.
Visual Studio validates the property values and creates the new container resource. When the process completes, Visual Studio returns to the Publish dialog and selects the new container in the list.
Select Finish to publish the new container.
Right-click your project in Solution Explorer and choose Publish. The Publish dialog opens.
On the Target tab, select Docker Container Registry, and then select Next.
On the Specific target tab, select Azure Container Registry, and then select Next.
On the Registry tab, select the Create new (+) option at the right:
Fill in your desired values in the Azure Container Registry screen.
Setting Suggested value Description DNS Prefix Globally unique name Name that uniquely identifies your container registry. Subscription Your subscription The Azure subscription to use. Resource Group Your resource group Name of the resource group in which to create your container registry. Select New to create a new resource group. SKU "Standard" Select the service tier of the container registry. Registry Location A nearby location Choose a location in a region close to you or close to other services that you expect to use the container registry. 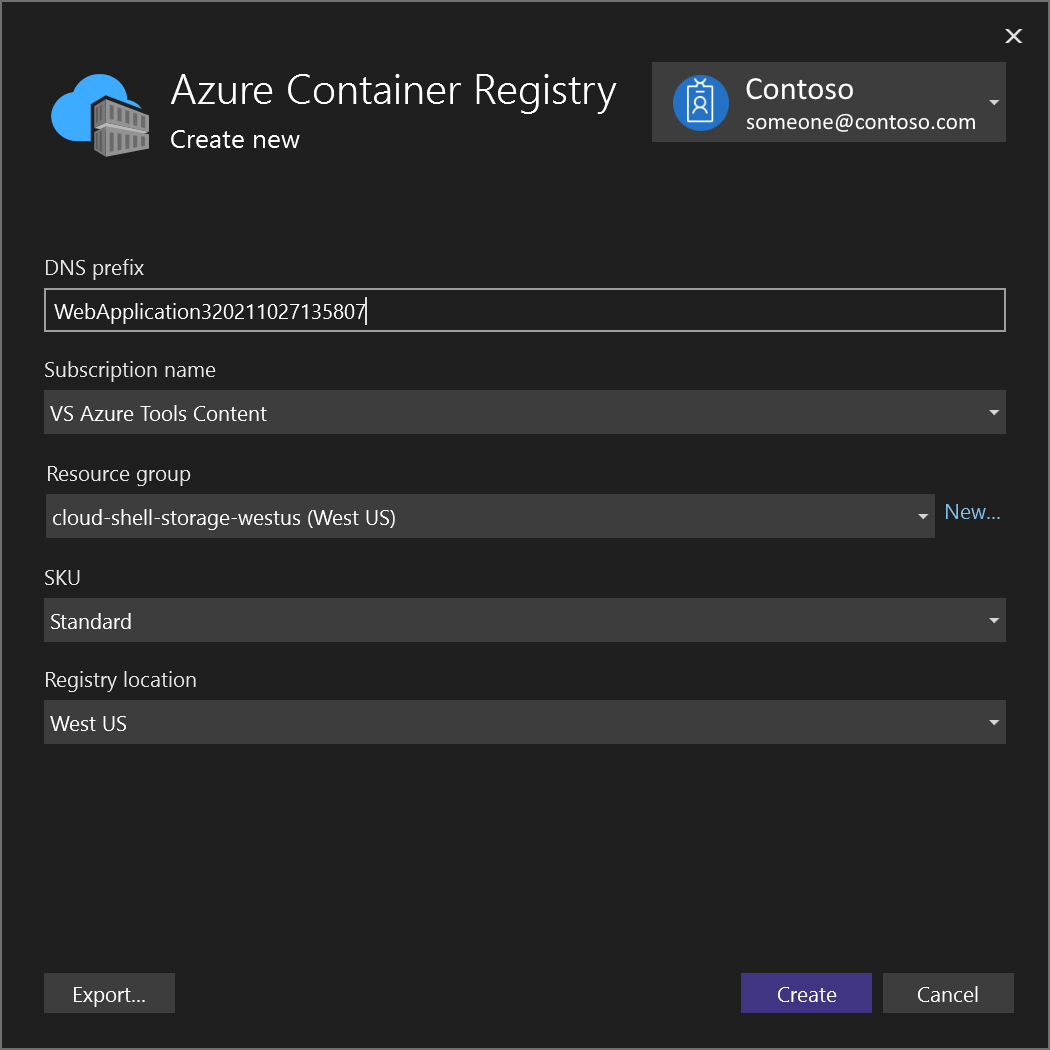
After you enter the resource values, select Create.
Visual Studio validates the property values and creates the new container resource. When the process completes, Visual Studio returns to the Publish dialog and selects the new container in the list.
Select Finish to publish the new container.
You can now pull the container from the registry to any host capable of running Docker images, such as Azure Container Instances.