Tutorial: Create a Windows Forms matching game app
In this series of four tutorials, you create a matching game. The player matches pairs of hidden icons.
Use these tutorials to learn about the following tasks in the Visual Studio integrated development environment (IDE):
- Store objects, such as icons, in a List<T> object.
- Use a
foreachloop in C# or aFor Eachloop in Visual Basic to iterate through items in a list. - Keep track of a form's state by using reference variables.
- Create an event handler to respond to events that you can use with multiple objects.
- Create a timer that counts down and then fires an event exactly once after it's started.
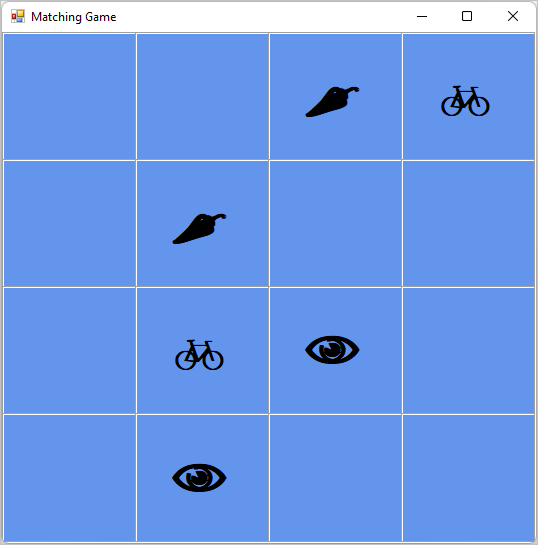
When you finish, you'll have a complete game.
In this first tutorial, you learn how to:
- Create a Visual Studio project that uses Windows Forms.
- Add and format a layout element.
- Add and format labels.
Prerequisites
You need Visual Studio to complete this tutorial. Visit the Visual Studio downloads page for a free version.
Note
This tutorial requires the Windows Forms App (.NET Framework) project template. During installation, select the .NET desktop development workload:
If you already have Visual Studio installed and need to add the template, from the menu, select Tools > Get Tools and Features, or in the Create a new project window, select Install more tools and features.

Create a Windows Forms match game project
The first step of creating your game is to create a Windows Forms App project.
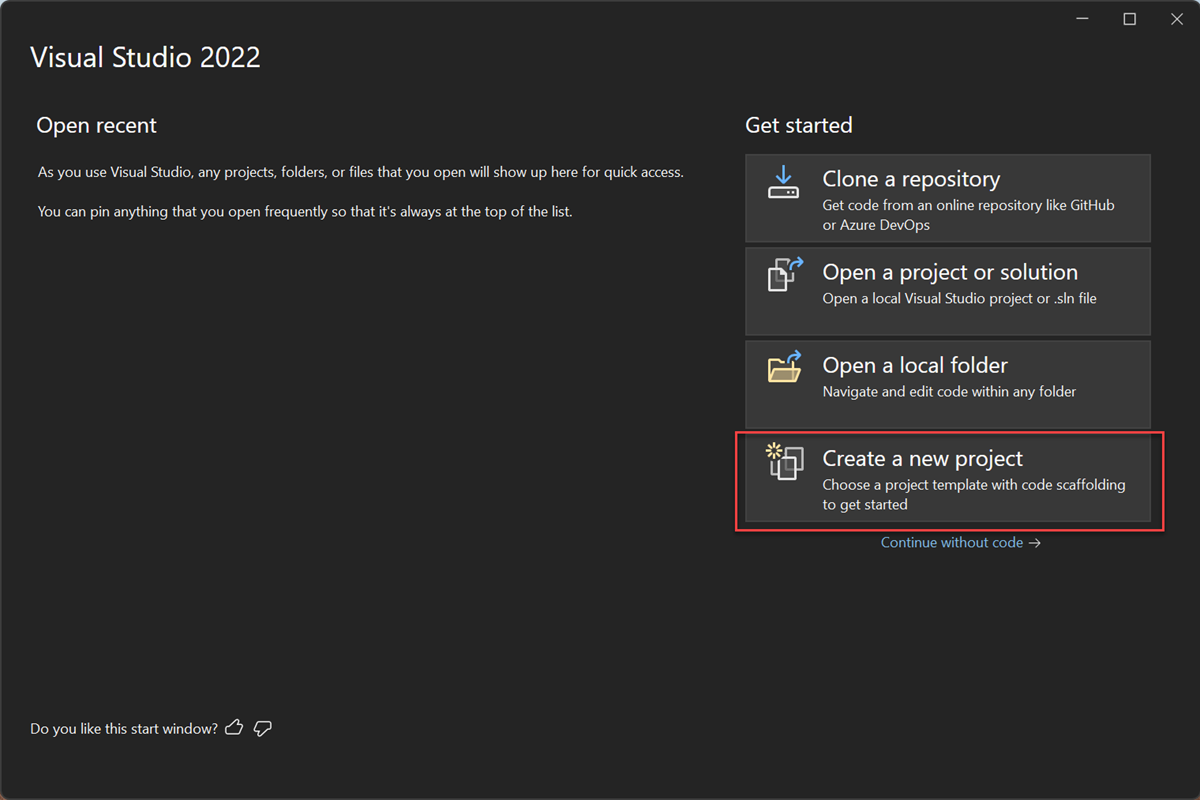
Open Visual Studio.
In the start window, select Create a new project.
In the Create a new project window, search for Windows Forms. Then select Desktop from the All project types list.
Select the Windows Forms App (.NET Framework) template for either C# or Visual Basic, and then select Next.
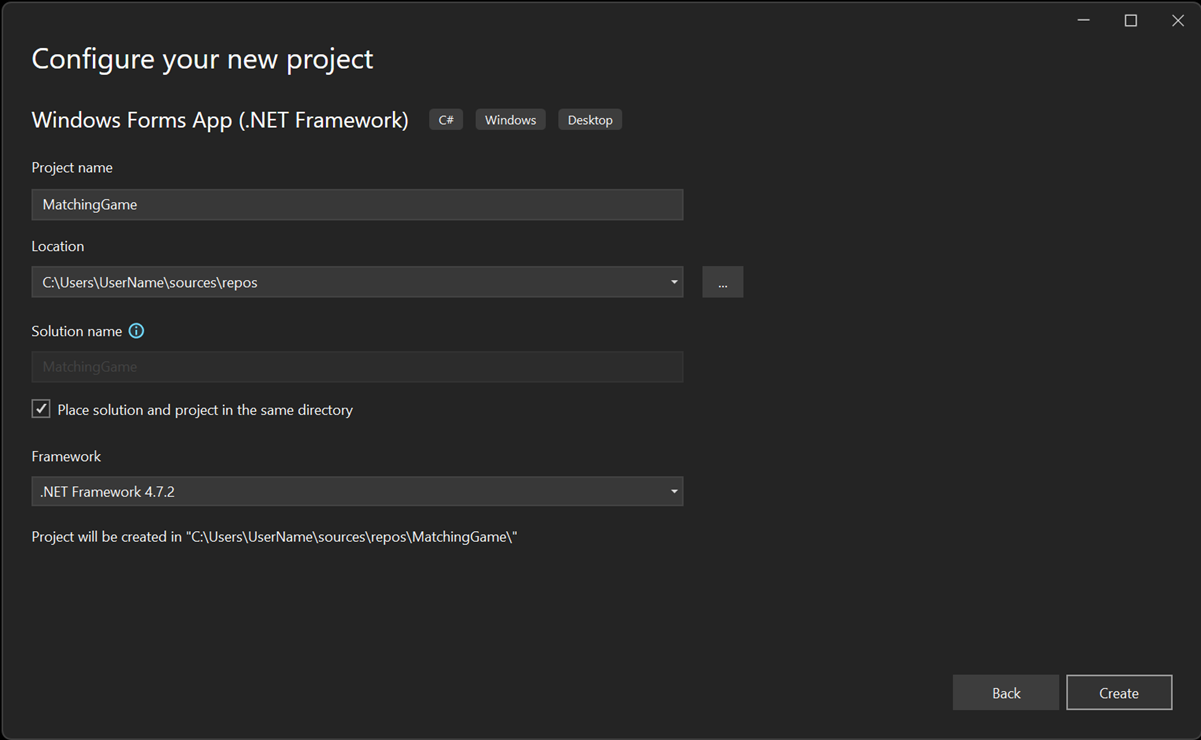
In the Configure your new project window, name your project MatchingGame, and then select Create.
Visual Studio creates a solution for your app. A solution is a container for the projects and files that your app needs.
At this point, Visual Studio displays an empty form in the Windows Forms Designer.
Create a layout for your game
In this section, you create the four-by-four grid for the game.
Select the form to select the Windows Forms Designer. The tab reads Form1.cs [Design] for C# or Form1.vb [Design] for Visual Basic. In the Properties window, set the following form properties.
- Change the Text property from Form1 to Matching Game. This text appears at the top of the game window.
- Set the size of the form. You can change it either by setting the Size property to 550, 550 or by dragging the corner of the form until you see the correct size at the bottom of the Visual Studio IDE.
Select the Toolbox tab on the left side of the IDE. If you don't see it, select View > Toolbox from the menu bar or select Ctrl+Alt+X.
Drag a TableLayoutPanel control from the Containers category in the toolbox, or double-click it. Set the following properties for the panel in the Properties window.
Set the BackColor property to CornflowerBlue. To set this property, select the down arrow next to the BackColor property. In the resulting dialog box, select Web. In the list of names, select CornflowerBlue.
Note
The colors aren't in alphabetical order. CornflowerBlue is near the bottom of the list.
Set the Dock property to Fill by selecting the down arrow and then selecting the large middle button. This option spreads the table out so that it covers the entire form.
Set the CellBorderStyle property to Inset. This value provides visual borders between each cell on the board.
Select the triangle button in the upper-right corner of the TableLayoutPanel to display its task menu. On the task menu, select Add Row twice to add two more rows. Then select Add Column twice to add two more columns.
On the task menu, select Edit Rows and Columns to open the Column and Row Styles window. For each column, select the Percent option, and then set each column's width to 25 percent.
Select Rows from the list at the top of the window, and then set each row's height to 25 percent.
When you're done, select OK to save your changes.
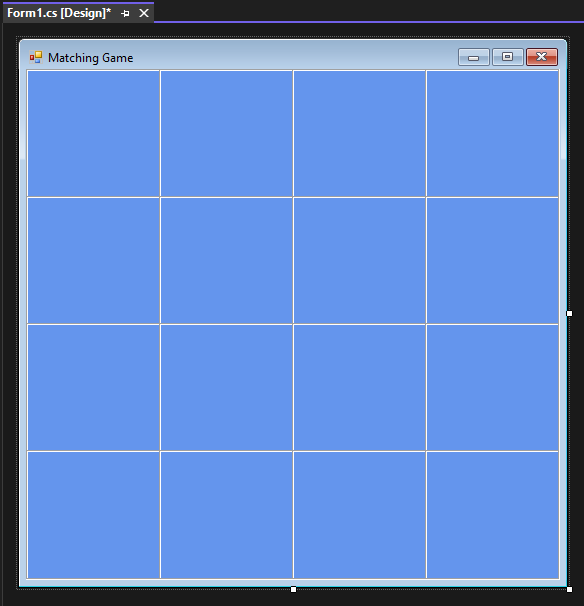
Your TableLayoutPanel is now a four-by-four grid with 16 equally sized square cells. These rows and columns are where the icons appear later.
Add and format labels
In this section, you create and format labels that appear during the game.
Be certain that the TableLayoutPanel is selected in the form editor. You should see tableLayoutPanel1 at the top of the Properties window. If it isn't selected, select the TableLayoutPanel on the form, or select it from the list at the top of the Properties window.
Open the toolbox, as before, and open the Common Controls category. Add a Label control to the upper-left cell of the TableLayoutPanel. The label control is now selected in the IDE. Set the following properties for it.
- Set the BackColor property of the label to CornflowerBlue.
- Set the AutoSize property to False.
- Set the Dock property to Fill.
- Set the TextAlign property to MiddleCenter by selecting the down arrow button next to the property and then selecting the middle button. This value ensures the icon appears in the middle of the cell.
- Select the Font property. An ellipsis (...) button appears. Select the ellipsis and set the Font value to Webdings, the Font Style to Bold, and the Size to 48.
- Set the Text property of the label to the letter c.
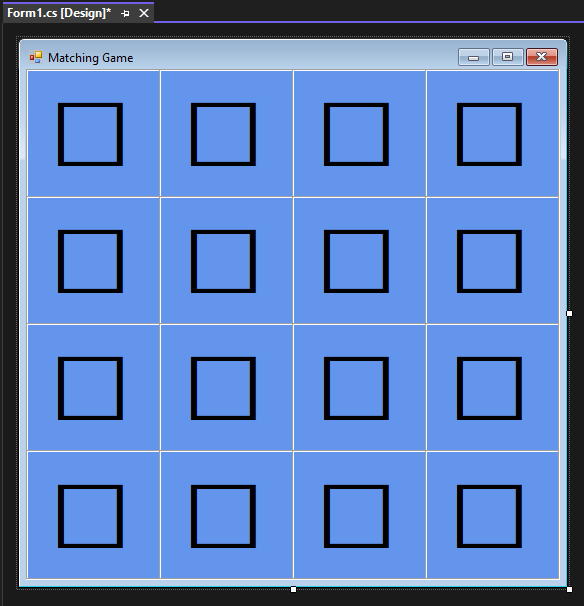
The upper-left cell of the TableLayoutPanel now contains a black box centered on a blue background.
Note
Webdings is an icon font that ships with the Windows operating system. In your matching game, the player matches pairs of icons. This font displays the icons to match. If the Webdings icons don't display properly on the form, set the UseCompatibleTextRendering property of labels on the form to True.
Instead of c, try different letters in the Text property. An exclamation point is a spider, an uppercase N is an eye, and a comma is a chili pepper.
Select your Label control and copy it to the next cell in the TableLayoutPanel. Select the Ctrl+C keys, or on the menu bar, Edit > Copy. Then paste it by using Ctrl+V or Edit > Paste.
A copy of the first Label appears in the second cell of the TableLayoutPanel. Paste it again, and another Label appears in the third cell. Keep pasting Label controls until all of the cells are filled.
This step completes the layout for your form.
Next step
Go to the next tutorial to learn how to assign a random icon to each label and add event handlers to labels.