Set up attributes in Viva Glint
Set up attributes in Microsoft Viva Glint to create a mapping of fields to expect in your employee data files transmitted to Glint. Use the decisions made in the Employee Attribute Template as a guide to set up required, custom, hierarchy, and derived attributes.
Tip
Ensure that attribute labels stay consistent over time in your Employee Data File. For example, if an attribute is set up as "Employee ID," it's not recognized as the same column if renamed "Employee Number".
Attribute setup in Viva Glint
To set up your attributes in Viva Glint, your uploaded file must contain a finalized attribute header row and at least one row of employee data. Use the in-platform, four-step attribute setup process to prepare the system to import employee data.
Important
Reporting hierarchies, file format, and date attribute formats can't be edited after initial setup is complete. Before beginning, confirm that the attribute selections in your Employee Attribute Template are final.
- From the admin dashboard, select the Configuration symbol.
- In Employees, select People.
- Choose Get Started to begin the four-step process.
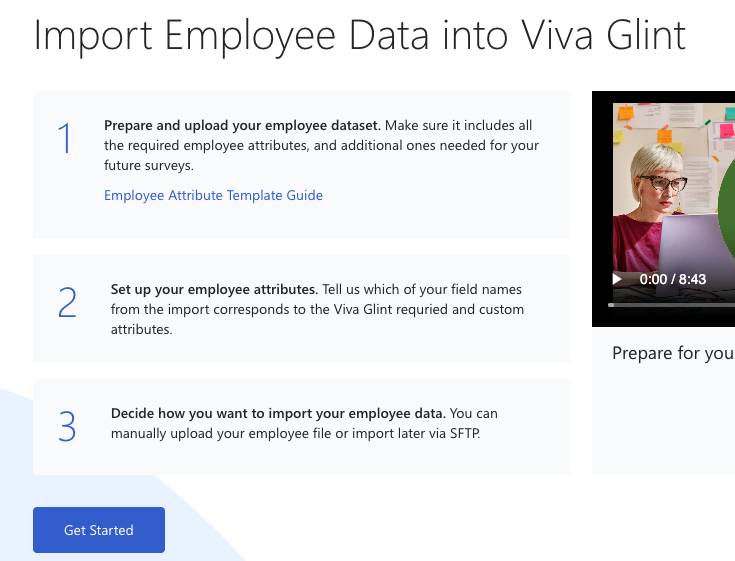
Follow the onscreen guidance for the following actions.
Caution
The Viva Glint Admin that sets up or changes attributes needs to save changes in the default language for your organization. Confirm that the default language (often English) is selected in the Language dropdown menu in Glint. Setting up or editing attributes in a different language resets the expected language for Viva Glint data ingestion and causes upload errors.
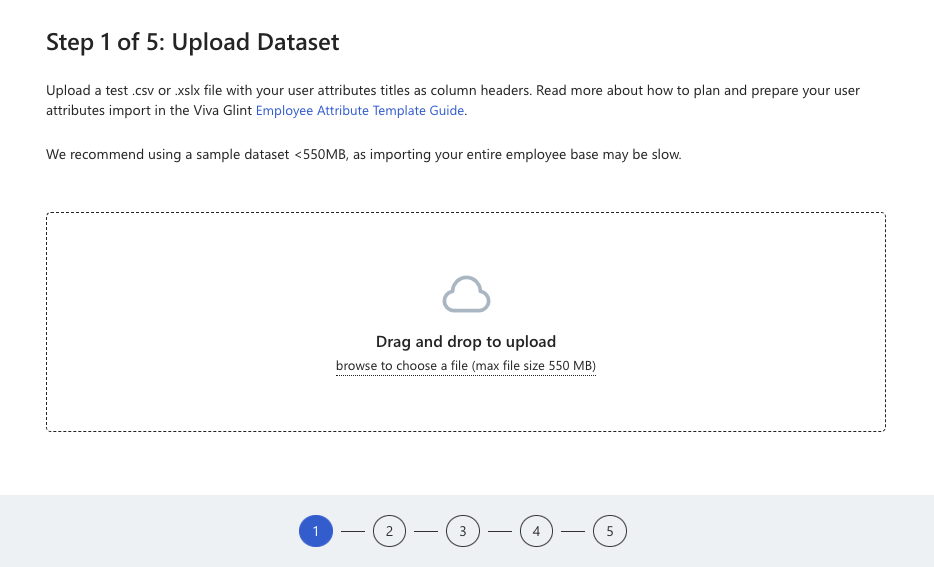
1. Upload dataset
Upload finalized attributes in your selected format. This file format determines the format for all future uploads. Select Continue.
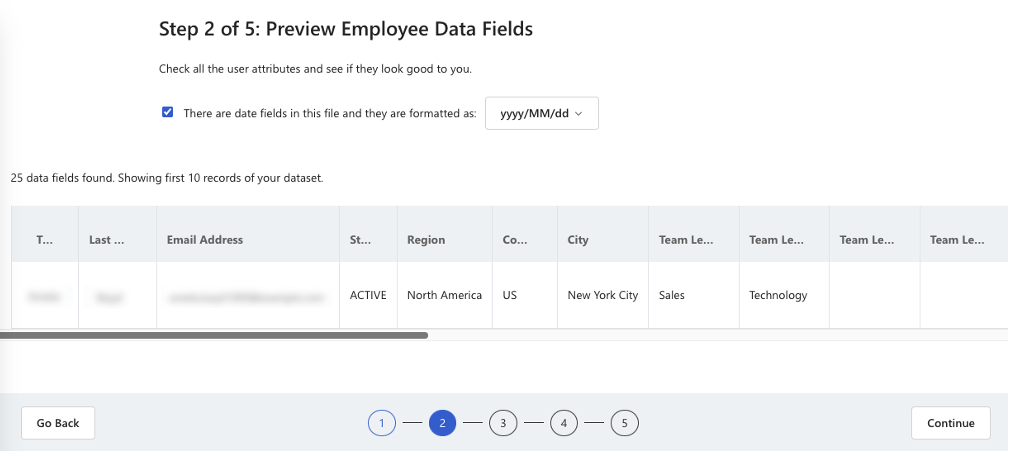
2. Preview employee data fields
Check that the attribute names and values appear as expected.
Verify that:
- All attributes are present in the preview.
- Attribute values shown for preview employee records display in the correct column.
- The total count of "data fields found" displayed above the preview matches the number of attributes in the file.
If dates are included in your file, select the There are date fields checkbox and then the appropriate date format from the dropdown menu.
Note
All attributes that include dates must follow the same format. Viva Glint transforms incoming dates to Viva Glint's preferred format, yyyy/mm/dd, upon upload.
After previewing, select Continue.
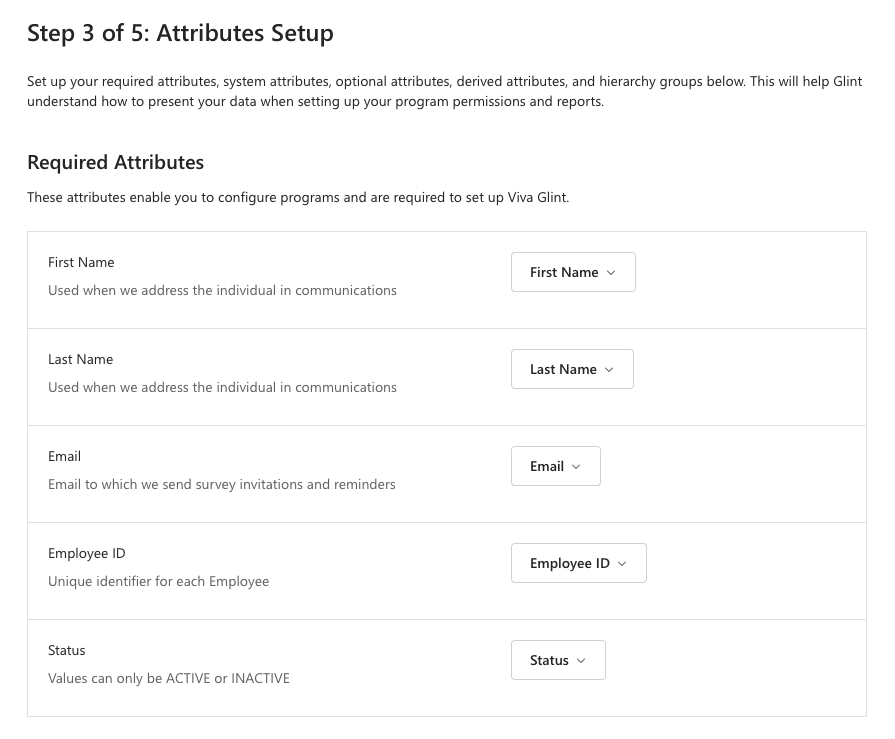
3. Set up attributes
Map your uploaded and confirmed attributes to Viva Glint fields. This setup is divided into three sections:
Required attributes
Select your attribute from the dropdown for each required attribute:
- First Name
- Last Name
- Employee ID
- Status
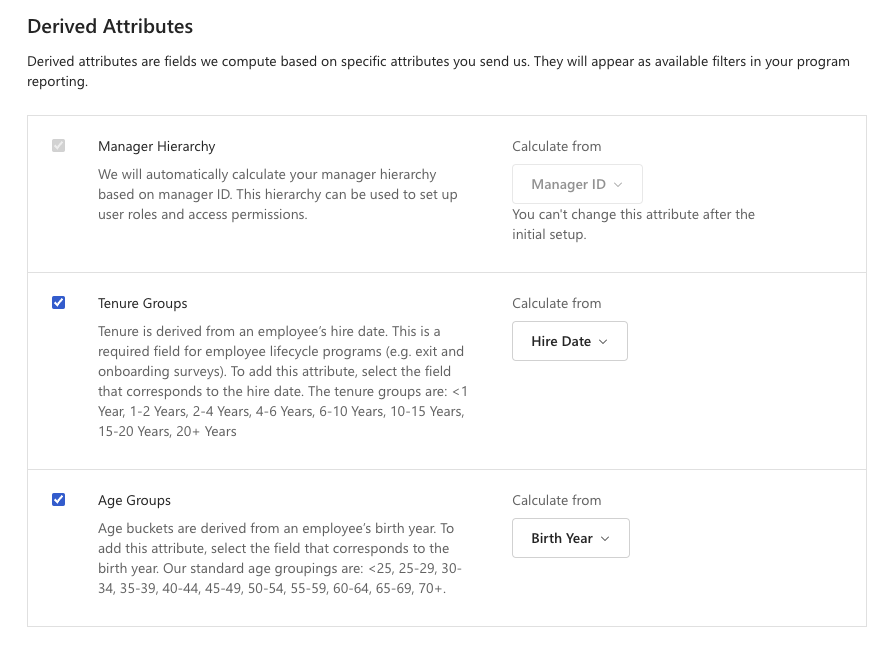
Derived attributes
Viva Glint calculates attributes based on data sent in your employee attribute file. Most organizations choose to include a managerial hierarchy. Select your option and the attribute that should be used to create it. Decide whether to include tenure groups based on hire date or age groups based on birth year.
| Derived Field | Based On | Derived Values |
|---|---|---|
| Manager Hierarchy | Employee ID and Manager ID data relationship | Up to 25 manager levels, starting with the CEO/top-level leader |
| Tenure* | Hire Date | <1 Year, 1-2 Years, 2-4 Years, 4-6 Years, 6-10 Years, 10-15 Years, 15-20 Years, 20+ Years |
| Age Grouping | Birth Year | <25, 25-29, 30-34, 35-39, 40-44, 45-49, 50-54, 55-59, 60-64, 65-69, 70+ |
*Tenure values for new Viva Glint customers after January 13, 2024. Before this date: 0-1 Year, 1-2 Years, 2-3 Years, 3-4 Years, 4-5 Years, 5-7 Years, 7+ Years.
Important
Don’t include derived attributes in your employee data file, Viva Glint creates these fields.
- Select the section with the desired attribute.
- Select the desired attribute from the dropdown menu for each derived attribute.
- Select Continue.
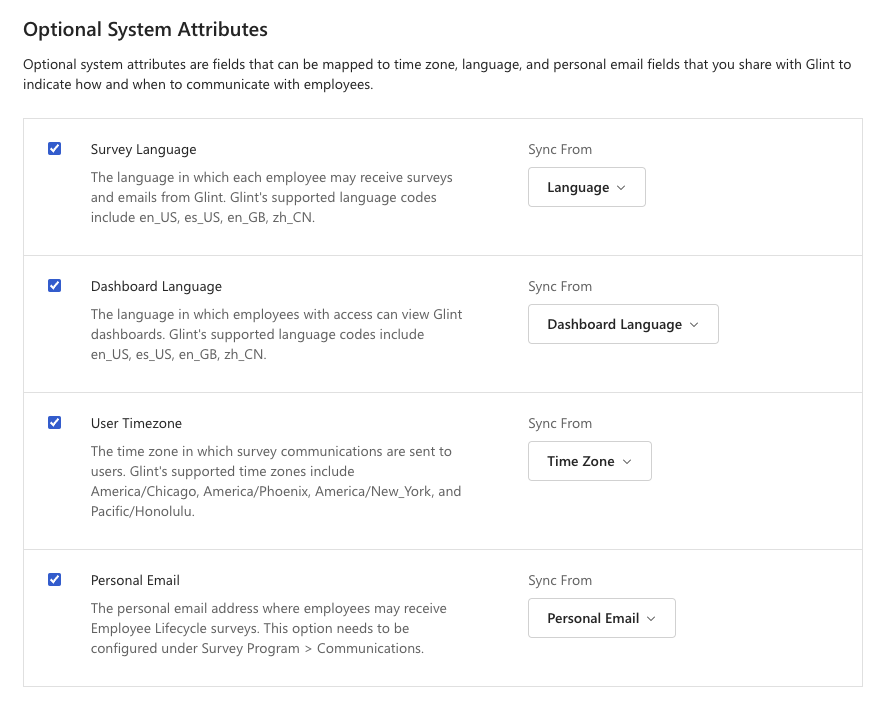
Optional System Attributes
Map attributes in your employee data to Viva Glint language, time zone, and personal email fields to indicate how and when to communicate with employees. Choose to enable any of the following fields by selecting the checkbox and choosing a field from your file in the Sync From dropdown menu:
| Viva Glint Field | Description |
|---|---|
| Survey Language | The language in which employees receive surveys and emails. |
| Dashboard Language | The language in which users view dashboards. |
| User Timezone | The time zone in which survey communications are sent. |
| Personal Email | Users' personal email addresses that can be used to survey exiting employees. Select Company and Personal Email in the Communications section of your survey program. |
Important
Send language and time zone values exactly as they appear in related tabs in the Employee Attribute Template. Users with blank or invalid values receive and access surveys/emails/dashboards in your organization's default selection in General Settings.
Note
Optional system attributes aren't included in raw response data exported from Viva Glint survey programs.
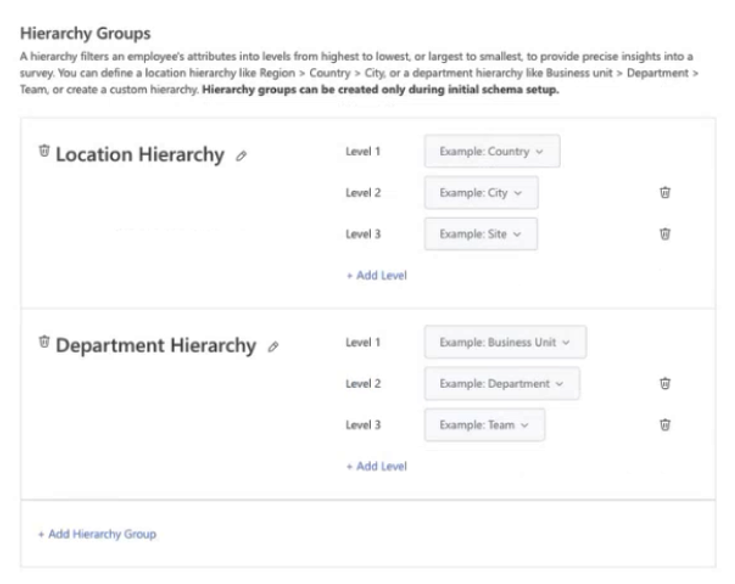
Hierarchy groups
Select your attributes from the dropdown menu for each hierarchy group.
- To add more levels to a hierarchy, select + Add Level.
- To add a new hierarchy group, select + Add Hierarchy Group.
- To rename the hierarchy label, select the pencil symbol.
- To delete a group or level, select the trash can symbol.
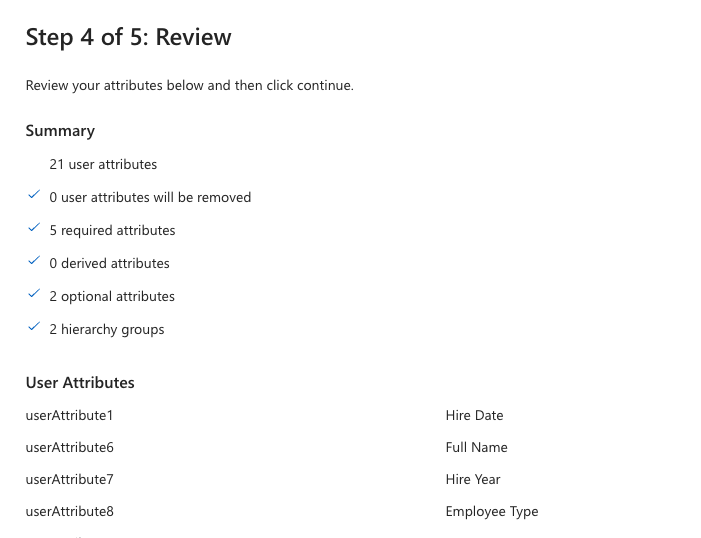
4. Review
Review a summary of all selections made in attribute setup and use the Go Back option to make any corrections before moving forward. The review step includes the following sections:
- Summary
- User Attributes
- Removed User Attributes
- Required Attributes Mapping
- Derived Attributes Mapping
- Optional System Attributes Mapping
- Hierarchy Groups Mapping
Note
Viva Glint allows for up to 100 User Attributes. Required, optional system, and hierarchy attributes don't count toward this limit.
5. Choose how you want to import data
- Choose between the following two options:
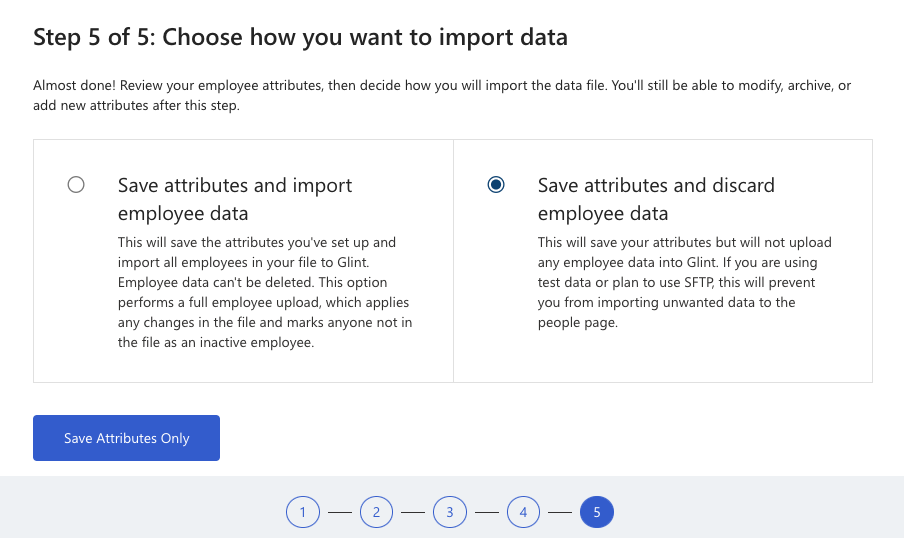
Option 1 - Save attributes and import employee data – Recommended if the employee data in your file is complete and finalized (doesn't contain test or partial data).
Caution
Employee data can't be deleted. This option performs a full employee upload, which applies any changes in the file and marks anyone not in the file as an inactive employee.
Option 2 - Save attributes and discard employee data – Recommended to set up attributes based on your header row and then import finalized employee data later.
Tip
Viva Glint recommends the Save attributes and discard employee data option for initial setup. This allows you to set up and map your attributes in the system and complete your first data import as a separate task.
- Select Save.
Update attributes after initial setup
To add new attributes or rename attributes after your initial setup, use Update attributes in Viva Glint guidance.
Next step
After setting up your attributes in Viva Glint, choose a data upload method and upload your employee data.