Set up and use Distribution Lists in Viva Glint
Distribution Lists define which employees within your organization should receive a survey. When creating a Distribution List, start with the list of all active employees and then refine this list using employee attributes. This creates a custom list of employees which can be chosen as recipients for any Microsoft Viva Glint program within your organization.
Distribution Lists are essential when a survey program isn't intended to be sent to all active employees.
Important
In order to set up Distribution Lists, you must have completed attribute setup and your data upload to the Viva Glint system.
Create your Distribution Lists
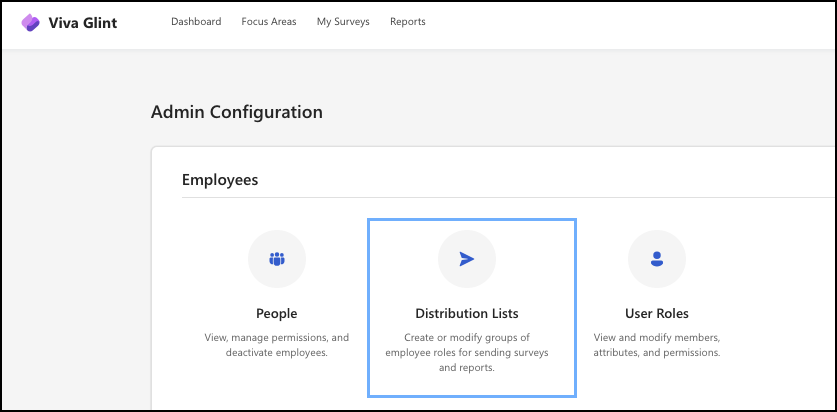
Distribution Lists are configured within Distribution Lists in the Employees section of your Admin Configuration dashboard.
Tip
Apply previously configured User Roles to efficiently set up Distribution Lists.
Follow these steps
From your admin dashboard, under the Employees section, select Distribution Lists.
The Distribution List page opens and displays any lists that have been previously created and includes the number of members within each list.
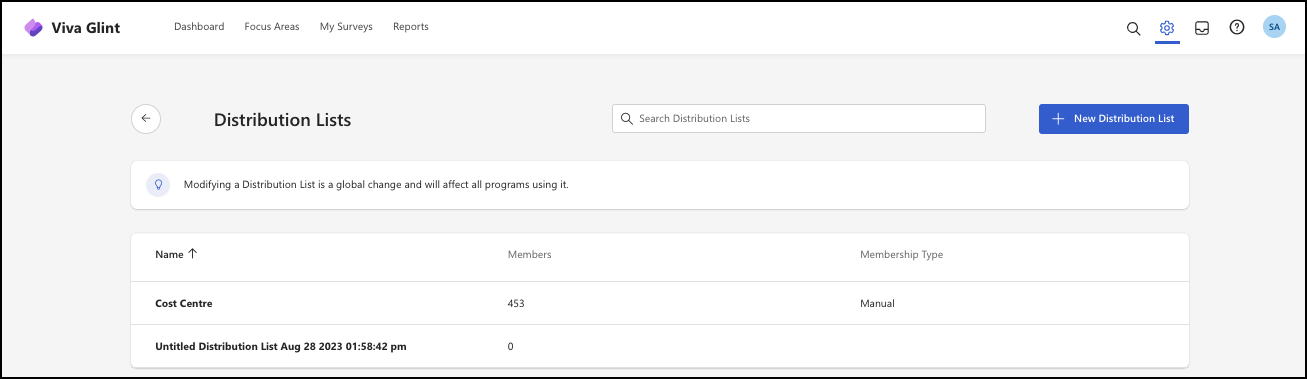
Select + New Distribution List to create a new list.
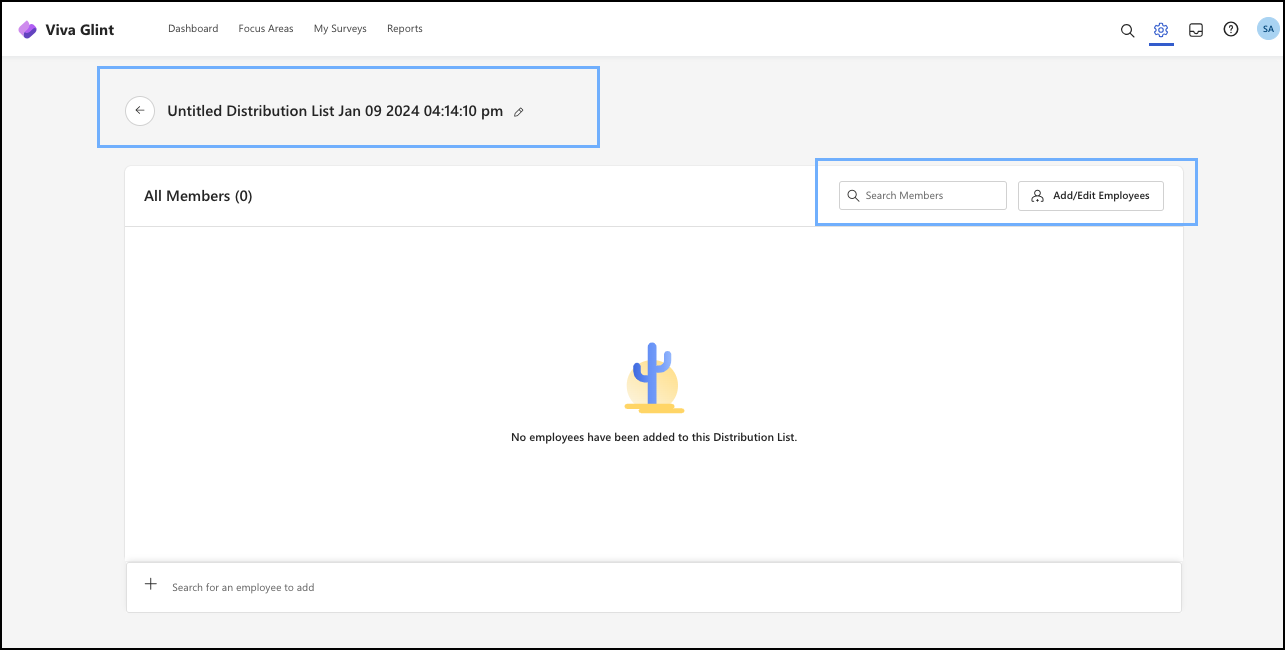
Title your Distribution List. Make it clear because you'll refer back to it often! For example: Viva Glint admins, or Managers with Live Access, or Managers of Small Teams.
Using the Search Members bar or the Add/Edit Employees bar, compile your list.
Search Members - Type in individual names and select those that should be added to the list.
Add/Edit Employees - The Choose a way to add employees window opens. Add members to a Distribution List by choosing one of the following options:
Option 1 - Attribute Rules - Use rules like location or manager level to populate a Distribution list. Follow the instructions on the slider window that opens. Remember, this section is populated from the Employee Data File that has been uploaded to Viva Glint. Choose from these two options:
- I want to include all active employees only.
- I want to filter all active employees by these populations:
- Select + New Population and then + New Filters
- From the dropdown filters menu, choose the attributes for employees who will be part of this distribution list.
- If you need to exclude someone, search for their name and select Exclude. Conversely, to remove someone from the Excluded list, search their name and select Remove.
- You will now see your new Distribution List and the number of members under the Included section and those you may choose to exclude under Excluded.
- Confirm your list and select Save Changes.
Tip
For an Exit survey, consider enabling Include Inactive Employees. To include inactive employees, contact them via their personal email.
Option 2 - Import - Use a CSV or XLSX to import employees to a Distribution List.
- Follow the onscreen guidance in the slider window that opens.
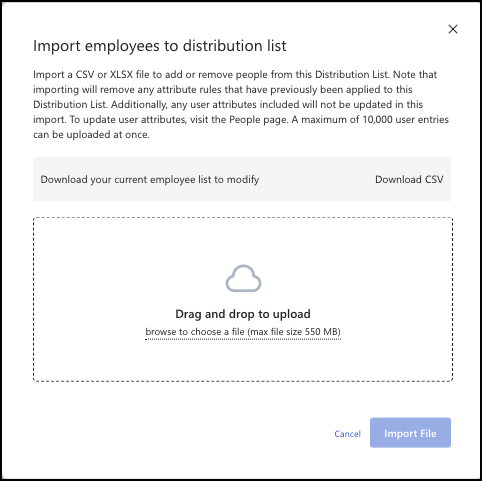
Note
This method removes attribute rules from this Distribution List.
Understand the date range attribute and why frequency of updating your Employee Attribute File matters
The date range selected for an attribute should always be equal or greater to the frequency at which you update your employee data files.
For companies that integrate their HRIS files automatically, this works well.
For companies that manually update employee files, make sure that the window set is wide enough to include the frequency with which employee data is refreshed. For example, if a window is set to 15 days but employee files are only updated once every 30 days, the survey will likely miss people who should get the survey, since the date range is only set to look at people who started 30-45 days earlier. Instead, set the window for at least 30 days so you're sure to include everyone.
Tip
Consider using the blended membership functionality, explained below.
Use the blended membership Distribution List functionality
Dynamic attributes automatically add and remove users to and from a distribution list. They can also include or exclude certain users from a list. Knowing how your distribution list has been populated helps you make decisions about how to add users.
Modify a Distribution List
Editing a Distribution List is a global change and will affect any program using that list. To modify:
Select the Distribution List you want to modify.
Select Add/Edit Employees or Edit Attribute Rules if there are filters available.
Make the necessary changes and select Save Changes.
View how a Distribution List was populated
From the Distribution Lists page, the far-right column entitled Membership Type defines if that list has been populated manually, by attribute rules, or both.
Note
If a distribution list is populated by an Import, it will have the membership type "Manual."
Use the dynamic Distribution Lists functionality
Your decision whether to use manual population or attribute rule population should be guided by these principles:
- If membership type is based on Attribute Rules and a user is manually added in the platform, employee data file imports will automatically update the Distribution List.
- If the Distribution List began manually, adding attribute rules will change the list to include both Attribute Rules and Manual.
- If a manually added member is deleted and they match the filter criteria, they'll still appear in the Distribution List, but the Added by method will change from Manual to Attribute Rules.
Important
Importing users to an Attribute Rules Distribution List removes existing rules.
- Activate the Preserve the employees already in this distribution list functionality to convert membership type to Manual for existing users.
- Uncheck to deactivate and remove the users based on the rules, and only include those in the import file.
Delete Distribution Lists
Distribution lists can be deleted by hovering over the list to be deleted and selecting the Delete button. A *Delete Distribution List window opens, notifying you of any programs that are currently using this list.
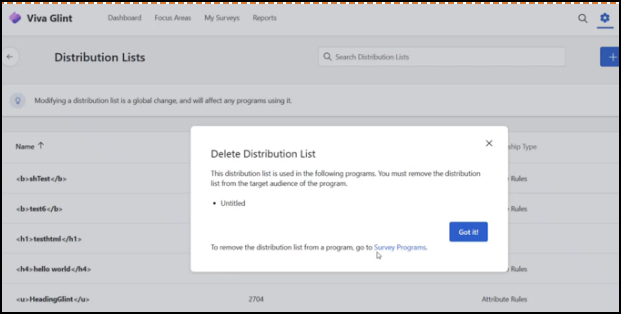
To move forward and remove the Distribution List, it must be removed from the target audience of the program.
- From the admin dashboard, select Survey Programs.
- Select the survey.
- Under Program Summary, Select Distribution.
- Follow the onscreen guidance to delete the list. A window will display to confirm that you mean to delete the list.
- Repeat for all programs in which that Distribution List should be removed.
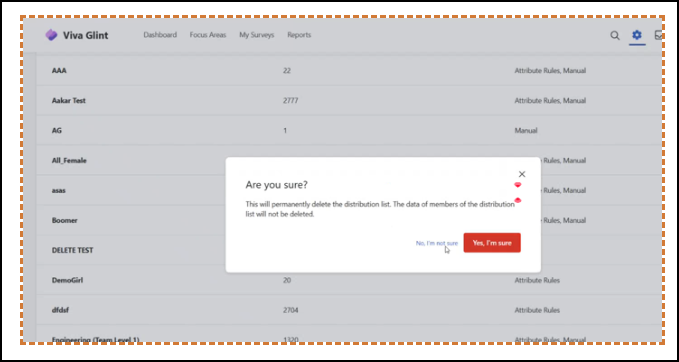
Note
Deleting a Distribution List is a permanent action. The data of the members of that list is not deleted.