Update a hardware submission
View and update hardware submission details, including status, packages, certification info, and shipping labels on the Partner Center hardware dashboard.
Prerequisites
Create a new hardware submission.
View hardware submission details
To view your hardware submission details:
Go to Partner Center hardware dashboard and sign in using your credentials.
If you don't see your hardware, you can then search for it.
In the Private Product ID column, select your driver's ID.
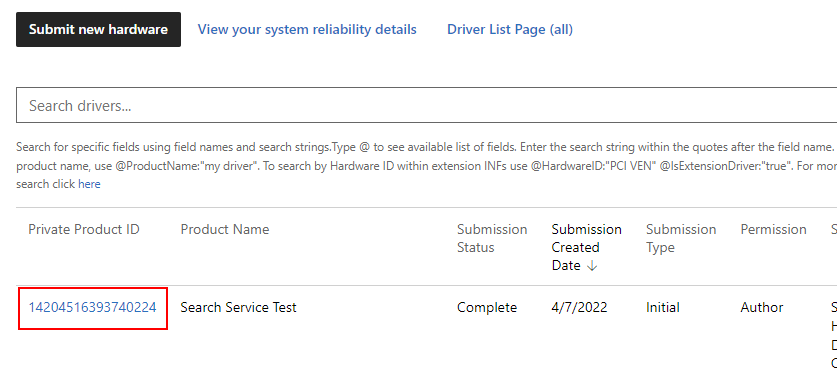
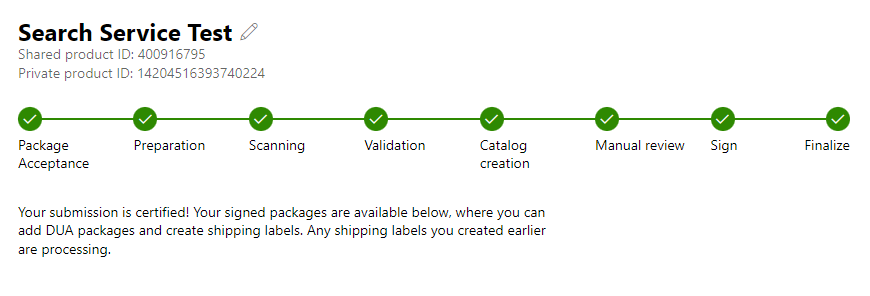
You can monitor the progress of your submission with the progress tracker. Once all steps show a green check, the submission is complete and your company receives a notification.
Update your hardware submission
There are two different options for updating your hardware submission:
Driver Update Acceptable (DUA) process (not available for drivers signed with attestation). After you submit your product for the Windows Hardware Compatibility Program for Windows 10 (or the certification program for previous Windows versions), you can then update it through the dashboard. DUA submissions can only be created off of an initial submission. DUA submissions shared with another company don't see the download DUA Shell button as you can't do a DUA on a DUA submission. For instructions on how to create a DUA submission from a DUA Shell, see Create a driver only update package.
Register an Extension Id. Before Windows 10, the operating system selected a single driver package to install for a given device. This process resulted in large, complex driver packages that included code for all scenarios and configurations, and each minor update required an update to the entire driver package. Starting in Windows 10, you can split INF functionality into multiple components, each of which can be serviced independently. The core driver package installed on a device is now called the base driver package and is handled by the system in the same way driver packages were handled before Windows 10. To extend a base driver package's functionality, provide an extension INF in a separate driver package. For more information about using ExtensionId, see Using an extension INF file.
Note
In your submissions, you may only use ExtensionIDs that are registered to your account.
Upload your driver update files
To update your submissions:
Go to your hardware submission details page.
Move down through the page, and then select Download DUA shell to download the DUA shell package.
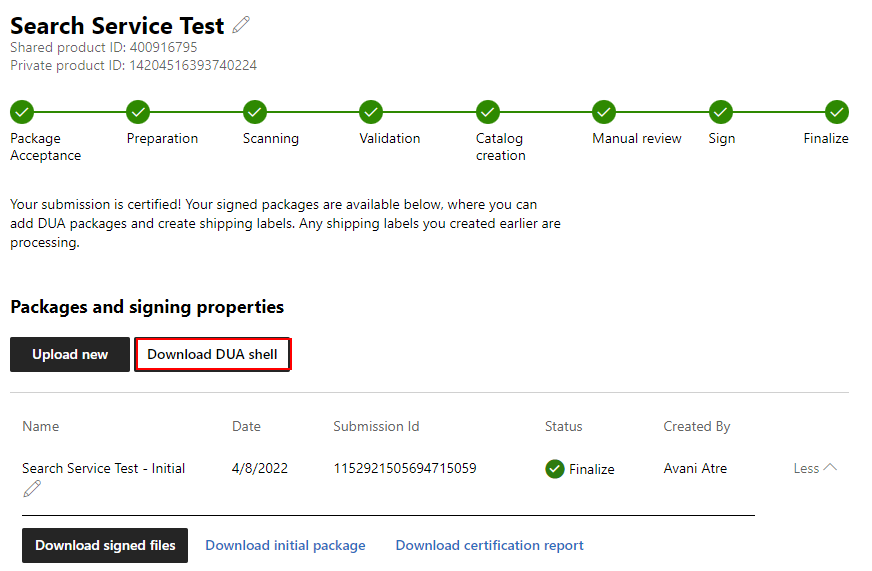
Create a DUA submission from a DUA Shell. For information on how to create a DUA submission, see Create a driver only update package.
On the driver details page, in the Packages and signing properties section, select Upload new.
Either drag or browse to the DUA package file that you want to submit.
Download your submission files
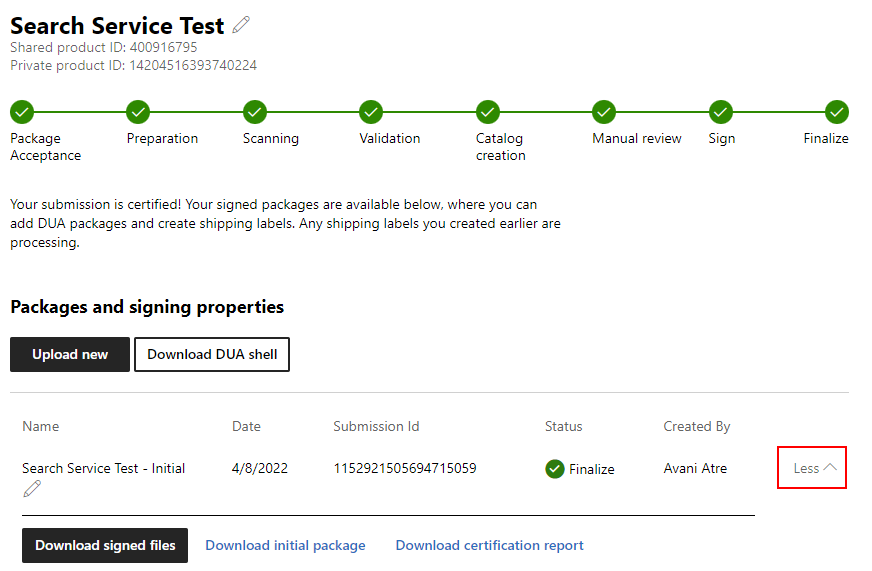
In the submission details page, you can download signed files, the initial package, or the certification report:
Go to your hardware submission details page.
Move down through the page, to the Packages and signing properties section.
Select More. The text turns to Less.
Choose which files you want to download.
View certification information
Go to your hardware submission details page.
Move through the page to the Certification section.
Select See more info.
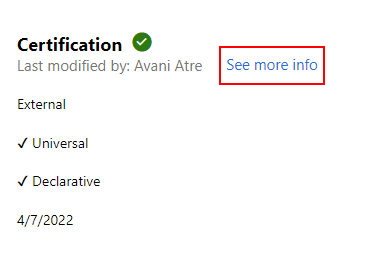
You can now review the certification information that you provided, which includes the following information:
Field Description DCHU Compliance Indicates whether or not your driver meets the Universal Windows Platform and ApiValidator requirements. What type of device? Indicates that your device is an internal component (part of a system and connects inside the PC), external component (an external device (peripheral) that connects to a PC), or both. firmware version The firmware version of your driver. Announcement date The date when you want your product included on the Windows Server Catalog, the Windows Certified Product List, and the Universal Driver List. The default setting is Today. Marketing names Your marketing names. Marketing names allow you to provide aliases for your product. You can provide as many names as you want. Important
Submissions are automatically assigned Declarative and Universal attributes based off the entire submission contents. If you want a submission to be marked as
Declarative=Trueand/orUniversal=True, all files and INFs within the submission must be compliant with the appropriate attribute(s). For example, a merged HLK package can contain two driver sets for different OS certifications. If one set is Declarative and another set is not, the entire submission would be marked asDeclarative=False. INF only packages will have Universal greyed out as there are no binaries to validate. Each set should be separated into two submissions to ensure they are marked appropriately.
Update certification information
In the submission details page, you can update certification information, such as the announcement date and marketing names for your driver.
Note
Make sure to check the announcement date that's been set. Once the announcement date has passed, you won't be able to add a new name.
To update certification details:
Go to your hardware submission details page.
Move through the page to the Certification section.
Select See more info.
To add or update the announcement date:
For Announcement date (UTC), enter the desired date.
Select Update.
To add a marketing name:
For Marketing name, enter the name.
Select Add.
Select Update.
To add multiple marketing names:
Select Add multiple.
Enter each marketing name; one per line; no commas.
Select Add marketing name(s).
Select Update.
To remove a marketing name:
Select Remove to the right of the marketing name you wish to remove.
Select Update.
Create and publish shipping labels
This section displays shipping label information for this submission. For information about how to use shipping labels, see the Manage driver distribution with shipping labels section.
To create a new shipping label, select New shipping label.
To publish all shipping labels that aren't yet published, select Publish all pending.
The shipping label list displays the shipping labels for this submission. This list includes shipping labels you created, and partner shipping labels for your shared driver. Select the shipping label name to see details for that shipping label. The shipping label list displays the following information about each label:
| Field | Description |
|---|---|
| Name | The shipping label name. Select this name to see details for the shipping label. |
| Creator | The Publisher display name of the shipping label creator. This allows you to easily keep track of which business partners sent you drivers. |
| Destination | For a Windows Update shipping label, the destination is "Windows Update". For a shared driver, the destination is the Publisher display name of the company you selected for Who is publishing? when creating the shipping label. This allows you to easily see all companies that you have shared your driver with. |
| Created date | The creation date of the shipping label. |
| Release date | The release date of the shipping label. |
| User created | If the shipping label is created by your company, you see the details of the user who created the shipping label. This allows you to follow up if you have any questions about the creation. This field isn't applicable if another company created the label. |
| User changed | If the shipping label is created by your company, you see the details of the user who last modified the shipping label. This allows you to follow up if you have any questions about the changes. This field isn't applicable if another company created the label. |
The status graphic displays the published status for each shipping label. A green check means the label is published. A yellow circle means the label isn't published yet.