OData and Windows Phone 7 Part 2
 In my last post, we walked through accessing the Twitpic OData feed to retrieve a collection of images for a particular user. We ended up with an app that simply displayed a list of ShortIds for the images concerned.
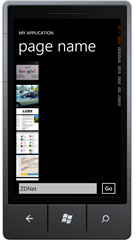
In this post we’ll jazz things up a bit and display the actual images. The picture on the right is the sort of thing we’re shooting for.
Fundamentally, nothing really needs to change. We’ve got the data, all we need do it change the presentation a little bit.
Getting the Images
First up is getting hold of the images themselves. If you take a good look at the results of our query:
https://odata.twitpic.com/Users('zdnet')/Images?$top=20
you’ll see that each feed item (or <entry>) contains a <properties> element. The proxy classes generated by DataSvcUtil expose children of the <properties> element as properties thus giving us easy access. So, for example, the Image type we’re using has properties ShortId, UserId, Source, Message, Views etc
The Value Converter
Unfortunately, it doesn’t have an ImageUrl property or equivalent. The Url property points to an HTML document – we want a url that points directly to the image. We’re going to have to make one ourselves. Enter the value converter. This allows us to modify data as part of the binding process. In our case, we’ll take the ShortId and transform into an image url.
Our value converter implementation is trivial:
 public class ThumbnailConverter : IValueConverter
{
  public object Convert(
    object value,
    Type targetType,
    object parameter,
    System.Globalization.CultureInfo culture)
  {
    string shortId = (string)value;

    return string.Format(
      "https://twitpic.com/show/thumb/{0}",
      shortId);
  }

  public object ConvertBack(
    object value,
    Type targetType,
    object parameter,
    System.Globalization.CultureInfo culture)
  {
    throw new NotImplementedException();
  }
}
And we can just add that as a new class in the project. We’ll need an instance of that type (which we can create in XAML) to do the conversion as part of the data binding.
Modify the XAML for the PhoneApplicationPage as follows (changes are the addition of the local namespace and the creation of a ThumbnailConverter as a resource):
 <phone:PhoneApplicationPage
  x:Class="WindowsPhoneApplication1.MainPage"
  xmlns="https://schemas.microsoft.com/winfx/2006/xaml/presentation"
  xmlns:x="https://schemas.microsoft.com/winfx/2006/xaml"
  xmlns:phone="clr-namespace:Microsoft.Phone.Controls;assembly=Microsoft.Phone"
  xmlns:shell="clr-namespace:Microsoft.Phone.Shell;assembly=Microsoft.Phone"
  xmlns:d="https://schemas.microsoft.com/expression/blend/2008"
  xmlns:mc="https://schemas.openxmlformats.org/markup-compatibility/2006"

  xmlns:local="clr-namespace:WindowsPhoneApplication1"

  mc:Ignorable="d" d:DesignWidth="480" d:DesignHeight="768"
  FontFamily="{StaticResource PhoneFontFamilyNormal}"
  FontSize="{StaticResource PhoneFontSizeNormal}"
  Foreground="{StaticResource PhoneForegroundBrush}"
  SupportedOrientations="Portrait" Orientation="Portrait"
  shell:SystemTray.IsVisible="True">

  <phone:PhoneApplicationPage.Resources>
    <local:ThumbnailConverter x:Key="ThumbnailConverter" />
  </phone:PhoneApplicationPage.Resources>
Now we just need to adjust our original binding expression slightly by changing it to:
 <ListBox.ItemTemplate>
  <DataTemplate>
    <TextBlock Text="{Binding ShortId,
      Converter={StaticResource ThumbnailConverter}}" />
  </DataTemplate>
</ListBox.ItemTemplate>
 By referencing the value converter, our rendered ListBox now looks like the image on the right.
Show Some Pictures
It should be pretty trivial to render some images now – just change the TextBlock element in the ItemTemplate to an Image.
I’ve also added a Margin and set a fixed Width / Height on the Image element as below.
 <ListBox.ItemTemplate>
  <DataTemplate>
    <Image Source="{Binding ShortId,
      Converter={StaticResource ThumbnailConverter}}"
           Margin="0,0,5,5"
           Width="100"
           Height="100"/>
  </DataTemplate>
</ListBox.ItemTemplate>
Nearly There
 This displays a list of images and there’s just a couple of things we need to do to replicate our “desired outcome”.
First we ought to change the ApplicationTitle and PageTitle elements (to “TWITPIC ODATA VIEWER” and “by user id” respectively).
Finally, we need to switch the ListBox to use a WrapPanel (which lives in the Silverlight for Windows Phone Toolkit) instead of a StackPanel. The easiest way to do this is to open the project in Expression Blend (right-click on the project and select “Open in Expression Blend”).
We <3 Expression Blend
Add a reference to Microsoft.Phone.Controls.Toolkit.dll (you’ll need to download and unzip the Toolkit if you don’t already have it).
Find the ListBox in the Objects and Timeline window, right-click and select Edit Additional Templates –> Edit Layout of Items (ItemsPanel) –> Create Empty and click Okay to create a new ItemsPanelTemplate resource.
In the ItemsPanelTemplate delete the StackPanel and replace it with a WrapPanel (either use the Assets selector or the Assets Window –> Controls –> Panels to find it).
Build and run (from Blend or save all and go back to Visual Studio and run from there) and we have our “finished” app.


