Build API plugins with a new API for Microsoft 365 Copilot
Important
API plugins are currently only supported as actions within declarative agents. They are not enabled in Microsoft 365 Copilot. See Add a plugin for an example of adding an API plugin to a declarative agent.
API plugins connect a REST API to Microsoft 365 Copilot. You can use the Teams Toolkit to quickly generate a plugin and a corresponding REST API that you can use as a starting point for your plugin development.
- Requirements specified in Requirements for plugin development
- Visual Studio Code with Teams Toolkit version 5.9 or later
- Node.js 18.x or 20.x
Create the plugin and API
Open Visual Studio Code. If Teams Toolkit isn't already installed, see Install Teams Toolkit for installation instructions.
Select the Teams Toolkit icon in the left-hand Activity Bar.
Select Create a New App in the Teams Toolkit task pane.
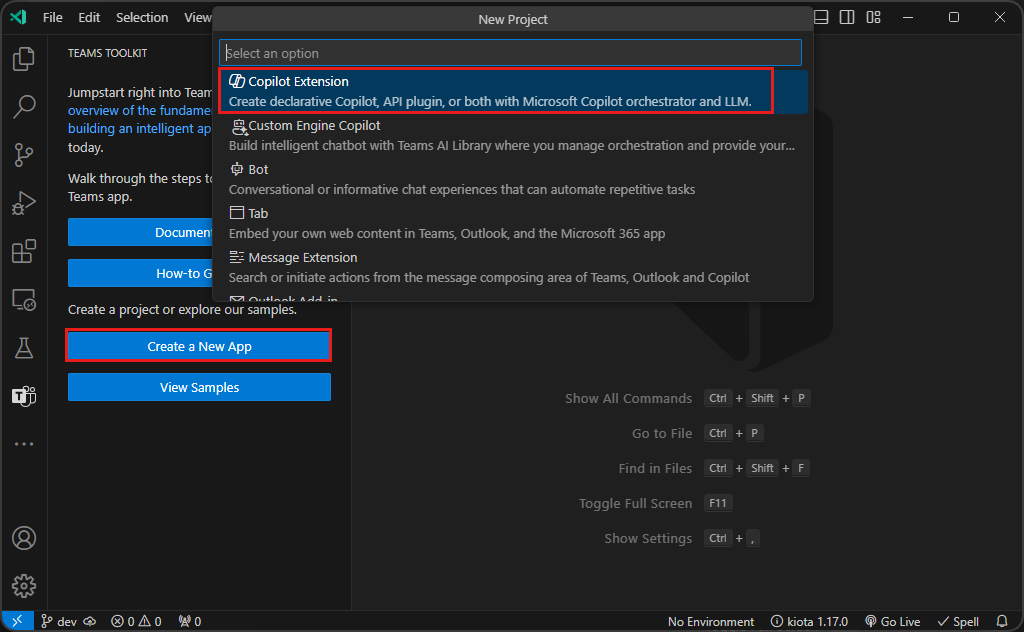
Select Copilot Extension, then select API Plugin.
Select Start with a new API.
Select OAuth for the Authentication Type.
Select your preferred programming language: JavaScript or TypeScript. This guide assumes TypeScript.
Choose a location for the API plugin project.
Enter a name for your plugin project.
Once you complete these steps, Teams Toolkit generates the required files for the plugin and opens a new Visual Studio Code window with the plugin project loaded. For details on the project, see the README.md file in the generated project's root directory.
Run the plugin
In the Visual Studio Code window with the plugin project loaded, select the Teams Toolkit icon in the left-hand Activity Bar.
In the Accounts pane, select Sign in to Microsoft 365. (If you're already signed in continue to the next step).
Confirm that both Custom App Upload Enabled and Copilot Access Enabled display under your Microsoft 365 account. If they don't, check with your organization admin. See Requirements for plugin development for details.
Select the Run and Debug icon in the left-hand Activity Bar.
Select either Debug in Copilot (Edge) or Debug in Copilot (Chrome), then press F5 to start debugging.
Teams Toolkit builds the project, creates the plugin package, and sideloads it for your user account. Once that is done, a new browser window opens to the Microsoft Teams app.
Test the plugin
In Microsoft Teams in your browser, select Copilot.
In the message compose area, select the Plugins icon, then enable testlocal in the Plugins flyout.
Send a message to Copilot about repairs. For example, try
Which repairs are assigned to Karin?.
At this point, the plugin is running locally on your development machine without authentication. In order to add authentication, deploy the solution to Azure.
Deploy to Azure and enable authentication
Select the Teams Toolkit icon in the left-hand Activity Bar.
In the Lifecycle pane, select Provision.
When asked for a resource group name, either accept the default or change it as desired and press Enter.
Select a location for the resource group.
Review the message in the dialog. If everything looks correct, select Provision to continue.
Wait for the provisioning steps to complete, then select Deploy in the Lifecycle pane.
Once you complete these steps, the plugin is deployed as an Azure Function with authentication.
Test the plugin with authentication
In Microsoft Teams in your browser, select Copilot.
In the message compose area, select the Plugins icon, then enable testdev in the Plugins flyout.
Send a message to Copilot about repairs. For example, try
Which repairs are assigned to Issac?.