Introduzione al kernel semantico
In pochi passaggi è possibile creare il primo agente di intelligenza artificiale con il kernel semantico in Python, .NET o Java. Questa guida ti mostrerà come...
- Installare i pacchetti necessari
- Creare una conversazione avanti e indietro con un'intelligenza artificiale
- Offrire a un agente di intelligenza artificiale la possibilità di eseguire il codice
- Guardare i piani di creazione dell'intelligenza artificiale in tempo reale
Installazione dell'SDK
Il kernel semantico include diversi pacchetti NuGet disponibili. Per la maggior parte degli scenari, tuttavia, in genere è necessario Microsoft.SemanticKernelsolo .
È possibile installarlo usando il comando seguente:
dotnet add package Microsoft.SemanticKernel
Per l'elenco completo dei pacchetti NuGet, vedere l'articolo relativo alle lingue supportate.
Le istruzioni per l'accesso al SemanticKernel pacchetto Python sono disponibili qui. È facile come:
pip install semantic-kernel
Le istruzioni per l'accesso al SemanticKernel pacchetto Java sono disponibili qui. È facile come:
<dependencyManagement>
    <dependencies>
        <dependency>
            <groupId>com.microsoft.semantic-kernel</groupId>
            <artifactId>semantickernel-bom</artifactId>
            <version>${sk.version}</version>
            <type>pom</type>
            <scope>import</scope>
        </dependency>
    </dependencies>
</dependencyManagement>

<dependencies>
<dependency>
    <groupId>com.microsoft.semantic-kernel</groupId>
    <artifactId>semantickernel-api</artifactId>
</dependency>
<dependency>
    <groupId>com.microsoft.semantic-kernel</groupId>
    <artifactId>semantickernel-aiservices-openai</artifactId>
</dependency>
</dependencies>
Introduzione rapida ai notebook
Gli sviluppatori Python o C# possono iniziare rapidamente a usare i notebook. Questi notebook forniscono guide dettagliate su come usare il kernel semantico per creare agenti di intelligenza artificiale.
Per iniziare, segui questa procedura:
- Clonare il repository del kernel semantico
- Aprire il repository in Visual Studio Code
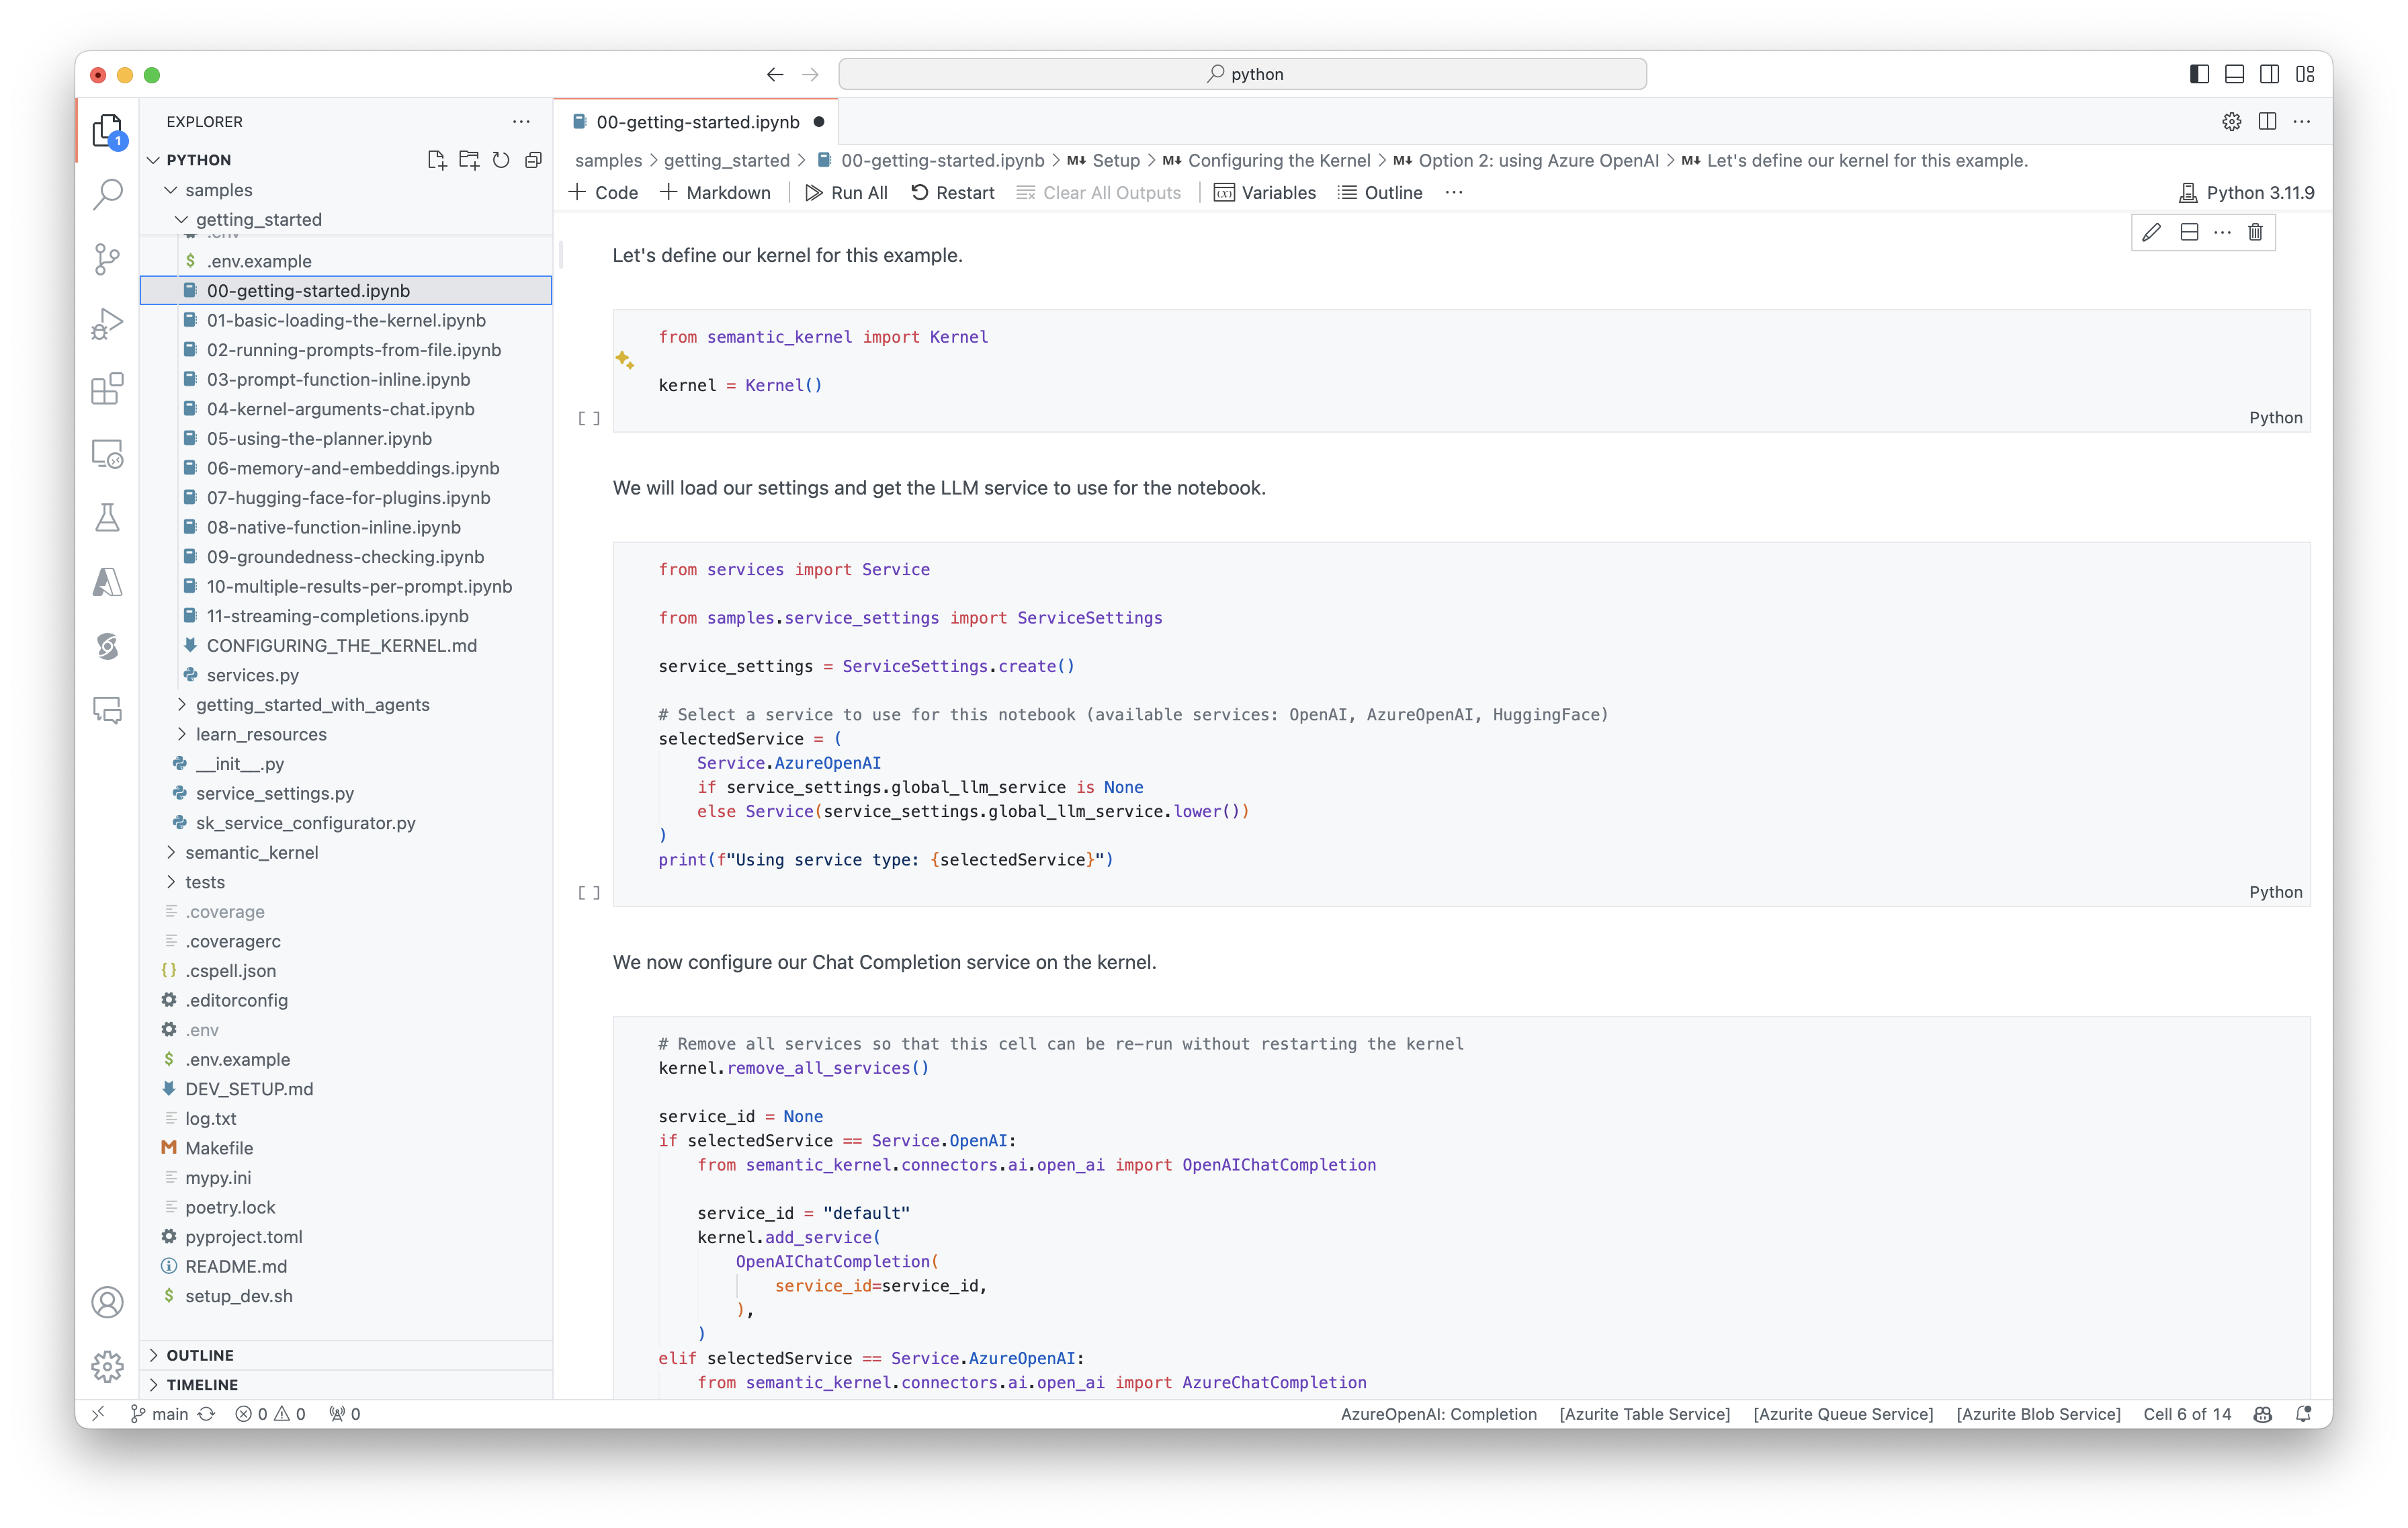
- Passare a _/python/samples/getting_started
- Aprire 00-getting-started.ipynb per iniziare a impostare l'ambiente e creare il primo agente di intelligenza artificiale.
Per iniziare, segui questa procedura:
- Clonare il repository del kernel semantico
- Aprire il repository in Visual Studio Code
- Passare a _/dotnet/notebooks
- Aprire 00-getting-started.ipynb per iniziare a impostare l'ambiente e creare il primo agente di intelligenza artificiale.
Scrittura della prima app console
// Import packages
using Microsoft.SemanticKernel;
using Microsoft.SemanticKernel.ChatCompletion;
using Microsoft.SemanticKernel.Connectors.OpenAI;

// Create a kernel with Azure OpenAI chat completion
var builder = Kernel.CreateBuilder().AddAzureOpenAIChatCompletion(modelId, endpoint, apiKey);

// Add enterprise components
builder.Services.AddLogging(services => services.AddConsole().SetMinimumLevel(LogLevel.Trace));

// Build the kernel
Kernel kernel = builder.Build();
var chatCompletionService = kernel.GetRequiredService<IChatCompletionService>();

// Add a plugin (the LightsPlugin class is defined below)
kernel.Plugins.AddFromType<LightsPlugin>("Lights");

// Enable planning
OpenAIPromptExecutionSettings openAIPromptExecutionSettings = new()
{
    FunctionChoiceBehavior = FunctionChoiceBehavior.Auto()
};

// Create a history store the conversation
var history = new ChatHistory();

// Initiate a back-and-forth chat
string? userInput;
do {
    // Collect user input
    Console.Write("User > ");
    userInput = Console.ReadLine();

    // Add user input
    history.AddUserMessage(userInput);

    // Get the response from the AI
    var result = await chatCompletionService.GetChatMessageContentAsync(
        history,
        executionSettings: openAIPromptExecutionSettings,
        kernel: kernel);

    // Print the results
    Console.WriteLine("Assistant > " + result);

    // Add the message from the agent to the chat history
    history.AddMessage(result.Role, result.Content ?? string.Empty);
} while (userInput is not null);
import asyncio

from semantic_kernel import Kernel
from semantic_kernel.utils.logging import setup_logging
from semantic_kernel.functions import kernel_function
from semantic_kernel.connectors.ai.open_ai import AzureChatCompletion
from semantic_kernel.connectors.ai.function_choice_behavior import FunctionChoiceBehavior
from semantic_kernel.connectors.ai.chat_completion_client_base import ChatCompletionClientBase
from semantic_kernel.contents.chat_history import ChatHistory
from semantic_kernel.functions.kernel_arguments import KernelArguments

from semantic_kernel.connectors.ai.open_ai.prompt_execution_settings.azure_chat_prompt_execution_settings import (
    AzureChatPromptExecutionSettings,
)

async def main():
    # Initialize the kernel
    kernel = Kernel()

    # Add Azure OpenAI chat completion
    chat_completion = AzureChatCompletion(
        deployment_name="your_models_deployment_name",
        api_key="your_api_key",
        base_url="your_base_url",
    )
    kernel.add_service(chat_completion)

    # Set the logging level for  semantic_kernel.kernel to DEBUG.
    setup_logging()
    logging.getLogger("kernel").setLevel(logging.DEBUG)

    # Add a plugin (the LightsPlugin class is defined below)
    kernel.add_plugin(
        LightsPlugin(),
        plugin_name="Lights",
    )

    # Enable planning
    execution_settings = AzureChatPromptExecutionSettings()
    execution_settings.function_call_behavior = FunctionChoiceBehavior.Auto()

    # Create a history of the conversation
    history = ChatHistory()

    # Initiate a back-and-forth chat
    userInput = None
    while True:
        # Collect user input
        userInput = input("User > ")

        # Terminate the loop if the user says "exit"
        if userInput == "exit":
            break

        # Add user input to the history
        history.add_user_message(userInput)

        # Get the response from the AI
        result = await chat_completion.get_chat_message_content(
            chat_history=history,
            settings=execution_settings,
            kernel=kernel,
        )

        # Print the results
        print("Assistant > " + str(result))

        # Add the message from the agent to the chat history
        history.add_message(result)

# Run the main function
if __name__ == "__main__":
    asyncio.run(main())
OpenAIAsyncClient client = new OpenAIClientBuilder()
    .credential(new AzureKeyCredential(AZURE_CLIENT_KEY))
    .endpoint(CLIENT_ENDPOINT)
    .buildAsyncClient();

// Import the LightsPlugin
KernelPlugin lightPlugin = KernelPluginFactory.createFromObject(new LightsPlugin(),
    "LightsPlugin");

// Create your AI service client
ChatCompletionService chatCompletionService = OpenAIChatCompletion.builder()
    .withModelId(MODEL_ID)
    .withOpenAIAsyncClient(client)
    .build();

// Create a kernel with Azure OpenAI chat completion and plugin
Kernel kernel = Kernel.builder()
    .withAIService(ChatCompletionService.class, chatCompletionService)
    .withPlugin(lightPlugin)
    .build();

// Add a converter to the kernel to show it how to serialise LightModel objects into a prompt
ContextVariableTypes
    .addGlobalConverter(
        ContextVariableTypeConverter.builder(LightModel.class)
            .toPromptString(new Gson()::toJson)
            .build());

// Enable planning
InvocationContext invocationContext = new InvocationContext.Builder()
    .withReturnMode(InvocationReturnMode.LAST_MESSAGE_ONLY)
    .withToolCallBehavior(ToolCallBehavior.allowAllKernelFunctions(true))
    .build();

// Create a history to store the conversation
ChatHistory history = new ChatHistory();

// Initiate a back-and-forth chat
Scanner scanner = new Scanner(System.in);
String userInput;
do {
  // Collect user input
  System.out.print("User > ");

  userInput = scanner.nextLine();
  // Add user input
  history.addUserMessage(userInput);

  // Prompt AI for response to users input
  List<ChatMessageContent<?>> results = chatCompletionService
      .getChatMessageContentsAsync(history, kernel, invocationContext)
      .block();

  for (ChatMessageContent<?> result : results) {
    // Print the results
    if (result.getAuthorRole() == AuthorRole.ASSISTANT && result.getContent() != null) {
      System.out.println("Assistant > " + result);
    }
    // Add the message from the agent to the chat history
    history.addMessage(result);
  }
} while (userInput != null && !userInput.isEmpty());
La chat avanti e indietro seguente dovrebbe essere simile a quella visualizzata nella console. Le chiamate di funzione sono state aggiunte di seguito per illustrare come l'intelligenza artificiale sfrutta il plug-in dietro le quinte.
| Ruolo | Message |
|---|---|
| 🔵Utente | Attiva/disattiva la luce |
| 🔴Assistente (chiamata di funzione) | LightsPlugin.GetState() |
| 🟢Strumento | off |
| 🔴Assistente (chiamata di funzione) | LightsPlugin.ChangeState(true) |
| 🟢Strumento | on |
| 🔴Assistente | La luce è ora attiva |
Se si è interessati a comprendere meglio il codice precedente, questo verrà suddiviso nella sezione successiva.
Informazioni sul codice
Per semplificare la creazione di app aziendali con il kernel semantico, è stata creata una procedura dettagliata che illustra il processo di creazione di un kernel e l'uso per interagire con i servizi di intelligenza artificiale.
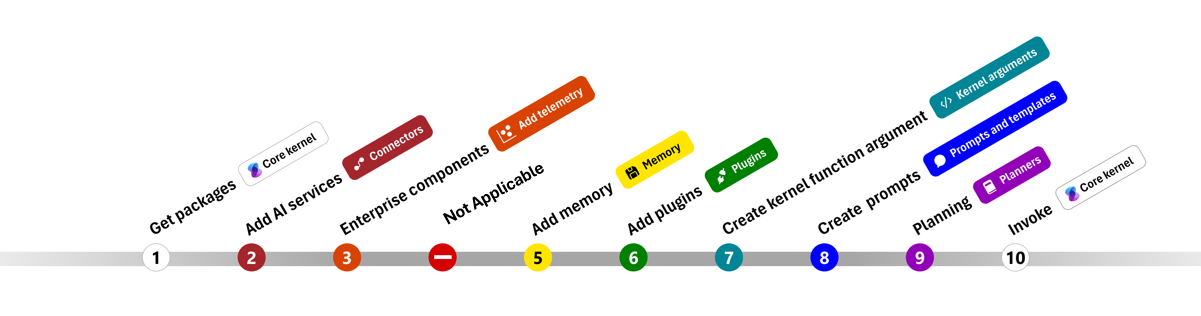

Nelle sezioni seguenti verrà decompresso l'esempio precedente seguendo i passaggi 1, 2, 3, 4, 6, 9 e 10. Tutto ciò che è necessario creare un agente semplice basato su un servizio di intelligenza artificiale e può eseguire il codice.
- Importare pacchetti
- Aggiungere servizi di intelligenza artificiale
- Componenti dell'organizzazione ::: zone-end
- Compilare il kernel
- Aggiungere memoria (ignorata)
- Aggiungere plug-in
- Creare argomenti del kernel (ignorati)
- Crea richieste (ignorate)
- Pianificazione
- Richiamare
1) Importare pacchetti
Per questo esempio, per prima cosa è stato iniziato importando i pacchetti seguenti:
using Microsoft.SemanticKernel;
using Microsoft.SemanticKernel.ChatCompletion;
using Microsoft.SemanticKernel.Connectors.OpenAI;
import asyncio

from semantic_kernel import Kernel
from semantic_kernel.connectors.ai.open_ai import AzureChatCompletion
from semantic_kernel.connectors.ai.function_choice_behavior import FunctionChoiceBehavior
from semantic_kernel.connectors.ai.chat_completion_client_base import ChatCompletionClientBase
from semantic_kernel.contents.chat_history import ChatHistory
from semantic_kernel.functions.kernel_arguments import KernelArguments

from semantic_kernel.connectors.ai.open_ai.prompt_execution_settings.azure_chat_prompt_execution_settings import (
    AzureChatPromptExecutionSettings,
)
import com.microsoft.semantickernel.Kernel;
import com.microsoft.semantickernel.aiservices.openai.chatcompletion.OpenAIChatCompletion;
import com.microsoft.semantickernel.contextvariables.ContextVariableTypeConverter;
import com.microsoft.semantickernel.contextvariables.ContextVariableTypes;
import com.microsoft.semantickernel.orchestration.InvocationContext;
import com.microsoft.semantickernel.orchestration.InvocationReturnMode;
import com.microsoft.semantickernel.orchestration.ToolCallBehavior;
import com.microsoft.semantickernel.plugin.KernelPlugin;
import com.microsoft.semantickernel.plugin.KernelPluginFactory;
import com.microsoft.semantickernel.services.chatcompletion.AuthorRole;
import com.microsoft.semantickernel.services.chatcompletion.ChatCompletionService;
import com.microsoft.semantickernel.services.chatcompletion.ChatHistory;
import com.microsoft.semantickernel.services.chatcompletion.ChatMessageContent;
2) Aggiungere servizi di intelligenza artificiale
Successivamente, si aggiunge la parte più importante di un kernel: i servizi di intelligenza artificiale da usare. In questo esempio è stato aggiunto un servizio di completamento della chat OpenAI di Azure al generatore di kernel.
Nota
In questo esempio è stato usato Azure OpenAI, ma è possibile usare qualsiasi altro servizio di completamento della chat. Per visualizzare l'elenco completo dei servizi supportati, vedere l'articolo relativo alle lingue supportate. Per informazioni sulla creazione di un servizio diverso, vedere l'articolo Servizi di intelligenza artificiale. Sono disponibili indicazioni su come usare i modelli OpenAI o OpenAI di Azure come servizi.
// Create kernel
var builder = Kernel.CreateBuilder()
builder.AddAzureOpenAIChatCompletion(modelId, endpoint, apiKey);
# Initialize the kernel
kernel = Kernel()

# Add Azure OpenAI chat completion
kernel.add_service(AzureChatCompletion(
    deployment_name="your_models_deployment_name",
    api_key="your_api_key",
    base_url="your_base_url",
))
// Create your AI service client
ChatCompletionService chatCompletionService = OpenAIChatCompletion.builder()
    .withModelId(MODEL_ID)
    .withOpenAIAsyncClient(client)
    .build();

// Create a kernel with Azure OpenAI chat completion and plugin
Kernel kernel = Kernel.builder()
    .withAIService(ChatCompletionService.class, chatCompletionService)
    .withPlugin(lightPlugin)
    .build();
3) Aggiungere servizi aziendali
Uno dei principali vantaggi dell'uso del kernel semantico è che supporta i servizi di livello aziendale. In questo esempio è stato aggiunto il servizio di registrazione al kernel per eseguire il debug dell'agente di intelligenza artificiale.
builder.Services.AddLogging(services => services.AddConsole().SetMinimumLevel(LogLevel.Trace));
import logging

# Set the logging level for  semantic_kernel.kernel to DEBUG.
logging.basicConfig(
    format="[%(asctime)s - %(name)s:%(lineno)d - %(levelname)s] %(message)s",
    datefmt="%Y-%m-%d %H:%M:%S",
)
logging.getLogger("kernel").setLevel(logging.DEBUG)
4) Compilare il kernel e recuperare i servizi
Dopo aver aggiunto i servizi, si compila il kernel e si recupera il servizio di completamento della chat per usarli in seguito.
Kernel kernel = builder.Build();

// Retrieve the chat completion service
var chatCompletionService = kernel.Services.GetRequiredService<IChatCompletionService>();
Dopo aver configurato il kernel, si recupera il servizio di completamento della chat per usarlo in seguito.
Nota
In Python non è necessario compilare in modo esplicito il kernel. È invece possibile accedere ai servizi direttamente dall'oggetto kernel.
chat_completion : AzureChatCompletion = kernel.get_service(type=ChatCompletionClientBase)
// Create a kernel with Azure OpenAI chat completion and plugin
Kernel kernel = Kernel.builder()
    .withAIService(ChatCompletionService.class, chatCompletionService)
    .withPlugin(lightPlugin)
    .build();
6) Aggiungere plug-in
Con i plug-in, può offrire all'agente di intelligenza artificiale la possibilità di eseguire il codice per recuperare informazioni da origini esterne o per eseguire azioni. Nell'esempio precedente è stato aggiunto un plug-in che consente all'agente di intelligenza artificiale di interagire con una lampadina. Di seguito verrà illustrato come creare questo plug-in.
Creare un plug-in nativo
Di seguito è possibile notare che la creazione di un plug-in nativo è semplice come la creazione di una nuova classe.
In questo esempio è stato creato un plug-in che può modificare una lampadina. Anche se questo è un semplice esempio, questo plug-in dimostra rapidamente come è possibile supportare entrambi...
- Recupero della generazione aumentata (RAG) fornendo all'agente di intelligenza artificiale lo stato della lampadina
- L'automazione delle attività consente all'agente di intelligenza artificiale di attivare o disattivare la lampadina.
Nel codice è possibile creare un plug-in che interagisca con qualsiasi servizio esterno o API per ottenere risultati simili.
using System.ComponentModel;
using Microsoft.SemanticKernel;

public class LightsPlugin
{
   // Mock data for the lights
   private readonly List<LightModel> lights = new()
   {
      new LightModel { Id = 1, Name = "Table Lamp", IsOn = false },
      new LightModel { Id = 2, Name = "Porch light", IsOn = false },
      new LightModel { Id = 3, Name = "Chandelier", IsOn = true }
   };

   [KernelFunction("get_lights")]
   [Description("Gets a list of lights and their current state")]
   [return: Description("An array of lights")]
   public async Task<List<LightModel>> GetLightsAsync()
   {
      return lights;
   }

   [KernelFunction("change_state")]
   [Description("Changes the state of the light")]
   [return: Description("The updated state of the light; will return null if the light does not exist")]
   public async Task<LightModel?> ChangeStateAsync(int id, bool isOn)
   {
      var light = lights.FirstOrDefault(light => light.Id == id);

      if (light == null)
      {
         return null;
      }

      // Update the light with the new state
      light.IsOn = isOn;

      return light;
   }
}

public class LightModel
{
   [JsonPropertyName("id")]
   public int Id { get; set; }

   [JsonPropertyName("name")]
   public string Name { get; set; }

   [JsonPropertyName("is_on")]
   public bool? IsOn { get; set; }
}
from typing import Annotated
from semantic_kernel.functions import kernel_function

class LightsPlugin:
    lights = [
        {"id": 1, "name": "Table Lamp", "is_on": False},
        {"id": 2, "name": "Porch light", "is_on": False},
        {"id": 3, "name": "Chandelier", "is_on": True},
    ]

    @kernel_function(
        name="get_lights",
        description="Gets a list of lights and their current state",
    )
    def get_state(
        self,
    ) -> Annotated[str, "the output is a string"]:
        """Gets a list of lights and their current state."""
        return self.lights

    @kernel_function(
        name="change_state",
        description="Changes the state of the light",
    )
    def change_state(
        self,
        id: int,
        is_on: bool,
    ) -> Annotated[str, "the output is a string"]:
        """Changes the state of the light."""
        for light in self.lights:
            if light["id"] == id:
                light["is_on"] = is_on
                return light
        return None
public class LightsPlugin {

  // Mock data for the lights
  private final Map<Integer, LightModel> lights = new HashMap<>();

  public LightsPlugin() {
    lights.put(1, new LightModel(1, "Table Lamp", false));
    lights.put(2, new LightModel(2, "Porch light", false));
    lights.put(3, new LightModel(3, "Chandelier", true));
  }

  @DefineKernelFunction(name = "get_lights", description = "Gets a list of lights and their current state")
  public List<LightModel> getLights() {
    System.out.println("Getting lights");
    return new ArrayList<>(lights.values());
  }

  @DefineKernelFunction(name = "change_state", description = "Changes the state of the light")
  public LightModel changeState(
      @KernelFunctionParameter(name = "id", description = "The ID of the light to change") int id,
      @KernelFunctionParameter(name = "isOn", description = "The new state of the light") boolean isOn) {
    System.out.println("Changing light " + id + " " + isOn);
    if (!lights.containsKey(id)) {
      throw new IllegalArgumentException("Light not found");
    }

    lights.get(id).setIsOn(isOn);

    return lights.get(id);
  }
}
Aggiungere il plug-in al kernel
Dopo aver creato il plug-in, è possibile aggiungerlo al kernel in modo che l'agente di intelligenza artificiale possa accedervi. Nell'esempio è stata aggiunta la LightsPlugin classe al kernel.
// Add the plugin to the kernel
kernel.Plugins.AddFromType<LightsPlugin>("Lights");
# Add the plugin to the kernel
kernel.add_plugin(
    LightsPlugin(),
    plugin_name="Lights",
)
// Import the LightsPlugin
KernelPlugin lightPlugin = KernelPluginFactory.createFromObject(new LightsPlugin(),
    "LightsPlugin");
9) Pianificazione
Il kernel semantico sfrutta la chiamata alla funzione, ovvero una funzionalità nativa della maggior parte delle macchine virtuali, per fornire la pianificazione. Con la chiamata di funzione, i llms possono richiedere (o chiamare) una funzione specifica per soddisfare la richiesta di un utente. Il kernel semantico effettua quindi il marshalling della richiesta alla funzione appropriata nella codebase e restituisce i risultati a LLM in modo che l'agente di intelligenza artificiale possa generare una risposta finale.
Per abilitare la chiamata automatica delle funzioni, è prima necessario creare le impostazioni di esecuzione appropriate in modo che Semantic Kernel sappia richiamare automaticamente le funzioni nel kernel quando l'agente di intelligenza artificiale le richiede.
OpenAIPromptExecutionSettings openAIPromptExecutionSettings = new()
{
    FunctionChoiceBehavior = FunctionChoiceBehavior.Auto()
};
execution_settings = AzureChatPromptExecutionSettings()
execution_settings.function_call_behavior = FunctionChoiceBehavior.Auto()
// Enable planning
InvocationContext invocationContext = new InvocationContext.Builder()
    .withReturnMode(InvocationReturnMode.LAST_MESSAGE_ONLY)
    .withToolCallBehavior(ToolCallBehavior.allowAllKernelFunctions(true))
    .build();
10) Richiamare
Infine, viene richiamato l'agente di intelligenza artificiale con il plug-in. Il codice di esempio illustra come generare una risposta non in streaming, ma è anche possibile generare una risposta di streaming usando il GetStreamingChatMessageContentAsync metodo .
// Create chat history
var history = new ChatHistory();

// Get the response from the AI
var result = await chatCompletionService.GetChatMessageContentAsync(
    history,
    executionSettings: openAIPromptExecutionSettings,
    kernel: kernel
);
# Create a history of the conversation
history = ChatHistory()

# Get the response from the AI
result = (await chat_completion.get_chat_message_contents(
    chat_history=history,
    settings=execution_settings,
    kernel=kernel,
    arguments=KernelArguments(),
))[0]
userInput = scanner.nextLine();
// Add user input
history.addUserMessage(userInput);

// Prompt AI for response to users input
List<ChatMessageContent<?>> results = chatCompletionService
    .getChatMessageContentsAsync(history, kernel, invocationContext)
    .block();
Passaggi successivi
In questa guida si è appreso come iniziare rapidamente a usare il kernel semantico creando un semplice agente di intelligenza artificiale in grado di interagire con un servizio di intelligenza artificiale ed eseguire il codice. Per altri esempi e informazioni su come creare agenti di intelligenza artificiale più complessi, vedere gli esempi approfonditi.