Universal pixel SDK for iOS
This article provides instructions on how publishers can integrate and install the Universal Pixel SDK (Pixie SDK) for iOS.
Integration instructions
Requirements
The SDK requires the following components:
- macOS Mojave 10.14.4+
- iOS 9+
- Swift 5+
- Xcode 11+
In order to use the Pixie SDK, you must have a valid Xandr Unified Pixel ID. This is an alphanumeric ID that represents a pixel in your app.
Installation guide
There are two ways to install the SDK:
Using CocoaPods
CocoaPods is a dependency manager for Cocoa projects. If you are unfamiliar with CocoaPods review their installation and user guides.
Once you have CocoaPods installed, using terminal or your command line editor of choice, navigate to the root directory of your project and create a podfile.
pod initUsing a text editor, open the newly created podfile. Set the platform version to 9.0 and add pod
PixieSDKto the target.# iOS: Podfile config to include our SDK platform :ios, '9.0' project 'SampleApp' target 'SampleApp' do pod 'PixieSDK' endSave your changes and return to Terminal and enter:
pod installCocoaPods will download the Pixie SDK and create a workspace in the project directory. If your project is currently open, close it and open the workspace.
Using Xandr Unified Pixel SDK XCFramework
Note
We are distributing PixieSDK.xcframework, which you can download here. Download the file and add it to the Frameworks folder.
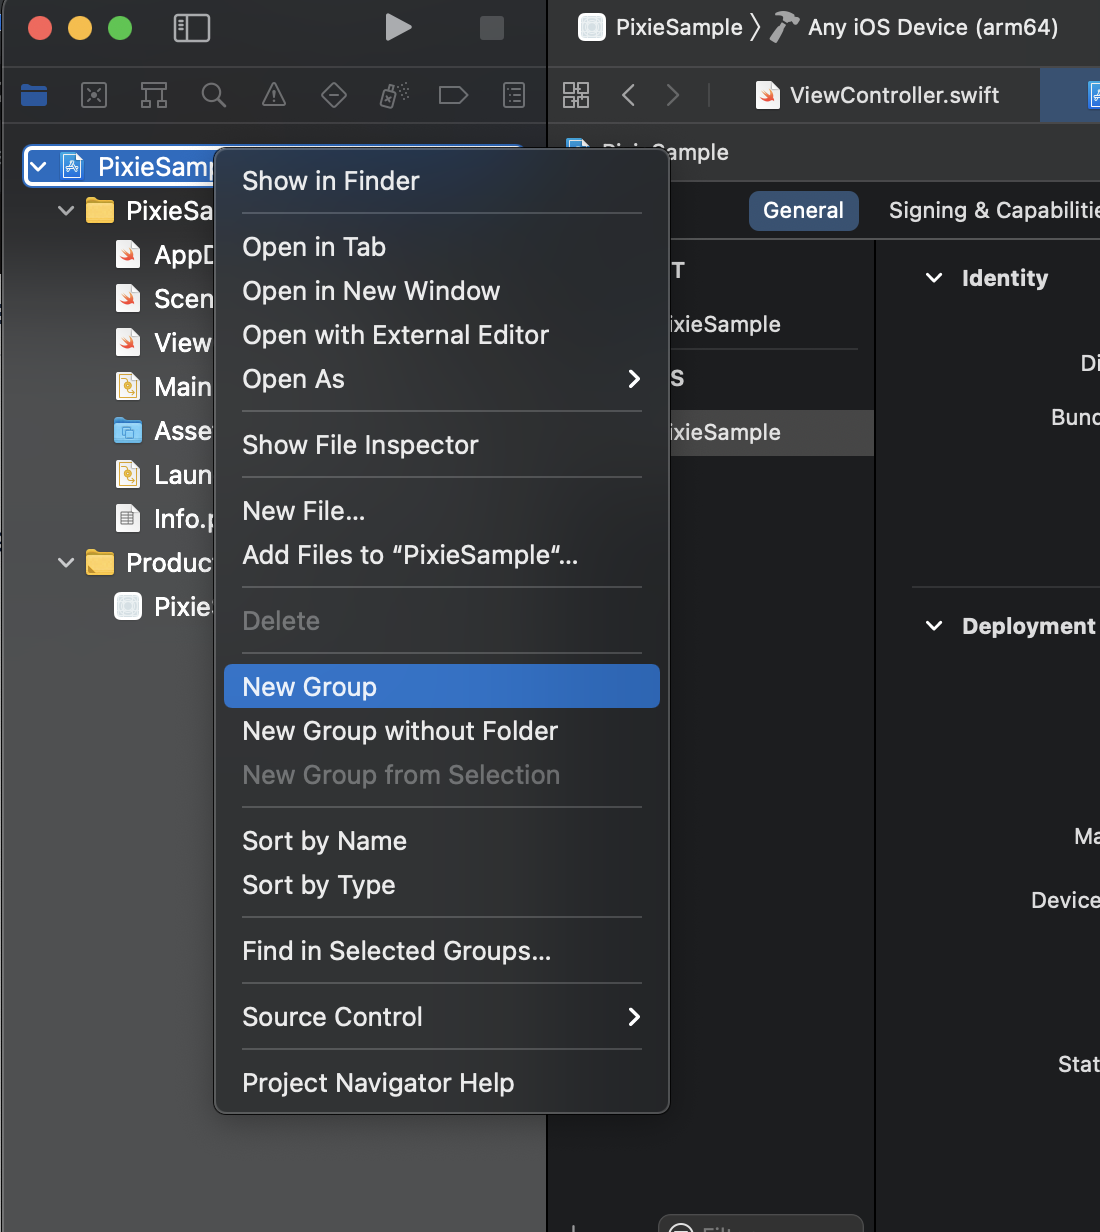
Create Frameworks folder.
Right click on your project in the project navigator (top-most entry), and select New Group. Name the new group as Frameworks.
Add
PixieSDK.xcframeworkto Frameworks folder.Drag and drop
PixieSDK.xcframeworkfrom Finder into the Frameworks folder. Make sure that the destination of drag is just under the Frameworks.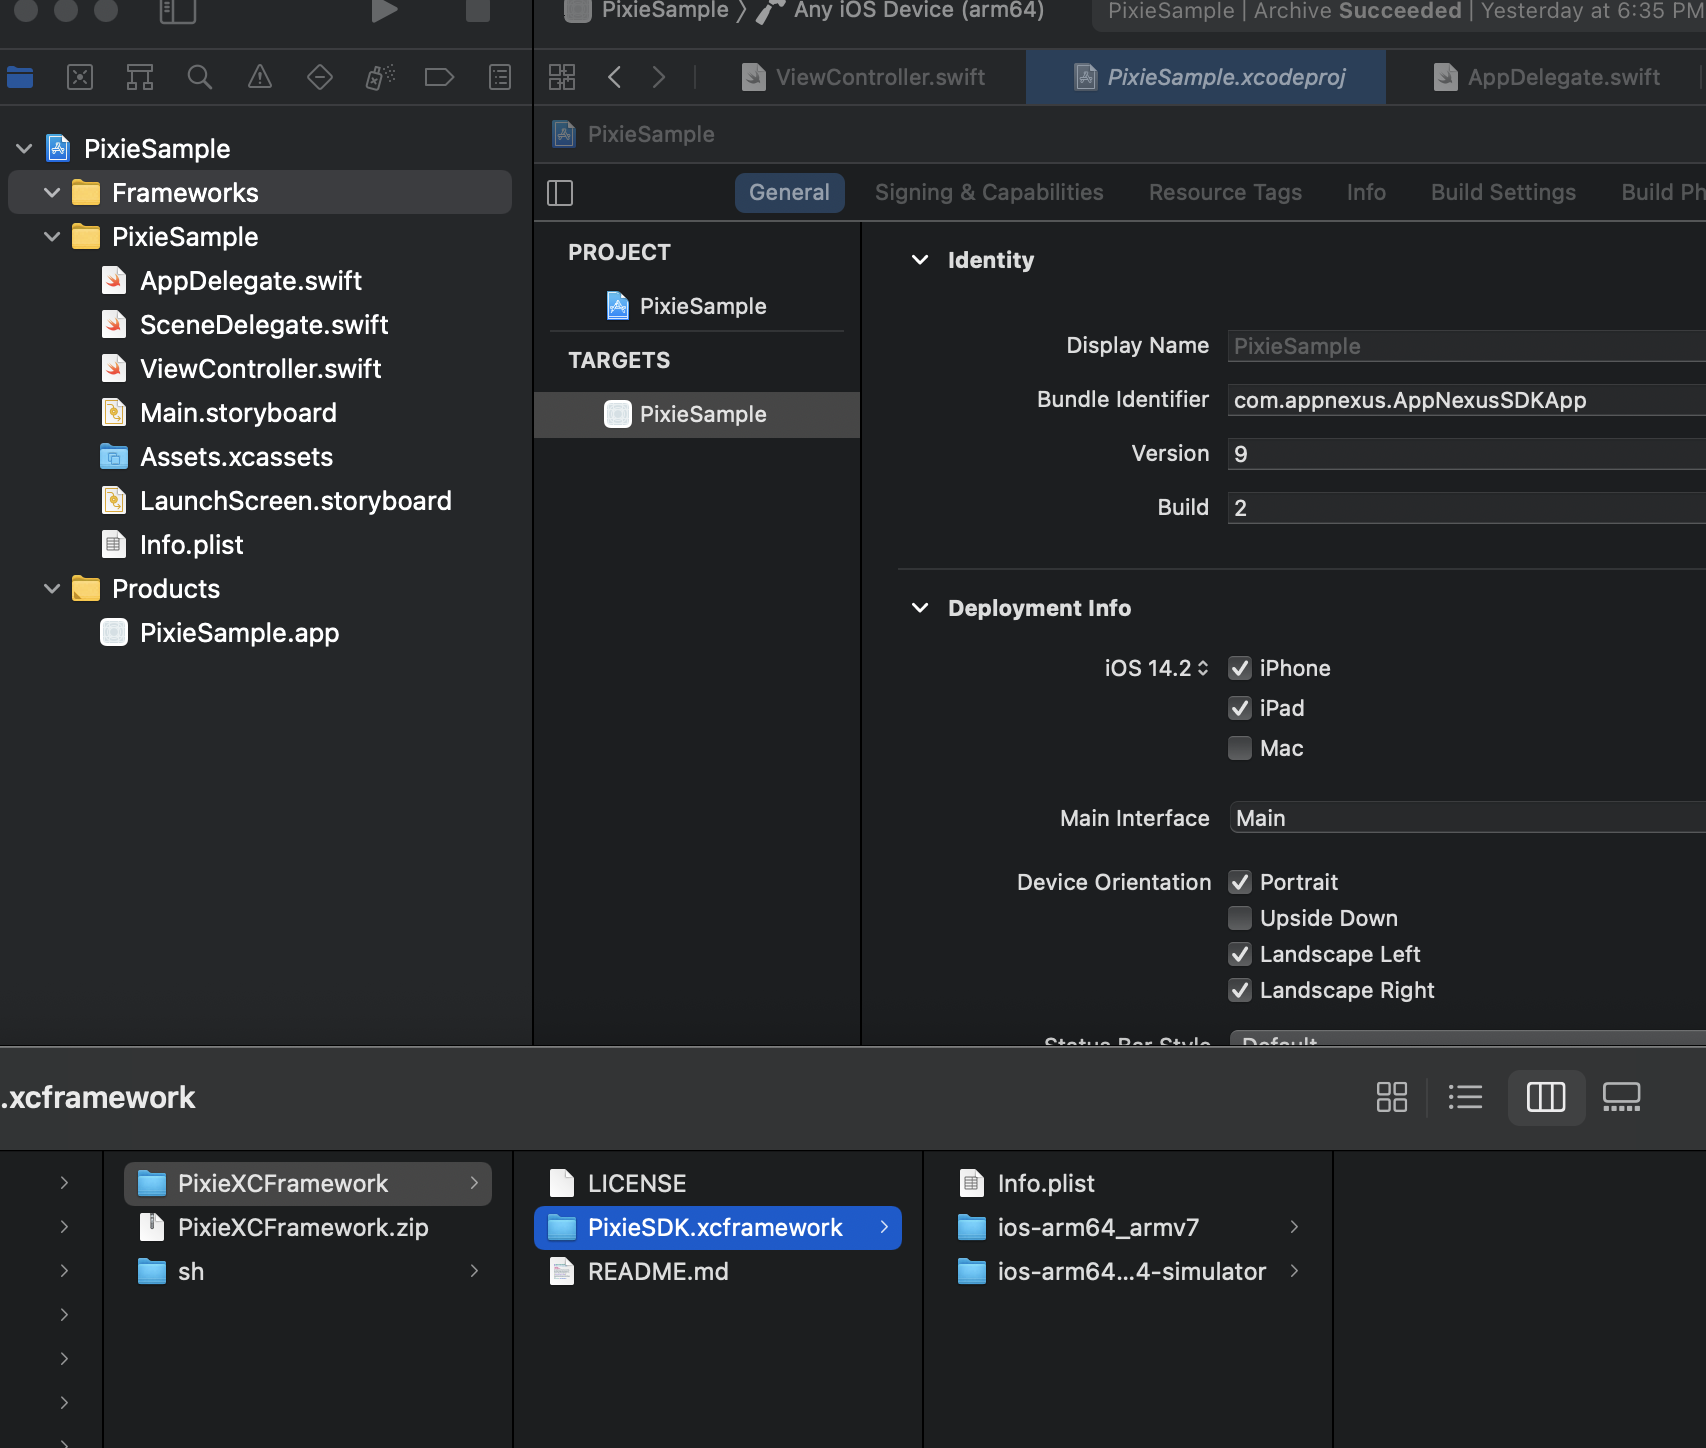
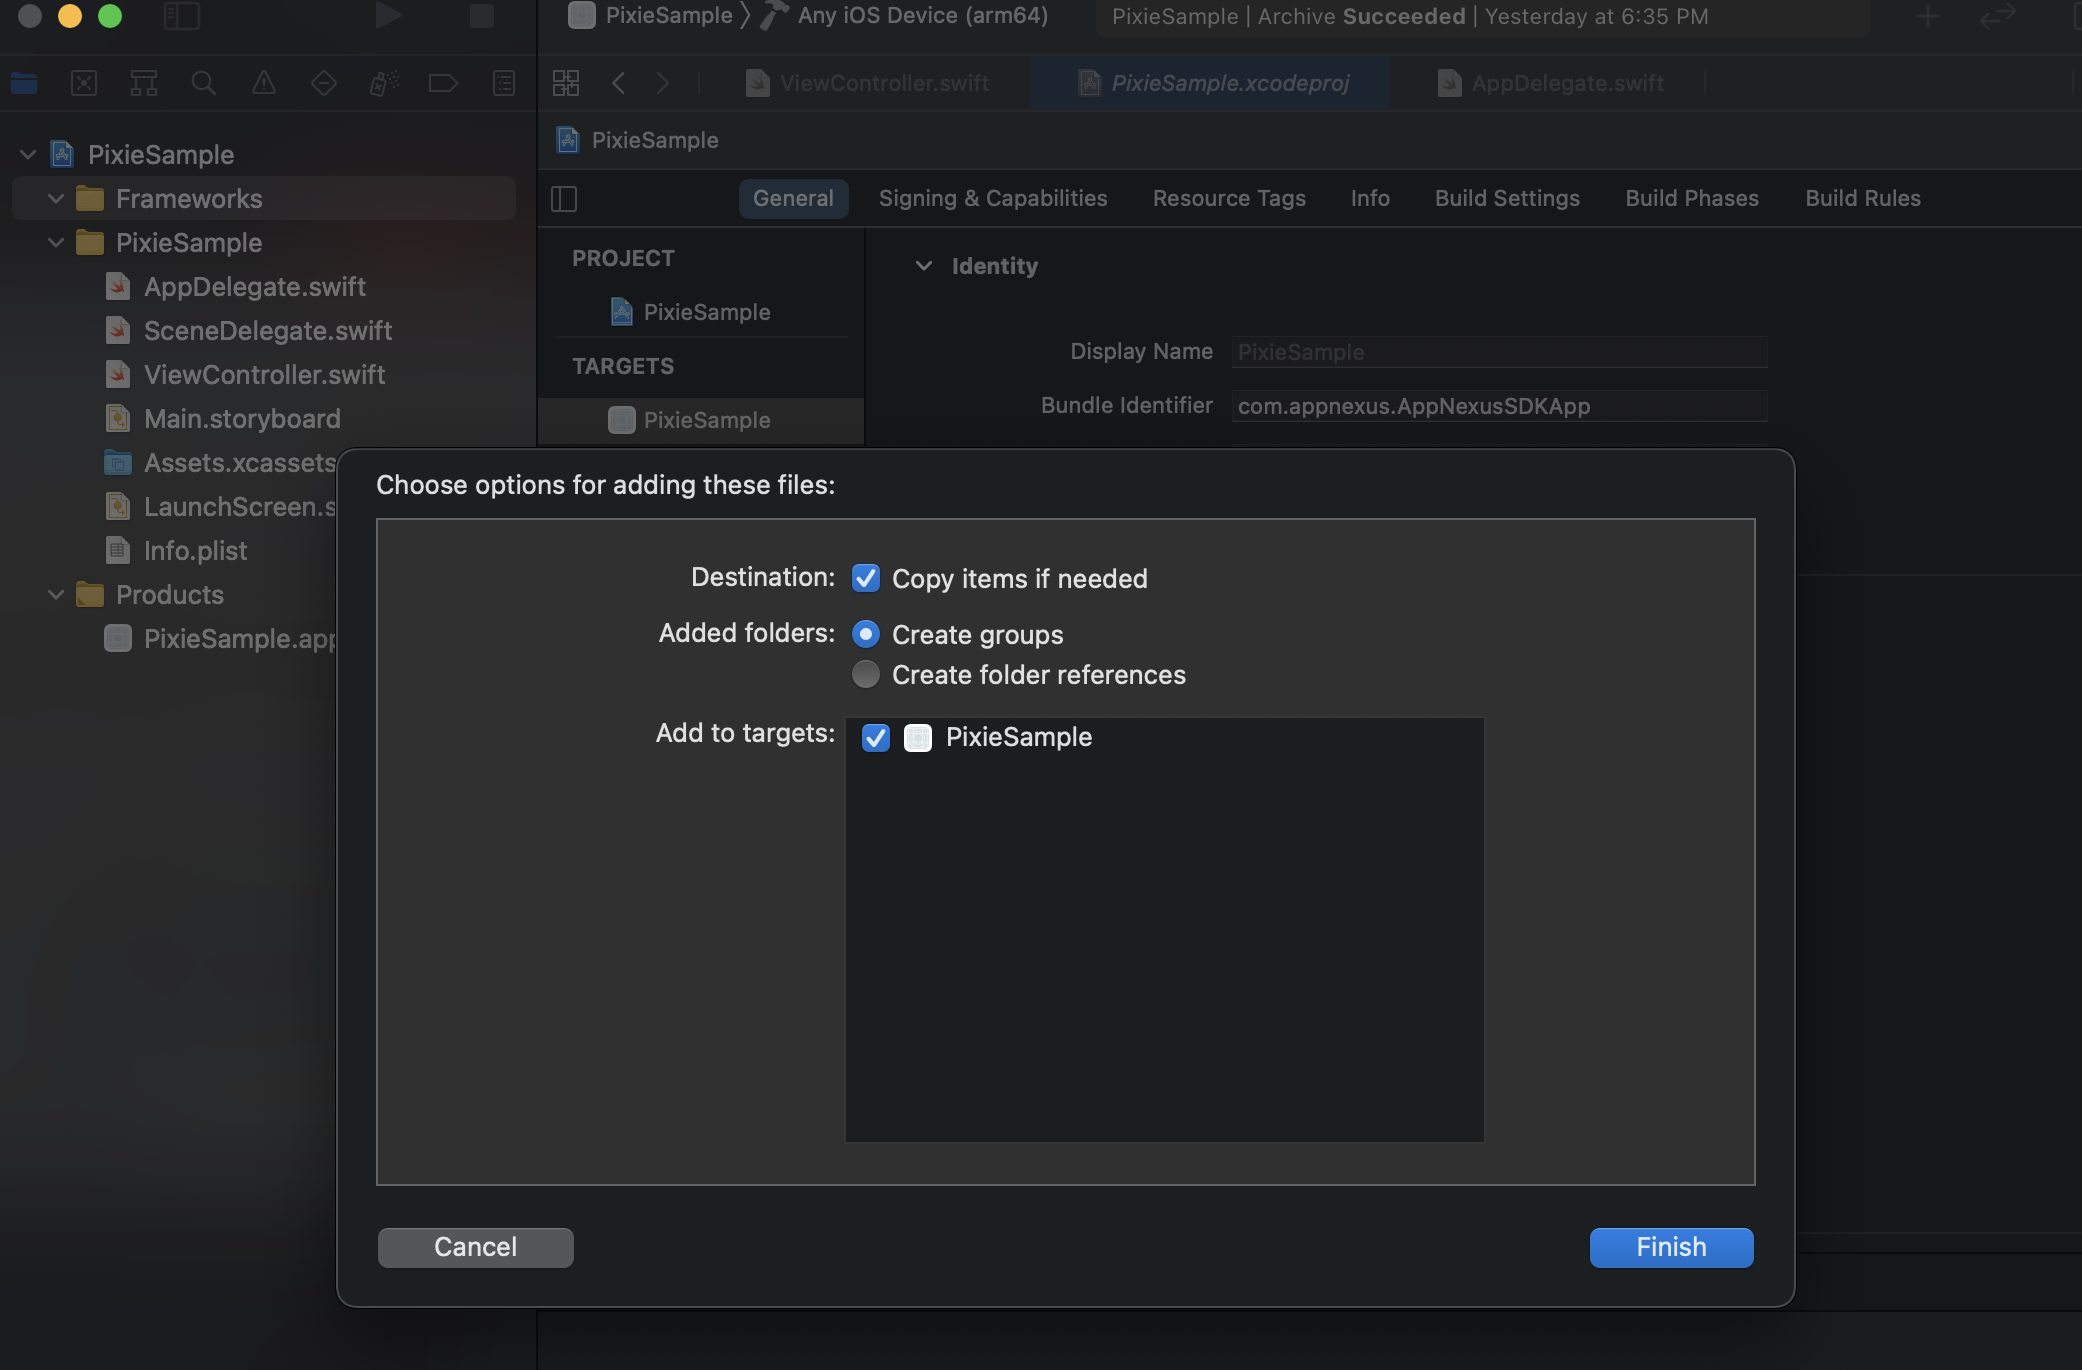
Make sure the options Copy items if needed and Create groups are checked and selected for adding files. Click Finish.
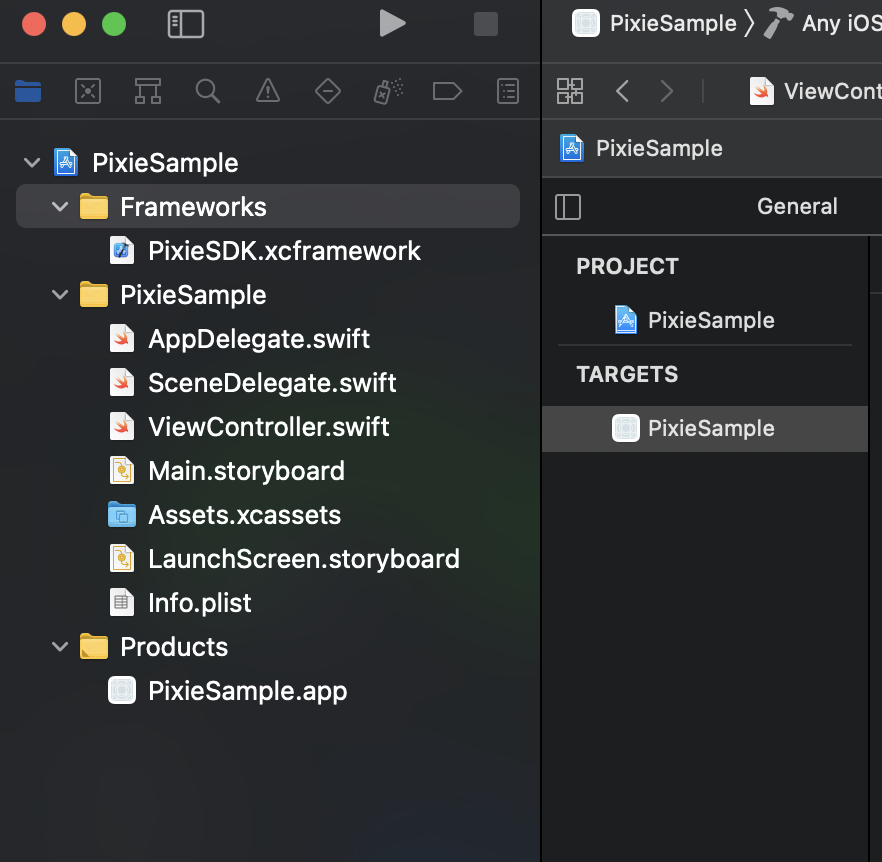
Once this step is completed, the result appears as below:
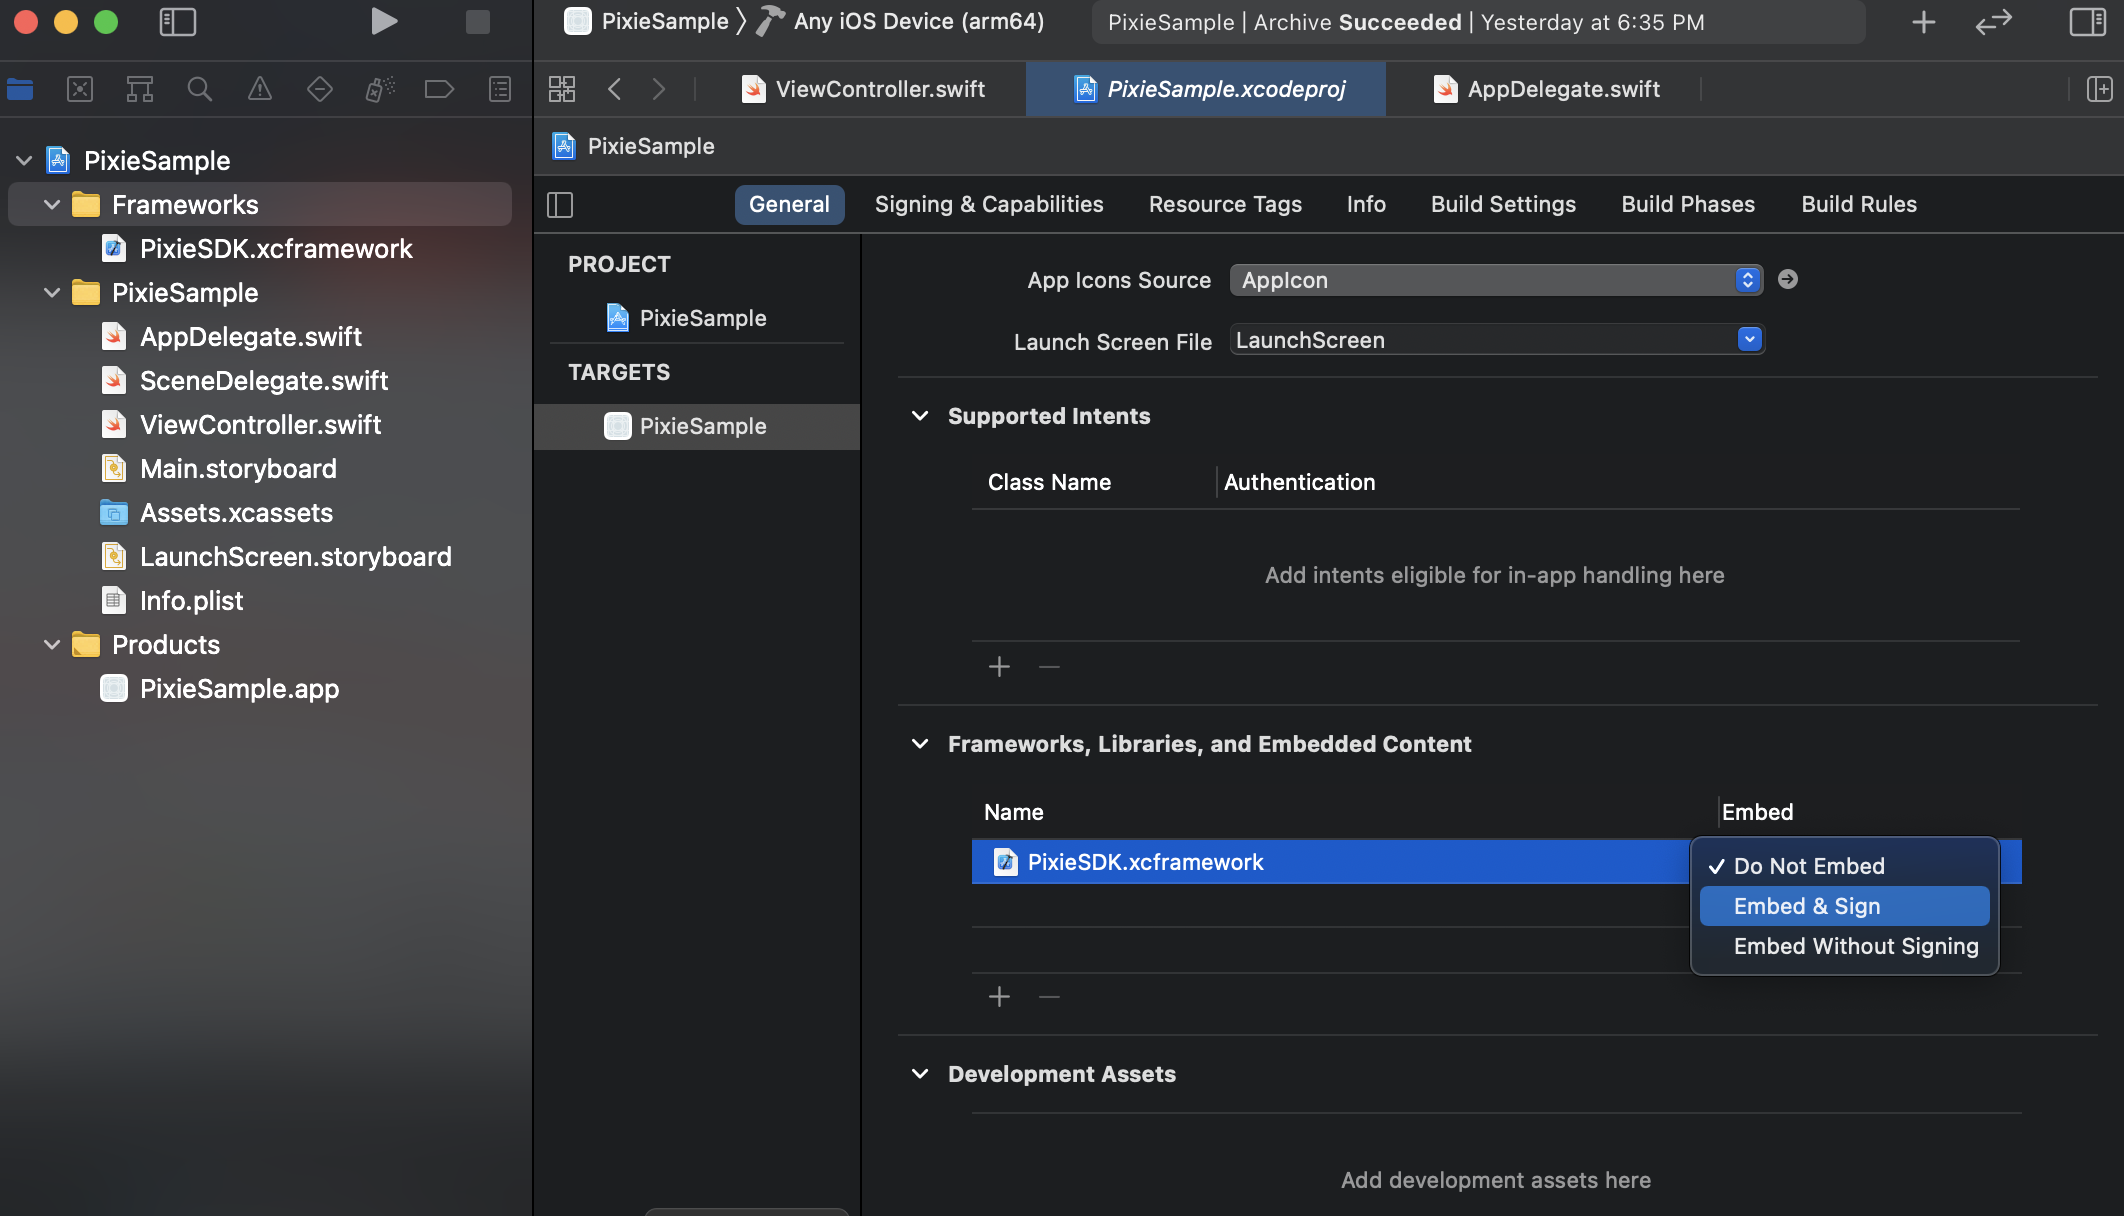
Embedded PixieSDK.xcframework in project’s target
Navigate to your project settings by clicking on it in the project navigator.
Make sure that your target is selected and General tab is open.
Select Embed & Sign for your newly added XCFramework.
Implementation guide
Initializing the SDK
Initialize the SDK calling its initialize method within the didFinishLaunchingWithOptions method within the app delegate's file:
Pixie.initialize(pixelId:String)`
Track event
Once the SDK is initialized events can be tracked and submitted using fireEvent method.
Note
Any events being tracked prior to initialization will be rejected.
Pixie.fireEvent(eventName : String, eventParams : PixieParams?)
fireEvent method takes Event string and PixieParams(optional) as these are parameters.
eventName:String
Standard Event strings are defined within the Event class. See the Standard Events section below for the available Standard Event strings. You also have the option to define Custom Event string(s) in Universal Pixel UI and use it in your application.
Custom Event String(s) must be pre-registered using Universal Pixel UI.
eventParams:PixieParams
Event data is represented by the PixieParams class. All parameters are optional.
Note
If no params are passed a nil object must still be sent if using Objective C.
| Name | Description |
|---|---|
| Properties | |
| currency : String | Currency for the value specified. |
| itemId : String | A generic ID of the item represented. IDs can also be passed as an array of comma separated items. Example: "itemId1, itemId2" |
| itemName : String | The name of the item represented. Names can also be passed as an array of comma separated items. Example: "itemName1, itemName2" |
| itemType : String | A generic type of the item represented. Types can also be passed as an array of comma separated items. Example: "itemType1, itemType2" |
| value : String | Value of a user performing this event to the business. |
| Function | |
| put (key : String, value : String) | Arbitrary data defined by the publisher. Enables the passing of custom event data through key/value pairs. Keys should be preregistered using Universal Pixel UI. Values can be an array separated by a comma. See the Custom Events section below for more details |
Code samples
Initialization code sample
Swift
import PixieSDK
func application(_ application: UIApplication, didFinishLaunchingWithOptions launchOptions: [UIApplication.LaunchOptionsKey: Any]?) -> Bool {
        Pixie.initialize("b63be84e-d95b-4c67-8242-d9c9c026ed30")
        return true
        }
Objective C
@import PixieSDK;
- (BOOL)application:(UIApplication *)application didFinishLaunchingWithOptions:(NSDictionary *)launchOptions {
    [Pixie initialize:@"b63be84e-d95b-4c67-8242-d9c9c026ed30"];
    return YES;
}
Track page view
Event.PAGE_VIEW`
The specific page that was visited.
Code samples
Swift
Pixie.fireEvent(Event.PAGE_VIEW)
Objective C
[Pixie fireEvent:Event.PAGE_VIEW eventParams:nil];
Track landing page views
Event.LANDING_PAGE`
Track landing pages views.
Code samples
Swift
let landingPageParams = PixieParams(value: "5.99", currency: "USD", itemId: "product_5,product_6", itemType: "apparel,accessory", itemName: "shirt,belt")
Pixie.fireEvent(Event.LANDING_PAGE, eventParams:landingPageParams)
Objective C
PixieParams *landingPageParams = [[PixieParams alloc] initWithValue:@"5.99" currency:@"USD" itemId:@"product_5,product_6" itemType:@"apparel,accessory" itemName:@"shirt,belt"]; [Pixie fireEvent:Event.LANDING_PAGE eventParams:landingPageParams];
Track item view
Event.ITEM_VIEW`
Track key page views (For example: product page, landing page, article).
Code samples
Swift
let itemViewParams = PixieParams(value: "5.99", currency: "USD", itemId: "product_5,product_6", itemType: "apparel,accessory", itemName: "shirt,belt")
               Pixie.fireEvent(Event.ITEM_VIEW, eventParams:itemViewParams)
Objective C
PixieParams *itemViewParams = [[PixieParams alloc] initWithValue:@"5.99" currency:@"USD" itemId:@"product_5,product_6" itemType:@"apparel,accessory" itemName:@"shirt,belt"];
[Pixie fireEvent:Event.ITEM_VIEW eventParams:itemViewParams];
Track add to cart event
Event.ADD_TO_CART`
Track when items are added to a shopping cart (For example: click, landing page on Add to Cart button).
Code sample
Swift
let addToCartParams = PixieParams(value: "5.99", currency: "USD", itemId: "product_5,product_6", itemType: "apparel,accessory", itemName: "shirt,belt")
               Pixie.fireEvent(Event.ADD_TO_CART, eventParams:addToCartParams)
Objective C
PixieParams *addToCartParams = [[PixieParams alloc] initWithValue:@"5.99" currency:@"USD" itemId:@"product_5,product_6" itemType:@"apparel,accessory" itemName:@"shirt,belt"];
[Pixie fireEvent:Event.ADD_TO_CART eventParams:addToCartParams];
Track checkout initiation
Event.INITIATE_CHECKOUT
Track when people enter the checkout flow (For example: click, landing page on checkout button).
Code sample
Swift
let initiateCheckOutParams = PixieParams(value: "5.99", currency: "USD", itemId: "product_5,product_6", itemType: "apparel,accessory", itemName: "shirt,belt")
               Pixie.fireEvent(Event.INITIATE_CHECKOUT, eventParams: initiateCheckOutParams)
Objective C
PixieParams *initiateCheckOutParams = [[PixieParams alloc] initWithValue:@"5.99" currency:@"USD" itemId:@"product_5,product_6" itemType:@"apparel,accessory" itemName:@"shirt,belt"];
[Pixie fireEvent:Event.INITIATE_CHECKOUT eventParams:initiateCheckOutParams];
Track add payment info event
Event.ADD_PAYMENT_INFO`
Track when payment information is added in the checkout flow (For example: click, landing page on billing information).
Code sample
Swift
let addPaymentInfoParams = PixieParams(value: "5.99", currency: "USD", itemId: "product_5,product_6", itemType: "apparel,accessory", itemName: "shirt,belt")
               Pixie.fireEvent(Event.ADD_PAYMENT_INFO, eventParams: addPaymentInfoParams)
Objective C
PixieParams *addPaymentInfo = [[PixieParams alloc] initWithValue:@"5.99" currency:@"USD" itemId:@"product_5,product_6" itemType:@"apparel,accessory" itemName:@"shirt,belt"];
[Pixie fireEvent:Event.ADD_PAYMENT_INFO eventParams:addPaymentInfo];
Track purchase
Event.PURCHASE`
Track purchases or checkout flow completions (For example: Landing on Thank You or confirmation page).
Code sample
Swift
let purchaseParams = PixieParams(value: "5.99", currency: "USD", itemId: "product_5,product_6", itemType: "apparel,accessory", itemName: "shirt,belt")
   Pixie.fireEvent(Event.PURCHASE, eventParams: purchaseParams)
Objective C
PixieParams *purchaseParams = [[PixieParams alloc] initWithValue:@"5.99" currency:@"USD" itemId:@"product_5,product_6" itemType:@"apparel,accessory" itemName:@"shirt,belt"];
[Pixie fireEvent:Event.PURCHASE eventParams:purchaseParams];
Track leads
Event.LEAD
Track when someone expresses interest in your offering (For example: form submission, sign up for trial, and registration).
Code sample
Swift
let leadParams = PixieParams(value: "5.99", currency: "USD")
Pixie.fireEvent(Event.LEAD, eventParams: leadParams)
Objective C
PixieParams *leadParams = [[PixieParams alloc] init];
leadParams.value = @"5.99";
leadParams.currency = @"USD";
[Pixie fireEvent:Event.LEAD eventParams:leadParams];
Track custom events
Custom Events enable publishers to create their own events to track and submit. To create a custom event, initiate a PixelParams object with the data to be submitted and pass that object, along with a string identifier to the Pixie SDK fireEvent method. Custom event data can also be sent in key-value pairs by using the put method of the PixelParams object.
Code samples
Swift
let customPixieParams = PixieParams()
customPixieParams.value = "5.99"
customPixieParams.itemName = "shirt,belt"
//passing key value pairs with the put method
customPixieParams.put("name", "Form Submission")
customPixieParams.put("email", "user@appnexus.com")
customPixieParams.put("type", "subscribe,newuser")
Pixie.fireEvent("TestCustomEvent", eventParams: customPixieParams) ```
Objective C
PixieParams *customPixieParams = [[PixieParams alloc] init];
customPixieParams.value = @"5.99";
customPixieParams.itemName = @"shirt,belt";
//passing key value pairs with the put method
[customPixieParams put:@"name" :@"Form Submission"];
[customPixieParams put:@"email" :@"user@appnexus.com"];
[customPixieParams put:@"type" :@"subscribe,newuser"];
[Pixie fireEvent:@"TestCustomEvent" eventParams:customPixieParams];
Enable logging
Pixie SDK comes with a debug mode feature that enables logging during development. This can be turned on by setting the debugMode variable to true. All logging will be disabled in the release build.
Swift
Pixie.shared.debugMode = true
Objective C
Pixie.shared.debugMode = true;