Integrating Angular 4 Unit Tests with Visual Studio Team Services (VSTS)
One of the nice features of Angular 4 (and Angular 2 before it) is the introduction of the Angular CLI (command line interface). I like to think of it as a style guide coming straight from the Angular team. But more importantly, it takes care of all the ceremony that accompanies building an Angular application like setting up module bundlers with WebPack, setting up unit testing with Jasmine, setting up end to end testing with protractor, etc.
One thing that Angular CLI doesn’t take care of though is integrating the JavaScript unit tests with your VSTS build. This is a crucial step as continuous integration is the process of automating a build and tests to ensure a stable code branch.
In this post, I will show you how to run JavaScript unit tests on VSTS as well as generate an output that can be parsed by the build.
Angular CLI was used to scaffold the project. It leverages Jasmine to define the unit tests and Karma as the test-running framework. There are two challenges to running these tests on the build server:
- The tests depend on browsers that aren’t available on the build server
- The generated output of the test results is not included in the final build report
Getting Rid of The Browser Dependency
There is a popular project that provides a “headless browser”, which is a browser that runs without rendering any UI, and it’s called PhantomJS. This allows you to run your JavaScript unit tests on the build server without the need to have any browsers available. Issue the following command to include it in your dev dependencies section of the package.json file of your project:
npm i phantomjs-prebuilt --save-dev
As mentioned before the Angular CLI uses Karma to run the unit tests. Karma uses special packages to link to the browsers called launchers. Here you will need to install the PhantomJS launcher using the following command:
npm i karma-phantomjs-launcher --save-dev
Add the PhantomJS launcher to the list of plugins under the Karma.config.js file
require(‘karma-phantomjs-launcher’)
Also modify the browsers property to launch PhantomJS as follows:
browsers: [‘PhantomJS’]
Generate Test Results To Be Included In The Build Report
The generated output of the test results is not included in the final build report but instead is printed to the console. This behavior is determined by the “reporters” property of the Karma configuration file which is set to “progress”. Fortunately, VSTS can include JavaScript unit tests in the Junit format in the build report. Here we will need to install the Junit reporter:
npm i karma-junit-reporter --save-dev
This can be added to the Karma config file the same way the PhantomJS launcher was:
require(‘karma-junit-reporter’)
In addition, make sure that Junit is also added to the array of reporters:
You will also need to setup the Junit reporter as follows:
It’s Time To Setup The Build Server
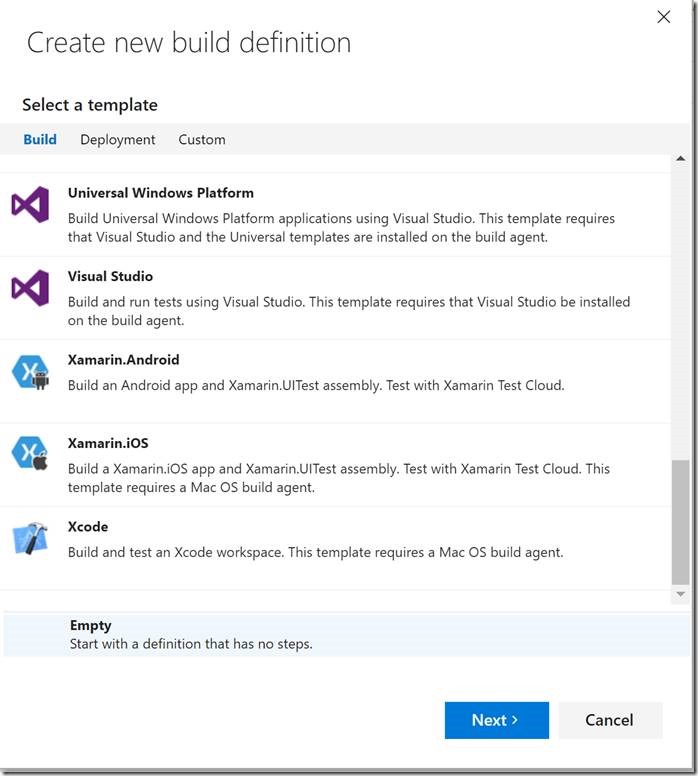
Start by creating an empty build:
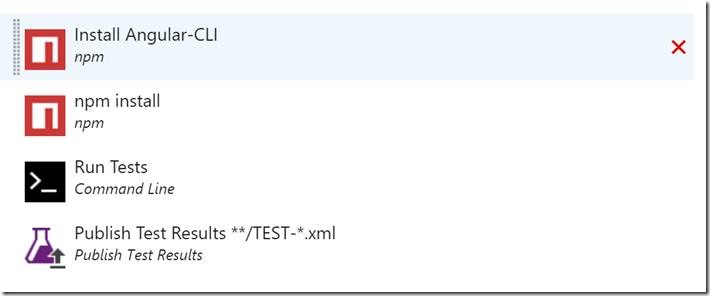
Once the new build definition is created add the following build steps:
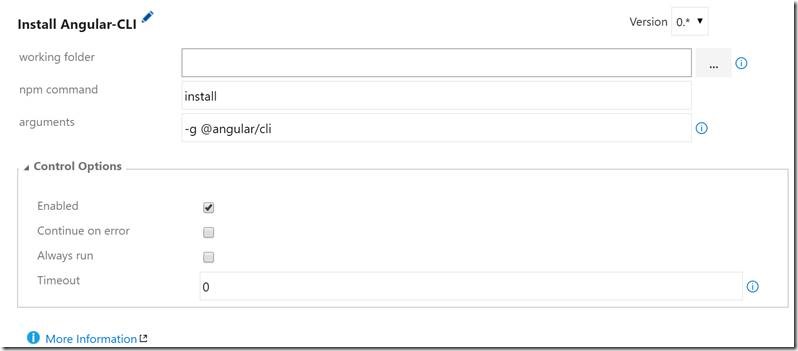
The first build step installs the Angular CLI on the build server. The package manager command is install and the arguments are:
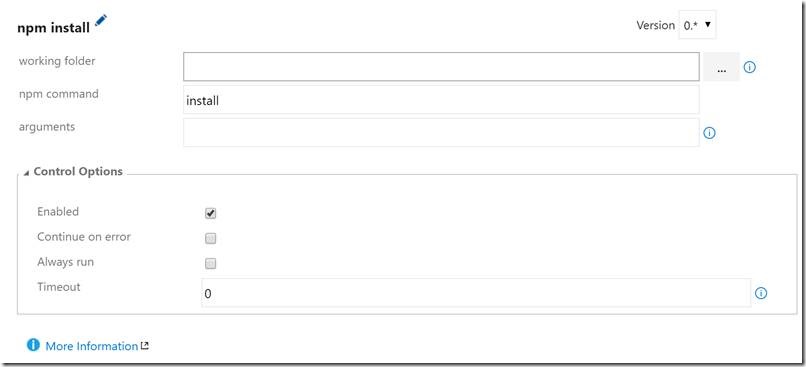
The second step ensures that the dependencies of the project are installed. This is achieved by using the install command with no arguments:
With the Angular CLI installed the build step is now ready to run the tests and generate the output file. Here we set the reporters flag to run both the progress as well as Junit in order to both see the test results on the command line on the build server and write to the output file which will be parsed in the last build step:
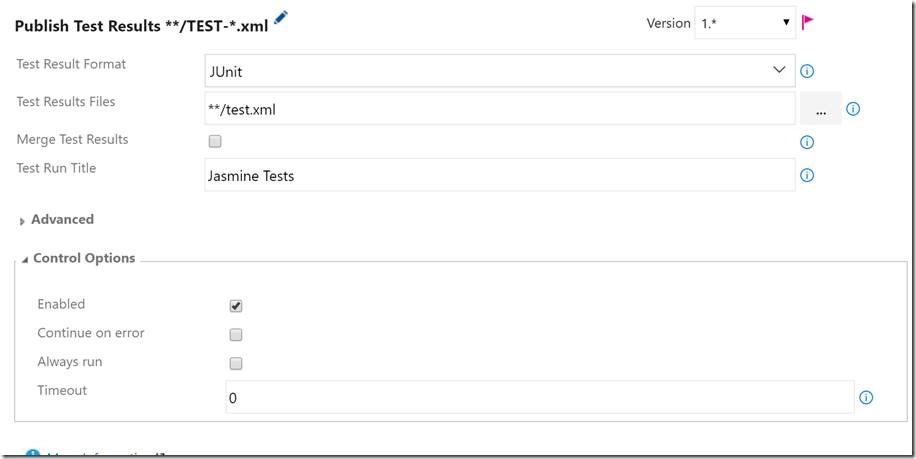
The last step instructs VSTS to read the file generated in the previous step and include it in the build report:
Looking at the setup above the assumption is that the reporter was setup under the Karma configuration file to write to a file called test.xml.
Once the build is triggered you should be able to see the different steps being executed at which point you should have successfully setup a build server that is capable of running JavaScript unit test. Here is the result of a successful build of the steps above:


