Azure Service Bus による SignalR スケールアウト (SignalR 1.x)
作成者: Patrick Fletcher
警告
このドキュメントは、最新版の SignalR を対象としていません。 ASP.NET Core SignalR に関する記事を参照してください。
このチュートリアルでは、Service Bus バックプレーンを使ってメッセージを各ロール インスタンスに配信し、SignalR アプリケーションを Windows Azure Web ロールにデプロイします
前提条件:
- Windows Azure アカウント。
- Windows Azure SDK。
- Visual Studio 2012。
サービス バス バックプレーンは、Service Bus for Windows Server バージョン 1.1 とも互換性があります。 ただし、Service Bus for Windows Server のバージョン 1.0 とは互換性がありません。
価格
Service Bus バックプレーンは、トピックを使ってメッセージを送信します。 最新の価格情報については、Service Bus のページを参照してください。 この記事の執筆時点では、毎月 1,000,000 件のメッセージを 1 ドル未満で送信できます。 バックプレーンは、SignalR ハブ メソッドが呼び出されるたびにサービス バス メッセージを送信します。 接続、切断、グループの参加または脱退などのための制御メッセージもいくつかあります。 ほとんどのアプリケーションでは、メッセージ トラフィックの大部分はハブ メソッドの呼び出しです。
概要
詳細なチュートリアルに進む前に、これから行うことの概要を簡単に説明します。
Windows Azure portal を使って、新しい Service Bus 名前空間を作成します。
次の NuGet パッケージをアプリケーションに追加します。
SignalR アプリケーションを作成します。
次のコードを Global.asax に追加して、バックプレーンを構成します。
protected void Application_Start()
{
    string connectionString = "Service Bus connection string";
    GlobalHost.DependencyResolver.UseServiceBus(connectionString, "YourAppName");

    RouteTable.Routes.MapHubs();
    // ...
}
アプリケーションごとに、"YourAppName" に異なる値を選びます。 複数のアプリケーションで同じ値を使わないでください。
Azure サービスを作成する
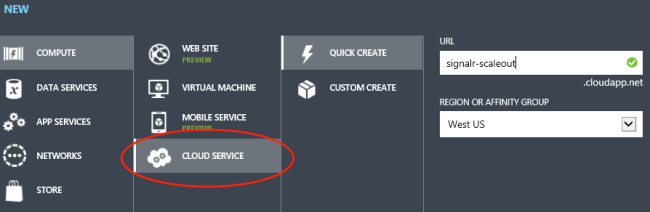
クラウド サービスを作成してデプロイする方法に関する記事の説明に従って、クラウド サービスを作成します。 「方法: 簡易作成を使ってクラウド サービスを作成する」セクションの手順に従います。 このチュートリアルでは、証明書をアップロードする必要はありません。
Service Bus のトピックとサブスクリプションの使用方法に関する記事の説明に従って、新しい Service Bus 名前空間を作成します。 「サービス名前空間を作成する」セクションの手順に従います。
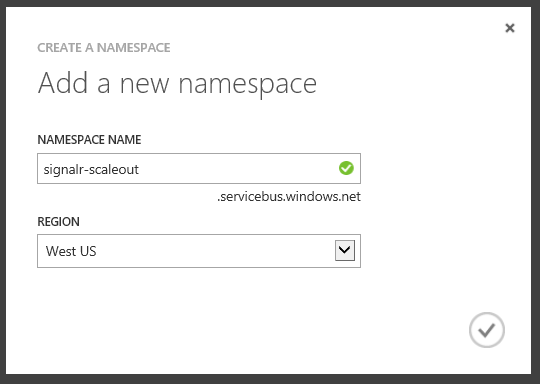
Note
クラウド サービスと Service Bus 名前空間には必ず同じリージョンを選びます。
Visual Studio プロジェクトを作成する
Visual Studio を起動します。 [ファイル] メニューの [新しいプロジェクト] をクリックします。
[新しいプロジェクト] ダイアログ ボックスで、[Visual C#] を展開します。 [インストールされているテンプレート] で、[クラウド] を選び、次に [Windows Azure クラウド サービス] を選びます。 既定の [.NET Framework 4.5] をそのまま使用します。 アプリケーションに ChatService という名前を付け、[OK] をクリックします。

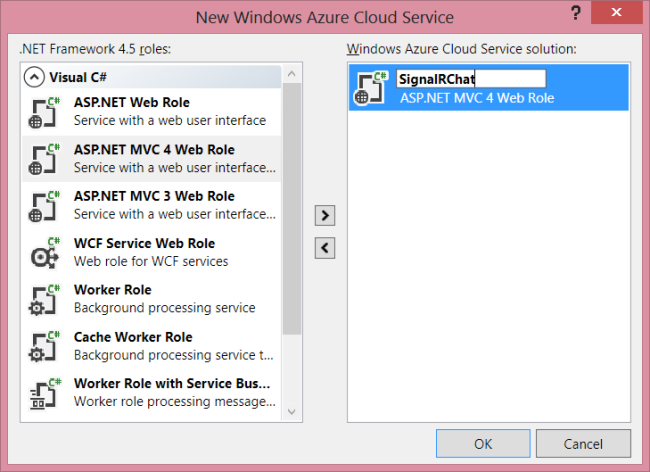
[新しい Windows Azure クラウド サービス] ダイアログで、[ASP.NET MVC 4 Web ロール] を選びます。 右矢印ボタン (>) をクリックして、ソリューションにロールを追加します。
新しいロールの上にマウスを置くと、鉛筆アイコンが表示されます。 このアイコンをクリックして、ロールの名前を変更します。 ロールに「SignalRChat」という名前を付け、[OK] をクリックします。
[新しい ASP.NET MVC 4 プロジェクト] ウィザードで、[インターネット アプリケーション] を選択します。 OK をクリックします。 プロジェクト ウィザードを使って 2 つのプロジェクトを作成します。
- ChatService: このプロジェクトは Windows Azure アプリケーションです。 Azure のロールとその他の構成オプションを定義します。
- SignalRChat: このプロジェクトは ASP.NET MVC 4 プロジェクトです。
SignalR チャット アプリケーションを作成する
チャット アプリケーションを作成するには、チュートリアル SignalR と MVC 4 の概要に関する記事の手順に従います。
NuGet を使って必要なライブラリをインストールします。 [ツール] メニューで、[NuGet パッケージ マネージャー] を選び、[パッケージ マネージャー コンソール] を選びます。 [パッケージ マネージャー コンソール] ウィンドウで、次のコマンドを入力します。
Install-Package -ProjectName SignalRChat Microsoft.AspNet.SignalR
Install-Package -ProjectName SignalRChat Microsoft.AspNet.SignalR.ServiceBus
Windows Azure プロジェクトではなく、ASP.NET MVC プロジェクトにパッケージをインストールするには、-ProjectName オプションを使います。
バックプレーンを構成する
アプリケーションの Global.asax ファイルに、次のコードを追加します。
protected void Application_Start()
{
    string connectionString = "";
    GlobalHost.DependencyResolver.UseServiceBus(connectionString, "Chat");

    RouteTable.Routes.MapHubs();
}
次に、サービス バスの接続文字列を取得する必要があります。 Azure portal で、作成したサービス バス名前空間を選び、[アクセス キー] アイコンをクリックします。

接続文字列をクリップボードにコピーし、それを connectionString 変数に貼り付けます。
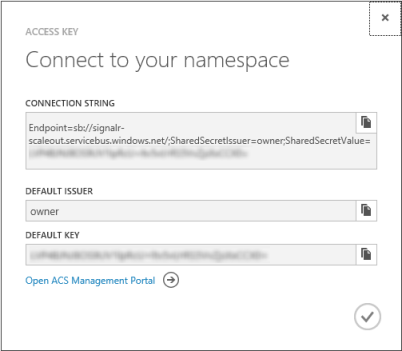
string connectionString = "Endpoint=sb://xxxx.servicebus.windows.net/;
SharedSecretIssuer=owner;SharedSecretValue=XXXXXXXX";
Azure に展開する
ソリューション エクスプローラーで、ChatService プロジェクト内の Roles フォルダーを展開します。
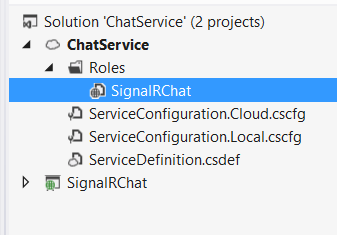
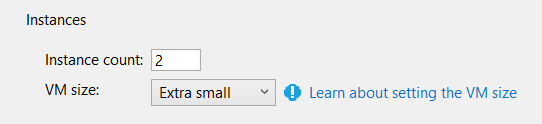
SignalRChat ロールを右クリックし、[プロパティ] を選びます。 [構成] タブを選択します。[インスタンス] で 2 を選びます。 VM サイズを [極小] に設定することもできます。
変更を保存します。
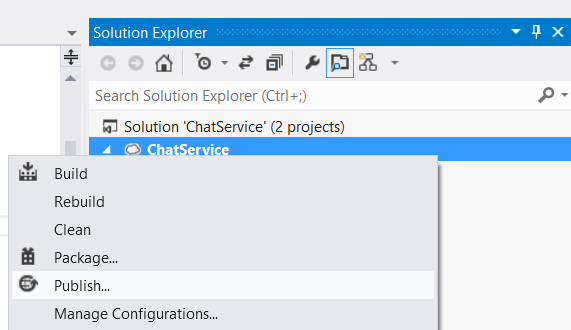
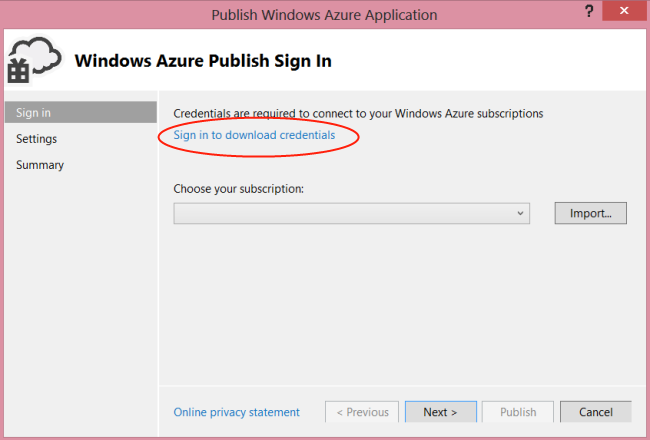
ソリューション エクスプローラーで、ChatService プロジェクトを右クリックします。 公開を選択します。
Windows Azure に初めて発行する場合は、資格情報をダウンロードする必要があります。 [発行] ウィザードで、[サインインして、資格情報をダウンロードする] をクリックします。 これにより、Windows Azure portal にサインインし、発行設定ファイルをダウンロードするよう求められます。
[インポート] をクリックし、ダウンロードした発行設定ファイルを選びます。
次へ をクリックします。 [発行の設定] ダイアログの [クラウド サービス] で、先ほど作成したクラウド サービスを選びます。
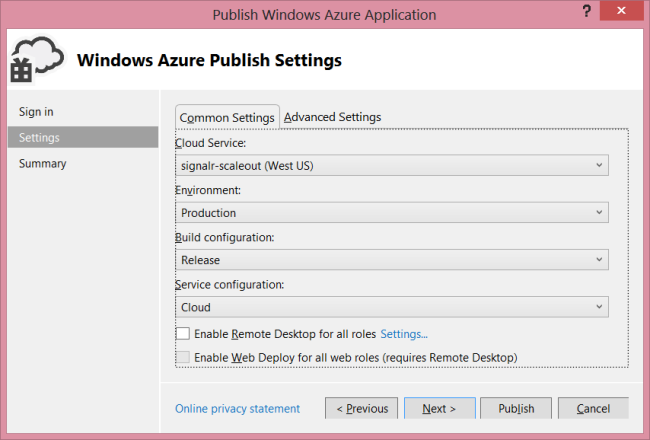
[発行] をクリックします。 アプリケーションをデプロイして VM を起動するには、数分かかる場合があります。
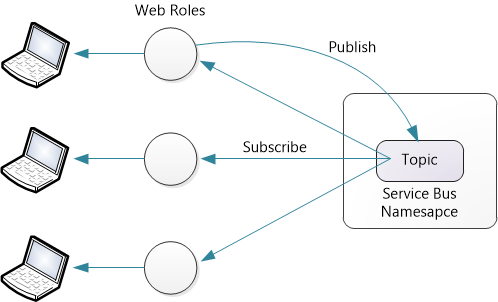
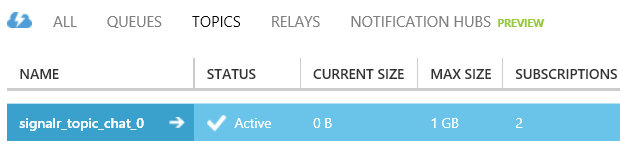
ここでチャット アプリケーションを実行すると、ロール インスタンスは Service Bus トピックを使って Azure Service Bus 経由で通信します。 トピックは、複数のサブスクライバーを許可するメッセージ キューです。
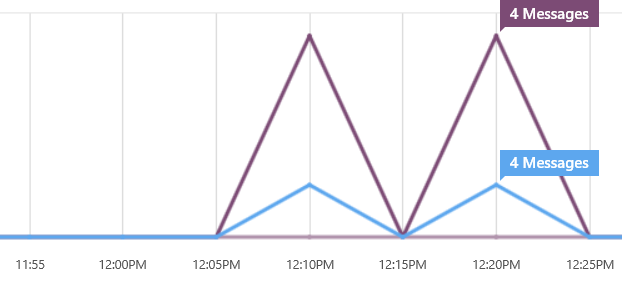
バックプレーンはトピックとサブスクリプションを自動的に作成します。 サブスクリプションとメッセージ アクティビティを確認するには、Azure portal を開き、Service Bus 名前空間を選び、[トピック] をクリックします。
メッセージ アクティビティがダッシュボードに表示されるまでに数分かかります。
SignalR はトピックの有効期間を管理します。 アプリケーションがデプロイされている限り、トピックを手動で削除したり、トピックの設定を変更したりしないでください。
フィードバック
以下は間もなく提供いたします。2024 年を通じて、コンテンツのフィードバック メカニズムとして GitHub の issue を段階的に廃止し、新しいフィードバック システムに置き換えます。 詳細については、「https://aka.ms/ContentUserFeedback」を参照してください。
フィードバックの送信と表示