場所をカードとして表示する
このサンプルは、マニフェストを使用して Web テンプレートを拡張し、カード形式で Web ページに場所を表示する方法を示します。
Web テンプレート コンポートを作成して場所を表示する方法
ステップ 1: 準備
- 環境に一致する列 (名前、アドレス、リンク) を持つテーブルを作成します。
- テーブルの論理名をコピーします。
- 新しいテーブルにサンプル レコードをいくつか作成します。
ステップ 2: Web テンプレートの設定
ソース コードを環境内の新しい Web テンプレートにコピーします。 詳細については、Web テンプレート コンポーネントを作成する方法を参照してください。
{% fetchxml locationsQuery %}
  <fetch mapping='logical' output-format='xml-platform'>
    <entity name='cr50f_place'>
      <attribute name='cr50f_name' />
      <attribute name='cr50f_address' />
      <attribute name='cr50f_link' />
    </entity>
  </fetch>
{% endfetchxml %}

<h2>{{ name | default: 'Cards' }}</h2>

{% assign place_count = count | integer %}
{% assign column_count = columns | integer %}

<ul style="list-style:none" class="grid">
  {% for loc in locationsQuery.results.entities limit: place_count %}
    <li class="col-md-{{ 12 | divided_by: column_count }}">
      <div class="panel panel-default">
        <div class="panel-heading">
          <h3>{{ loc.cr50f_name }}</h3>
        </div>
        <div class="panel-body">
          <p>{{ loc.cr50f_address }}</p>
        </div>
        {% if footer == 'true' and loc.cr50f_link %}
          <div class="panel-footer">
            <a href="{{loc.cr50f_link}}">Learn more about {{ loc.cr50f_name }}</a>
          </div>
        {% endif %}
      </div>
    </li>
  {% endfor %}
</ul>
{% manifest %}
  {
  "type": "Functional",
              "displayName": "Cards",
              "description": "Custom card component using the table 'Place' as the data source",
              "tables": [
                "cr50f_place"
              ],
              "params": [
                {
                  "id": "name",
                  "displayName": "Title",
                  "description": "Let's give it a title"
                },
                {
                  "id": "count",
                  "displayName": "Count",
                  "description": "No. of items"
                },
                {
                  "id": "columns",
                  "displayName": "# of Columns",
                  "description": "less than 12"
                },
                {
                  "id": "footer",
                  "displayName": "Footer",
                  "description": "Show the footer of the cards"
                }
              ]
          }
{% endmanifest %}
cr50f のすべてのインスタンスを新しいテーブルのスキーマ名に置き換えます。 これにより、fetchXML プロパティと、HTML および
{% manifest %}全体が処理されます。
ステップ 3: Web テンプレートの使用
- 新しい Web テンプレートをページのページ コピーに追加します。たとえば、Visual Studio Code for the Web を使用して、
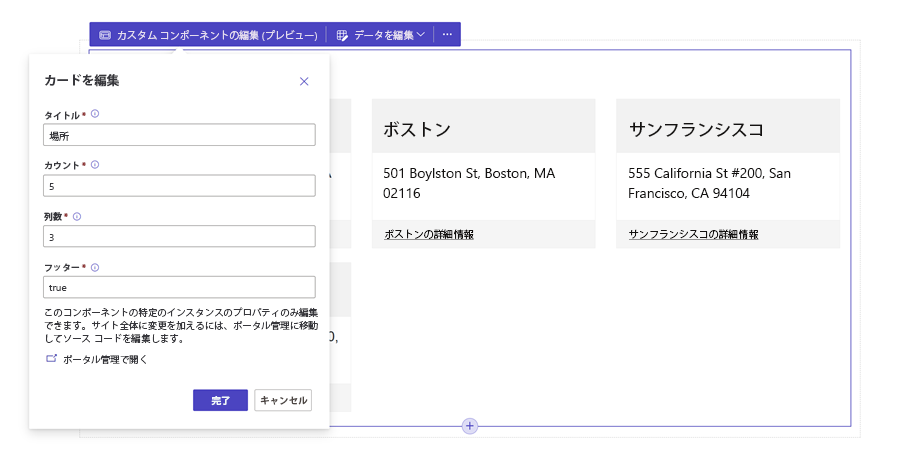
{% include 'Cards' %}を追加します。 - デザイン スタジオで Web テンプレートのプロパティを編集および構成します。
- 必要に応じてさまざまな Web ページ間でコンポーネントを再利用し、前の手順を繰り返して、要件に基づいて表示を構成します。
- データの編集を選択して、新しく作成したテーブルのレコードを更新します。