Create a coded UI test to test a UWP app
Applies to: ![]() Visual Studio
Visual Studio ![]() Visual Studio for Mac
Visual Studio for Mac
Note
This article applies to Visual Studio 2017. If you're looking for the latest Visual Studio documentation, see Visual Studio documentation. We recommend upgrading to the latest version of Visual Studio. Download it here
This article explains how to create a coded UI test for a Universal Windows Platform (UWP) app.
Note
Coded UI Test for automated UI-driven functional testing is deprecated. Visual Studio 2019 is the last version where Coded UI Test will be fully available. We recommend using Playwright for testing web apps and Appium with WinAppDriver for testing desktop and UWP apps. Consider Xamarin.UITest for testing iOS and Android apps using the NUnit test framework. To reduce the impact on users some minimum support will still be available in Visual Studio 2022 Preview 4 or later.
Create a UWP app to test
The first step is to create a simple UWP app to run the test against.
In Visual Studio, create a new project using the Blank App (Universal Windows) template for Visual C# or Visual Basic.
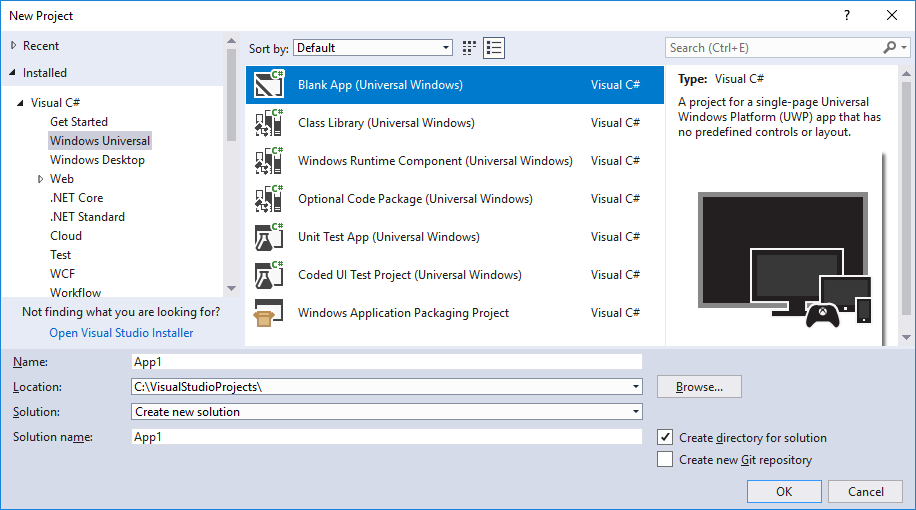
In the New Universal Windows Platform Project dialog, select OK to accept the default platform versions.
From Solution Explorer, open MainPage.xaml.
The file opens in the XAML Designer.
Drag a button control and a textbox control from Toolbox to the design surface.

Give names to the controls. Select the textbox control, and then in the Properties window, enter textBox in the Name field. Select the button control, and then in the Properties window, enter button in the Name field.
Double-click the button control and add the following code to the body of the
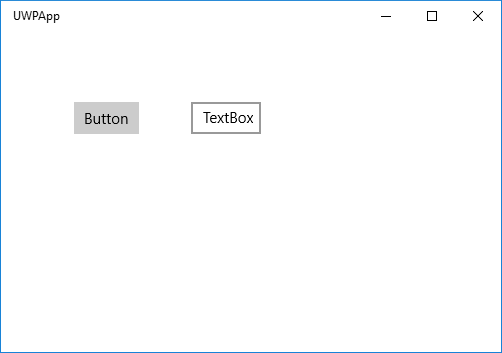
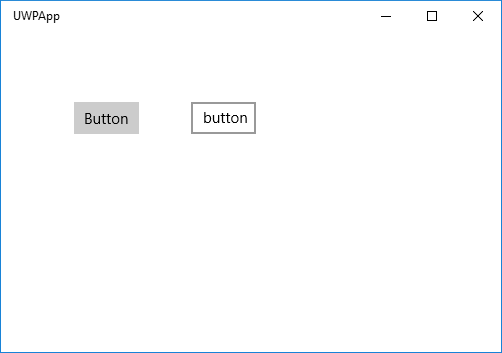
Button_Clickmethod. This code simply sets the text in the textbox to the name of the button control, just to give us something to verify with the coded UI test we'll create later.this.textBox.Text = this.button.Name;Me.textBox.Text = Me.button.NamePress Ctrl+F5 to run the app. You should see something like the following:
Create a coded UI test
To add a test project to the solution, right-click on the solution in Solution Explorer and choose Add > New Project.
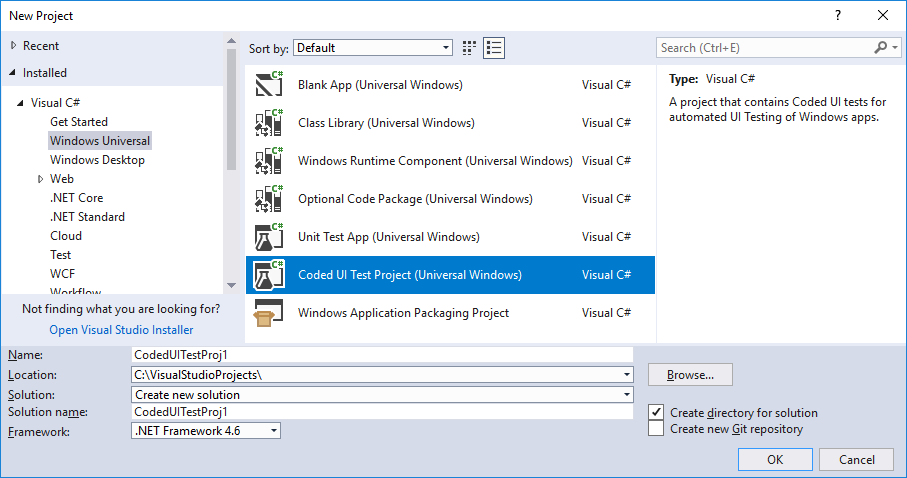
Search for and select the Coded UI Test Project (Universal Windows) template.
Note
If you don't see the Coded UI Test Project (Universal Windows) template, you need to install the coded UI test component.
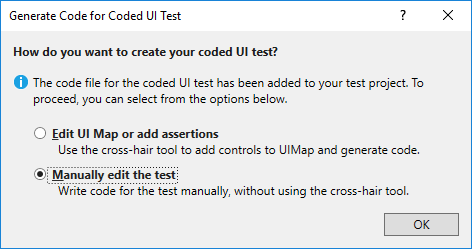
In the Generate Code for Coded UI Test dialog, select Manually edit the test.
If your UWP app is not already running, start it by pressing Ctrl+F5.
Open the Coded UI Test Builder dialog by placing the cursor in the
CodedUITestMethod1method and then choosing Test > Generate Code for Coded UI Test > Use Coded UI Test Builder.Add the controls to the UI control map. Use the Coded UI Test Builder cross-hair tool to select the button control in the UWP app. In the Add Assertions dialog, expand the UI Control Map pane if necessary, and then select Add control to UI Control Map.
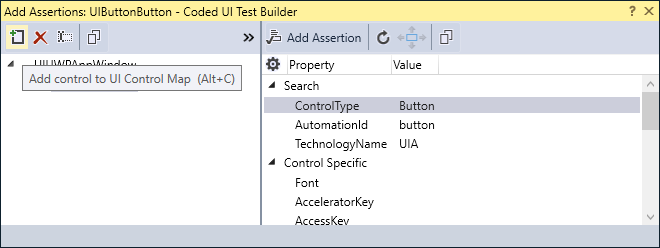
Repeat the previous step to add the textbox control to the UI control map.
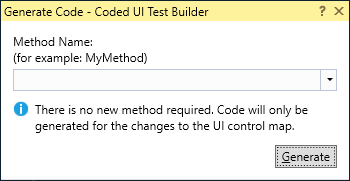
In the Coded UI Test Builder dialog, select Generate Code or press Ctrl+G. Then select Generate to create code for changes to the UI control map.
To verify that the text in the textbox changes to button when the button is clicked, click the button.
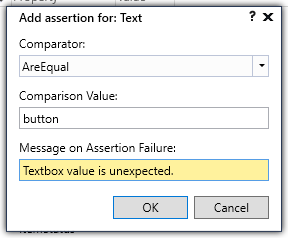
Add an assertion to verify the text in the textbox control. Use the cross-hair tool to select the textbox control, and then select the Text property in the Add Assertions dialog. Then, select Add Assertion or press Alt+A. In the Message on Assertion Failure box, enter Textbox value is unexpected. and then select OK.
Generate test code for the assertion. In the Coded UI Test Builder dialog, select Generate Code. In the Generate Code dialog, select Add and Generate.
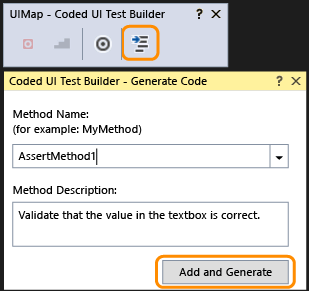
In Solution Explorer, open UIMap.Designer.cs to view the added code for the assert method and the controls.
Tip
If you're using Visual Basic,open CodedUITest1.vb. Then, in the
CodedUITestMethod1()test method code, right-click on the call to the assert methodMe.UIMap.AssertMethod1()and choose Go To Definition. UIMap.Designer.vb opens in the code editor, and you can view the added code for the assert method and the controls.Warning
Do not modify the UIMap.designer.cs or UIMap.Designer.vb files directly. If you do, your changes will be overwritten when the test is generated.
The assert method looks like this:
public void AssertMethod1()
{
    #region Variable Declarations
    XamlEdit uITextBoxEdit = this.UIUWPAppWindow.UITextBoxEdit;
    #endregion

    // Verify that the 'Text' property of 'textBox' text box equals 'button'
    Assert.AreEqual(this.AssertMethod1ExpectedValues.UITextBoxEditText, uITextBoxEdit.Text, "Textbox value is unexpected.");
}
Public Sub AssertMethod1() Dim uITextBoxEdit As XamlEdit = Me.UIApp2Window.UITextBoxEdit 'Verify that the 'Text' property of 'textBox' text box equals 'button' Assert.AreEqual(Me.AssertMethod1ExpectedValues.UITextBoxEditText, uITextBoxEdit.Text, "Textbox value is unexpected.") End SubNext, we need to obtain the AutomationId of the UWP app that we want to test. Open the Windows Start menu to see the tile for the app. Then, drag the cross-hair tool
 from the Coded UI Test Builder dialog to the tile for your app. When a blue box surrounds the tile, release your mouse.
The Add Assertions dialog box opens and displays the AutomationId for your app. Right-click AutomationId and choose Copy Value to Clipboard.
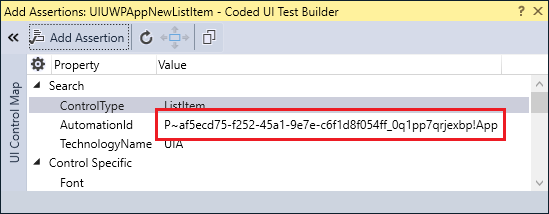
Add code to the test method to launch the UWP app. In Solution Explorer, open CodedUITest1.cs or CodedUITest1.vb. Above the call to
AssertMethod1, add code to launch the UWP app:XamlWindow.Launch("af5ecd75-f252-45a1-9e7e-c6f1d8f054ff_0q1pp7qrjexbp!App")XamlWindow myAppWindow = XamlWindow.Launch("af5ecd75-f252-45a1-9e7e-c6f1d8f054ff_0q1pp7qrjexbp!App");Replace the automation ID in the example code with the value you copied to the clipboard in the previous step.
Important
Trim the beginning of the automation ID to remove characters such as P~. If you don't trim these characters, the test throws a
Microsoft.VisualStudio.TestTools.UITest.Extension.PlaybackFailureExceptionwhen it tries to launch the app.Next, add code to the test method to click the button. On the line after
XamlWindow.Launch, add a gesture to tap the button control:Gesture.Tap(this.UIMap.UIUWPAppWindow.UIButtonButton);Gesture.Tap(Me.UIMap.UIUWPAppWindow.UIButtonButton)After adding the code, the complete
CodedUITestMethod1test method should appear as follows:[TestMethod] public void CodedUITestMethod1() { XamlWindow.Launch("af5ecd75-f252-45a1-9e7e-c6f1d8f054ff_0q1pp7qrjexbp!App"); Gesture.Tap(this.UIMap.UIUWPAppWindow.UIButtonButton); // To generate code for this test, select "Generate Code for Coded UI Test" from the shortcut menu and select one of the menu items. this.UIMap.AssertMethod1(); }<CodedUITest(CodedUITestType.WindowsStore)> Public Class CodedUITest1 <TestMethod()> Public Sub CodedUITestMethod1() ' Launch the app. XamlWindow.Launch("af5ecd75-f252-45a1-9e7e-c6f1d8f054ff_0q1pp7qrjexbp!App") '// Tap the button. Gesture.Tap(Me.UIMap.UIUWPAppWindow.UIButtonButton) Me.UIMap.AssertMethod1() End SubBuild the test project, and then open Test Explorer by selecting Test > Windows > Test Explorer.
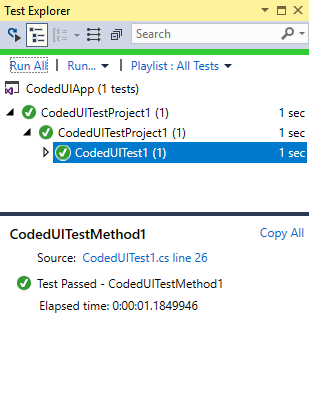
Select Run All to run the test.
The app opens, the button is tapped, and the textbox's Text property is populated. The assert method validates the textbox's Text property.
After the test completes, Test Explorer displays that the test passed.
Q & A
Q: Why don't I see the option to record my coded UI test in the Generate Code for a Coded UI Test dialog?
A: The option to record is not supported for UWP apps.
Q: Can I create a coded UI test for my UWP apps based on WinJS?
A: No, only XAML-based apps are supported.
Q: Why can't I modify the code in the UIMap.Designer file?
A: Any code changes you make in the UIMapDesigner.cs file are overwritten every time you generate code using the Coded UI Test Builder. If you have to modify a recorded method, copy it to the UIMap.cs file and rename it. The UIMap.cs file can be used to override methods and properties in the UIMapDesigner.cs file. Remove the reference to the original method in the CodedUITest.cs file and replace it with the renamed method name.