Xamarin での tvOS テーブル ビューの操作
この記事では、Xamarin.tvOS アプリ内でのテーブル ビューとテーブル ビュー コントローラーの設計と操作方法について説明します。
tvOS では、テーブル ビューは、必要に応じてグループまたはセクションに編成できる、スクロール可能な行をまとめた 1 つの列として表示されます。 テーブル ビューを使用する必要があるのは、ユーザーに大量のデータをわかりやすく効果的に示す必要がある場合です。
テーブル ビューは通常、分割ビューの片側にナビゲーションとして表示され、選択した項目の詳細が反対側に表示されます。

テーブル ビューについて
UITableView は、スクロール可能な行をまとめた単一の列を、階層型の情報のリストとして表示します。これは、必要に応じてグループまたはセクションに編成できます。

Apple では、テーブルの使用に関して次のように提案しています。
- 幅に注意する - テーブルの幅を正しいバランスで調整してみてください。 テーブルが広すぎると、離れた場所からは読み取りにくくなり、使用できるコンテンツ領域が狭くなる可能性があります。 テーブルが狭すぎると、情報が途切れたり、折り返される可能性があります。この場合も、室内の離れた場所からは読み取りにくくなる場合があります。
- テーブルの内容をすばやく表示する - データのリストが長い場合は、コンテンツをゆっくり読み込み、テーブルがユーザーに見えたらすぐに情報の表示を開始します。 テーブルの読み込みに時間がかかりすぎると、ユーザーがアプリに関心を持たなくなったり、ロックされたと思われる可能性があります。
- コンテンツの読み込みに時間がかかることをユーザーに伝える - テーブルの読み込みにどうしても時間がかかる場合は、進行状況バーやアクティビティ インジケーターを示して、アプリがロックされているのではないことを伝えます。
テーブル ビュー セルのタイプ
UITableViewCell は、テーブル ビュー内の個々のデータ行を表すために使用されます。 Apple は、いくつかの既定のタイプのテーブル セルを定義しています。
- Default - このタイプは、セルの左側にオプション イメージを表示し、右側に左揃えのタイトルを表示します。
- Subtitle - このタイプは、1 行目に左揃えのタイトルを表示し、次の行に、左揃えのサブタイトルを上より小さい文字で表示します。
- Value 1 - このタイプは、左揃えのタイトルを表示し、より明るい色の右揃えのサブタイトルを同じ行に表示します。
- Value 2 - このタイプは、右揃えのタイトルを表示し、より明るい色の左揃えのサブタイトルを同じ行に表示します。
既定のテーブル ビュー セルのすべてのタイプは、ディスクロージャー インジケーターやチェック マークなどのグラフィカル要素もサポートしています。
さらに、カスタムのテーブル ビュー セルのタイプを定義し、プロトタイプ セルを表示できます。これは、Interface Designer またはコードを使用して作成します。
Apple では、テーブル ビュー セルの使用に関して次のように提案しています。
- テキストが途切れないようにする - テキストの個々の行を短くして、途切れないようにします。 途切れている単語や語句は、室内の離れた場所からは読み取りにくくなります。
- フォーカスされた行の状態を考慮する - 行がフォーカスされると、角が丸くなって少し大きく表示されるため、セルの外観をすべての状態でテストする必要があります。 画像やテキストは、フォーカスされた状態になると、途切れたり、正しく見えなくなったりすることがあります。
- テーブル編集はなるべく使用しない - テーブル行の移動や削除は、iOS よりも tvOS の方が時間がかかります。 この機能を tvOS アプリに追加するかどうかは慎重に決める必要があります。
- 必要に応じてカスタム セルのタイプを作成する - 多くの場合、組み込みのテーブル ビュー セルのタイプで十分対応できますが、標準とは異なる情報の場合は、より細かく制御したり、より適切に情報をユーザーに提示するため、カスタム セル タイプを作成することを検討してください。
テーブル ビューの操作
Xamarin.tvOS アプリでテーブル ビューを操作する最も簡単な方法は、Interface Designer で外観を作成し、変更することです。
使用を開始するには、以下を実行します。
Visual Studio for Mac で、新しい tvOS アプリ プロジェクトを開始し、 [tvOS]>[App]>[Single View App] を選択し、[Next] ボタンをクリックします。

アプリの名前を入力し、[Next] をクリックします。

[Project Name] と [Solution Name] を調整するか、既定値をそのまま使用し、[Create] ボタンをクリックして新しいソリューションを作成します。
![[プロジェクト名] と [ソリューション名]](table-views-images/table04.png)
Solution Pad で
Main.storyboardファイルをダブルクリックし、iOS Designer で開きます。
既定のビュー コントローラーを選択して削除します。
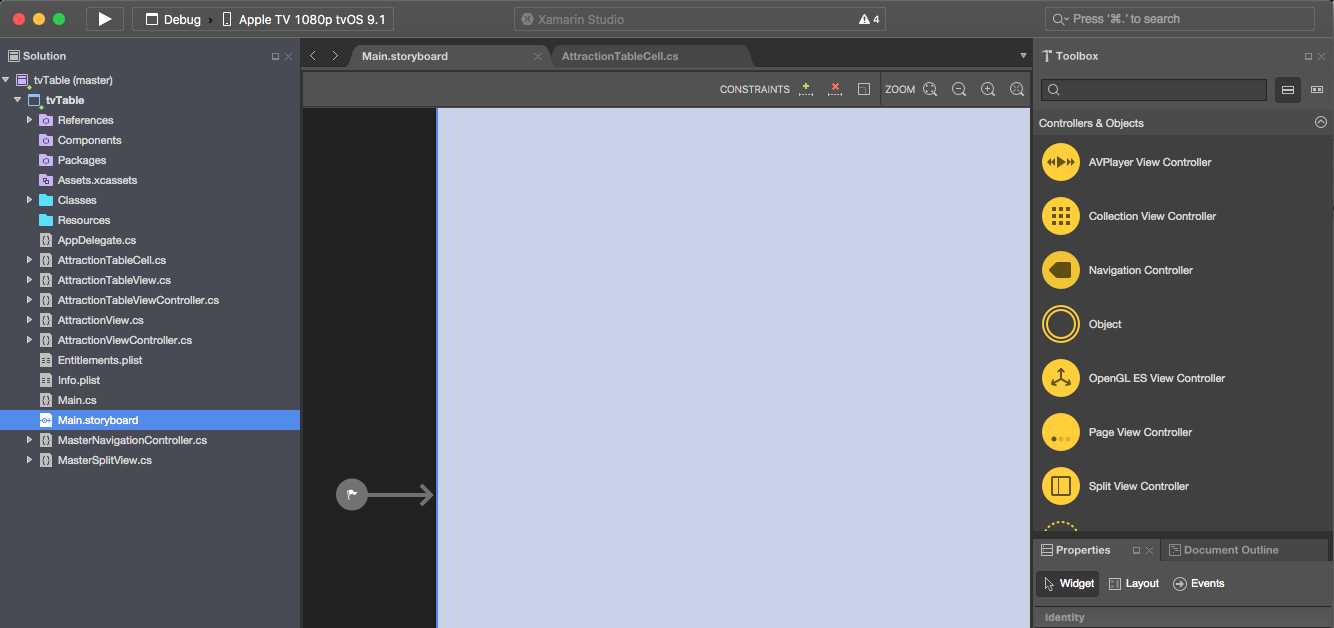
ツールボックスから分割ビュー コントローラーを選択し、デザイン サーフェイスにドラッグします。
既定では、分割ビューの左側にナビゲーション ビュー コントローラーとテーブル ビュー コントローラー、右側にビュー コントローラーが表示されます。 これは、Apple が推奨する、tvOS でのテーブル ビューの使用方法です。

後で C# コードでアクセスできるようにするため、テーブル ビューのすべての部分を選択し、プロパティ エクスプローラーの [Widget] タブでカスタムのクラス名を割り当てる必要があります。 たとえば、テーブル ビュー コントローラーは次のようになります。

カスタム クラスは、テーブル ビュー コントローラー、テーブル ビュー、プロトタイプ セルについて作成してください。 Visual Studio for Mac では、カスタム クラスが作成されると、プロジェクト ツリーに追加されます。
次に、デザイン サーフェイスでテーブル ビューを選択し、必要に応じてプロパティを調整します。 たとえば、プロトタイプ セルの数やスタイル (プレーンまたはグループ化) などです。
![[ウィジェット] タブ](table-views-images/table11.png)
各プロトタイプ セルについて選択し、プロパティ エクスプローラーの [Widget] タブで、一意の識別子を割り当てます。 この手順はきわめて重要です。この識別子は後でテーブルに入力するときに必要になります。 例:
AttrCell![[ウィジェット] タブ](table-views-images/table12.png)
[Style] ドロップダウンから既定のテーブル ビュー セルのタイプの 1 つとしてセルを表示するように選択したり、カスタムに設定し、デザイン サーフェイスを使用して、ツールボックスから他の UI ウィジェットをドラッグしてセルをレイアウトしたりすることもできます。

後で C# コードでアクセスできるようにするため、プロパティ エクスプローラーの [Widget] タブで、プロトタイプ セル デザインの各 UI 要素に一意の名前を割り当てます。

テーブル ビューのすべてのプロトタイプ セルについて、上記の手順を繰り返します。
次に、カスタム クラスを UI デザインの残りの部分に割り当て、詳細ビューをレイアウトし、詳細ビューの各 UI 要素に一意の名前を割り当てて、C# でもアクセスできるようにします。 例:

変更をストーリーボードに保存します。


![[プロジェクト名] と [ソリューション名]](table-views-images/table04.png#lightbox)


![[ウィジェット] タブ](table-views-images/table11.png#lightbox)
![[ウィジェット] タブ](table-views-images/table12.png#lightbox)


![クラス名を割り当てるプロパティ エクスプローラーの [ウィジェット] タブ。](table-views-images/table09-vs.png#lightbox)

![必要に応じてプロパティを変更できる [ウィジェット] タブ。](table-views-images/table11-vs.png#lightbox)

![[スタイル] ドロップダウン](table-views-images/table13-vs.png#lightbox)
![各 U I 要素の名前を割り当てることができまる [ウィジェット] タブ。](table-views-images/table14-vs.png#lightbox)
データ モデルの設計
テーブル ビューで表示される情報を操作しやすくし、詳細情報の表示を容易にするには (ユーザーがテーブル ビューで行を選択または強調表示する場合)、表示される情報のデータ モデルとして機能するカスタム クラスを作成します。
旅行予約アプリの例を見てみましょう。このアプリには都市の一覧があり、各都市には独自の観光名所一覧が含まれていて、ユーザーが選択できるようになっています。 ユーザーは観光名所をお気に入りとしてマークし、観光名所へのアクセス方法を入手し、その都市へのフライト予約を選択できます。
観光名所のデータ モデルを作成するには、Solution Pad でプロジェクト名を右クリックし、[Add]>[New File...] を選択します。[Name] に「AttractionInformation」と入力し、[New] ボタンをクリックします。
![[名前] に「AttractionInformation」と入力する](table-views-images/data01.png#lightbox)
![[クラス] を選んで、[名前] に「AttractionInformation」と入力する](table-views-images/data01-vs.png#lightbox)
AttractionInformation.cs ファイルを編集して、次のようにします。
using System;
using Foundation;

namespace tvTable
{
    public class AttractionInformation : NSObject
    {
        #region Computed Properties
        public CityInformation City { get; set;}
        public string Name { get; set;}
        public string Description { get; set;}
        public string ImageName { get; set;}
        public bool IsFavorite { get; set;}
        public bool AddDirections { get; set;}
        #endregion

        #region Constructors
        public AttractionInformation (string name, string description, string imageName)
        {
            // Initialize
            this.Name = name;
            this.Description = description;
            this.ImageName = imageName;
        }
        #endregion
    }
}
このクラスは、指定した観光名所に関する情報を格納するプロパティを提供します。
次に、Solution Pad のプロジェクト名をもう一度右クリックし、[Add]>[New File...] を選択します。[Name] に「CityInformation」と入力し、[New] ボタンをクリックします。
![[名前] に「CityInformation」と入力する](table-views-images/data02.png#lightbox)
![[名前] に「CityInformation」と入力する](table-views-images/data02-vs.png#lightbox)
CityInformation.cs ファイルを編集して、次のようにします。
using System;
using System.Collections.Generic;
using Foundation;

namespace tvTable
{
    public class CityInformation : NSObject
    {
        #region Computed Properties
        public string Name { get; set; }
        public List<AttractionInformation> Attractions { get; set;}
        public bool FlightBooked { get; set;}
        #endregion

        #region Constructors
        public CityInformation (string name)
        {
            // Initialize
            this.Name = name;
            this.Attractions = new List<AttractionInformation> ();
        }
        #endregion

        #region Public Methods
        public void AddAttraction (AttractionInformation attraction)
        {
            // Mark as belonging to this city
            attraction.City = this;

            // Add to collection
            Attractions.Add (attraction);
        }

        public void AddAttraction (string name, string description, string imageName)
        {
            // Create attraction
            var attraction = new AttractionInformation (name, description, imageName);

            // Mark as belonging to this city
            attraction.City = this;

            // Add to collection
            Attractions.Add (attraction);
        }
        #endregion
    }
}
このクラスは、目的地の都市に関するすべての情報と、その都市の観光名所のコレクションを保持し、都市に観光名所を追加しやすくするための 2 つのヘルパー メソッド (AddAttraction) を提供します。
テーブル ビューのデータ ソース
各テーブル ビューには、テーブルのデータを提供し、テーブル ビューに必要な行を必要に応じて生成するためのデータ ソース (UITableViewDataSource) が必要です。
上記の例では、ソリューション エクスプローラーのプロジェクト名を右クリックし、[Add]>[New File...] を選択して AttractionTableDatasource を呼び出し、[New] ボタンをクリックして作成します。 次に、AttractionTableDatasource.cs ファイルを編集して、次のようにします。
using System;
using System.Collections.Generic;
using UIKit;

namespace tvTable
{
    public class AttractionTableDatasource : UITableViewDataSource
    {
        #region Constants
        const string CellID = "AttrCell";
        #endregion

        #region Computed Properties
        public AttractionTableViewController Controller { get; set;}
        public List<CityInformation> Cities { get; set;}
        #endregion

        #region Constructors
        public AttractionTableDatasource (AttractionTableViewController controller)
        {
            // Initialize
            this.Controller = controller;
            this.Cities = new List<CityInformation> ();
            PopulateCities ();
        }
        #endregion

        #region Public Methods
        public void PopulateCities ()
        {
            // Clear existing
            Cities.Clear ();

            // Define cities and attractions
            var Paris = new CityInformation ("Paris");
            Paris.AddAttraction ("Eiffel Tower", "Is a wrought iron lattice tower on the Champ de Mars in Paris, France.", "EiffelTower");
            Paris.AddAttraction ("Musée du Louvre", "is one of the world's largest museums and a historic monument in Paris, France.", "Louvre");
            Paris.AddAttraction ("Moulin Rouge", "French for 'Red Mill', is a cabaret in Paris, France.", "MoulinRouge");
            Paris.AddAttraction ("La Seine", "Is a 777-kilometre long river and an important commercial waterway within the Paris Basin.", "RiverSeine");
            Cities.Add (Paris);

            var SanFran = new CityInformation ("San Francisco");
            SanFran.AddAttraction ("Alcatraz Island", "Is located in the San Francisco Bay, 1.25 miles (2.01 km) offshore from San Francisco.", "Alcatraz");
            SanFran.AddAttraction ("Golden Gate Bridge", "Is a suspension bridge spanning the Golden Gate strait between San Francisco Bay and the Pacific Ocean", "GoldenGateBridge");
            SanFran.AddAttraction ("San Francisco", "Is the cultural, commercial, and financial center of Northern California.", "SanFrancisco");
            SanFran.AddAttraction ("Telegraph Hill", "Is primarily a residential area, much quieter than adjoining North Beach.", "TelegraphHill");
            Cities.Add (SanFran);

            var Houston = new CityInformation ("Houston");
            Houston.AddAttraction ("City Hall", "It was constructed in 1938-1939, and is located in Downtown Houston.", "CityHall");
            Houston.AddAttraction ("Houston", "Is the most populous city in Texas and the fourth most populous city in the US.", "Houston");
            Houston.AddAttraction ("Texas Longhorn", "Is a breed of cattle known for its characteristic horns, which can extend to over 6 ft.", "LonghornCattle");
            Houston.AddAttraction ("Saturn V Rocket", "was an American human-rated expendable rocket used by NASA between 1966 and 1973.", "Rocket");
            Cities.Add (Houston);
        }
        #endregion

        #region Override Methods
        public override UITableViewCell GetCell (UITableView tableView, Foundation.NSIndexPath indexPath)
        {
            // Get cell
            var cell = tableView.DequeueReusableCell (CellID) as AttractionTableCell;

            // Populate cell
            cell.Attraction = Cities [indexPath.Section].Attractions [indexPath.Row];

            // Return new cell
            return cell;
        }

        public override nint NumberOfSections (UITableView tableView)
        {
            // Return number of cities
            return Cities.Count;
        }

        public override nint RowsInSection (UITableView tableView, nint section)
        {
            // Return the number of attractions in the given city
            return Cities [(int)section].Attractions.Count;
        }

        public override string TitleForHeader (UITableView tableView, nint section)
        {
            // Get the name of the current city
            return Cities [(int)section].Name;
        }
        #endregion
    }
}
クラスのいくつかのセクションを詳しく見てみましょう。
まず、プロトタイプ セルの一意の識別子を保持する定数を定義し (これは上記の Interface Designer で割り当てられた識別子と同じ)、テーブル ビュー コントローラーにショートカットを追加し、データ用のストレージを作成しました。
const string CellID = "AttrCell";
public AttractionTableViewController Controller { get; set;}
public List<CityInformation> Cities { get; set;}
次に、テーブル ビュー コントローラーを保存し、クラスの作成時に (上記で定義したデータ モデルを使用して) データ ソースをビルドして設定します。
public AttractionTableDatasource (AttractionTableViewController controller)
{
    // Initialize
    this.Controller = controller;
    this.Cities = new List<CityInformation> ();
    PopulateCities ();
}
この例では、PopulateCities メソッドは単にデータ モデル オブジェクトをメモリに作成しますが、実際のアプリでは、これらはデータベースまたは Web サービスから簡単に読み取れる可能性があります。
public void PopulateCities ()
{
    // Clear existing
    Cities.Clear ();

    // Define cities and attractions
    var Paris = new CityInformation ("Paris");
    Paris.AddAttraction ("Eiffel Tower", "Is a wrought iron lattice tower on the Champ de Mars in Paris, France.", "EiffelTower");
    ...
}
NumberOfSections メソッドは、テーブル内のセクション数を返します。
public override nint NumberOfSections (UITableView tableView)
{
    // Return number of cities
    return Cities.Count;
}
プレーン スタイルのテーブル ビューの場合は、常に 1 を返します。
RowsInSection メソッドは、現在のセクションの行数を返します。
public override nint RowsInSection (UITableView tableView, nint section)
{
    // Return the number of attractions in the given city
    return Cities [(int)section].Attractions.Count;
}
ここでも、プレーン テーブル ビューの場合は、データ ソース内のアイテムの合計数を返します。
TitleForHeader メソッドは、指定したセクションのタイトルを返します。
public override string TitleForHeader (UITableView tableView, nint section)
{
    // Get the name of the current city
    return Cities [(int)section].Name;
}
プレーン テーブル ビュー タイプの場合は、タイトルを空白のまま ("") にします。
最後に、テーブル ビューから要求されたら、GetCell メソッドを使用して、プロトタイプ セルを作成して設定します。
public override UITableViewCell GetCell (UITableView tableView, Foundation.NSIndexPath indexPath)
{
    // Get cell
    var cell = tableView.DequeueReusableCell (CellID) as AttractionTableCell;

    // Populate cell
    cell.Attraction = Cities [indexPath.Section].Attractions [indexPath.Row];

    // Return new cell
    return cell;
}
UITableViewDatasource の操作の詳細については、Apple の UITableViewDatasource のドキュメントを参照してください。
テーブル ビュー デリゲート
各テーブル ビューでは、テーブルでのユーザー操作またはその他のシステム イベントに応答するためのデリゲート (UITableViewDelegate) が必要です。
上記の例では、ソリューション エクスプローラーのプロジェクト名を右クリックし、[Add]>[New File...] を選択して AttractionTableDelegate を呼び出し、[New] ボタンをクリックして作成します。 次に、AttractionTableDelegate.cs ファイルを編集して、次のようにします。
using System;
using System.Collections.Generic;
using UIKit;

namespace tvTable
{
    public class AttractionTableDelegate : UITableViewDelegate
    {
        #region Computed Properties
        public AttractionTableViewController Controller { get; set;}
        #endregion

        #region Constructors
        public AttractionTableDelegate (AttractionTableViewController controller)
        {
            // Initializw
            this.Controller = controller;
        }
        #endregion

        #region Override Methods
        public override void RowSelected (UITableView tableView, Foundation.NSIndexPath indexPath)
        {
            var attraction = Controller.Datasource.Cities [indexPath.Section].Attractions [indexPath.Row];
            attraction.IsFavorite = (!attraction.IsFavorite);

            // Update UI
            Controller.TableView.ReloadData ();
        }

        public override bool CanFocusRow (UITableView tableView, Foundation.NSIndexPath indexPath)
        {
            // Inform caller of highlight change
            RaiseAttractionHighlighted (Controller.Datasource.Cities [indexPath.Section].Attractions [indexPath.Row]);
            return true;
        }
        #endregion

        #region Events
        public delegate void AttractionHighlightedDelegate (AttractionInformation attraction);
        public event AttractionHighlightedDelegate AttractionHighlighted;

        internal void RaiseAttractionHighlighted (AttractionInformation attraction)
        {
            // Inform caller
            if (this.AttractionHighlighted != null) this.AttractionHighlighted (attraction);
        }
        #endregion
    }
}
このクラスのいくつかのセクションを詳しく見てみましょう。
まず、クラスの作成時にテーブル ビュー コントローラーへのショートカットを作成します。
public AttractionTableViewController Controller { get; set;}
...

public AttractionTableDelegate (AttractionTableViewController controller)
{
    // Initialize
    this.Controller = controller;
}
次に、行が選択 (ユーザーが Apple Remote の Touch Surface をクリック) されたら、選択した行が表す観光名所をお気に入りとしてマークします。
public override void RowSelected (UITableView tableView, Foundation.NSIndexPath indexPath)
{
    var attraction = Controller.Datasource.Cities [indexPath.Section].Attractions [indexPath.Row];
    attraction.IsFavorite = (!attraction.IsFavorite);

    // Update UI
    Controller.TableView.ReloadData ();
}
次に、ユーザーが行を強調表示 (Apple Remote の Touch Surface を使用してフォーカス) したら、分割ビュー コントローラーの [Details] セクションに、その行が表す観光名所の詳細を表示します。
public override bool CanFocusRow (UITableView tableView, Foundation.NSIndexPath indexPath)
{
    // Inform caller of highlight change
    RaiseAttractionHighlighted (Controller.Datasource.Cities [indexPath.Section].Attractions [indexPath.Row]);
    return true;
}
...

public delegate void AttractionHighlightedDelegate (AttractionInformation attraction);
public event AttractionHighlightedDelegate AttractionHighlighted;

internal void RaiseAttractionHighlighted (AttractionInformation attraction)
{
    // Inform caller
    if (this.AttractionHighlighted != null) this.AttractionHighlighted (attraction);
}
テーブル ビューでフォーカスを取得しようとしている各行について CanFocusRow メソッドが呼び出されます。 行がフォーカスを取得できたら true を返し、それ以外の場合は false を返します。 この例では、各行でフォーカスを受け取ると発生する、カスタムの AttractionHighlighted イベントを作成しました。
UITableViewDelegate の操作の詳細については、Apple の UITableViewDelegate のドキュメントを参照してください。
テーブル ビュー セル
Interface Designer のテーブル ビューに追加した各プロトタイプ セルには、新しいセル (行) の作成時にそれを設定することができる、テーブル ビュー セルのカスタム インスタンス (UITableViewCell) も作成しました。
サンプルのアプリでは、AttractionTableCell.cs ファイルをダブルクリックして編集用に開き、次のようにします。
using System;
using Foundation;
using UIKit;

namespace tvTable
{
    public partial class AttractionTableCell : UITableViewCell
    {
        #region Private Variables
        private AttractionInformation _attraction = null;
        #endregion

        #region Computed Properties
        public AttractionInformation Attraction {
            get { return _attraction; }
            set {
                _attraction = value;
                UpdateUI ();
            }
        }
        #endregion

        #region Constructors
        public AttractionTableCell (IntPtr handle) : base (handle)
        {
        }
        #endregion

        #region Private Methods
        private void UpdateUI ()
        {
            // Trap all errors
            try {
                Title.Text = Attraction.Name;
                Favorite.Hidden = (!Attraction.IsFavorite);
            } catch {
                // Since the UI might not be fully loaded, ignore
                // all errors at this point
            }
        }
        #endregion
    }
}
このクラスは、指定した行に表示される、観光名所データ モデル オブジェクト (上で定義した AttractionInformation) のストレージを提供します。
private AttractionInformation _attraction = null;
...

public AttractionInformation Attraction {
    get { return _attraction; }
    set {
        _attraction = value;
        UpdateUI ();
    }
}
UpdateUI メソッドは、必要に応じて UI ウィジェット (Interface Designer でセルのプロトタイプに追加されたもの) を設定します。
private void UpdateUI ()
{
    // Trap all errors
    try {
        Title.Text = Attraction.Name;
        Favorite.Hidden = (!Attraction.IsFavorite);
    } catch {
        // Since the UI might not be fully loaded, ignore
        // all errors at this point
    }
}
UITableViewCell の操作の詳細については、Apple の UITableViewCell のドキュメントを参照してください。
テーブル ビュー コントローラー
テーブル ビュー コントローラー (UITableViewController) は、Interface Designer を使用してストーリーボードに追加されたテーブル ビューを管理します。
サンプルのアプリでは、AttractionTableViewController.cs ファイルをダブルクリックして編集用に開き、次のようにします。
using System;
using Foundation;
using UIKit;

namespace tvTable
{
    public partial class AttractionTableViewController : UITableViewController
    {
        #region Computed Properties
        public AttractionTableDatasource Datasource {
            get { return TableView.DataSource as AttractionTableDatasource; }
        }

        public AttractionTableDelegate TableDelegate {
            get { return TableView.Delegate as AttractionTableDelegate; }
        }
        #endregion

        #region Constructors
        public AttractionTableViewController (IntPtr handle) : base (handle)
        {
        }
        #endregion

        #region Override Methods
        public override void ViewDidLoad ()
        {
            base.ViewDidLoad ();

            // Setup table
            TableView.DataSource = new AttractionTableDatasource (this);
            TableView.Delegate = new AttractionTableDelegate (this);
            TableView.ReloadData ();
        }
        #endregion
    }
}
このクラスを詳しく見てみましょう。 まず、テーブル ビューの DataSource と TableDelegate に簡単にアクセスできるようにショートカットを作成しました。 これらは後で、分割ビューの左側にあるテーブル ビューと右側の詳細ビューの間で通信するために使用します。
最後に、テーブル ビューがメモリに読み込まれたら、AttractionTableDatasource と AttractionTableDelegate のインスタンス (両方とも上で作成) を作成し、テーブル ビューにアタッチします。
UITableViewController の操作の詳細については、Apple の UITableViewController のドキュメントを参照してください。
まとめ
このドキュメントの冒頭で説明したように、テーブル ビューは通常、分割ビューの片側にナビゲーションとして表示され、選択した項目の詳細が反対側に表示されます。 次に例を示します。
これが tvOS の標準的なパターンなので、ここですべてを取り込んだ最後の手順に進み、分割ビューの左側と右側でのやり取りを見てみましょう。
詳細ビュー
上記の旅行アプリの例では、分割ビューの右側に詳細ビューとして表示される標準ビュー コントローラーに対し、カスタム クラス (AttractionViewController) が定義されています。
using System;
using Foundation;
using UIKit;

namespace tvTable
{
    public partial class AttractionViewController : UIViewController
    {
        #region Private Variables
        private AttractionInformation _attraction = null;
        #endregion

        #region Computed Properties
        public AttractionInformation Attraction {
            get { return _attraction; }
            set {
                _attraction = value;
                UpdateUI ();
            }
        }

        public MasterSplitView SplitView { get; set;}
        #endregion

        #region Constructors
        public AttractionViewController (IntPtr handle) : base (handle)
        {
        }
        #endregion

        #region Public Methods
        public void UpdateUI ()
        {
            // Trap all errors
            try {
                City.Text = Attraction.City.Name;
                Title.Text = Attraction.Name;
                SubTitle.Text = Attraction.Description;

                IsFlighBooked.Hidden = (!Attraction.City.FlightBooked);
                IsFavorite.Hidden = (!Attraction.IsFavorite);
                IsDirections.Hidden = (!Attraction.AddDirections);
                BackgroundImage.Image = UIImage.FromBundle (Attraction.ImageName);
                AttractionImage.Image = BackgroundImage.Image;
            } catch {
                // Since the UI might not be fully loaded, ignore
                // all errors at this point
            }
        }
        #endregion

        #region Override Methods
        public override void ViewWillAppear (bool animated)
        {
            base.ViewWillAppear (animated);

            // Ensure the UI Updates
            UpdateUI ();
        }
        #endregion

        #region Actions
        partial void BookFlight (NSObject sender)
        {
            // Ask user to book flight
            AlertViewController.PresentOKCancelAlert ("Book Flight",
                                                      string.Format ("Would you like to book a flight to {0}?", Attraction.City.Name),
                                                      this,
                                                      (ok) => {
                Attraction.City.FlightBooked = ok;
                IsFlighBooked.Hidden = (!Attraction.City.FlightBooked);
            });
        }

        partial void GetDirections (NSObject sender)
        {
            // Ask user to add directions
            AlertViewController.PresentOKCancelAlert ("Add Directions",
                                                     string.Format ("Would you like to add directions to {0} to you itinerary?", Attraction.Name),
                                                     this,
                                                     (ok) => {
                                                         Attraction.AddDirections = ok;
                                                         IsDirections.Hidden = (!Attraction.AddDirections);
                                                     });
        }

        partial void MarkFavorite (NSObject sender)
        {
            // Flip favorite state
            Attraction.IsFavorite = (!Attraction.IsFavorite);
            IsFavorite.Hidden = (!Attraction.IsFavorite);

            // Reload table
            SplitView.Master.TableController.TableView.ReloadData ();
        }
        #endregion
    }
}
ここでは、プロパティとして表示される観光名所 (AttractionInformation) を指定し、Interface Designer のビューに追加された UI ウィジェットを設定する UpdateUI メソッドを作成しました。
また、変更をテーブル ビュー (AcctractionTableView) に伝達するために使用する分割ビュー コントローラー (SplitView) へのショートカットを定義しました。
最後に、Interface Designer で作成された 3 つの UIButton インスタンスにカスタム アクション (イベント) が追加されました。これにより、ユーザーは観光名所をお気に入りとしてマークし、観光名所へのアクセス方法を取得し、指定した都市へのフライト予約を行えます。
ナビゲーション ビュー コントローラー
テーブル ビュー コントローラーは、分割ビューの左側にあるナビゲーション ビュー コントローラーで入れ子になっているため、ナビゲーション ビュー コントローラーには Interface Designer でカスタム クラス (MasterNavigationController) が割り当てられ、次のように定義されています。
using System;
using Foundation;
using UIKit;

namespace tvTable
{
    public partial class MasterNavigationController : UINavigationController
    {
        #region Computed Properties
        public MasterSplitView SplitView { get; set;}
        public AttractionTableViewController TableController {
            get { return TopViewController as AttractionTableViewController; }
        }
        #endregion

        #region Constructors
        public MasterNavigationController (IntPtr handle) : base (handle)
        {
        }
        #endregion
    }
}
繰り返しますが、このクラスは、分割ビュー コントローラーの両側間の通信を容易にするために、いくつかのショートカットを定義するだけです。
SplitView- ナビゲーション ビュー コントローラーが属する分割ビュー コントローラー (MainSpiltViewController) へのリンクです。TableController- ナビゲーション ビュー コントローラーでトップ ビューとして表示されるテーブル ビュー コントローラー (AttractionTableViewController) を取得します。
分割ビュー コントローラー
分割ビュー コントローラーはアプリケーションのベースであるため、Interface Designer でカスタム クラス (MasterSplitViewController) を作成し、次のように定義しました。
using System;
using Foundation;
using UIKit;

namespace tvTable
{
    public partial class MasterSplitView : UISplitViewController
    {
        #region Computed Properties
        public AttractionViewController Details {
            get { return ViewControllers [1] as AttractionViewController; }
        }

        public MasterNavigationController Master {
            get { return ViewControllers [0] as MasterNavigationController; }
        }
        #endregion

        #region Constructors
        public MasterSplitView (IntPtr handle) : base (handle)
        {
        }
        #endregion

        #region Override Methods
        public override void ViewDidLoad ()
        {
            base.ViewDidLoad ();

            // Initialize
            Master.SplitView = this;
            Details.SplitView = this;

            // Wire-up events
            Master.TableController.TableDelegate.AttractionHighlighted += (attraction) => {
                // Display new attraction
                Details.Attraction = attraction;
            };
        }
        #endregion
    }
}
最初に、分割ビューの詳細側 (AttractionViewController) とマスター側 (MasterNavigationController) へのショートカットを作成します。 繰り返しますが、これにより、後で両側間の通信が容易になります。
次に、分割ビューがメモリに読み込まれたら、分割ビューの両側に分割ビュー コントローラーをアタッチし、テーブル ビューの観光名所を強調表示 (AttractionHighlighted) したユーザーに応答して、分割ビューの詳細側に新しい観光名所を表示します。
テーブル ビューの詳細
tvOS は iOS に基づいているため、テーブル ビューとテーブル ビュー コントローラーも同様の方法で設計されており、同様に動作します。 Xamarin アプリでのテーブル ビューの操作の詳細については、iOS のテーブルとセルの操作に関するドキュメントを参照してください。
まとめ
この記事では、Xamarin.tvOS アプリ内でのテーブル ビューの設計と使用について説明しました。 また、tvOS アプリでのテーブル ビューの一般的な使用方法である、分割ビュー内でのテーブル ビューの操作例を紹介しました。