Xamarin.Forms のカルーセル ページ
Xamarin.Forms の CarouselPage は、ギャラリーのように、ユーザーが端から端までスワイプしてコンテンツの各ページをナビゲートできるページです。 この記事では、CarouselPage を使用してページのコレクション内を移動する方法を示します。
重要
CarouselPage は CarouselView に置き換えられています。これにより、ユーザーがスワイプして項目のコレクション内を移動できるスクロール可能なレイアウトが提供されます。 CarouselView の詳細については、「Xamarin.Forms CarouselView」を参照してください。
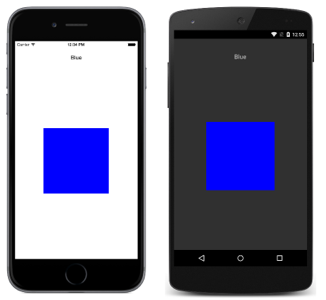
次のスクリーンショットは、各プラットフォームでの CarouselPage を示したものです。

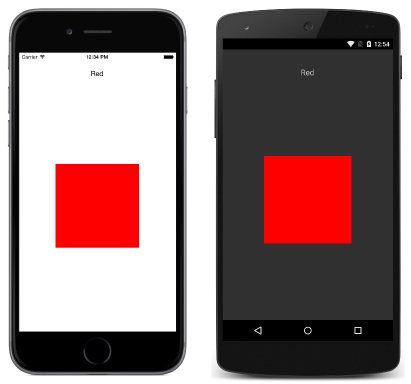
CarouselPage のレイアウトは、どのプラットフォームでも同じです。 右から左にスワイプするとコレクション内のページを前方に移動でき、左から右にスワイプするとコレクション内のページを後方に移動できます。 次のスクリーンショットは、CarouselPage インスタンスの最初のページです。

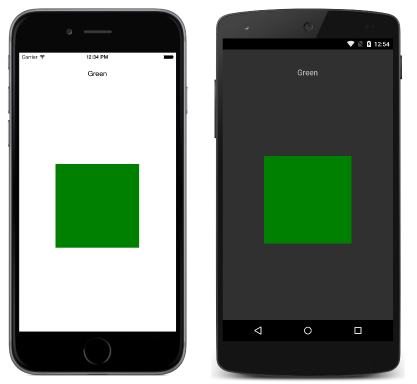
次のスクリーンショットのように、右から左にスワイプすると 2 番目のページに移動します。

もう一度右から左にスワイプすると 3 番目のページに移動し、左から右にスワイプすると前のページに戻ります。
Note
CarouselPage では、UI の仮想化はサポートされていません。 このため、CarouselPage に含まれる子要素が多すぎると、パフォーマンスに影響する可能性があります。
CarouselPage を FlyoutPage の Detail ページに埋め込む場合は、CarouselPage と FlyoutPage の間でジェスチャが競合するのを防ぐため、FlyoutPage.IsGestureEnabled プロパティを false に設定する必要があります。
CarouselPage の詳細については、Charles Petzold 氏著作の Xamarin.Forms ブックの第 25 章を参照してください。
CarouselPage を作成する
CarouselPage を作成するには、次の 2 つの方法を使用することができます。
- 子
ContentPageインスタンスのコレクションをCarouselPageに設定します。 - コレクションを
ItemsSourceプロパティに割り当て、DataTemplateをItemTemplateプロパティに割り当てて、コレクション内のオブジェクトに対するContentPageインスタンスを取得します。
どちらの方法でも、CarouselPage では各ページが順番に表示され、スワイプ操作によって次のページの表示に移動します。
Note
CarouselPage に設定できるのは、ContentPage インスタンスまたは ContentPage 派生クラスだけです。
CarouselPage にページ コレクションを設定する
次の XAML コード例では、3 つの ContentPage インスタンスを表示する CarouselPage を示します。
<CarouselPage xmlns="http://xamarin.com/schemas/2014/forms"
              xmlns:x="http://schemas.microsoft.com/winfx/2009/xaml"
              x:Class="CarouselPageNavigation.MainPage">
    <ContentPage>
        <ContentPage.Padding>
          <OnPlatform x:TypeArguments="Thickness">
              <On Platform="iOS, Android" Value="0,40,0,0" />
          </OnPlatform>
        </ContentPage.Padding>
        <StackLayout>
            <Label Text="Red" FontSize="Medium" HorizontalOptions="Center" />
            <BoxView Color="Red" WidthRequest="200" HeightRequest="200" HorizontalOptions="Center" VerticalOptions="CenterAndExpand" />
        </StackLayout>
    </ContentPage>
    <ContentPage>
        ...
    </ContentPage>
    <ContentPage>
        ...
    </ContentPage>
</CarouselPage>
次に示すのは、C# での同等の UI のコード例です。
public class MainPageCS : CarouselPage
{
    public MainPageCS ()
    {
        Thickness padding;
        switch (Device.RuntimePlatform)
        {
            case Device.iOS:
            case Device.Android:
                padding = new Thickness(0, 40, 0, 0);
                break;
            default:
                padding = new Thickness();
                break;
        }

        var redContentPage = new ContentPage {
            Padding = padding,
            Content = new StackLayout {
                Children = {
                    new Label {
                        Text = "Red",
                        FontSize = Device.GetNamedSize (NamedSize.Medium, typeof(Label)),
                        HorizontalOptions = LayoutOptions.Center
                    },
                    new BoxView {
                        Color = Color.Red,
                        WidthRequest = 200,
                        HeightRequest = 200,
                        HorizontalOptions = LayoutOptions.Center,
                        VerticalOptions = LayoutOptions.CenterAndExpand
                    }
                }
            }
        };
        var greenContentPage = new ContentPage {
            Padding = padding,
            Content = new StackLayout {
                ...
            }
        };
        var blueContentPage = new ContentPage {
            Padding = padding,
            Content = new StackLayout {
                ...
            }
        };

        Children.Add (redContentPage);
        Children.Add (greenContentPage);
        Children.Add (blueContentPage);
    }
}
各 ContentPage では、特定の色に対する Label と、その色の BoxView が単に表示されます。
CarouselPage にテンプレートを設定する
次の XAML コード例は、DataTemplate を ItemTemplate プロパティに割り当てて、コレクション内のオブジェクト用のページを返すことによって、CarouselPage を作成します。
<CarouselPage xmlns="http://xamarin.com/schemas/2014/forms"
              xmlns:x="http://schemas.microsoft.com/winfx/2009/xaml"
              x:Class="CarouselPageNavigation.MainPage">
    <CarouselPage.ItemTemplate>
        <DataTemplate>
            <ContentPage>
                <ContentPage.Padding>
                  <OnPlatform x:TypeArguments="Thickness">
                    <On Platform="iOS, Android" Value="0,40,0,0" />
                  </OnPlatform>
                </ContentPage.Padding>
                <StackLayout>
                    <Label Text="{Binding Name}" FontSize="Medium" HorizontalOptions="Center" />
                    <BoxView Color="{Binding Color}" WidthRequest="200" HeightRequest="200" HorizontalOptions="Center" VerticalOptions="CenterAndExpand" />
                </StackLayout>
            </ContentPage>
        </DataTemplate>
    </CarouselPage.ItemTemplate>
</CarouselPage>
分離コード ファイルのコンストラクターで ItemsSource プロパティを設定することにより、CarouselPage にデータを設定します。
public MainPage ()
{
    ...
    ItemsSource = ColorsDataModel.All;
}
次に示すのは、C# で作成された同等の CarouselPage のコード例です。
public class MainPageCS : CarouselPage
{
    public MainPageCS ()
    {
        Thickness padding;
        switch (Device.RuntimePlatform)
        {
            case Device.iOS:
            case Device.Android:
                padding = new Thickness(0, 40, 0, 0);
                break;
            default:
                padding = new Thickness();
                break;
        }

        ItemTemplate = new DataTemplate (() => {
            var nameLabel = new Label {
                FontSize = Device.GetNamedSize (NamedSize.Medium, typeof(Label)),
                HorizontalOptions = LayoutOptions.Center
            };
            nameLabel.SetBinding (Label.TextProperty, "Name");

            var colorBoxView = new BoxView {
                WidthRequest = 200,
                HeightRequest = 200,
                HorizontalOptions = LayoutOptions.Center,
                VerticalOptions = LayoutOptions.CenterAndExpand
            };
            colorBoxView.SetBinding (BoxView.ColorProperty, "Color");

            return new ContentPage {
                Padding = padding,
                Content = new StackLayout {
                    Children = {
                        nameLabel,
                        colorBoxView
                    }
                }
            };
        });

        ItemsSource = ColorsDataModel.All;
    }
}
各 ContentPage では、特定の色に対する Label と、その色の BoxView が単に表示されます。