VMware HCX のネットワークとコンピューティング プロファイルを構成する
VMware HCX コネクタがオンプレミスでインストールされたら、それを Azure VMware Solution の VMware HCX クラウドにリンクします。 このユニットと次のユニットでは、このタスクに関連する手順について説明します。
サイト ペアとは
最初の手順では、"サイト ペア" を作成します。 サイト ペアにより、移行元と移行先の VMware vSphere 環境全体にわたる VMware の HCX 移行サービスの管理、認証、およびオーケストレーションに必要なネットワーク接続が提供されます。 このシナリオでは、移行元はオンプレミスの VMware vSphere 環境であり、移行先は Azure VMware Solution です。 その他の詳細を次の表に示します。
| コンポーネント | Notes |
|---|---|
| HCX コネクタ (移行元) | - Azure VMware Solution のデプロイ後にオンプレミスの vSphere 環境にデプロイされます。 - Azure VMware Solution との一方向のサイト ペアを作成します。 - Azure VMware Solution への移行を開始します。 |
| HCX クラウド (移行先) | - プライベート クラウドが Azure にデプロイされるときに、Azure VMware Solution でプロビジョニングされます。 - 一般に、VMware HCX サイト ペアの移行先となります。 - VMware HCX クラウドサイトは常にソフトウェアによるデータセンターです。 - ネットワーク スタックのレイヤー 2 でネットワーク拡張機能をサポートします。これはオプションです。 |
サイト ペアを追加する
オンプレミスの vCenter Server にサインインします。
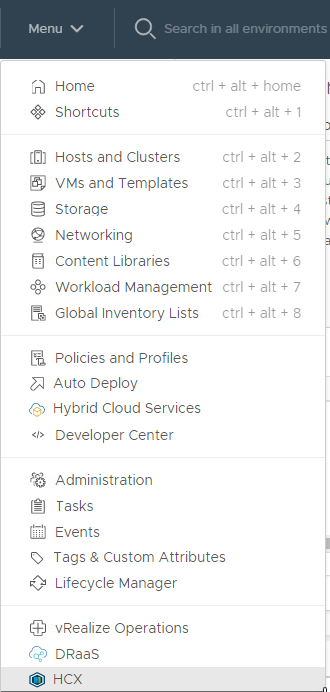
[Menu](メニュー) で [HCX] を選択します。
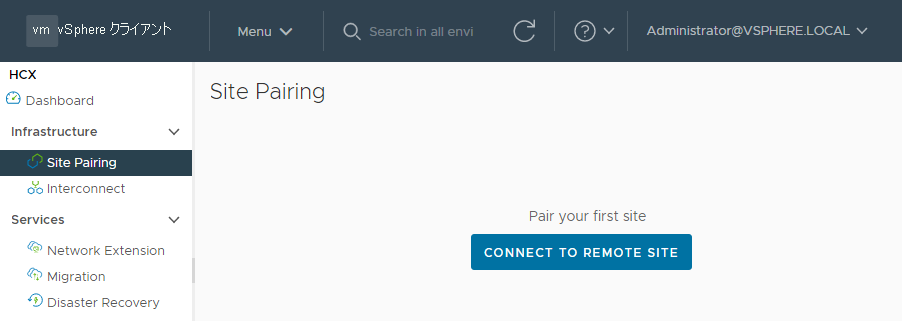
[Infrastructure](インフラストラクチャ) で、[Site Pairing](サイトのペアリング) を選択します。
[Pair your first site](最初のサイトのペアを作成する) で、[Connect To Remote Site](リモート サイトへの接続) を選択します。
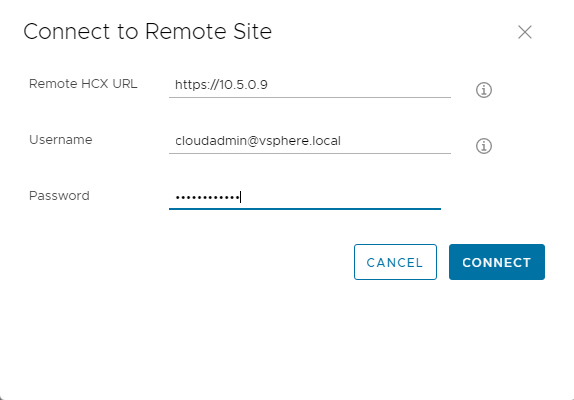
前のユニットで取得した Azure VMware Solution の HCX Cloud Manager の IP アドレスを入力します。
Azure portal からの Azure VMware Solution cloudadmin@vsphere.local のユーザー名とパスワードを入力します。
[接続] を選択します。 証明書の警告のメッセージが表示された場合は、証明書をインポートして続行します。
接続を機能させるには、VMware HCX コネクタからポート 443 経由で VMware HCX Cloud Manager の IP にルーティングする必要があります。 オンプレミスにデプロイした Azure ExpressRoute を使用します。
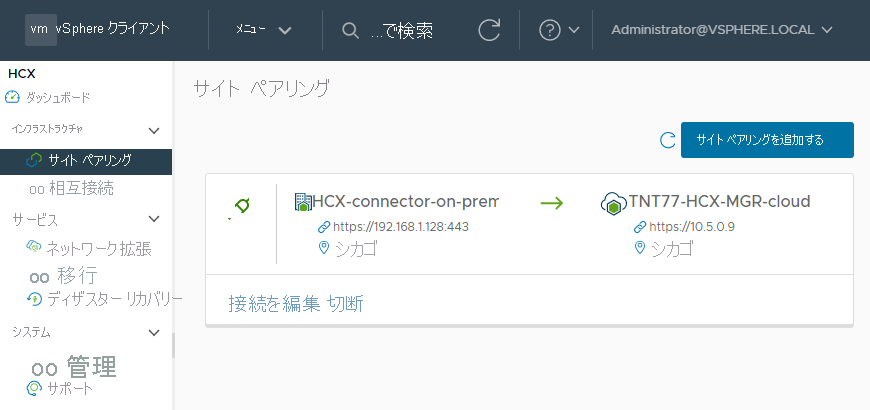
Azure VMware Solution の VMware HCX Cloud Manager とオンプレミスの VMware HCX コネクタが接続 (つまりペアリング) されたことを示す画面が表示されます。
ネットワーク プロファイルを作成する
オンプレミスの VMware HCX コネクタによって、複数の IP セグメントを必要とする自動化仮想アプライアンスのセットがデプロイされます。 まず、ネットワーク プロファイルを構成する必要があります。 これらのネットワーク プロファイルは、VMware HCX での使用を目的としたネットワークごとに作成します。 ネットワーク プロファイルを作成するときに、VMware HCX デプロイの計画段階で特定された IP セグメントを使用します。
オンプレミスの VMware HCX コネクタにサインインします。
4 つのネットワーク プロファイルを作成します。
- 管理
- vMotion
- レプリケーション
- アップリンク
[Infrastructure](インフラストラクチャ) で、[Interconnect](相互接続)>[Multi-Site Service Mesh](マルチサイト サービス メッシュ)>[Network Profiles](ネットワーク プロファイル) を選択します。 次に、[Create Network Profile](ネットワーク プロファイルの作成) を選択します。
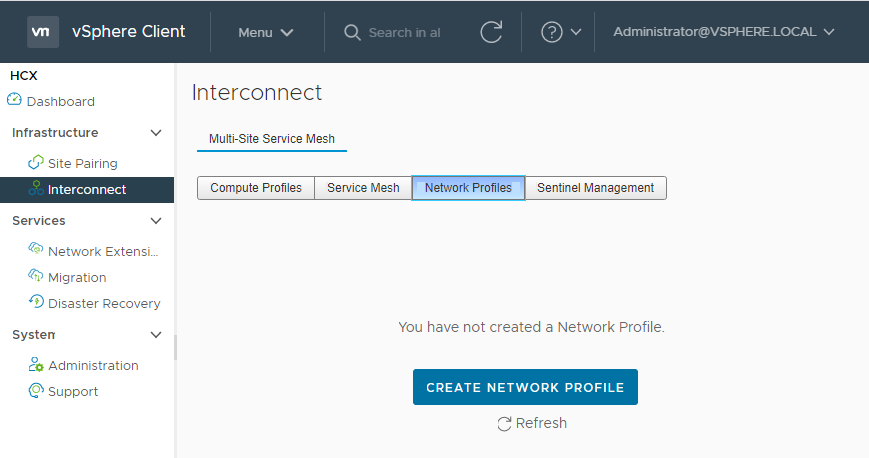
ネットワーク プロファイルごとに、ネットワークとポート グループを選択し、名前を指定して、セグメントの IP プールを作成します。 [作成] を選択します。

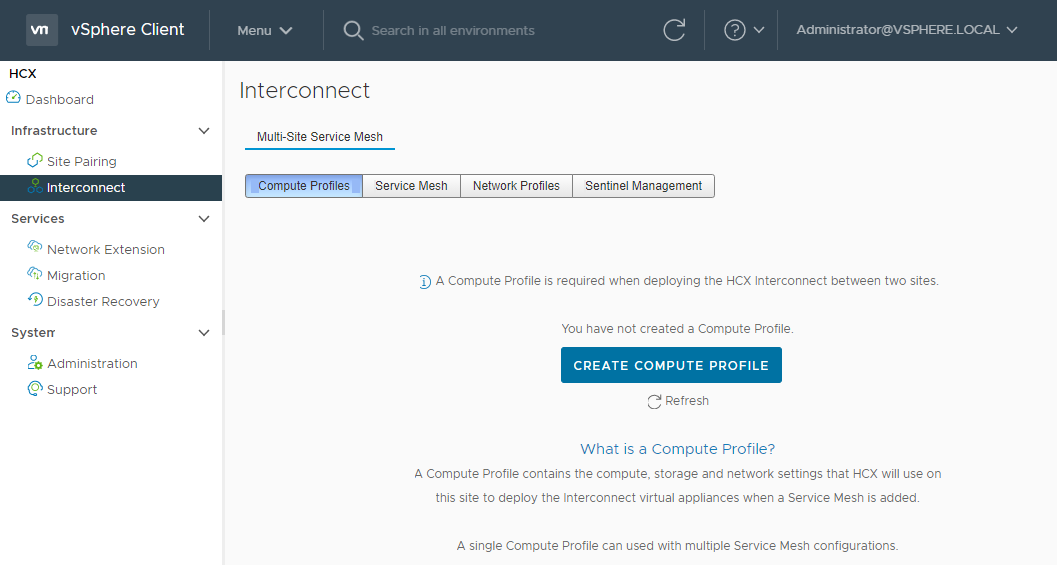
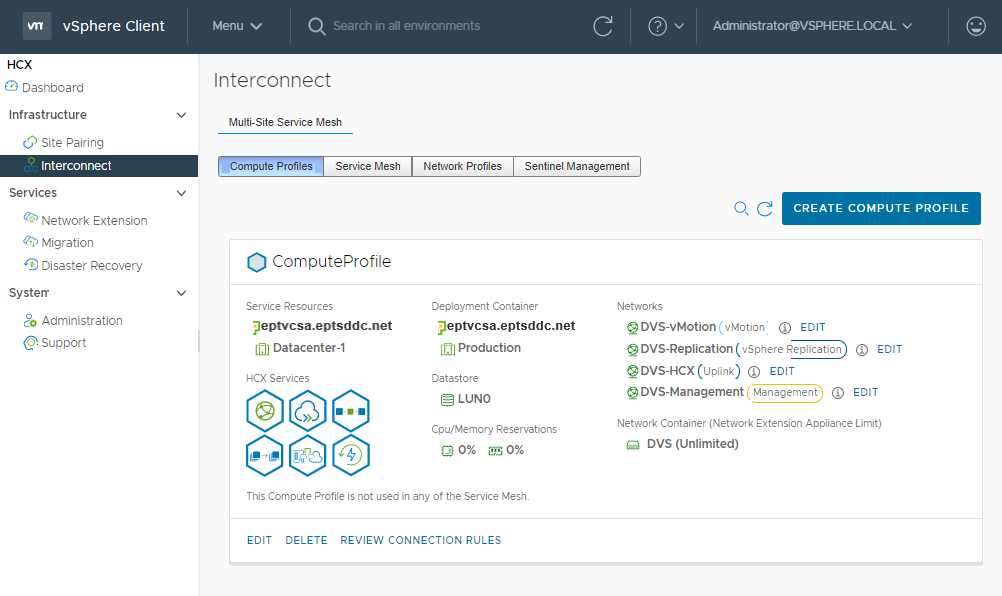
コンピューティング プロファイルを作成する
ネットワーク プロファイルを作成したら、コンピューティング プロファイルを作成する必要があります。 コンピューティング プロファイルには、VMware HCX が "サービス メッシュ" の構成に使用するコンピューティング、ストレージ、およびネットワークの設定が含まれています。 サービス メッシュによって、オンプレミスから Azure VMware Solution への VM 移行が可能になります。
[Infrastructure](インフラストラクチャ) で、 [Interconnect](相互接続)>[Compute Profiles](コンピューティング プロファイル)>[Create Compute Profile](コンピューティング プロファイルの作成) の順に選択します。
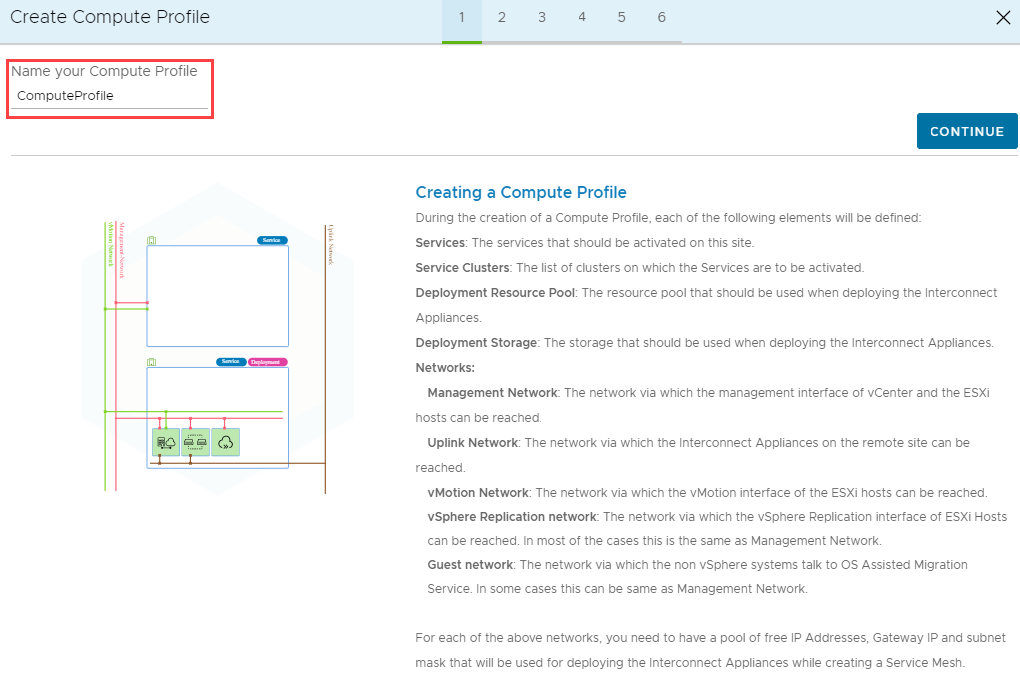
プロファイルの名前を入力し、 [続行] を選択します。
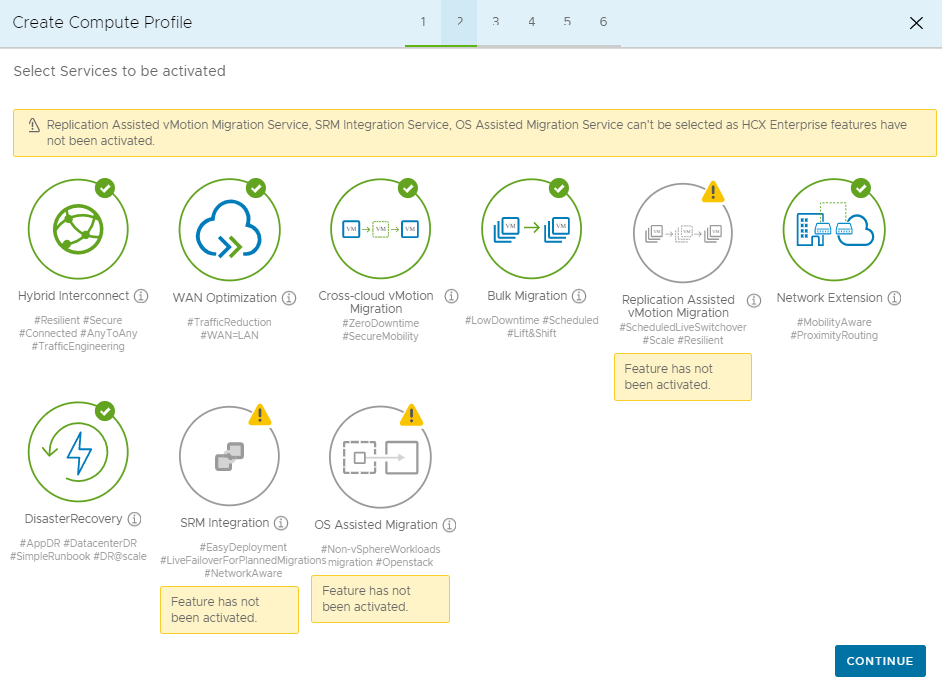
次の画面で、アクティブ化が設定されたサービスを確認できます。 Azure VMware Solution では VMware HCX Enterprise がデプロイされることを思い出してください。 HCX Enterprise が必要な場合は、サポートのチケットを開く必要があります。
HCX Enterprise キーで有効にできるすべての既定のサービスをオンのままにして、[続行] を選択します。
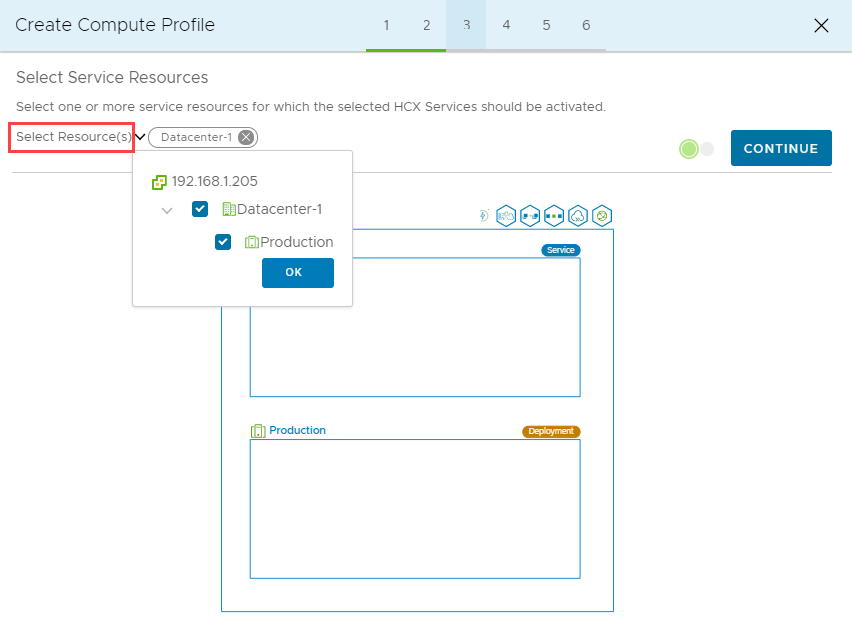
[Select Service Resources](サービス リソースの選択) で、選択した VMware HCX サービスを有効にするためのサービス リソース (クラスター) を 1 つ以上選択します。
オンプレミスのデータセンター内にクラスターが表示されたら、[Continue] (続行) を選びます。
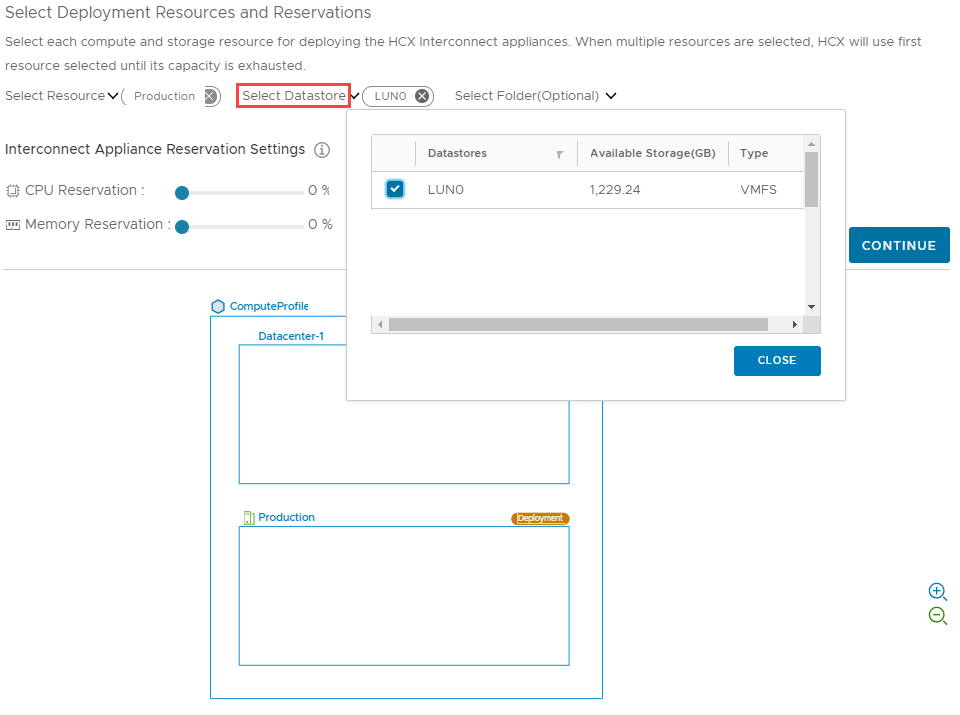
[Select Datastore](データストアの選択) ウィンドウで、VMware HCX インターコネクト アプライアンスをデプロイするためのデータストア ストレージ リソースを選択します。 その後 [続行] を選択します。 複数のリソースを選択すると、VMware HCX では容量が使い果たされるまで、最初に選択されたリソースが使用されることに注意してください。
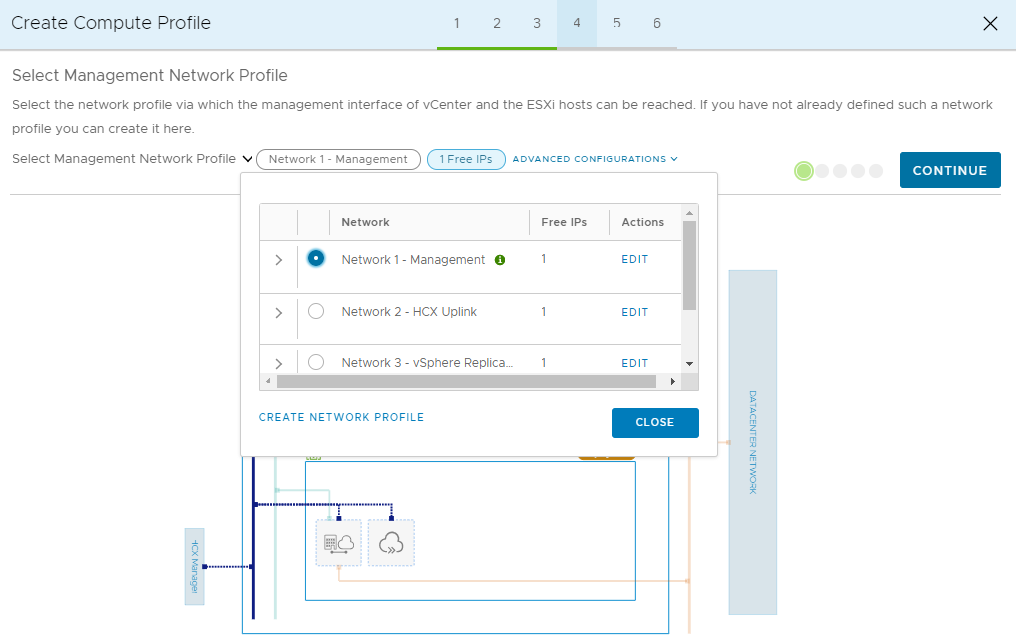
[Select Management Network Profile] (管理ネットワーク プロファイルの選択) ペインで、前の手順で作成した管理ネットワーク プロファイルを選び、[Continue] (続行) を選びます。
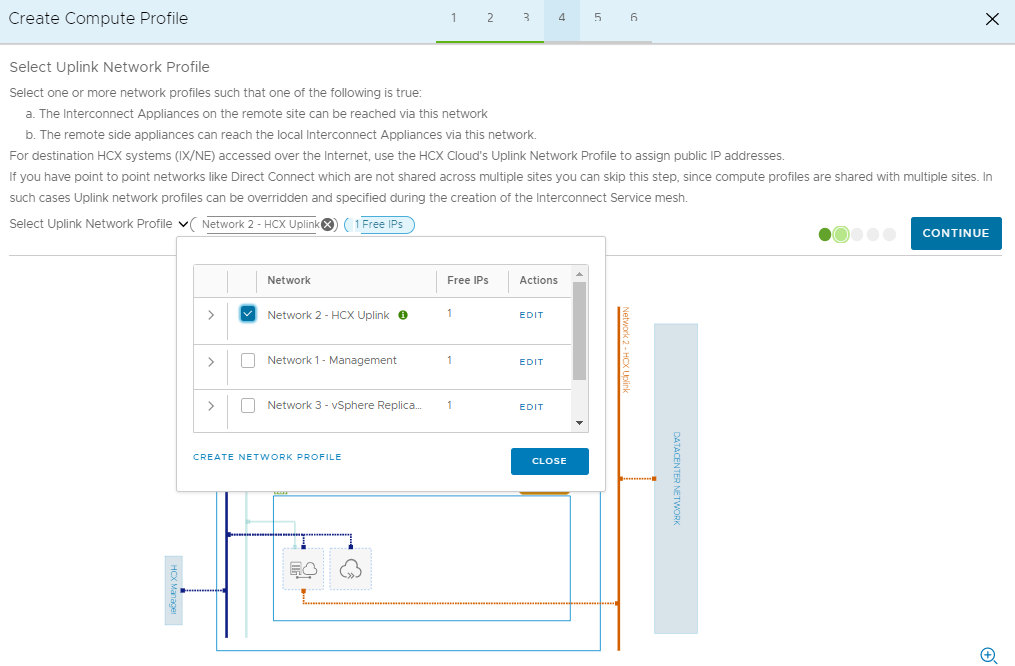
[Select Uplink Network Profile] (アップリンク ネットワーク プロファイルの選択) ペインで、前の手順で作成したアップリンク ネットワーク プロファイルを選び、[Continue] (続行) を選びます。
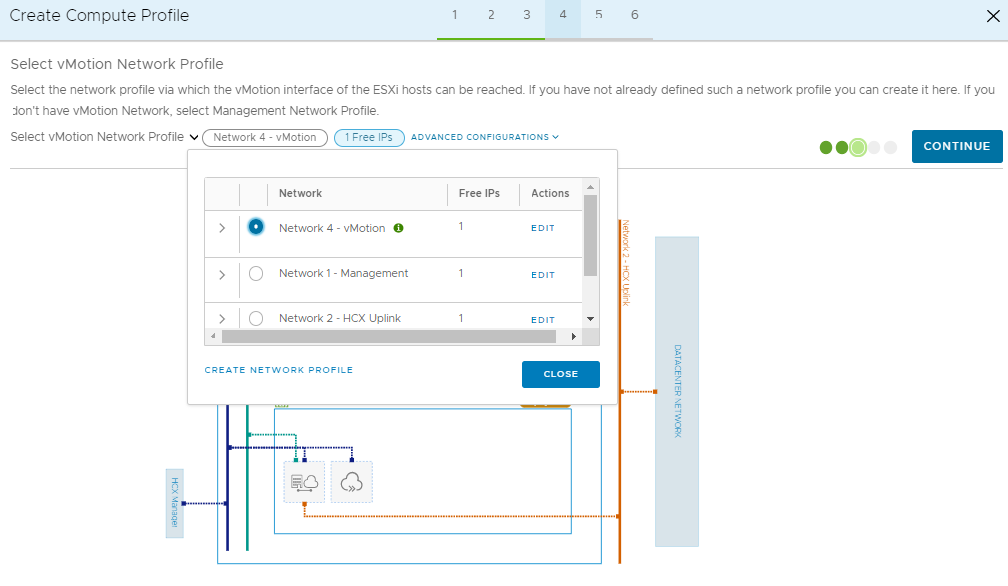
[Select vMotion Network Profile] (vMotion ネットワーク プロファイルの選択) ペインで、前の手順で作成した vMotion ネットワーク プロファイルを選び、[Continue] (続行) を選びます。
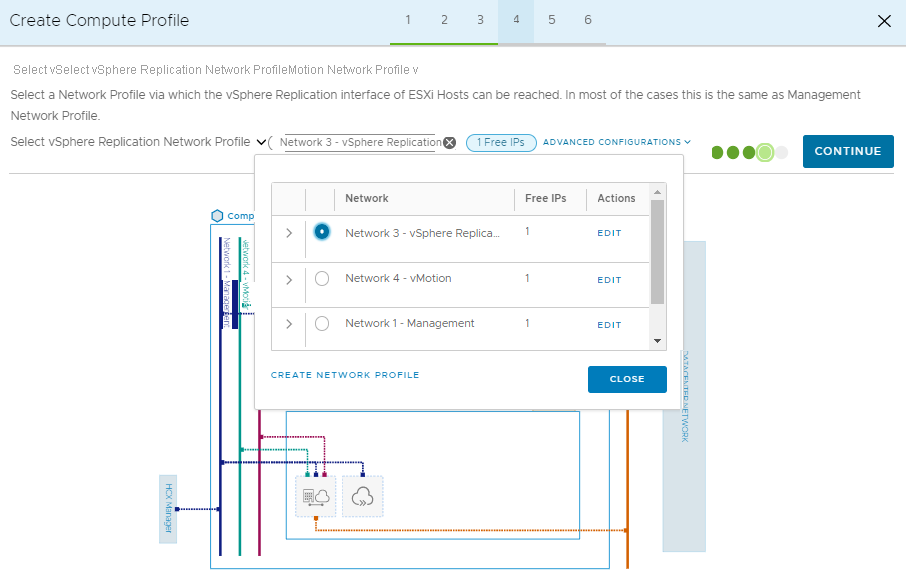
[Select vSphere Replication Network Profile] (vSphere レプリケーション ネットワーク プロファイルの選択) ペインで、前の手順で作成したレプリケーション ネットワーク プロファイルを選び、[Continue] (続行) を選びます。
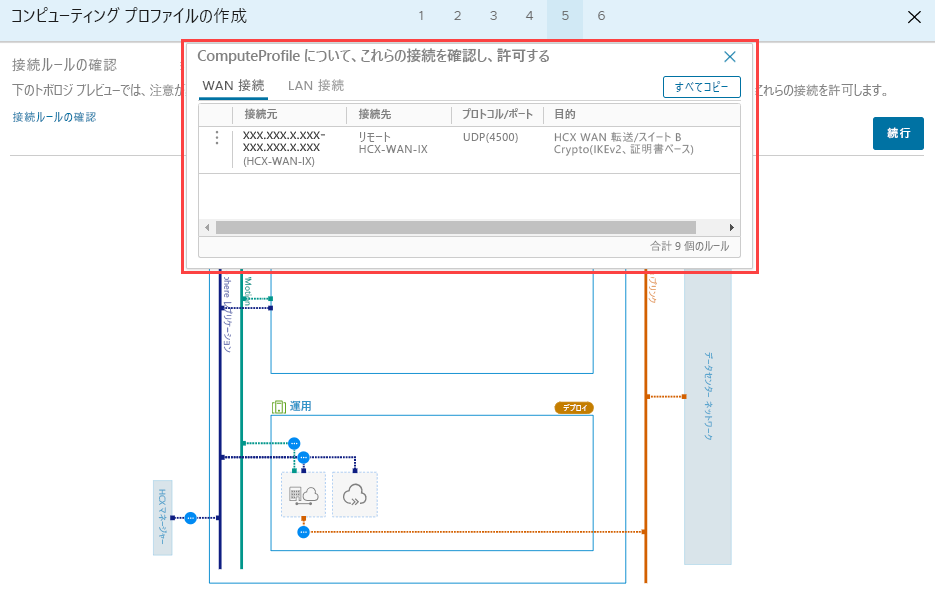
接続ルールを確認し、 [Continue](続行) を選択します。
[Finish](完了) を選択して、コンピューティング プロファイルを作成します。
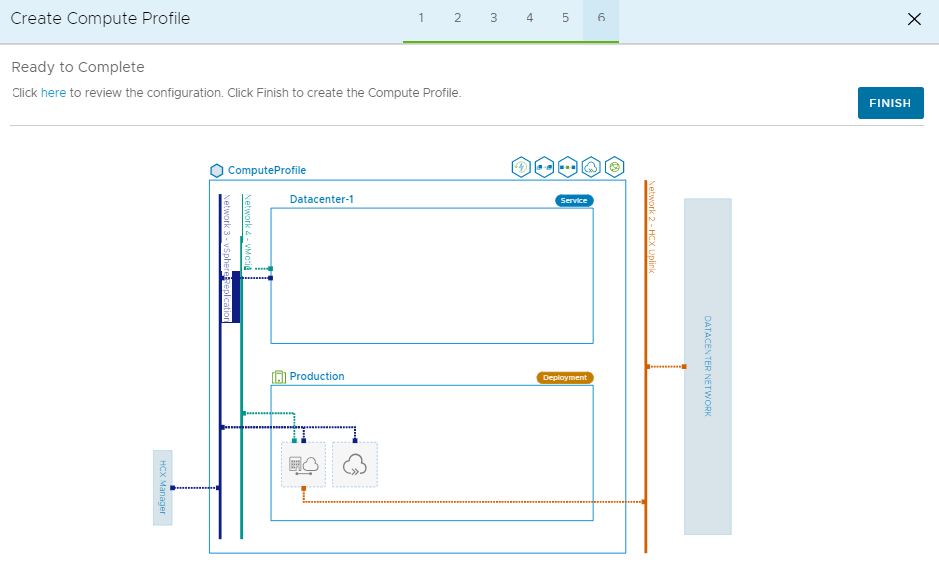
コンピューティング プロファイルの作成が完了すると、コンピューティング プロファイルは [Interconnect](相互接続) の [Compute Profiles](コンピューティング プロファイル) に一覧表示されます。
次のユニットでは、サービス メッシュを設定して VMware HCX コネクタのオンプレミス構成を完了する方法について説明します。