자습서: ARM 템플릿에 출력 추가
이 자습서에서는 ARM 템플릿(Azure Resource Manager 템플릿)에서 값을 반환하는 방법에 대해 알아봅니다. 배포하는 리소스에 대한 값이 필요할 때 출력을 사용합니다. 이 자습서를 완료하는 데 7분이 소요됩니다.
필수 조건
변수에 대한 자습서를 완료하는 것이 좋지만 필수는 아닙니다.
Resource Manager 도구 확장이 있는 Visual Studio Code와 Azure PowerShell 또는 Azure CLI(명령줄 인터페이스)가 있어야 합니다. 자세한 내용은 템플릿 도구를 참조하세요.
템플릿 검토
이전 자습서의 끝 부분에 템플릿에는 다음 JSON이 있습니다.
{
  "$schema": "https://schema.management.azure.com/schemas/2019-04-01/deploymentTemplate.json#",
  "contentVersion": "1.0.0.0",
  "parameters": {
    "storagePrefix": {
      "type": "string",
      "minLength": 3,
      "maxLength": 11
    },
    "storageSKU": {
      "type": "string",
      "defaultValue": "Standard_LRS",
      "allowedValues": [
        "Standard_LRS",
        "Standard_GRS",
        "Standard_RAGRS",
        "Standard_ZRS",
        "Premium_LRS",
        "Premium_ZRS",
        "Standard_GZRS",
        "Standard_RAGZRS"
      ]
    },
    "location": {
      "type": "string",
      "defaultValue": "[resourceGroup().location]"
    }
  },
  "variables": {
    "uniqueStorageName": "[concat(parameters('storagePrefix'), uniqueString(resourceGroup().id))]"
  },
  "resources": [
    {
      "type": "Microsoft.Storage/storageAccounts",
      "apiVersion": "2021-09-01",
      "name": "[variables('uniqueStorageName')]",
      "location": "[parameters('location')]",
      "sku": {
        "name": "[parameters('storageSKU')]"
      },
      "kind": "StorageV2",
      "properties": {
        "supportsHttpsTrafficOnly": true
      }
    }
  ]
}
스토리지 계정을 배포하지만 이에 대한 정보는 반환하지 않습니다. 나중에 참조할 수 있도록 새 리소스에서 속성을 캡처해야 할 수도 있습니다.
출력 추가
출력을 사용하여 템플릿에서 값을 반환할 수 있습니다. 예를 들어 새 스토리지 계정에 대한 엔드포인트를 가져오는 것이 도움이 될 수 있습니다.
다음 예에는 출력 값을 추가하는 템플릿에 대한 변경 사항이 강조 표시되어 있습니다. 전체 파일을 복사하고 템플릿을 해당 콘텐츠로 바꿉니다.
{
"$schema": "https://schema.management.azure.com/schemas/2019-04-01/deploymentTemplate.json#",
"contentVersion": "1.0.0.0",
"parameters": {
"storagePrefix": {
"type": "string",
"minLength": 3,
"maxLength": 11
},
"storageSKU": {
"type": "string",
"defaultValue": "Standard_LRS",
"allowedValues": [
"Standard_LRS",
"Standard_GRS",
"Standard_RAGRS",
"Standard_ZRS",
"Premium_LRS",
"Premium_ZRS",
"Standard_GZRS",
"Standard_RAGZRS"
]
},
"location": {
"type": "string",
"defaultValue": "[resourceGroup().location]"
}
},
"variables": {
"uniqueStorageName": "[concat(parameters('storagePrefix'), uniqueString(resourceGroup().id))]"
},
"resources": [
{
"type": "Microsoft.Storage/storageAccounts",
"apiVersion": "2021-09-01",
"name": "[variables('uniqueStorageName')]",
"location": "[parameters('location')]",
"sku": {
"name": "[parameters('storageSKU')]"
},
"kind": "StorageV2",
"properties": {
"supportsHttpsTrafficOnly": true
}
}
],
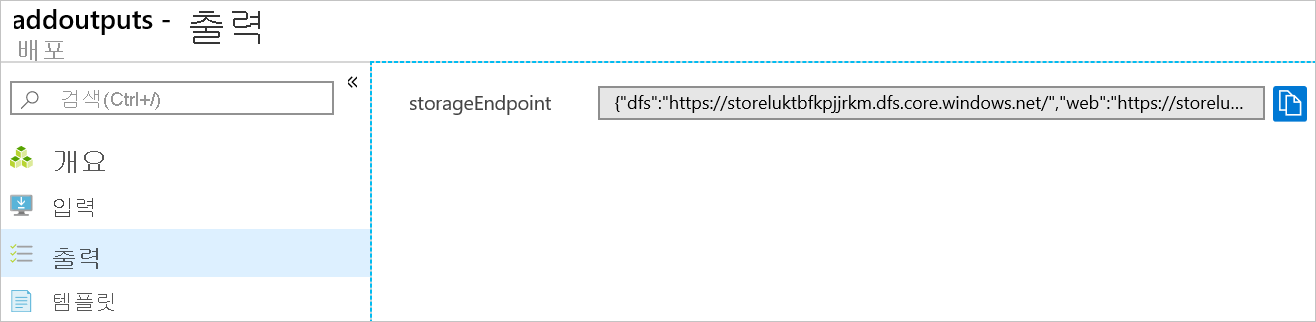
"outputs": {
"storageEndpoint": {
"type": "object",
"value": "[reference(variables('uniqueStorageName')).primaryEndpoints]"
}
}
}
추가한 출력 값과 관련하여 알아두어야 할 몇 가지 중요한 항목이 있습니다.
반환되는 값의 유형은 object로 설정됩니다. 즉, JSON 개체를 반환합니다.
reference 함수를 사용하여 스토리지 계정의 런타임 상태를 가져옵니다. 리소스의 런타임 상태를 가져오려면 리소스의 이름 또는 ID를 전달합니다. 이 경우 스토리지 계정의 이름을 만드는 데 사용한 것과 동일한 변수를 사용합니다.
마지막으로, 스토리지 계정에서 primaryEndpoints 속성을 반환합니다.
템플릿 배포
템플릿을 배포하고 반환되는 값을 확인할 준비가 되었습니다.
리소스 그룹을 만들지 않은 경우 리소스 그룹 만들기를 참조하세요. 이 예제에서는 첫 번째 자습서에 표시된 대로 templateFile 변수를 템플릿 파일의 경로로 설정했다고 가정합니다.
New-AzResourceGroupDeployment `
  -Name addoutputs `
  -ResourceGroupName myResourceGroup `
  -TemplateFile $templateFile `
  -storagePrefix "store" `
  -storageSKU Standard_LRS
배포 명령의 출력에서는 출력이 JSON 형식인 경우에만 다음 예제와 유사한 개체가 표시됩니다.
{
    "dfs": "https://storeluktbfkpjjrkm.dfs.core.windows.net/",
    "web": "https://storeluktbfkpjjrkm.z19.web.core.windows.net/",
    "blob": "https://storeluktbfkpjjrkm.blob.core.windows.net/",
    "queue": "https://storeluktbfkpjjrkm.queue.core.windows.net/",
    "table": "https://storeluktbfkpjjrkm.table.core.windows.net/",
    "file": "https://storeluktbfkpjjrkm.file.core.windows.net/"
}
참고 항목
배포에 실패한 경우 verbose 스위치를 사용하여 생성 중인 리소스에 대한 정보를 가져옵니다. 디버깅에 대한 자세한 정보를 보려면 debug 스위치를 사용합니다.
작업 검토
최근 6개의 자습서에서 많은 작업을 수행했습니다. 잠시 시간을 내어 수행한 작업을 검토해 보겠습니다. 쉽게 제공할 수 있는 매개 변수를 사용하여 템플릿을 만들었습니다. 템플릿은 사용자 지정이 가능하고 필요한 값을 동적으로 만들 수 있으므로 여러 환경에서 재사용할 수 있습니다. 또한 스크립트에서 사용할 수 있는 스토리지 계정에 대한 정보도 반환합니다.
이제 리소스 그룹 및 배포 기록을 살펴보겠습니다.
Azure Portal에 로그인합니다.
왼쪽 메뉴에서 리소스 그룹을 선택합니다.
배포한 리소스 그룹을 선택합니다.
수행한 단계에 따라 리소스 그룹에 하나 이상의 스토리지 계정이 있을 것입니다.
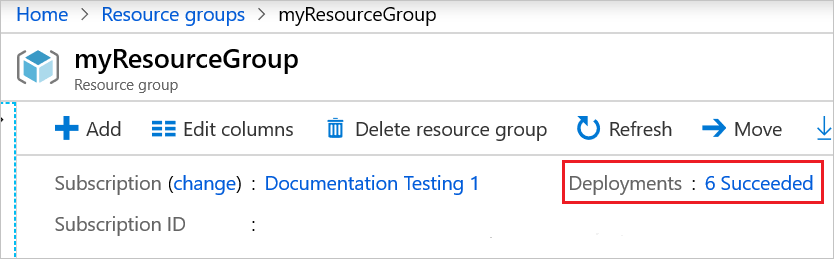
또한 기록에 몇 가지 성공적인 배포가 나열되어 있을 것입니다. 해당 링크를 선택합니다.
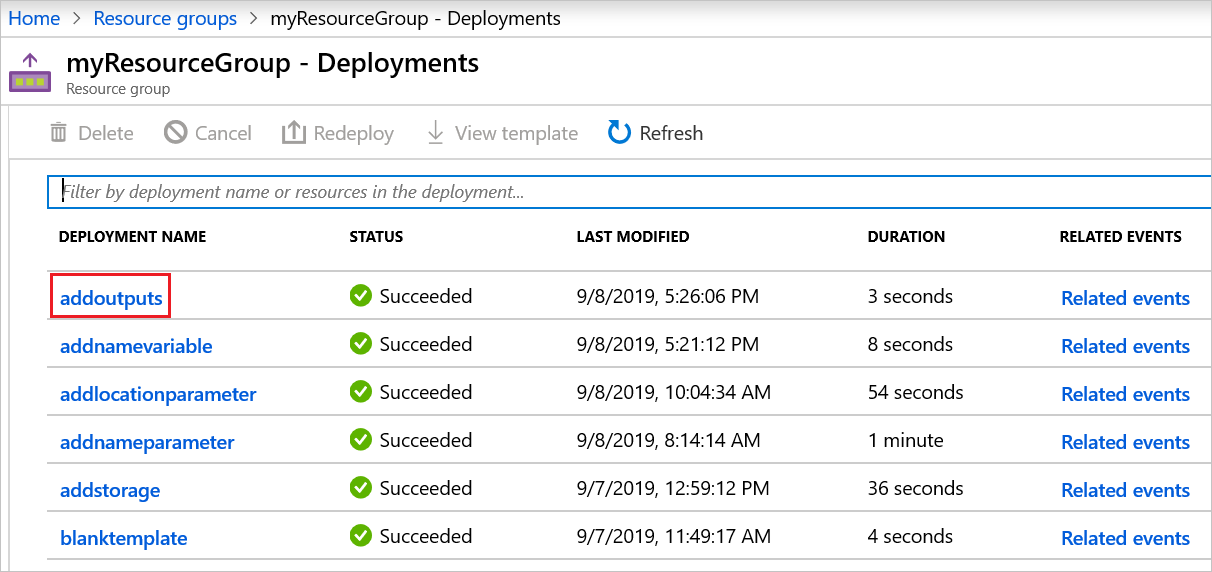
모든 배포가 기록에 표시됩니다. addoutputs라는 배포를 선택합니다.
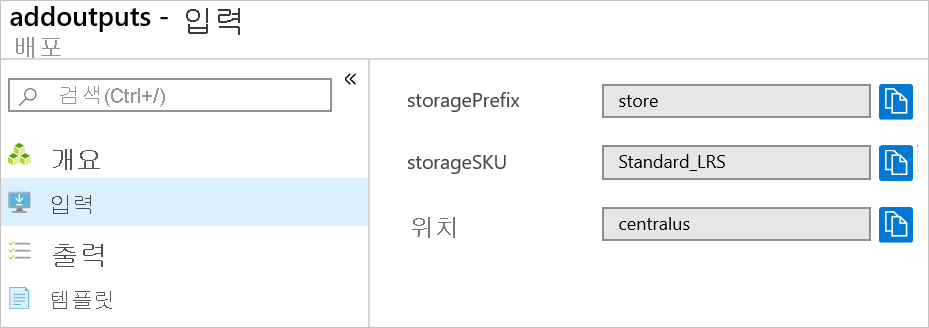
입력을 검토할 수 있습니다.
출력을 검토할 수 있습니다.
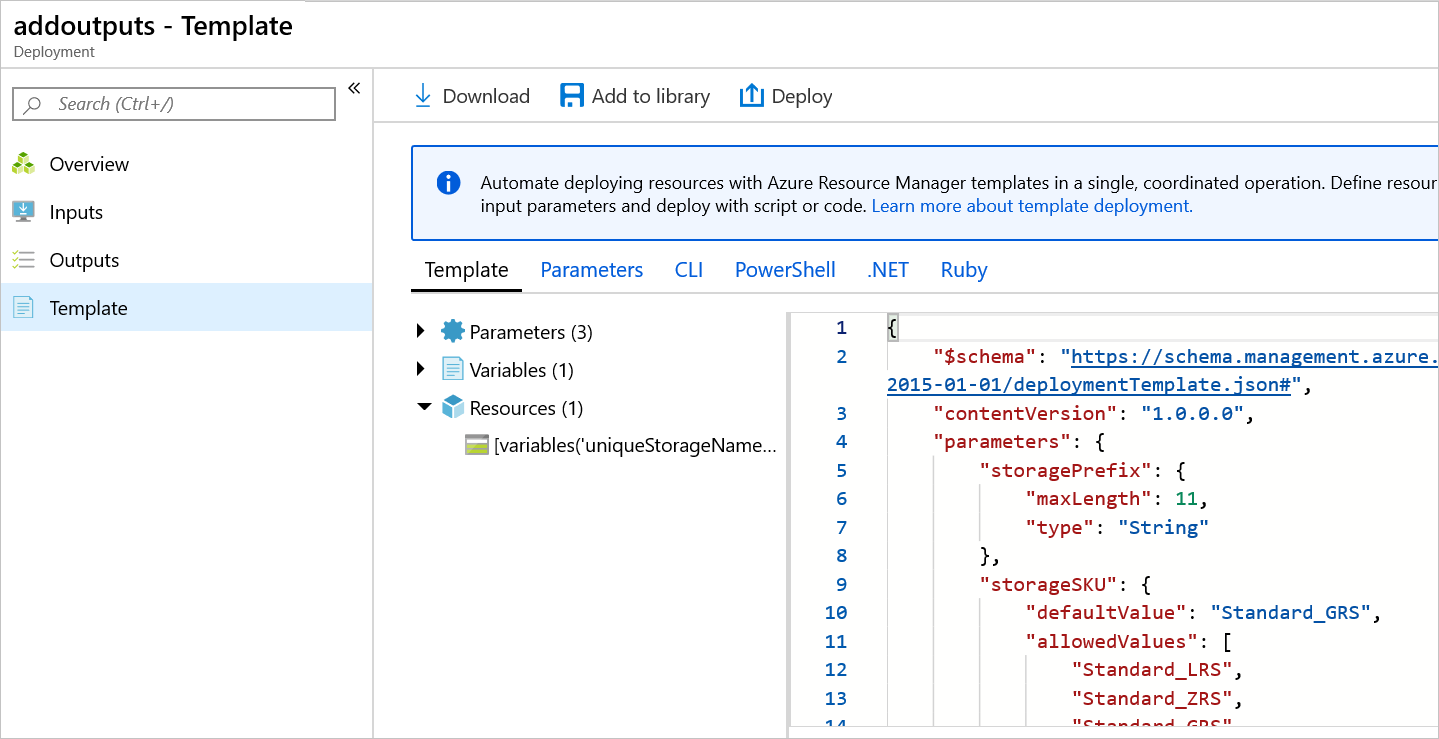
템플릿을 검토할 수 있습니다.
리소스 정리
다음 자습서로 이동하는 경우에는 리소스 그룹을 삭제할 필요가 없습니다.
지금 중지하는 경우 리소스 그룹을 삭제하는 것이 좋습니다.
- Azure Portal의 왼쪽 메뉴에서 리소스 그룹을 선택합니다.
- 모든 필드에 대한 필터... 텍스트 필드에 리소스 그룹 이름을 입력합니다.
- myResourceGroup 옆에 있는 확인란을 선택하고 myResourceGroup 또는 리소스 그룹 이름을 선택합니다.
- 위쪽 메뉴에서 리소스 그룹 삭제를 선택합니다.
다음 단계
이 자습서에서는 템플릿에 반환 값을 추가했습니다. 다음 자습서에서는 템플릿을 내보내고 템플릿에서 내보낸 템플릿의 일부를 사용하는 방법에 대해 알아봅니다.