연습 - 모델을 배포하고 엔드포인트 사용하기
모델의 성능이 만족스러운 수준이므로 배포하겠습니다.
다양한 배포 옵션이 있습니다. 선택하는 옵션은 기계 학습 모델을 어떻게 사용할지에 따라 달라집니다. 엔드포인트에 배포하거나 모델을 내보내 다른 플랫폼에 배포할 수 있습니다.
앱을 사용하여 엔드포인트에 배포하고 모델을 사용하는 방법을 설명하겠습니다.
엔드포인트에 배포하기
예측 URL을 가져오거나 Python 앱에서 API를 사용하여 엔드포인트에 배포할 수 있습니다.
예측 URL 가져오기
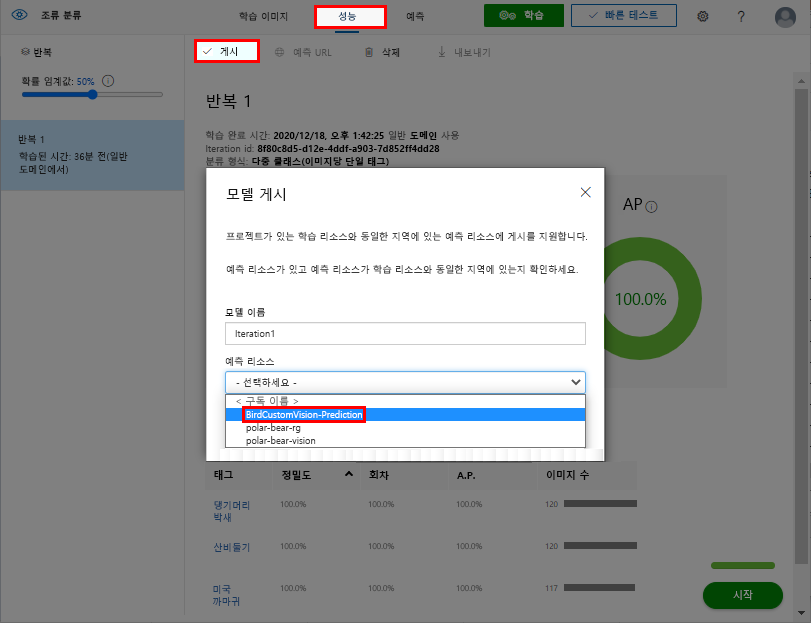
Custom Vision 포털 맨 위 메뉴 모음에서 성능을 선택합니다.
게시를 선택합니다.
모델 게시에서 예측 리소스를 선택한 다음 Custom Vision 프로젝트의 예측 이름을 선택합니다. 게시를 선택합니다.
모델이 게시되면 Custom Vision 포털에서 모델에 대한 작업이 변경됩니다.
예측 URL 탭을 선택합니다.
예측 API를 사용하는 방법에서 이미지 URL이 있는 경우 아래의 텍스트 상자에 값을 복사하여 저장한 다음 확인을 선택합니다.

Python 앱에서 API 사용
모델이 학습되었고 정확도가 만족스럽다면 앱에서 사용할 준비가 된 것입니다.
Azure Portal에서 Custom Vision 리소스가 포함된 리소스 그룹으로 이동합니다. <YourCustomVisionResourceName>-Prediction이라는 리소스가 원래 리소스 그룹과 함께 표시됩니다.
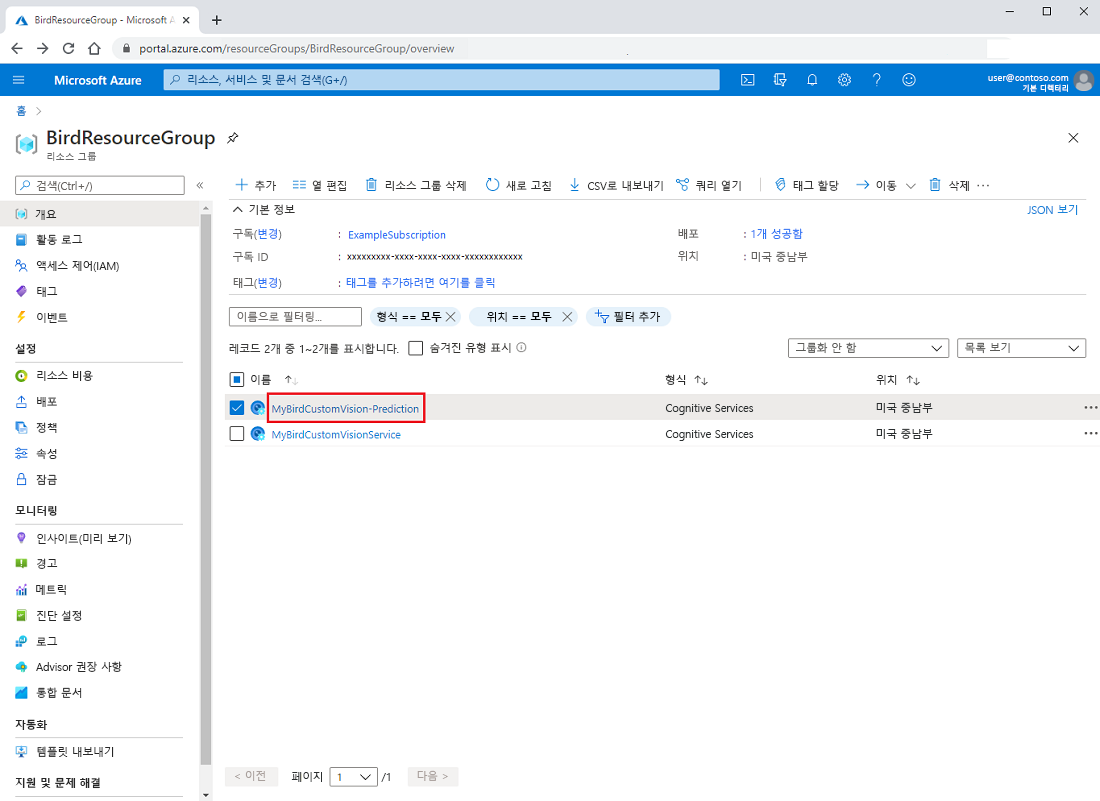
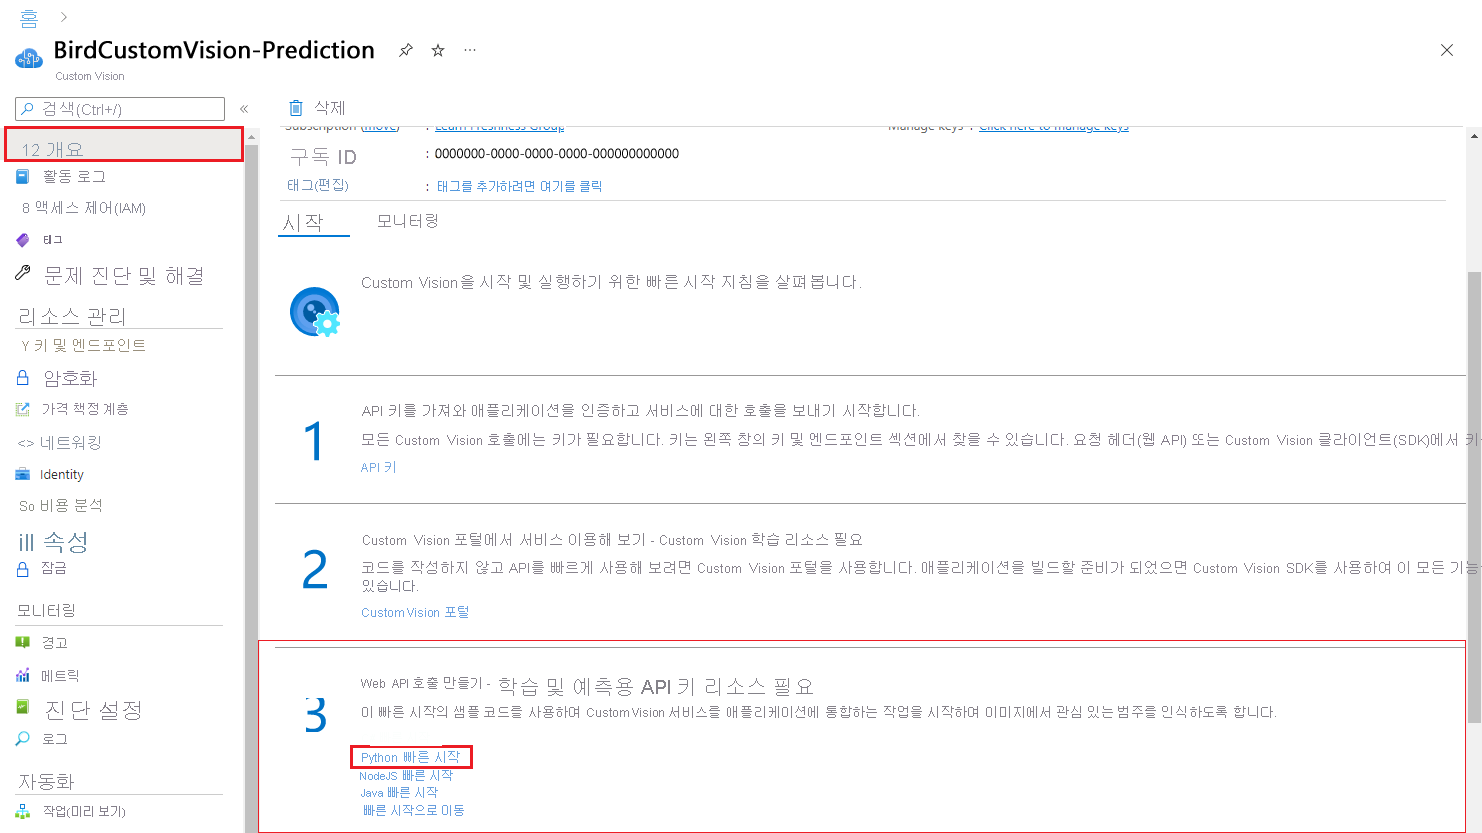
예측 이름을 선택하여 개요 페이지를 엽니다. 이 페이지에는 API를 호출하여 모델에서 예측을 가져오는 방법에 대해 자세히 알아보는 데 도움이 되는 리소스에 대한 링크가 있습니다.
시작하기 아래의 섹션 3에서 Python 빠른 시작 링크를 선택합니다. Python용 Azure AI 서비스 이미지 분류 빠른 시작이 웹 브라우저에서 열립니다.
Python에서 예측 API를 호출하는 샘플 코드의 예는 다음과 같습니다. 전체 코드는 빠른 시작을 참조하세요.
from azure.cognitiveservices.vision.customvision.prediction import CustomVisionPredictionClient

# Create variables for your resource; replace variables with valid values.
prediction_key = "<YourKey>"
endpoint = "<YourEndpoint>"
base_image_url = "<BasePathToImageFolder>"

# An example of a default iteration name is "Iteration1".
publish_iteration_name = "<PublishedIterationName>"

# You can find the project ID in the settings of the Custom Vision project in the portal.
project.id = "<CustomVisionProjectId>"

# Now, you have a trained endpoint that you can use to make a prediction.
prediction_credentials = ApiKeyCredentials(in_headers={"Prediction-key": prediction_key})

predictor = CustomVisionPredictionClient(endpoint, prediction_credentials)

with open(base_image_url + "images/Test/test_image.jpg", "rb") as image_contents:
    results = predictor.classify_image(
        project.id, publish_iteration_name, image_contents.read())

# Display the results.
for prediction in results.predictions:
    print("\t" + prediction.tag_name +
         ": {0:.2f}%".format(prediction.probability * 100))
게시된 엔드포인트에 게시하는 경우 결과는 다음 예와 유사합니다. Custom Vision 모델이 학습된 각 태그의 확률은 가장 높은 점수를 기준으로 정렬되어 표시됩니다. 모델은 인식하도록 학습된 조류 유형만 인식합니다. 모델에서 인식하도록 학습시키지 않은 조류의 이미지를 게시하는 경우 모델은 학습했던 조류 종 중 한 가지를 새로운 조류 종으로 예측합니다.
American Crow: 99.18%
Common Grackle: 25.34%
Red-tailed Hawk (Dark morph): 4.09%
Mourning Dove: 1.74%
American Robin (Adult): 0.92%
House Sparrow (Female): 0.40%
American Robin (Juvenile): 0.31%
Northern Cardinal (Adult Male): 0.24%
Tufted Titmouse: 0.04%
Blue Jay: 0.04%
House Sparrow (Male): 0.04%
Northern Cardinal (Female): 0.04%
Red-tailed Hawk (Light morph immature): 0.02%
American Goldfinch (Male): 0.02%
House Wren: 0.01%
American Goldfinch (Female): 0.01%
이제 만든 기계 학습 모델을 사용해 봤습니다. 분석할 새로운 데이터를 사용하면 조류 습성의 문서화를 개선하여 조류 서식지를 보호하고 멸종 위기 조류 개체 수를 늘리는 데 도움이 될 수 있습니다. Azure AI Custom Vision의 도움으로 모든 것이 가능합니다!