연습 - XML 주석으로 OpenAPI 설명서 사용자 지정 및 확장
이 예에서는 코드에 주석을 추가하여 외부 개발자에게 노출되는 API 문서를 더욱 유용하게 만들어 봅니다. 먼저 Swagger UI에 기본적으로 표시되는 내용을 살펴보겠습니다.
Swagger UI에서 API 엔드포인트의 OpenAPI 정의를 검토하려면 브라우저에서
http://localhost:5000/swagger로 이동합니다. Get 메서드를 선택하면 다음과 유사한 출력이 표시됩니다.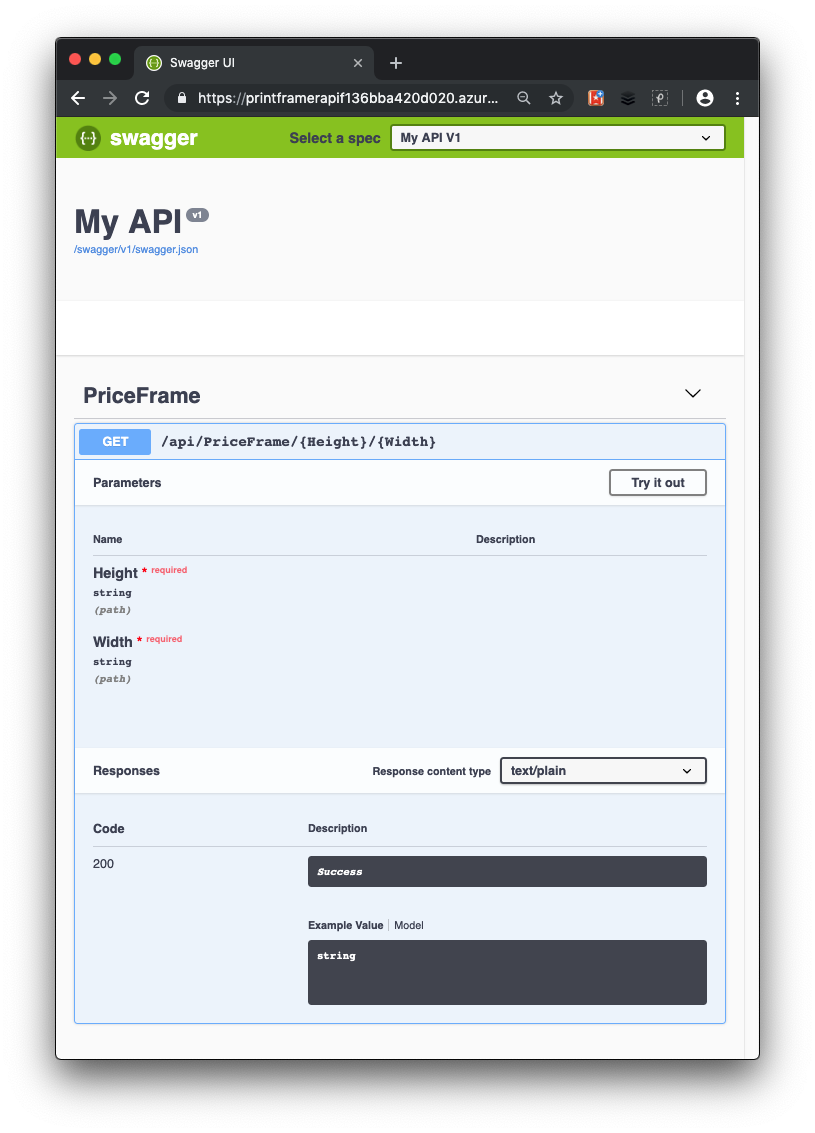
Swagger UI에 API에 대한 몇 가지 유용한 정보가 표시됩니다. 호출할 수 있는 메서드가 표시되는데, 이 예제에서는 PriceFrame이라는 하나의 메서드를 볼 수 있습니다. 이는 Height 및 Width라는 두 개의 필수 매개 변수를 사용하는 HTTP Get 작업임을 확인할 수 있습니다. API 호출이 작동하는지 확인하기 위해 사용해 보기를 선택하고, Height와 Width의 값을 입력하고, 실행을 선택할 수 있습니다.
사용자의 API 사용자는 아직 PriceFrame 메서드의 제한 사항을 알 만큼 충분한 정보를 갖고 있지 않습니다. 사용자들이 자세한 정보를 볼 수 있도록 XML 주석으로 더욱 상세한 정보를 추가해 보겠습니다.
API에 XML 주석 추가
마지막 연습에 사용한 Visual Studio Code 인스턴스로 돌아갑니다.
마지막 연습에서 웹 API가 아직 실행 중인 경우 Windows에서는 ctrl+c를 누르고 Mac에서는 cmd+c를 눌러 중지합니다.
프로젝트에서 XML 문서를 활성화하려면 PrintFramerAPI.csproj 프로젝트 파일을 업데이트하고, 기존
<PropertyGroup>에GenerateDocumentationFile태그를 추가하고,true로 설정합니다.<PropertyGroup> <TargetFramework>net7.0</TargetFramework> <GenerateDocumentationFile>true</GenerateDocumentationFile> <NoWarn>$(NoWarn);1591</NoWarn> </PropertyGroup>Startup.cs에 문을 사용하여 다음을 추가합니다.
using System.Reflection; using System.IO;Startup.cs에서
ConfigureServices의AddSwaggerGen()호출을 업데이트하여 Swashbuckle에 XML 문서를 사용하도록 명령합니다.public void ConfigureServices(IServiceCollection services) { services.AddControllers(); // Register the Swagger generator, defining 1 or more Swagger documents services.AddSwaggerGen(c => { c.SwaggerDoc("v1", new OpenApiInfo { Version = "v1", Title = "PrintFramer API", Description = "Calculates the cost of a picture frame based on its dimensions.", TermsOfService = new Uri("https://go.microsoft.com/fwlink/?LinkID=206977"), Contact = new OpenApiContact { Name = "Your name", Email = string.Empty, Url = new Uri("https://video2.skills-academy.com/training") } }); // Set the comments path for the Swagger JSON and UI. var xmlFile = $"{Assembly.GetExecutingAssembly().GetName().Name}.xml"; var xmlPath = Path.Combine(AppContext.BaseDirectory, xmlFile); c.IncludeXmlComments(xmlPath); }); }위 코드에서 리플렉션은 XML 주석을 로드할 XML 파일의 이름을 확인합니다.
Controllers 폴더에서 PriceFrameController.cs를 엽니다.
GetPrice메서드의 HttpGet 특성 위에 다음과 같은 XML 주석 블록을 추가합니다. 동작에 삼중 슬래시 주석을 추가하면 섹션 헤더에 설명을 추가하여 Swagger UI가 향상됩니다./// <summary> /// Returns the price of a frame based on its dimensions. /// </summary> /// <param name="Height">The height of the frame.</param> /// <param name="Width">The width of the frame.</param> /// <returns>The price, in dollars, of the picture frame.</returns> /// <remarks> The API returns 'not valid' if the total length of frame material needed (the perimeter of the frame) is less than 20 inches and greater than 1000 inches.</remarks> [HttpGet("{Height}/{Width}")] public string GetPrice(string Height, string Width) { string result; result = CalculatePrice(Double.Parse(Height), Double.Parse(Width)); return $"The cost of a {Height}x{Width} frame is ${result}"; }모든 변경 내용을 저장하고 로컬로 빌드되는지 확인하려면 Visual Studio Code 터미널 창에서 다음 명령을 실행합니다.
dotnet build변경 내용을 보려면 Visual Studio Code 터미널 창에 다음을 입력하여 ASP.NET 애플리케이션을 로컬로 실행합니다.
dotnet runhttp://localhost:5000/swagger에서 Swagger UI를 다시 살펴보고 XML 주석으로 OpenAPI 설명서에 추가된 정보를 확인합니다.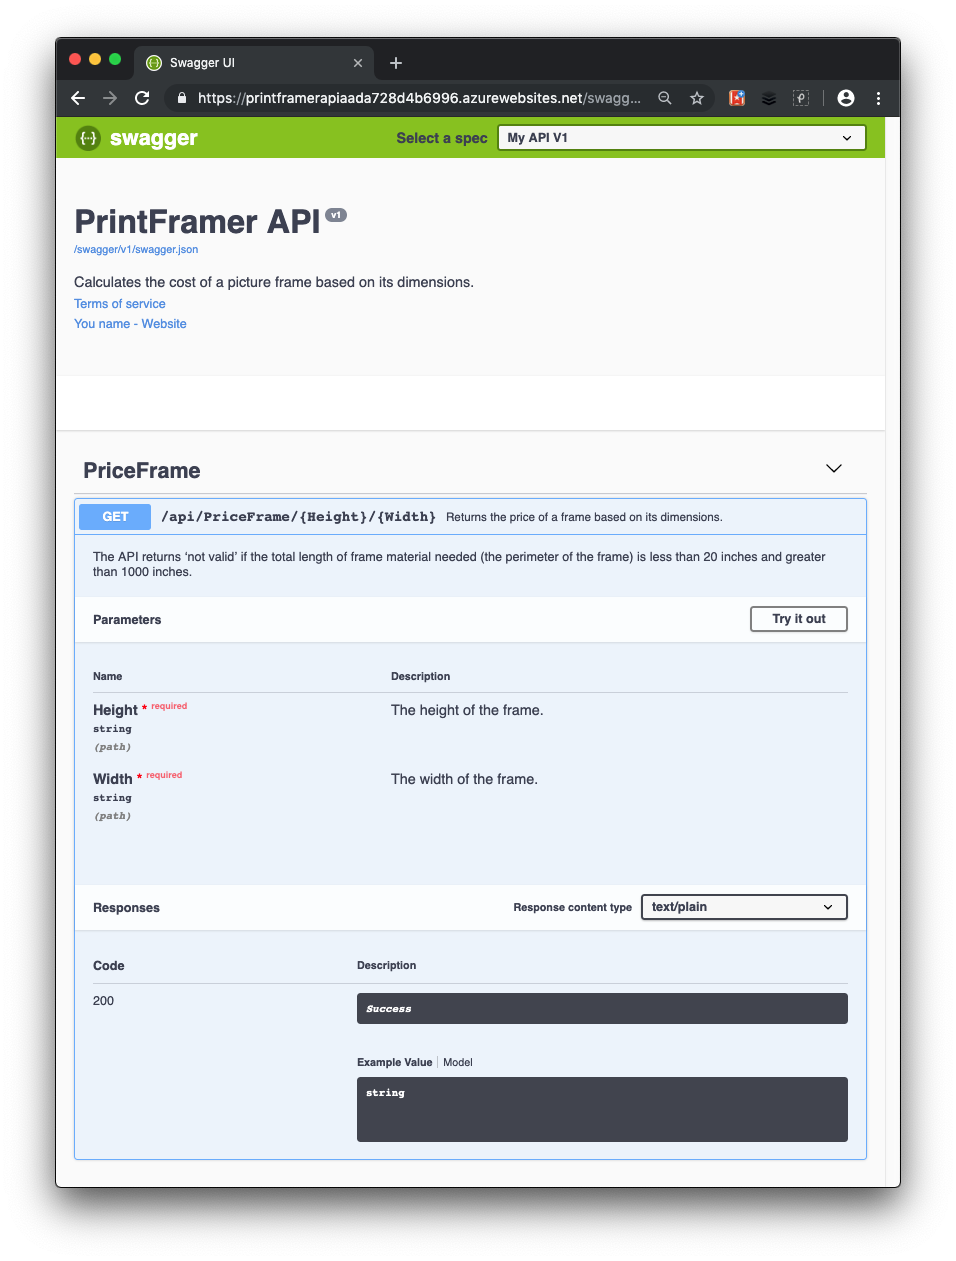
API에 데이터 주석 추가
Swagger가 OpenAPI 설명서를 개선할 수 있도록 하려면 Microsoft.AspNetCore.Mvc 네임스페이스의 특성을 사용합니다.
마지막 연습에서 웹 API가 아직 실행 중인 경우 Windows에서는 ctrl+c를 누르고 Mac에서는 cmd+c를 눌러 중지합니다.
API가 text/plain
[Produces("text/plain")]에 대한 콘텐츠 형식 응답을 지원한다는 사실을 표시하려면 API 컨트롤러 PriceFrameController.cs에서GetPrice정의 위에GetPrice특성을 추가합니다.[HttpGet("{Height}/{Width}")] [Produces("text/plain")]이렇게 하면 컨트롤러의 GET 동작에 대해 Response Content Type(응답 콘텐츠 형식) 드롭다운의 기본값으로 이 콘텐츠 형식이 선택됩니다.
API에 Swashbuckle 주석 추가
지금까지 API는 지정된 프레임 크기에 대한 가격을 계산할 수 있을 때 상태 코드 200을 반환합니다. GetPrice 메서드 설명에서 가격을 계산할 수 없는 경우를 참고합니다.
개발자들에게 응답 유형과 오류 코드를 보여주는 보다 효율적인 방법은 다음과 같은 XML 주석과 데이터 주석을 사용하는 것입니다. Swashbuckle 및 Swagger 도구는 이러한 값을 사용하여 필요한 HTTP 응답 코드에 대한 OpenAPI 설명을 명확하게 생성합니다.
또한 Name 속성을 포함하고 OpenAPI operationId 값을 포함하도록 HTTP 동사 필터 생성자를 업데이트합니다.
다음 using 문을 PriceFrameController.cs 파일에 추가합니다.
using Microsoft.AspNetCore.Http;PriceFrameController.cs에서
GetPrice를 다음 코드와 주석으로 바꿉니다./// <summary> /// Returns the price of a frame based on its dimensions. /// </summary> /// <param name="Height">The height of the frame.</param> /// <param name="Width">The width of the frame.</param> /// <returns>The price, in dollars, of the picture frame.</returns> /// <remarks> /// Sample request: /// /// Get /api/priceframe/5/10 /// /// </remarks> /// <response code="200">Returns the cost of the frame in dollars.</response> /// <response code="400">If the amount of frame material needed is less than 20 inches or greater than 1000 inches.</response> [HttpGet("{Height}/{Width}", Name=nameof(GetPrice))] [Produces("text/plain")] [ProducesResponseType(StatusCodes.Status200OK)] [ProducesResponseType(StatusCodes.Status400BadRequest)] public ActionResult<string> GetPrice(string Height, string Width) { string result; result = CalculatePrice(Double.Parse(Height), Double.Parse(Width)); if (result == "not valid") { return BadRequest(result); } else { return Ok($"The cost of a {Height}x{Width} frame is ${result}"); } }코드를 업데이트하면 다음과 같은 변경 사항이 적용됩니다.
- 메서드가
BadRequest()메서드와Ok()메서드를 사용하여 각각 BadRequest (400)와 Ok 상태를 만들고 이를 응답의 문자열 결과로 전달합니다. - XML 주석은 이 메서드가 반환할 수 있는 각 상태 코드를 설명합니다.
- HttpGet 특성에는 OpenAPI
operationId매개 변수를 내보내는Name속성이 포함되어 있습니다. - ProducesResponseType 특성은 작업이 반환할 수 있는 다양한 응답을 나열합니다. 이러한 특성은 앞서 설명한 바와 같이 XML 주석과 결합되어, 생성된 Swagger의 각 응답에 읽기 쉬운 설명으로 포함됩니다.
- 메서드가
다음 명령을 사용하여 웹 API를 다시 빌드합니다.
dotnet build다음 명령을 사용하여 ASP.NET 애플리케이션을 실행합니다.
dotnet runhttp://localhost:5000/swagger에서 Swagger UI를 살펴보고 주석으로 추가된 정보를 확인합니다. 다음 그림은 API의 최종 Swagger UI입니다.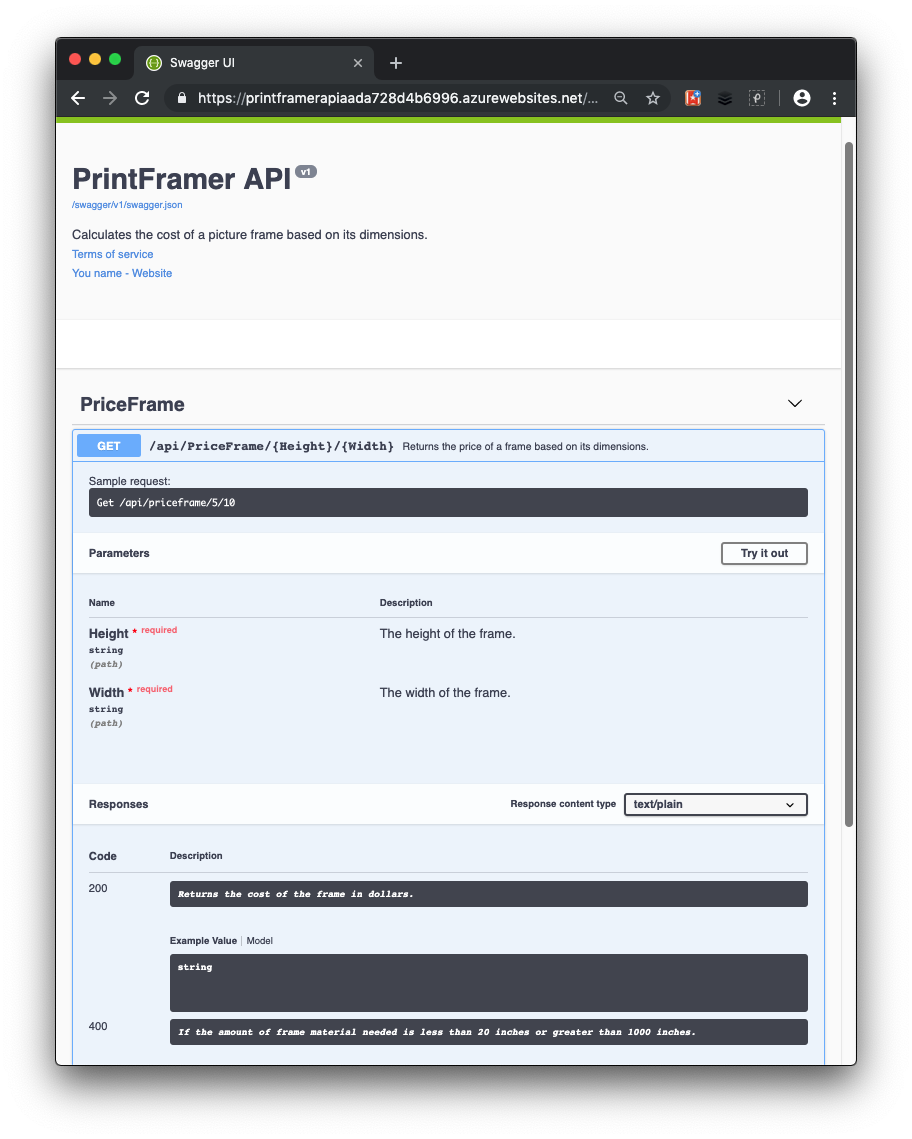
이 예에서는 API를 훨씬 더 쉽게 사용할 수 있도록 개발자에게 노출되는 API 정보에 주석을 추가했습니다.