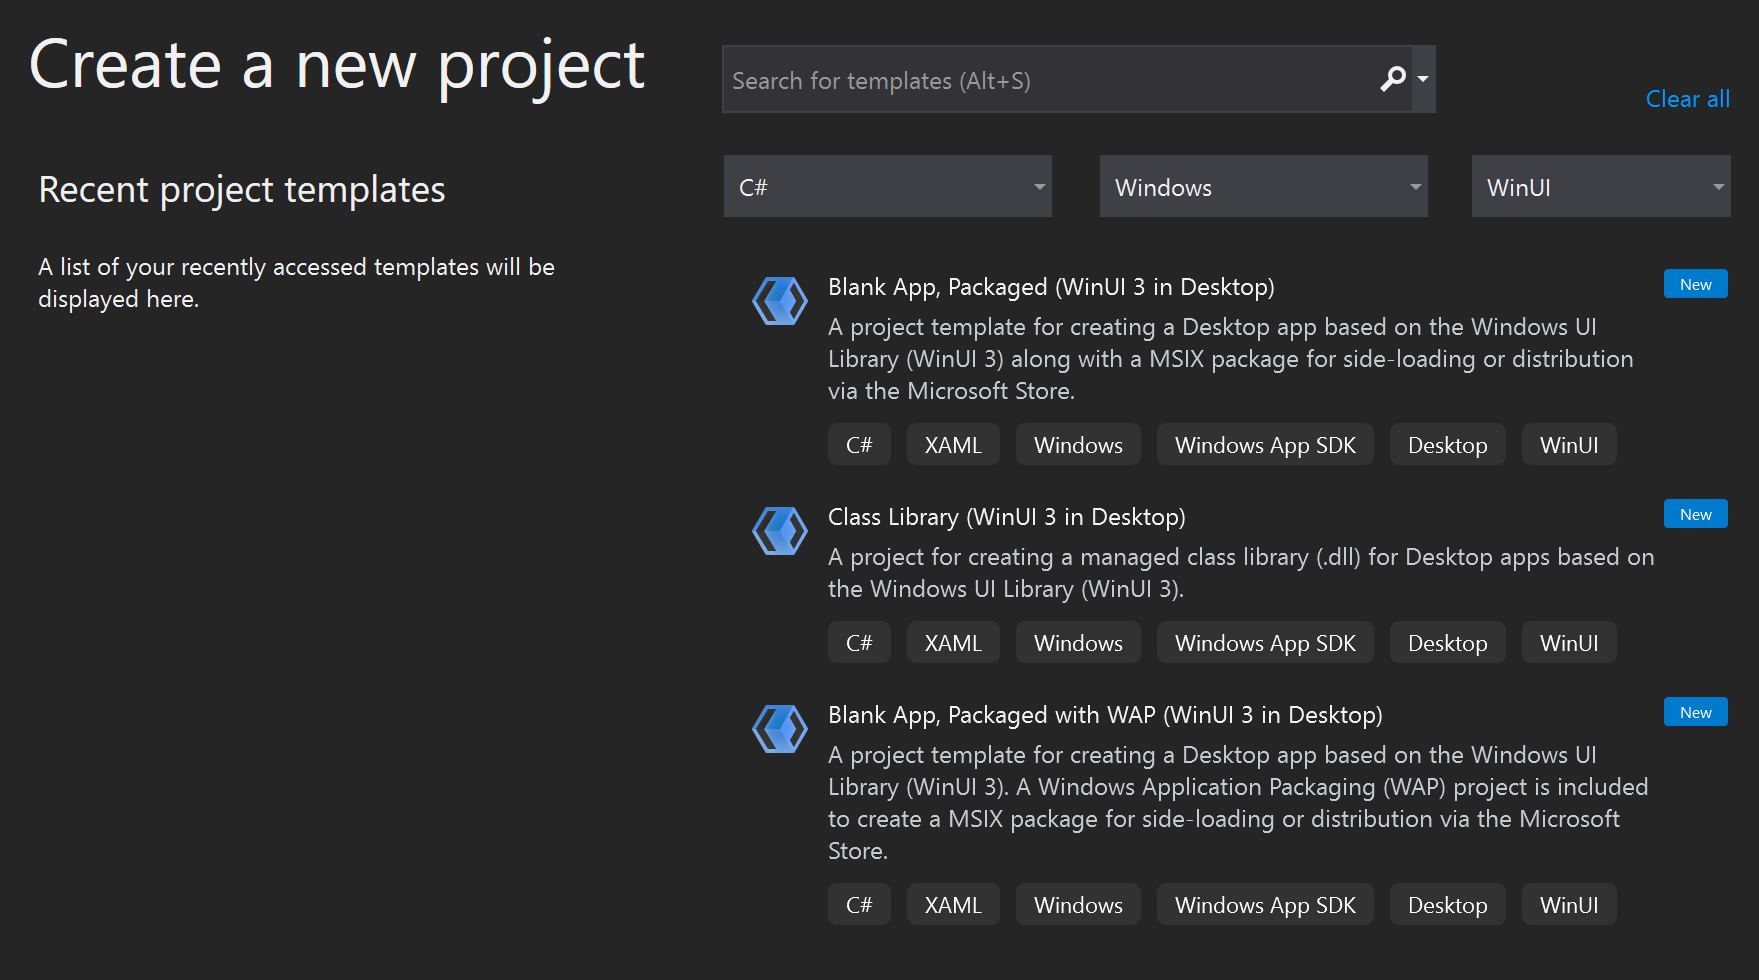
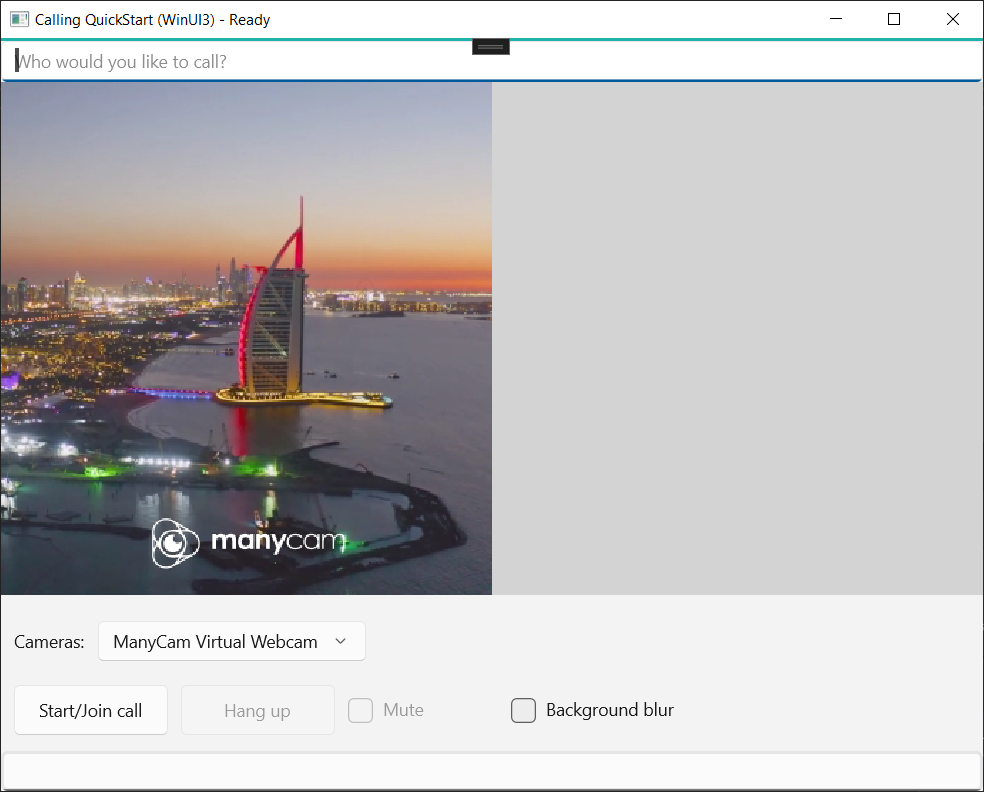
Guia de início rápido: adicionar chamadas de vídeo 1:1 como um usuário do Teams ao seu aplicativo
Comece a usar os Serviços de Comunicação do Azure usando o SDK de chamada dos Serviços de Comunicação para adicionar chamadas de voz e vídeo 1:1 ao seu aplicativo. Você aprenderá como iniciar e atender uma chamada usando o SDK de Chamada dos Serviços de Comunicação do Azure para JavaScript.
Código de Exemplo
Se você quiser pular para o final, você pode baixar este início rápido como um exemplo no GitHub.
Pré-requisitos
- Obtenha uma conta do Azure com uma assinatura ativa. Crie uma conta gratuitamente.
- Você precisa ter Node.js 18. Você pode usar o instalador msi para instalá-lo.
- Crie um recurso ativo dos Serviços de Comunicação. Crie um recurso de Serviços de Comunicação.
- Crie um Token de Acesso de Usuário para instanciar o cliente de chamada. Saiba como criar e gerenciar tokens de acesso de usuário.
- Obtenha o ID de thread do Teams para operações de chamada usando o Graph Explorer. Leia mais sobre como criar ID de thread de chat.
Configuração
Criar uma nova aplicação Node.js
Abra o terminal ou a janela de comando, crie um novo diretório para seu aplicativo e navegue até o diretório.
mkdir calling-quickstart && cd calling-quickstart
Execute npm init -y para criar um arquivo package.json com as configurações padrão.
npm init -y
Instalar o pacote
Use o npm install comando para instalar o SDK de Chamada dos Serviços de Comunicação do Azure para JavaScript.
Importante
Este guia de início rápido usa a versão mais recente do SDK de Chamada dos Serviços de Comunicação do Azure.
npm install @azure/communication-common --save
npm install @azure/communication-calling --save
Configurar a estrutura do aplicativo
Este guia de início rápido usa o webpack para agrupar os ativos do aplicativo. Execute o seguinte comando para instalar os webpackpacotes , webpack-cli e webpack-dev-server npm e listá-los como dependências de desenvolvimento em seu package.json:
npm install copy-webpack-plugin@^11.0.0 webpack@^5.88.2 webpack-cli@^5.1.4 webpack-dev-server@^4.15.1 --save-dev
Crie um index.html arquivo no diretório raiz do seu projeto. Usaremos esse arquivo para configurar um layout básico que permitirá ao usuário fazer uma chamada de vídeo 1:1.
Aqui está o código:
<!-- index.html -->
<!DOCTYPE html>
<html>
    <head>
        <title>Azure Communication Services - Teams Calling Web Application</title>
    </head>
    <body>
        <h4>Azure Communication Services - Teams Calling Web Application</h4>
        <input id="user-access-token"
            type="text"
            placeholder="User access token"
            style="margin-bottom:1em; width: 500px;"/>
        <button id="initialize-teams-call-agent" type="button">Login</button>
        <br>
        <br>
        <input id="callee-teams-user-id"
            type="text"
            placeholder="Microsoft Teams callee's id (xxxxxxxx-xxxx-xxxx-xxxx-xxxxxxxxxxxx)"
            style="margin-bottom:1em; width: 500px; display: block;"/>
        <button id="start-call-button" type="button" disabled="true">Start Call</button>
        <button id="hangup-call-button" type="button" disabled="true">Hang up Call</button>
        <button id="accept-call-button" type="button" disabled="true">Accept Call</button>
        <button id="start-video-button" type="button" disabled="true">Start Video</button>
        <button id="stop-video-button" type="button" disabled="true">Stop Video</button>
        <br>
        <br>
        <div id="connectedLabel" style="color: #13bb13;" hidden>Call is connected!</div>
        <br>
        <div id="remoteVideoContainer" style="width: 40%;" hidden>Remote participants' video streams:</div>
        <br>
        <div id="localVideoContainer" style="width: 30%;" hidden>Local video stream:</div>
        <!-- points to the bundle generated from client.js -->
        <script src="./main.js"></script>
    </body>
</html>
Modelo de objeto do SDK da Web dos Serviços de Comunicação do Azure
As seguintes classes e interfaces lidam com alguns dos principais recursos do SDK de Chamada dos Serviços de Comunicação do Azure:
| Nome | Descrição |
|---|---|
CallClient |
O ponto de entrada principal para o SDK de chamada. |
AzureCommunicationTokenCredential |
Implementa a CommunicationTokenCredential interface, que é usada para instanciar teamsCallAgento . |
TeamsCallAgent |
Usado para iniciar e gerenciar chamadas do Teams. |
DeviceManager |
Usado para gerenciar dispositivos de mídia. |
TeamsCall |
Usado para representar uma chamada do Teams |
LocalVideoStream |
Usado para criar um fluxo de vídeo local para um dispositivo de câmera no sistema local. |
RemoteParticipant |
Usado para representar um participante remoto na chamada |
RemoteVideoStream |
Usado para representar um fluxo de vídeo remoto de um participante remoto. |
Crie um arquivo no diretório raiz do seu projeto chamado index.js para conter a lógica do aplicativo para este início rápido. Adicione o seguinte código ao index.js:
// Make sure to install the necessary dependencies
const { CallClient, VideoStreamRenderer, LocalVideoStream } = require('@azure/communication-calling');
const { AzureCommunicationTokenCredential } = require('@azure/communication-common');
const { AzureLogger, setLogLevel } = require("@azure/logger");
// Set the log level and output
setLogLevel('verbose');
AzureLogger.log = (...args) => {
    console.log(...args);
};
// Calling web sdk objects
let teamsCallAgent;
let deviceManager;
let call;
let incomingCall;
let localVideoStream;
let localVideoStreamRenderer;
// UI widgets
let userAccessToken = document.getElementById('user-access-token');
let calleeTeamsUserId = document.getElementById('callee-teams-user-id');
let initializeCallAgentButton = document.getElementById('initialize-teams-call-agent');
let startCallButton = document.getElementById('start-call-button');
let hangUpCallButton = document.getElementById('hangup-call-button');
let acceptCallButton = document.getElementById('accept-call-button');
let startVideoButton = document.getElementById('start-video-button');
let stopVideoButton = document.getElementById('stop-video-button');
let connectedLabel = document.getElementById('connectedLabel');
let remoteVideoContainer = document.getElementById('remoteVideoContainer');
let localVideoContainer = document.getElementById('localVideoContainer');
/**
 * Create an instance of CallClient. Initialize a TeamsCallAgent instance with a CommunicationUserCredential via created CallClient. TeamsCallAgent enables us to make outgoing calls and receive incoming calls.
 * You can then use the CallClient.getDeviceManager() API instance to get the DeviceManager.
 */
initializeCallAgentButton.onclick = async () => {
    try {
        const callClient = new CallClient();
        tokenCredential = new AzureCommunicationTokenCredential(userAccessToken.value.trim());
        teamsCallAgent = await callClient.createTeamsCallAgent(tokenCredential)
        // Set up a camera device to use.
        deviceManager = await callClient.getDeviceManager();
        await deviceManager.askDevicePermission({ video: true });
        await deviceManager.askDevicePermission({ audio: true });
        // Listen for an incoming call to accept.
        teamsCallAgent.on('incomingCall', async (args) => {
            try {
                incomingCall = args.incomingCall;
                acceptCallButton.disabled = false;
                startCallButton.disabled = true;
            } catch (error) {
                console.error(error);
            }
        });
        startCallButton.disabled = false;
        initializeCallAgentButton.disabled = true;
    } catch(error) {
        console.error(error);
    }
}
/**
 * Place a 1:1 outgoing video call to a user
 * Add an event listener to initiate a call when the `startCallButton` is selected.
 * Enumerate local cameras using the deviceManager `getCameraList` API.
 * In this quickstart, we're using the first camera in the collection. Once the desired camera is selected, a
 * LocalVideoStream instance will be constructed and passed within `videoOptions` as an item within the
 * localVideoStream array to the call method. When the call connects, your application will be sending a video stream to the other participant.
 */
startCallButton.onclick = async () => {
    try {
        const localVideoStream = await createLocalVideoStream();
        const videoOptions = localVideoStream ? { localVideoStreams: [localVideoStream] } : undefined;
        call = teamsCallAgent.startCall({ microsoftTeamsUserId: calleeTeamsUserId.value.trim() }, { videoOptions: videoOptions });
        // Subscribe to the call's properties and events.
        subscribeToCall(call);
    } catch (error) {
        console.error(error);
    }
}
/**
 * Accepting an incoming call with a video
 * Add an event listener to accept a call when the `acceptCallButton` is selected.
 * You can accept incoming calls after subscribing to the `TeamsCallAgent.on('incomingCall')` event.
 * You can pass the local video stream to accept the call with the following code.
 */
acceptCallButton.onclick = async () => {
    try {
        const localVideoStream = await createLocalVideoStream();
        const videoOptions = localVideoStream ? { localVideoStreams: [localVideoStream] } : undefined;
        call = await incomingCall.accept({ videoOptions });
        // Subscribe to the call's properties and events.
        subscribeToCall(call);
    } catch (error) {
        console.error(error);
    }
}
// Subscribe to a call obj.
// Listen for property changes and collection updates.
subscribeToCall = (call) => {
    try {
        // Inspect the initial call.id value.
        console.log(`Call Id: ${call.id}`);
        //Subscribe to call's 'idChanged' event for value changes.
        call.on('idChanged', () => {
            console.log(`Call ID changed: ${call.id}`);
        });
        // Inspect the initial call.state value.
        console.log(`Call state: ${call.state}`);
        // Subscribe to call's 'stateChanged' event for value changes.
        call.on('stateChanged', async () => {
            console.log(`Call state changed: ${call.state}`);
            if(call.state === 'Connected') {
                connectedLabel.hidden = false;
                acceptCallButton.disabled = true;
                startCallButton.disabled = true;
                hangUpCallButton.disabled = false;
                startVideoButton.disabled = false;
                stopVideoButton.disabled = false;
            } else if (call.state === 'Disconnected') {
                connectedLabel.hidden = true;
                startCallButton.disabled = false;
                hangUpCallButton.disabled = true;
                startVideoButton.disabled = true;
                stopVideoButton.disabled = true;
                console.log(`Call ended, call end reason={code=${call.callEndReason.code}, subCode=${call.callEndReason.subCode}}`);
            }
        });
        call.on('isLocalVideoStartedChanged', () => {
            console.log(`isLocalVideoStarted changed: ${call.isLocalVideoStarted}`);
        });
        console.log(`isLocalVideoStarted: ${call.isLocalVideoStarted}`);
        call.localVideoStreams.forEach(async (lvs) => {
            localVideoStream = lvs;
            await displayLocalVideoStream();
        });
        call.on('localVideoStreamsUpdated', e => {
            e.added.forEach(async (lvs) => {
                localVideoStream = lvs;
                await displayLocalVideoStream();
            });
            e.removed.forEach(lvs => {
               removeLocalVideoStream();
            });
        });

        // Inspect the call's current remote participants and subscribe to them.
        call.remoteParticipants.forEach(remoteParticipant => {
            subscribeToRemoteParticipant(remoteParticipant);
        });
        // Subscribe to the call's 'remoteParticipantsUpdated' event to be
        // notified when new participants are added to the call or removed from the call.
        call.on('remoteParticipantsUpdated', e => {
            // Subscribe to new remote participants that are added to the call.
            e.added.forEach(remoteParticipant => {
                subscribeToRemoteParticipant(remoteParticipant)
            });
            // Unsubscribe from participants that are removed from the call
            e.removed.forEach(remoteParticipant => {
                console.log('Remote participant removed from the call.');
            });
        });
    } catch (error) {
        console.error(error);
    }
}
// Subscribe to a remote participant obj.
// Listen for property changes and collection updates.
subscribeToRemoteParticipant = (remoteParticipant) => {
    try {
        // Inspect the initial remoteParticipant.state value.
        console.log(`Remote participant state: ${remoteParticipant.state}`);
        // Subscribe to remoteParticipant's 'stateChanged' event for value changes.
        remoteParticipant.on('stateChanged', () => {
            console.log(`Remote participant state changed: ${remoteParticipant.state}`);
        });
        // Inspect the remoteParticipants's current videoStreams and subscribe to them.
        remoteParticipant.videoStreams.forEach(remoteVideoStream => {
            subscribeToRemoteVideoStream(remoteVideoStream)
        });
        // Subscribe to the remoteParticipant's 'videoStreamsUpdated' event to be
        // notified when the remoteParticipant adds new videoStreams and removes video streams.
        remoteParticipant.on('videoStreamsUpdated', e => {
            // Subscribe to newly added remote participant's video streams.
            e.added.forEach(remoteVideoStream => {
                subscribeToRemoteVideoStream(remoteVideoStream)
            });
            // Unsubscribe from newly removed remote participants' video streams.
            e.removed.forEach(remoteVideoStream => {
                console.log('Remote participant video stream was removed.');
            })
        });
    } catch (error) {
        console.error(error);
    }
}
/**
 * Subscribe to a remote participant's remote video stream obj.
 * You have to subscribe to the 'isAvailableChanged' event to render the remoteVideoStream. If the 'isAvailable' property
 * changes to 'true' a remote participant is sending a stream. Whenever the availability of a remote stream changes
 * you can choose to destroy the whole 'Renderer' a specific 'RendererView' or keep them. Displaying RendererView without a video stream will result in a blank video frame.
 */
subscribeToRemoteVideoStream = async (remoteVideoStream) => {
    // Create a video stream renderer for the remote video stream.
    let videoStreamRenderer = new VideoStreamRenderer(remoteVideoStream);
    let view;
    const renderVideo = async () => {
        try {
            // Create a renderer view for the remote video stream.
            view = await videoStreamRenderer.createView();
            // Attach the renderer view to the UI.
            remoteVideoContainer.hidden = false;
            remoteVideoContainer.appendChild(view.target);
        } catch (e) {
            console.warn(`Failed to createView, reason=${e.message}, code=${e.code}`);
        }
    }

    remoteVideoStream.on('isAvailableChanged', async () => {
        // Participant has switched video on.
        if (remoteVideoStream.isAvailable) {
            await renderVideo();
        // Participant has switched video off.
        } else {
            if (view) {
                view.dispose();
                view = undefined;
            }
        }
    });
    // Participant has video on initially.
    if (remoteVideoStream.isAvailable) {
        await renderVideo();
    }
}
// Start your local video stream.
// This will send your local video stream to remote participants so they can view it.
startVideoButton.onclick = async () => {
    try {
        const localVideoStream = await createLocalVideoStream();
        await call.startVideo(localVideoStream);
    } catch (error) {
        console.error(error);
    }
}
// Stop your local video stream.
// This will stop your local video stream from being sent to remote participants.
stopVideoButton.onclick = async () => {
    try {
        await call.stopVideo(localVideoStream);
    } catch (error) {
        console.error(error);
    }
}
/**
 * To render a LocalVideoStream, you need to create a new instance of VideoStreamRenderer, and then
 * create a new VideoStreamRendererView instance using the asynchronous createView() method.
 * You may then attach view.target to any UI element.
 */
// Create a local video stream for your camera device
createLocalVideoStream = async () => {
    const camera = (await deviceManager.getCameras())[0];
    if (camera) {
        return new LocalVideoStream(camera);
    } else {
        console.error(`No camera device found on the system`);
    }
}
// Display your local video stream preview in your UI
displayLocalVideoStream = async () => {
    try {
        localVideoStreamRenderer = new VideoStreamRenderer(localVideoStream);
        const view = await localVideoStreamRenderer.createView();
        localVideoContainer.hidden = false;
        localVideoContainer.appendChild(view.target);
    } catch (error) {
        console.error(error);
    }
}
// Remove your local video stream preview from your UI
removeLocalVideoStream = async() => {
    try {
        localVideoStreamRenderer.dispose();
        localVideoContainer.hidden = true;
    } catch (error) {
        console.error(error);
    }
}
// End the current call
hangUpCallButton.addEventListener("click", async () => {
    // end the current call
    await call.hangUp();
});
Adicionar o código do servidor local do webpack
Crie um arquivo no diretório raiz do seu projeto chamado webpack.config.js para conter a lógica do servidor local para este início rápido. Adicione o seguinte código ao webpack.config.js:
const path = require('path');
const CopyPlugin = require("copy-webpack-plugin");

module.exports = {
    mode: 'development',
    entry: './index.js',
    output: {
        filename: 'main.js',
        path: path.resolve(__dirname, 'dist'),
    },
    devServer: {
        static: {
            directory: path.join(__dirname, './')
        },
    },
    plugins: [
        new CopyPlugin({
            patterns: [
                './index.html'
            ]
        }),
    ]
};
Executar o código
Use o webpack-dev-server para criar e executar seu aplicativo. Execute o seguinte comando para agrupar o host do aplicativo em um servidor Web local:
`npx webpack serve --config webpack.config.js`
Abra o navegador e, em dois separadores, navegue até http://localhost:8080/. As guias devem mostrar o resultado semelhante como a imagem a seguir: 
Na primeira guia, insira um token de acesso de usuário válido. Na segunda guia, insira outro token de acesso de usuário válido diferente. Consulte a documentação do token de acesso do usuário se ainda não tiver tokens de acesso disponíveis para uso.
Em ambas as guias, clique nos botões "Inicializar Call Agent". As guias devem mostrar o resultado semelhante como a imagem a seguir: 
Na primeira guia, insira a identidade de usuário dos Serviços de Comunicação do Azure da segunda guia e selecione o botão "Iniciar chamada". A primeira guia iniciará a chamada de saída para a segunda guia, e o botão "Aceitar chamada" da segunda guia será ativado: 
Na segunda guia, selecione o botão "Aceitar chamada". A chamada será atendida e conectada. As guias devem mostrar o resultado semelhante como a imagem a seguir: 
Ambas as guias agora são bem-sucedidas em uma chamada de vídeo 1:1. Ambos os usuários podem ouvir o áudio um do outro e ver o fluxo de vídeo um do outro.
Comece a usar os Serviços de Comunicação do Azure usando o SDK de chamada dos Serviços de Comunicação para adicionar chamadas de voz e vídeo 1:1 ao seu aplicativo. Você aprende a iniciar e atender uma chamada usando o SDK de Chamada dos Serviços de Comunicação do Azure para Windows.
Código de Exemplo
Se você quiser pular para o final, você pode baixar este início rápido como um exemplo no GitHub.
Pré-requisitos
Para concluir este tutorial, precisa dos seguintes pré-requisitos:
- Uma conta do Azure com uma subscrição ativa. Crie uma conta gratuitamente.
- Instale o Visual Studio 2022 com a carga de trabalho de desenvolvimento da Plataforma Universal do Windows.
- Um recurso de Serviços de Comunicação implantado. Crie um recurso de Serviços de Comunicação. Você precisa gravar sua cadeia de conexão para este início rápido.
- Um Token de Acesso de Usuário para seu Serviço de Comunicação do Azure.
- Obtenha o ID de thread do Teams para operações de chamada usando o Graph Explorer. Leia mais sobre como criar ID de thread de chat.
Configuração
Criação do projeto
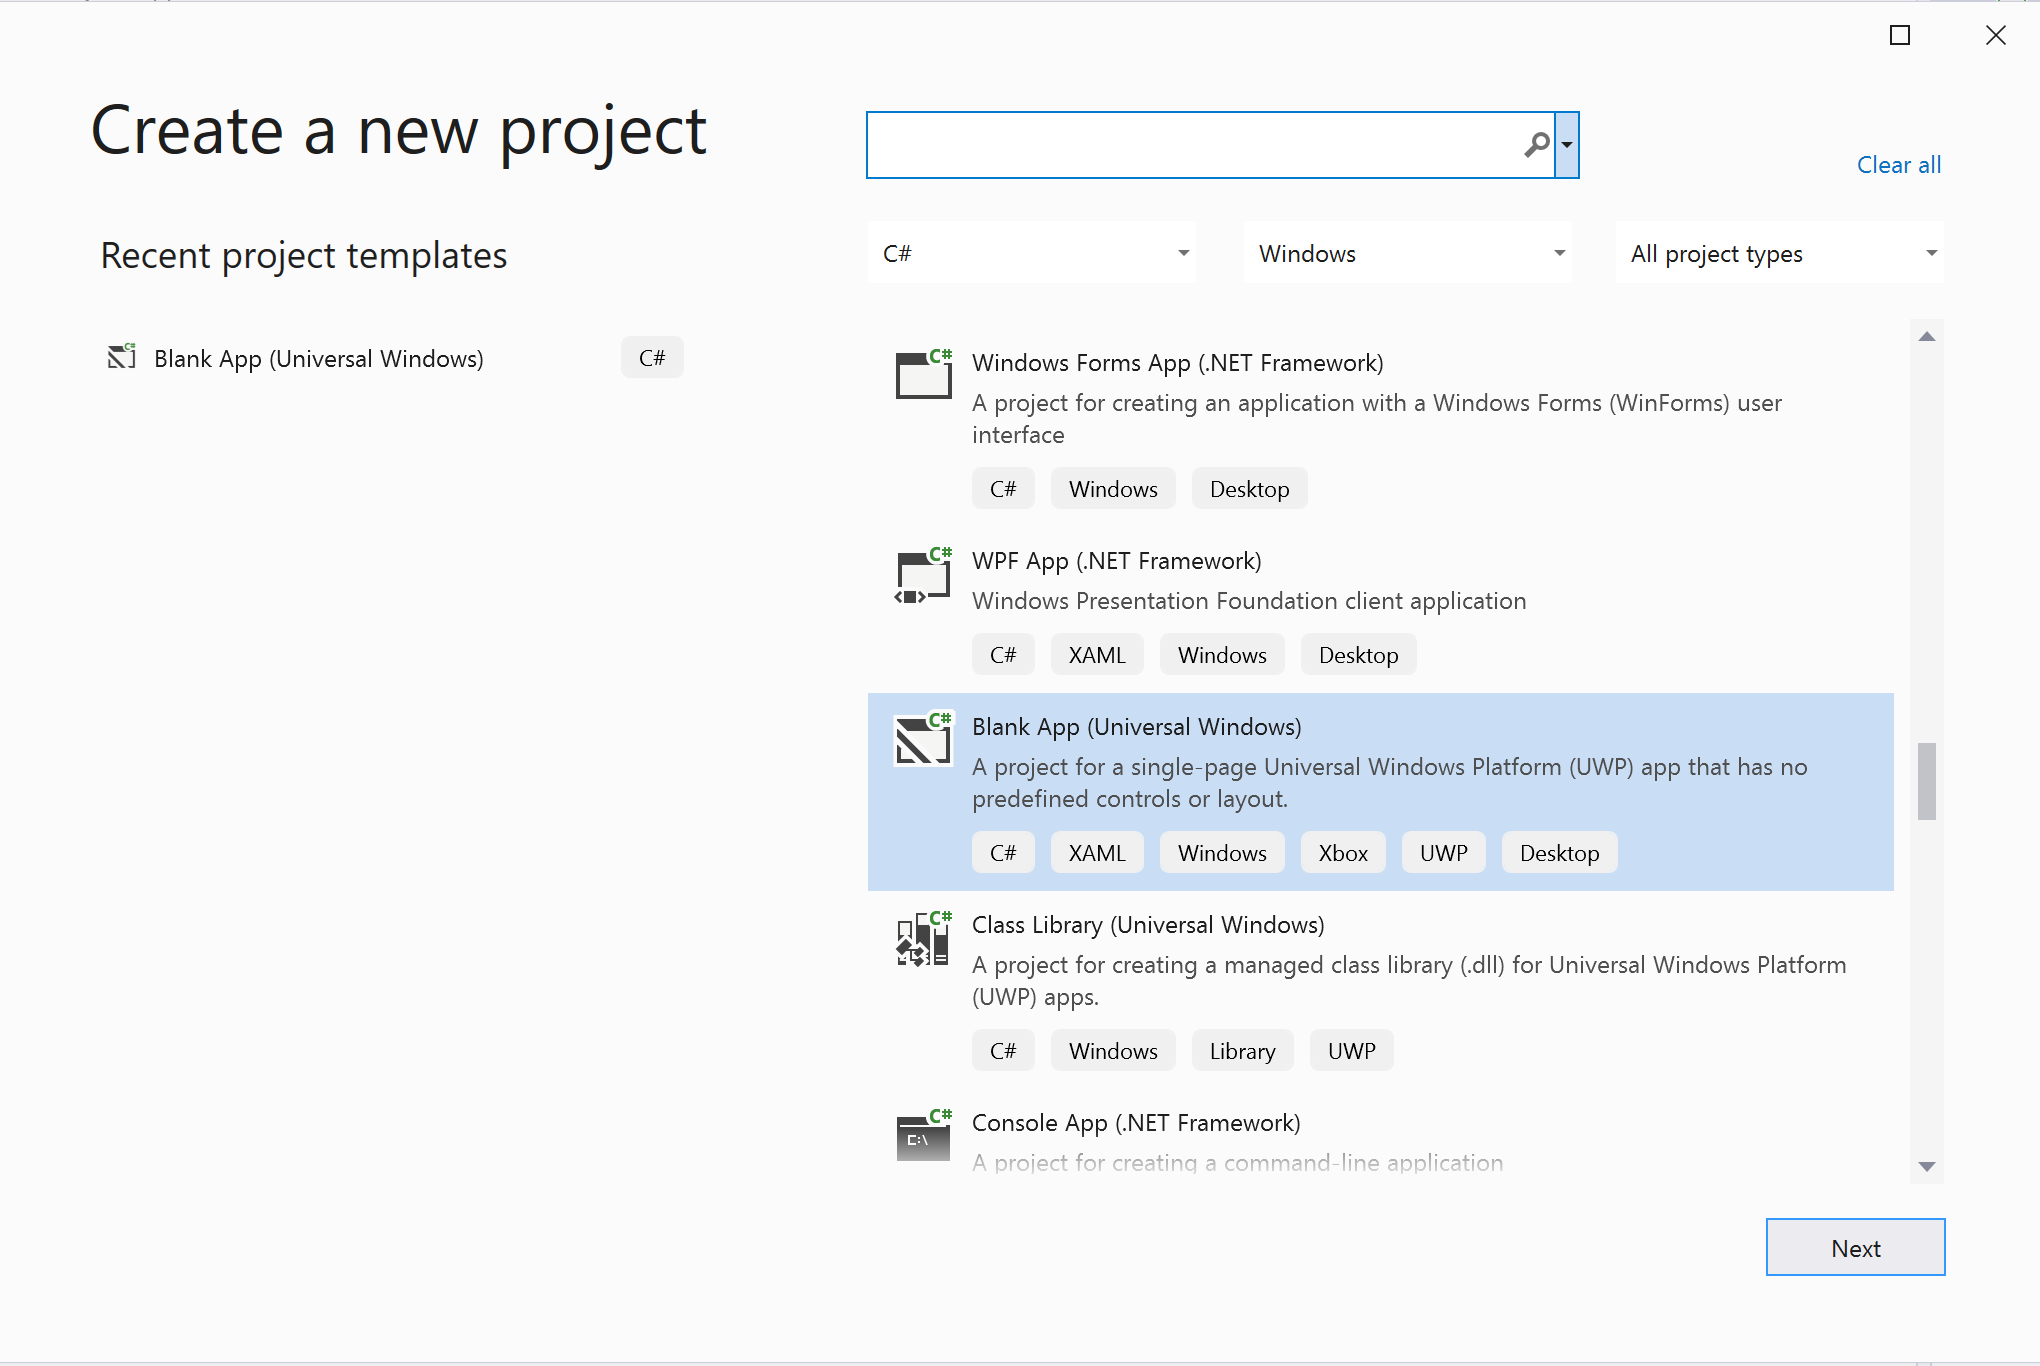
No Visual Studio, crie um novo projeto com o modelo Aplicativo em Branco (Universal Windows) para configurar um aplicativo da Plataforma Universal do Windows (UWP) de página única.
Instalar o pacote
Selecione com o botão direito do mouse seu projeto e vá para Manage Nuget Packages instalar Azure.Communication.Calling.WindowsClient1.2.0-beta.1 ou superior. Certifique-se de que a opção Incluir pré-liberado está marcada.
Pedir acesso
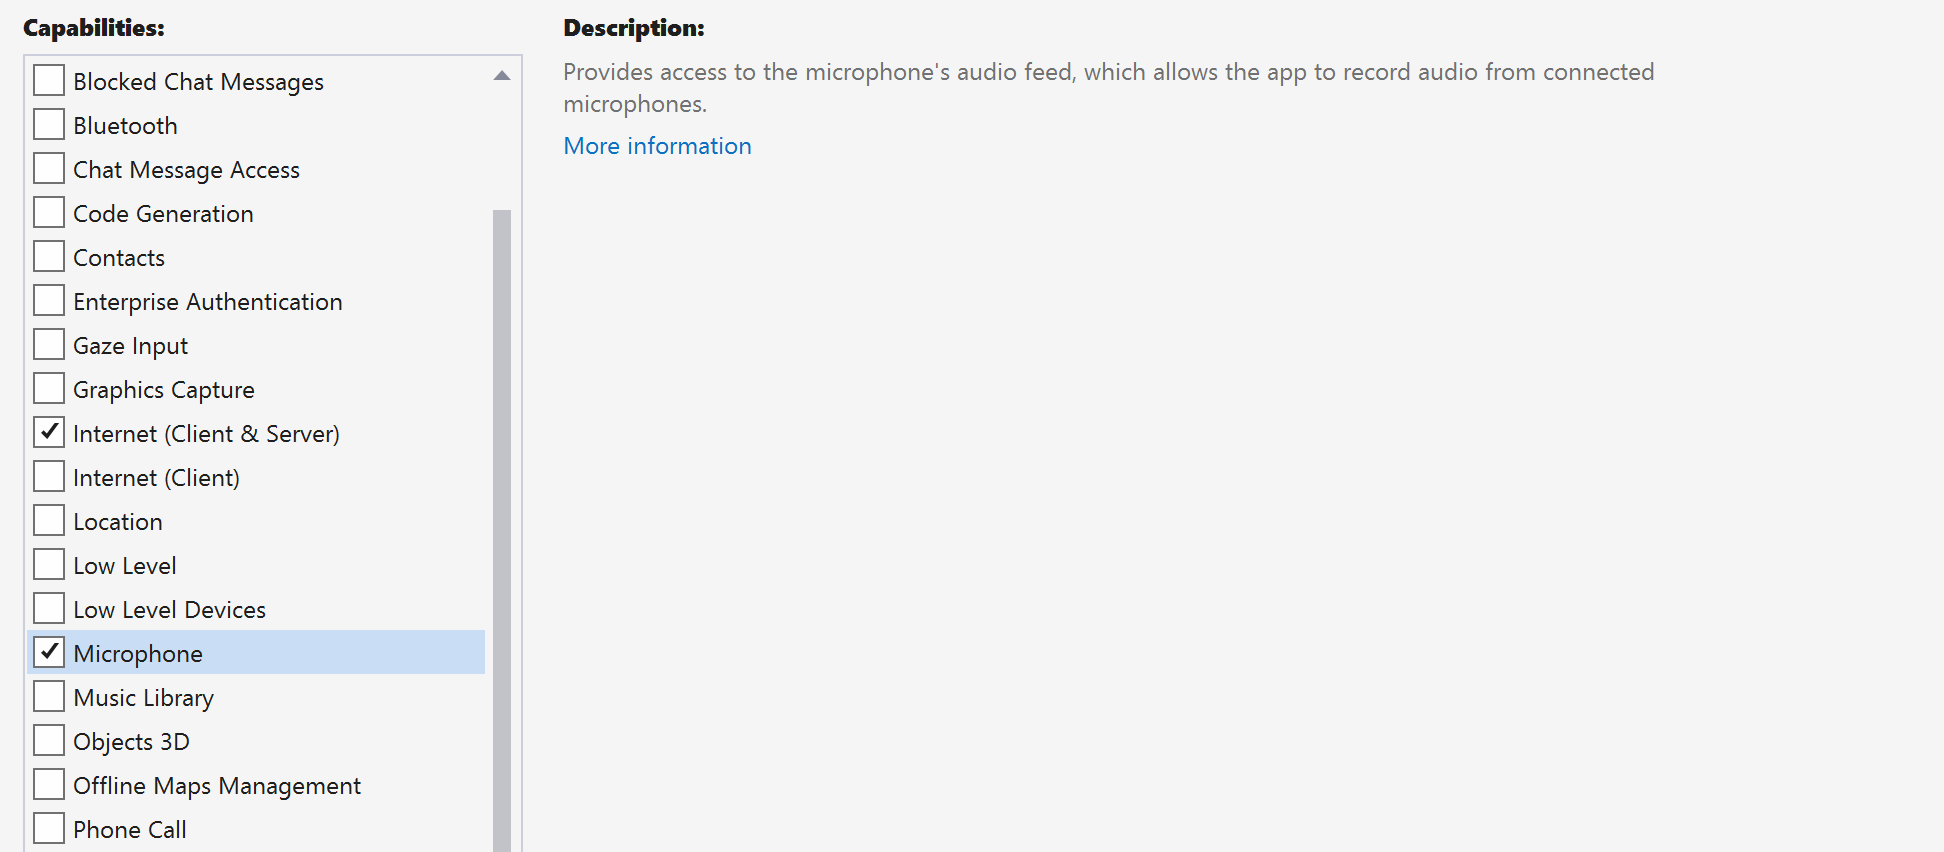
Vá para Package.appxmanifest e selecione Capabilities.
Verifique Internet (Client) e Internet (Client & Server) obtenha acesso de entrada e saída à Internet. Verifique Microphone para acessar o feed de áudio do microfone e Webcam para acessar o feed de vídeo da câmera.
Configurar a estrutura do aplicativo
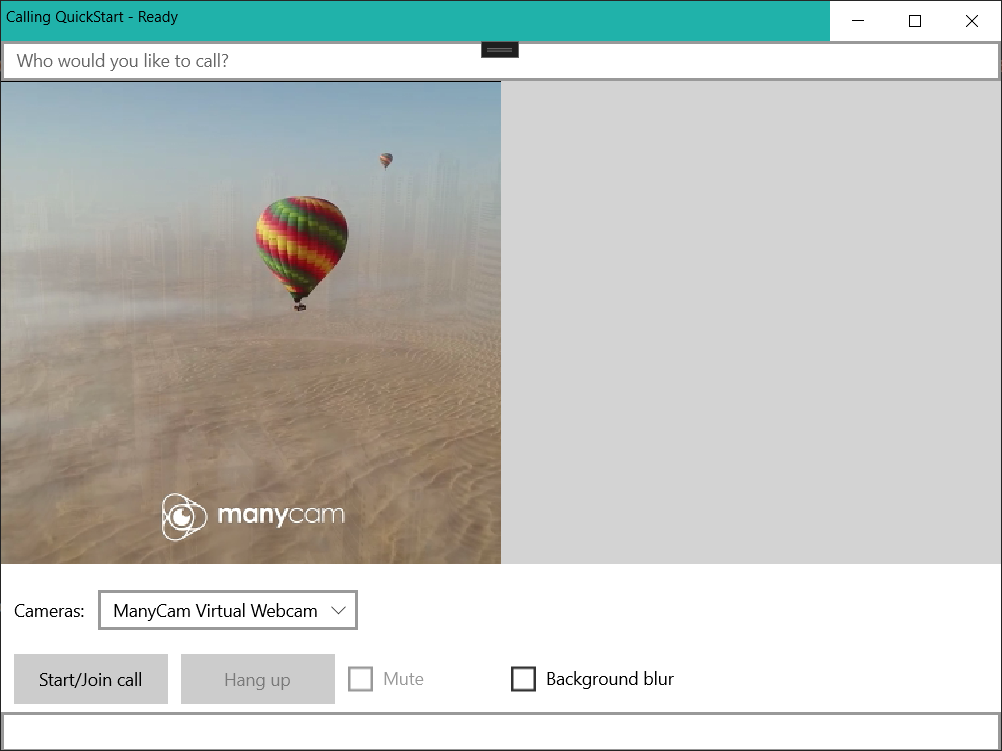
Precisamos configurar um layout básico para anexar nossa lógica. Para fazer uma chamada de saída, precisamos de um TextBox para fornecer o ID de usuário do destinatário. Precisamos também de um Start/Join call botão e de um Hang up botão. As caixas de seleção A Mute e a BackgroundBlur também estão incluídas neste exemplo para demonstrar os recursos de alternar estados de áudio e efeitos de vídeo.
Abra o MainPage.xaml do seu projeto e adicione o Grid nó ao seu Page:
<Page
    x:Class="CallingQuickstart.MainPage"
    xmlns="http://schemas.microsoft.com/winfx/2006/xaml/presentation"
    xmlns:x="http://schemas.microsoft.com/winfx/2006/xaml"
    xmlns:local="using:CallingQuickstart"
    xmlns:d="http://schemas.microsoft.com/expression/blend/2008"
    xmlns:mc="http://schemas.openxmlformats.org/markup-compatibility/2006"
    mc:Ignorable="d"
    Background="{ThemeResource ApplicationPageBackgroundThemeBrush}" Width="800" Height="600">

    <Grid>
        <Grid.RowDefinitions>
            <RowDefinition Height="16*"/>
            <RowDefinition Height="30*"/>
            <RowDefinition Height="200*"/>
            <RowDefinition Height="60*"/>
            <RowDefinition Height="16*"/>
        </Grid.RowDefinitions>
        <TextBox Grid.Row="1" x:Name="CalleeTextBox" PlaceholderText="Who would you like to call?" TextWrapping="Wrap" VerticalAlignment="Center" Height="30" Margin="10,10,10,10" />

        <Grid x:Name="AppTitleBar" Background="LightSeaGreen">
            <TextBlock x:Name="QuickstartTitle" Text="Calling Quickstart sample title bar" Style="{StaticResource CaptionTextBlockStyle}" Padding="7,7,0,0"/>
        </Grid>

        <Grid Grid.Row="2">
            <Grid.RowDefinitions>
                <RowDefinition/>
            </Grid.RowDefinitions>
            <Grid.ColumnDefinitions>
                <ColumnDefinition Width="*"/>
                <ColumnDefinition Width="*"/>
            </Grid.ColumnDefinitions>
            <MediaPlayerElement x:Name="LocalVideo" HorizontalAlignment="Center" Stretch="UniformToFill" Grid.Column="0" VerticalAlignment="Center" AutoPlay="True" />
            <MediaPlayerElement x:Name="RemoteVideo" HorizontalAlignment="Center" Stretch="UniformToFill" Grid.Column="1" VerticalAlignment="Center" AutoPlay="True" />
        </Grid>
        <StackPanel Grid.Row="3" Orientation="Vertical" Grid.RowSpan="2">
            <StackPanel Orientation="Horizontal">
                <Button x:Name="CallButton" Content="Start/Join call" Click="CallButton_Click" VerticalAlignment="Center" Margin="10,0,0,0" Height="40" Width="123"/>
                <Button x:Name="HangupButton" Content="Hang up" Click="HangupButton_Click" VerticalAlignment="Center" Margin="10,0,0,0" Height="40" Width="123"/>
                <CheckBox x:Name="MuteLocal" Content="Mute" Margin="10,0,0,0" Click="MuteLocal_Click" Width="74"/>
            </StackPanel>
        </StackPanel>
        <TextBox Grid.Row="5" x:Name="Stats" Text="" TextWrapping="Wrap" VerticalAlignment="Center" Height="30" Margin="0,2,0,0" BorderThickness="2" IsReadOnly="True" Foreground="LightSlateGray" />
    </Grid>
</Page>
Abra o e substitua MainPage.xaml.cs o conteúdo pela seguinte implementação:
using Azure.Communication.Calling.WindowsClient;
using System;
using System.Collections.Generic;
using System.ComponentModel;
using System.Linq;
using System.Threading.Tasks;
using Windows.ApplicationModel;
using Windows.ApplicationModel.Core;
using Windows.Media.Core;
using Windows.Networking.PushNotifications;
using Windows.UI;
using Windows.UI.ViewManagement;
using Windows.UI.Xaml;
using Windows.UI.Xaml.Controls;
using Windows.UI.Xaml.Media;
using Windows.UI.Xaml.Navigation;

namespace CallingQuickstart
{
    public sealed partial class MainPage : Page
    {
        private const string authToken = "<AUTHENTICATION_TOKEN>";

        private CallClient callClient;
        private CallTokenRefreshOptions callTokenRefreshOptions = new CallTokenRefreshOptions(false);
        private TeamsCallAgent teamsCallAgent;
        private TeamsCommunicationCall teamsCall;

        private LocalOutgoingAudioStream micStream;
        private LocalOutgoingVideoStream cameraStream;

        #region Page initialization
        public MainPage()
        {
            this.InitializeComponent();
            // Additional UI customization code goes here
        }

        protected override async void OnNavigatedTo(NavigationEventArgs e)
        {
            base.OnNavigatedTo(e);
        }
        #endregion

        #region UI event handlers
        private async void CallButton_Click(object sender, RoutedEventArgs e)
        {
            // Start a call
        }

        private async void HangupButton_Click(object sender, RoutedEventArgs e)
        {
            // Hang up a call
        }

        private async void MuteLocal_Click(object sender, RoutedEventArgs e)
        {
            // Toggle mute/unmute audio state of a call
        }
        #endregion

        #region API event handlers
        private async void OnIncomingCallAsync(object sender, TeamsIncomingCallReceivedEventArgs args)
        {
            // Handle incoming call event
        }

        private async void OnStateChangedAsync(object sender, PropertyChangedEventArgs args)
        {
            // Handle connected and disconnected state change of a call
        }
        #endregion
    }
}
Modelo de objeto
A tabela a seguir listou as classes e interfaces que manipulam alguns dos principais recursos do SDK de Chamada dos Serviços de Comunicação do Azure:
| Nome | Descrição |
|---|---|
CallClient |
O CallClient é o principal ponto de entrada para o SDK de chamada. |
TeamsCallAgent |
O TeamsCallAgent é usado para iniciar e gerenciar chamadas. |
TeamsCommunicationCall |
O TeamsCommunicationCall é usado para gerenciar uma chamada em andamento. |
CallTokenCredential |
O CallTokenCredential é usado como a credencial de token para instanciar o TeamsCallAgent. |
CallIdentifier |
O CallIdentifier é usado para representar a identidade do usuário, que pode ser uma das seguintes opções: MicrosoftTeamsUserCallIdentifier, UserCallIdentifier, PhoneNumberCallIdentifier etc. |
Autenticar o cliente
Inicialize uma TeamsCallAgent instância com um Token de Acesso de Usuário que nos permite fazer e receber chamadas e, opcionalmente, obter uma instância do DeviceManager para consultar configurações de dispositivo cliente.
No código, substitua <AUTHENTICATION_TOKEN> por um Token de Acesso de Usuário. Consulte a documentação do token de acesso do usuário se ainda não tiver um token disponível.
Adicionar InitCallAgentAndDeviceManagerAsync função, que inicializa o SDK. Este auxiliar pode ser personalizado para atender aos requisitos do seu aplicativo.
        private async Task InitCallAgentAndDeviceManagerAsync()
        {
            this.callClient = new CallClient(new CallClientOptions() {
                Diagnostics = new CallDiagnosticsOptions() {
                    AppName = "CallingQuickstart",
                    AppVersion="1.0",
                    Tags = new[] { "Calling", "CTE", "Windows" }
                    }
                });

            // Set up local video stream using the first camera enumerated
            var deviceManager = await this.callClient.GetDeviceManagerAsync();
            var camera = deviceManager?.Cameras?.FirstOrDefault();
            var mic = deviceManager?.Microphones?.FirstOrDefault();
            micStream = new LocalOutgoingAudioStream();

            var tokenCredential = new CallTokenCredential(authToken, callTokenRefreshOptions);

            this.teamsCallAgent = await this.callClient.CreateTeamsCallAgentAsync(tokenCredential);
            this.teamsCallAgent.IncomingCallReceived += OnIncomingCallAsync;
        }
Iniciar uma chamada
Adicione a implementação ao CallButton_Click para iniciar vários tipos de chamadas com o teamsCallAgent objeto que criamos e conecte RemoteParticipantsUpdated e StateChanged manipuladores de eventos no TeamsCommunicationCall objeto.
        private async void CallButton_Click(object sender, RoutedEventArgs e)
        {
            var callString = CalleeTextBox.Text.Trim();

            teamsCall = await StartCteCallAsync(callString);
            if (teamsCall != null)
            {
                teamsCall.StateChanged += OnStateChangedAsync;
            }
        }
Terminar uma chamada
Termine a chamada atual quando o Hang up botão for clicado. Adicione a implementação ao HangupButton_Click para encerrar uma chamada e interrompa a visualização e os fluxos de vídeo.
        private async void HangupButton_Click(object sender, RoutedEventArgs e)
        {
            var teamsCall = this.teamsCallAgent?.Calls?.FirstOrDefault();
            if (teamsCall != null)
            {
                await teamsCall.HangUpAsync(new HangUpOptions() { ForEveryone = false });
            }
        }
Alternar mudo/desativar mudo no áudio
Silencie o áudio de saída quando o Mute botão for clicado. Adicione a implementação ao MuteLocal_Click para silenciar a chamada.
        private async void MuteLocal_Click(object sender, RoutedEventArgs e)
        {
            var muteCheckbox = sender as CheckBox;

            if (muteCheckbox != null)
            {
                var teamsCall = this.teamsCallAgent?.Calls?.FirstOrDefault();
                if (teamsCall != null)
                {
                    if ((bool)muteCheckbox.IsChecked)
                    {
                        await teamsCall.MuteOutgoingAudioAsync();
                    }
                    else
                    {
                        await teamsCall.UnmuteOutgoingAudioAsync();
                    }
                }

                // Update the UI to reflect the state
            }
        }
Iniciar a chamada
Uma vez obtido um StartTeamsCallOptions objeto, TeamsCallAgent pode ser usado para iniciar a chamada do Teams:
        private async Task<TeamsCommunicationCall> StartCteCallAsync(string cteCallee)
        {
            var options = new StartTeamsCallOptions();
            var teamsCall = await this.teamsCallAgent.StartCallAsync( new MicrosoftTeamsUserCallIdentifier(cteCallee), options);
            return call;
        }
Aceitar uma chamada recebida
TeamsIncomingCallReceived o coletor de eventos é configurado no auxiliar InitCallAgentAndDeviceManagerAsyncde bootstrap do SDK.
this.teamsCallAgent.IncomingCallReceived += OnIncomingCallAsync;
O aplicativo tem a oportunidade de configurar como a chamada recebida deve ser aceita, como tipos de fluxo de vídeo e áudio.
        private async void OnIncomingCallAsync(object sender, TeamsIncomingCallReceivedEventArgs args)
        {
            var teamsIncomingCall = args.IncomingCall;

            var acceptteamsCallOptions = new AcceptTeamsCallOptions() { };

            teamsCall = await teamsIncomingCall.AcceptAsync(acceptteamsCallOptions);
            teamsCall.StateChanged += OnStateChangedAsync;
        }
Participe de uma chamada do Teams
O usuário também pode participar de uma chamada existente passando um link
TeamsMeetingLinkLocator link = new TeamsMeetingLinkLocator("meetingLink");
JoinTeamsCallOptions options = new JoinTeamsCallOptions();
TeamsCall call = await teamsCallAgent.JoinAsync(link, options);
Monitorar e responder ao evento de alteração de estado da chamada
StateChanged evento no TeamsCommunicationCall objeto é acionado quando um em andamento chama transações de um estado para outro. O aplicativo oferece a oportunidade de refletir as alterações de estado na interface do usuário ou inserir lógicas de negócios.
        private async void OnStateChangedAsync(object sender, PropertyChangedEventArgs args)
        {
            var teamsCall = sender as TeamsCommunicationCall;

            if (teamsCall != null)
            {
                var state = teamsCall.State;

                // Update the UI

                switch (state)
                {
                    case CallState.Connected:
                        {
                            await teamsCall.StartAudioAsync(micStream);

                            break;
                        }
                    case CallState.Disconnected:
                        {
                            teamsCall.StateChanged -= OnStateChangedAsync;

                            teamsCall.Dispose();

                            break;
                        }
                    default: break;
                }
            }
        }
Executar o código
Você pode criar e executar o código no Visual Studio. Para plataformas de solução, suportamos ARM64e x86x64 .
Você pode fazer uma chamada de saída fornecendo um ID de usuário no campo de texto e clicando no Start Call/Join botão. Ligar 8:echo123 conecta você a um bot de eco, esse recurso é ótimo para começar e verificar se seus dispositivos de áudio estão funcionando.
Comece a usar os Serviços de Comunicação do Azure usando o SDK de chamada dos Serviços de Comunicação para adicionar chamadas de voz e vídeo 1:1 ao seu aplicativo. Você aprenderá como iniciar e atender uma chamada usando o SDK de Chamada dos Serviços de Comunicação do Azure para Java.
Código de Exemplo
Se você quiser pular para o final, você pode baixar este início rápido como um exemplo no GitHub.
Pré-requisitos
- Uma conta do Azure com uma subscrição ativa. Crie uma conta gratuitamente.
- Android Studio, para criar a sua aplicação Android.
- Um recurso de Serviços de Comunicação implantado. Crie um recurso de Serviços de Comunicação. Você precisa gravar sua cadeia de conexão para este início rápido.
- Um Token de Acesso de Usuário para seu Serviço de Comunicação do Azure.
- Obtenha o ID de thread do Teams para operações de chamada usando o Graph Explorer. Leia mais sobre como criar ID de thread de chat.
Configuração
Criar um aplicativo Android com uma atividade vazia
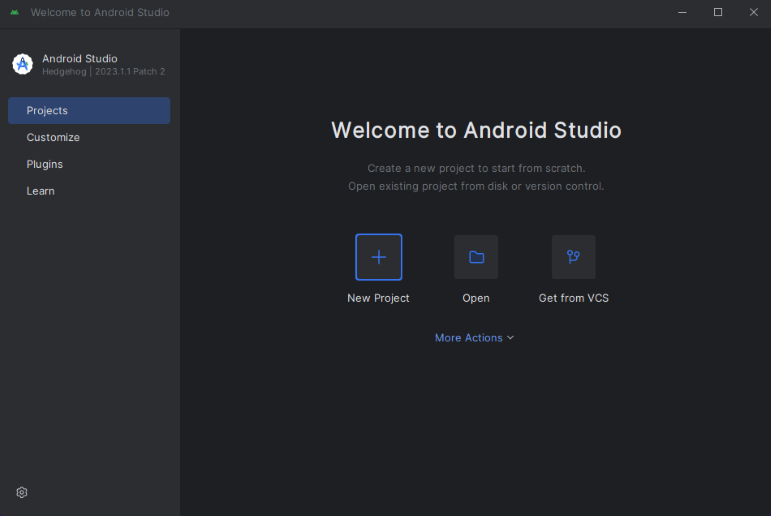
No Android Studio, selecione Iniciar um novo projeto do Android Studio.
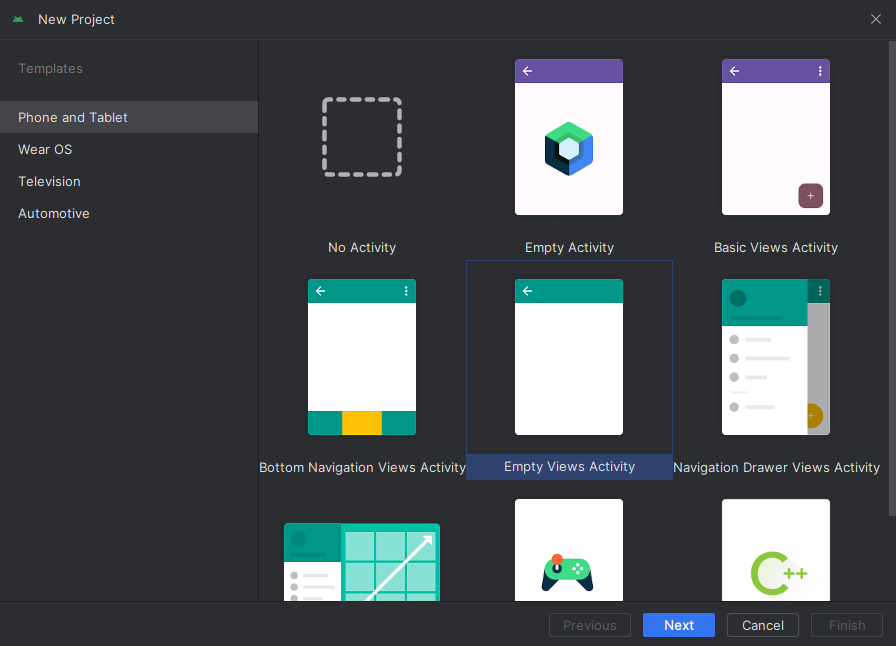
Selecione o modelo de projeto "Atividade vazia" em "Telefone e tablet".
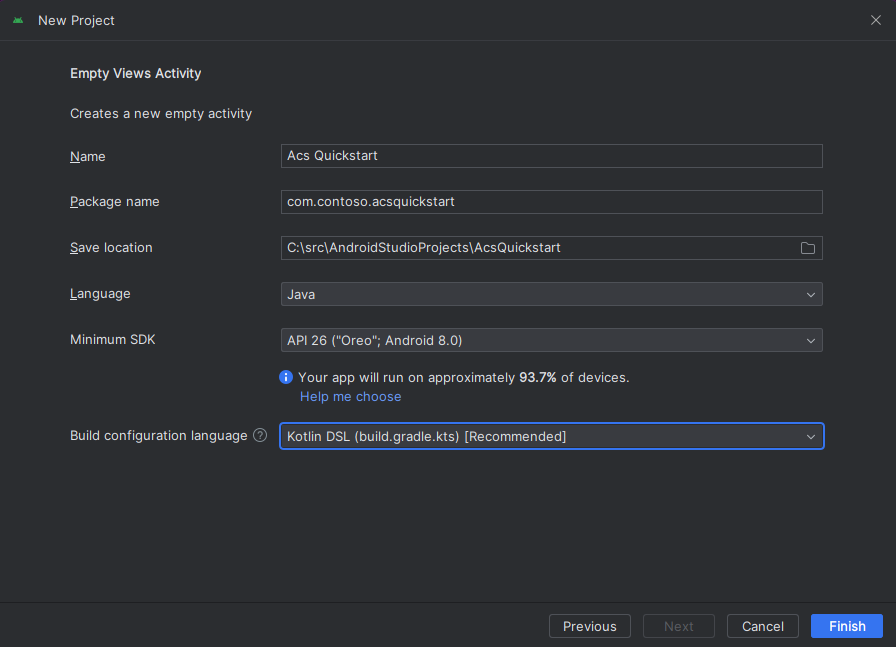
Selecione SDK mínimo de "API 26: Android 8.0 (Oreo)" ou superior.
Instalar o pacote
Localize seu nível de projeto build.gradle e certifique-se de adicionar mavenCentral() à lista de repositórios em buildscript e allprojects
buildscript {
    repositories {
    ...
        mavenCentral()
    ...
    }
}
allprojects {
    repositories {
    ...
        mavenCentral()
    ...
    }
}
Em seguida, no nível do módulo build.gradle, adicione as seguintes linhas às dependências e às seções android:
android {
    ...
    packagingOptions {
        pickFirst  'META-INF/*'
    }
    compileOptions {
        sourceCompatibility JavaVersion.VERSION_1_8
        targetCompatibility JavaVersion.VERSION_1_8
    }
}

dependencies {
    ...
    implementation 'com.azure.android:azure-communication-calling:1.0.0-beta.8'
    ...
}
Adicionar permissões ao manifesto do aplicativo
Para solicitar as permissões necessárias para fazer uma chamada, elas devem ser declaradas no manifesto do aplicativo (app/src/main/AndroidManifest.xml). Substitua o conteúdo do arquivo pelo seguinte código:
    <?xml version="1.0" encoding="utf-8"?>
<manifest xmlns:android="http://schemas.android.com/apk/res/android"
    package="com.contoso.ctequickstart">

    <uses-permission android:name="android.permission.INTERNET" />
    <uses-permission android:name="android.permission.ACCESS_NETWORK_STATE" />
    <uses-permission android:name="android.permission.ACCESS_WIFI_STATE" />
    <uses-permission android:name="android.permission.RECORD_AUDIO" />
    <uses-permission android:name="android.permission.CAMERA" />
    <uses-permission android:name="android.permission.WRITE_EXTERNAL_STORAGE" />
    <uses-permission android:name="android.permission.READ_PHONE_STATE" />

    <application
        android:allowBackup="true"
        android:icon="@mipmap/ic_launcher"
        android:label="@string/app_name"
        android:roundIcon="@mipmap/ic_launcher_round"
        android:supportsRtl="true"
        android:theme="@style/AppTheme">
        <!--Our Calling SDK depends on the Apache HTTP SDK.
When targeting Android SDK 28+, this library needs to be explicitly referenced.
See https://developer.android.com/about/versions/pie/android-9.0-changes-28#apache-p-->
        <uses-library android:name="org.apache.http.legacy" android:required="false"/>
        <activity android:name=".MainActivity">
            <intent-filter>
                <action android:name="android.intent.action.MAIN" />

                <category android:name="android.intent.category.LAUNCHER" />
            </intent-filter>
        </activity>
    </application>

</manifest>
Configurar o layout do aplicativo
Duas entradas são necessárias: uma entrada de texto para o ID do destinatário e um botão para fazer a chamada. Essas entradas podem ser adicionadas através do designer ou editando o layout xml. Crie um botão com um ID de e uma entrada de call_button texto de callee_id. Navegue até (app/src/main/res/layout/activity_main.xml) e substitua o conteúdo do arquivo pelo seguinte código:
<?xml version="1.0" encoding="utf-8"?>
<androidx.constraintlayout.widget.ConstraintLayout xmlns:android="http://schemas.android.com/apk/res/android"
    xmlns:app="http://schemas.android.com/apk/res-auto"
    xmlns:tools="http://schemas.android.com/tools"
    android:layout_width="match_parent"
    android:layout_height="match_parent"
    tools:context=".MainActivity">

    <Button
        android:id="@+id/call_button"
        android:layout_width="wrap_content"
        android:layout_height="wrap_content"
        android:layout_marginBottom="16dp"
        android:text="Call"
        app:layout_constraintBottom_toBottomOf="parent"
        app:layout_constraintEnd_toEndOf="parent"
        app:layout_constraintStart_toStartOf="parent" />

    <EditText
        android:id="@+id/callee_id"
        android:layout_width="wrap_content"
        android:layout_height="wrap_content"
        android:ems="10"
        android:hint="Callee Id"
        android:inputType="textPersonName"
        app:layout_constraintBottom_toTopOf="@+id/call_button"
        app:layout_constraintEnd_toEndOf="parent"
        app:layout_constraintStart_toStartOf="parent"
        app:layout_constraintTop_toTopOf="parent" />
</androidx.constraintlayout.widget.ConstraintLayout>
Criar os andaimes e encadernações da atividade principal
Com o layout criado as encadernações podem ser adicionadas, bem como o andaime básico da atividade. A atividade lida com a solicitação de permissões de tempo de execução, a criação do agente de chamada de equipes e a realização da chamada quando o botão é pressionado. Cada um é coberto na sua própria secção. O onCreate método é substituído para invocar getAllPermissions e createTeamsAgent adicionar as ligações para o botão de chamada. Esse evento ocorre apenas uma vez quando a atividade é criada. Para obter mais informações, consulte onCreateo guia Compreender o ciclo de vida da atividade.
Navegue até MainActivity.java e substitua o conteúdo pelo seguinte código:
package com.contoso.ctequickstart;

import androidx.appcompat.app.AppCompatActivity;
import androidx.core.app.ActivityCompat;
import android.media.AudioManager;
import android.Manifest;
import android.content.pm.PackageManager;

import android.os.Bundle;
import android.widget.Button;
import android.widget.EditText;
import android.widget.Toast;

import com.azure.android.communication.common.CommunicationUserIdentifier;
import com.azure.android.communication.common.CommunicationTokenCredential;
import com.azure.android.communication.calling.TeamsCallAgent;
import com.azure.android.communication.calling.CallClient;
import com.azure.android.communication.calling.StartTeamsCallOptions;


import java.util.ArrayList;

public class MainActivity extends AppCompatActivity {

    private TeamsCallAgent teamsCallAgent;

    @Override
    protected void onCreate(Bundle savedInstanceState) {
        super.onCreate(savedInstanceState);
        setContentView(R.layout.activity_main);

        getAllPermissions();
        createTeamsAgent();

        // Bind call button to call `startCall`
        Button callButton = findViewById(R.id.call_button);
        callButton.setOnClickListener(l -> startCall());

        setVolumeControlStream(AudioManager.STREAM_VOICE_CALL);
    }

    /**
     * Request each required permission if the app doesn't already have it.
     */
    private void getAllPermissions() {
        // See section on requesting permissions
    }

    /**
      * Create the call agent for placing calls
      */
    private void createTeamsAgent() {
        // See section on creating the call agent
    }

    /**
     * Place a call to the callee id provided in `callee_id` text input.
     */
    private void startCall() {
        // See section on starting the call
    }
}
Solicitar permissões em tempo de execução
Para Android 6.0 e superior (nível de API 23) e targetSdkVersion 23 ou superior, as permissões são concedidas em tempo de execução em vez de quando o aplicativo é instalado. A fim de apoiá-lo, getAllPermissions pode ser implementado para chamar ActivityCompat.checkSelfPermission e ActivityCompat.requestPermissions para cada permissão necessária.
/**
 * Request each required permission if the app doesn't already have it.
 */
private void getAllPermissions() {
    String[] requiredPermissions = new String[]{Manifest.permission.RECORD_AUDIO, Manifest.permission.CAMERA, Manifest.permission.WRITE_EXTERNAL_STORAGE, Manifest.permission.READ_PHONE_STATE};
    ArrayList<String> permissionsToAskFor = new ArrayList<>();
    for (String permission : requiredPermissions) {
        if (ActivityCompat.checkSelfPermission(this, permission) != PackageManager.PERMISSION_GRANTED) {
            permissionsToAskFor.add(permission);
        }
    }
    if (!permissionsToAskFor.isEmpty()) {
        ActivityCompat.requestPermissions(this, permissionsToAskFor.toArray(new String[0]), 1);
    }
}
Nota
Ao projetar seu aplicativo, considere quando essas permissões devem ser solicitadas. As permissões devem ser solicitadas conforme necessário, não com antecedência. Para obter mais informações, consulte o Guia de permissões do Android.
Modelo de objeto
As seguintes classes e interfaces lidam com alguns dos principais recursos do SDK de Chamada dos Serviços de Comunicação do Azure:
| Nome | Descrição |
|---|---|
CallClient |
O CallClient é o principal ponto de entrada para o SDK de chamada. |
TeamsCallAgent |
O TeamsCallAgent é usado para iniciar e gerenciar chamadas. |
TeamsCall |
O TeamsCall usado para representar uma chamada de equipes. |
CommunicationTokenCredential |
O CommunicationTokenCredential é usado como a credencial de token para instanciar o TeamsCallAgent. |
CommunicationIdentifier |
O CommunicationIdentifier é usado como diferente tipo de participante que pode fazer parte de uma chamada. |
Criar um agente a partir do token de acesso do usuário
Com um token de usuário, um agente de chamada autenticado pode ser instanciado. Geralmente esse token é gerado a partir de um serviço com autenticação específica para o aplicativo. Para obter mais informações sobre tokens de acesso de usuário, consulte o guia Tokens de acesso de usuário.
Para o início rápido, substitua <User_Access_Token> por um token de acesso de usuário gerado para seu recurso do Serviço de Comunicação do Azure.
/**
 * Create the teams call agent for placing calls
 */
private void createAgent() {
    String userToken = "<User_Access_Token>";

    try {
        CommunicationTokenCredential credential = new CommunicationTokenCredential(userToken);
        teamsCallAgent = new CallClient().createTeamsCallAgent(getApplicationContext(), credential).get();
    } catch (Exception ex) {
        Toast.makeText(getApplicationContext(), "Failed to create teams call agent.", Toast.LENGTH_SHORT).show();
    }
}
Iniciar uma chamada usando o agente de chamada
A realização da chamada pode ser feita através do agente de chamadas das equipas e requer apenas o fornecimento de uma lista de IDs de chamada e as opções de chamada. Para o início rápido, as opções de chamada padrão sem vídeo e um único ID de destinatário da entrada de texto são usadas.
/**
 * Place a call to the callee id provided in `callee_id` text input.
 */
private void startCall() {
    EditText calleeIdView = findViewById(R.id.callee_id);
    String calleeId = calleeIdView.getText().toString();

    StartTeamsCallOptions options = new StartTeamsCallOptions();

    teamsCallAgent.startCall(
        getApplicationContext(),
        new MicrosoftTeamsUserCallIdentifier(calleeId),
        options);
}
Atender uma chamada
A aceitação de uma chamada pode ser feita usando o agente de chamada de equipes usando apenas uma referência ao contexto atual.
public void acceptACall(TeamsIncomingCall teamsIncomingCall){
	teamsIncomingCall.accept(this);
}
Participe de uma chamada do Teams
Um usuário pode ingressar em uma chamada existente passando um link.
/**
 * Join a call using a teams meeting link.
 */
public TeamsCall joinTeamsCall(TeamsCallAgent teamsCallAgent){
	TeamsMeetingLinkLocator link = new TeamsMeetingLinkLocator("meetingLink");
	TeamsCall call = teamsCallAgent.join(this, link);
}
Participe de uma chamada do Teams com opções
Também podemos participar de uma chamada existente com opções predefinidas, como silenciar.
/**
 * Join a call using a teams meeting link while muted.
 */
public TeamsCall joinTeamsCall(TeamsCallAgent teamsCallAgent){
	TeamsMeetingLinkLocator link = new TeamsMeetingLinkLocator("meetingLink");
	OutgoingAudioOptions audioOptions = new OutgoingAudioOptions().setMuted(true);
	JoinTeamsCallOptions options = new JoinTeamsCallOptions().setAudioOptions(audioOptions);
	TeamsCall call = teamsCallAgent.join(this, link, options);
}
Configurar o ouvinte de chamadas recebidas
Para poder detetar chamadas recebidas e outras ações não realizadas por esse usuário, os ouvintes devem ser configurados.
private TeamsIncomingCall teamsincomingCall;
teamsCallAgent.addOnIncomingCallListener(this::handleIncomingCall);

private void handleIncomingCall(TeamsIncomingCall incomingCall) {
	this.teamsincomingCall = incomingCall;
}
Inicie o aplicativo e chame o bot de eco
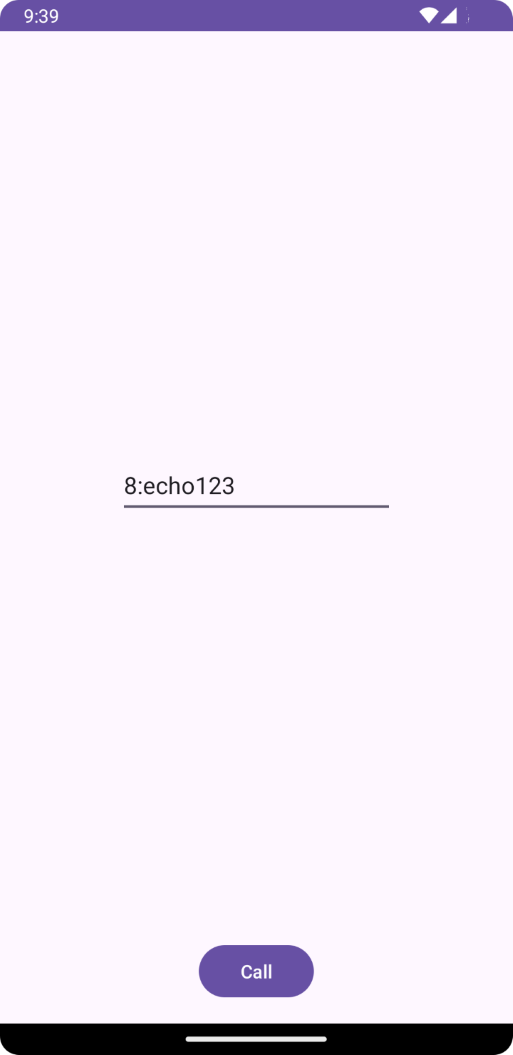
O aplicativo agora pode ser iniciado usando o botão "Executar aplicativo" na barra de ferramentas (Shift + F10). Verifique se você consegue fazer chamadas ligando 8:echo123para . Uma mensagem pré-gravada é reproduzida e, em seguida, repita a mensagem de volta para você.
Comece a usar os Serviços de Comunicação do Azure usando o SDK de chamada dos Serviços de Comunicação para adicionar uma chamada de vídeo individual ao seu aplicativo. Você aprende a iniciar e atender uma chamada de vídeo usando o SDK de Chamada dos Serviços de Comunicação do Azure para iOS usando a identidade do Teams.
Código de Exemplo
Se você quiser pular para o final, você pode baixar este início rápido como um exemplo no GitHub.
Pré-requisitos
- Obtenha uma conta do Azure com uma assinatura ativa. Crie uma conta gratuitamente.
- Um Mac com Xcode, juntamente com um certificado de programador válido instalado no seu Porta-chaves.
- Crie um recurso ativo dos Serviços de Comunicação. Crie um recurso de Serviços de Comunicação. Você precisa gravar sua cadeia de conexão para este início rápido.
- Um Token de Acesso de Usuário para seu Serviço de Comunicação do Azure.
- Obtenha o ID de thread do Teams para operações de chamada usando o Graph Explorer. Leia mais sobre como criar ID de thread de bate-papo
Configuração
Criando o projeto Xcode
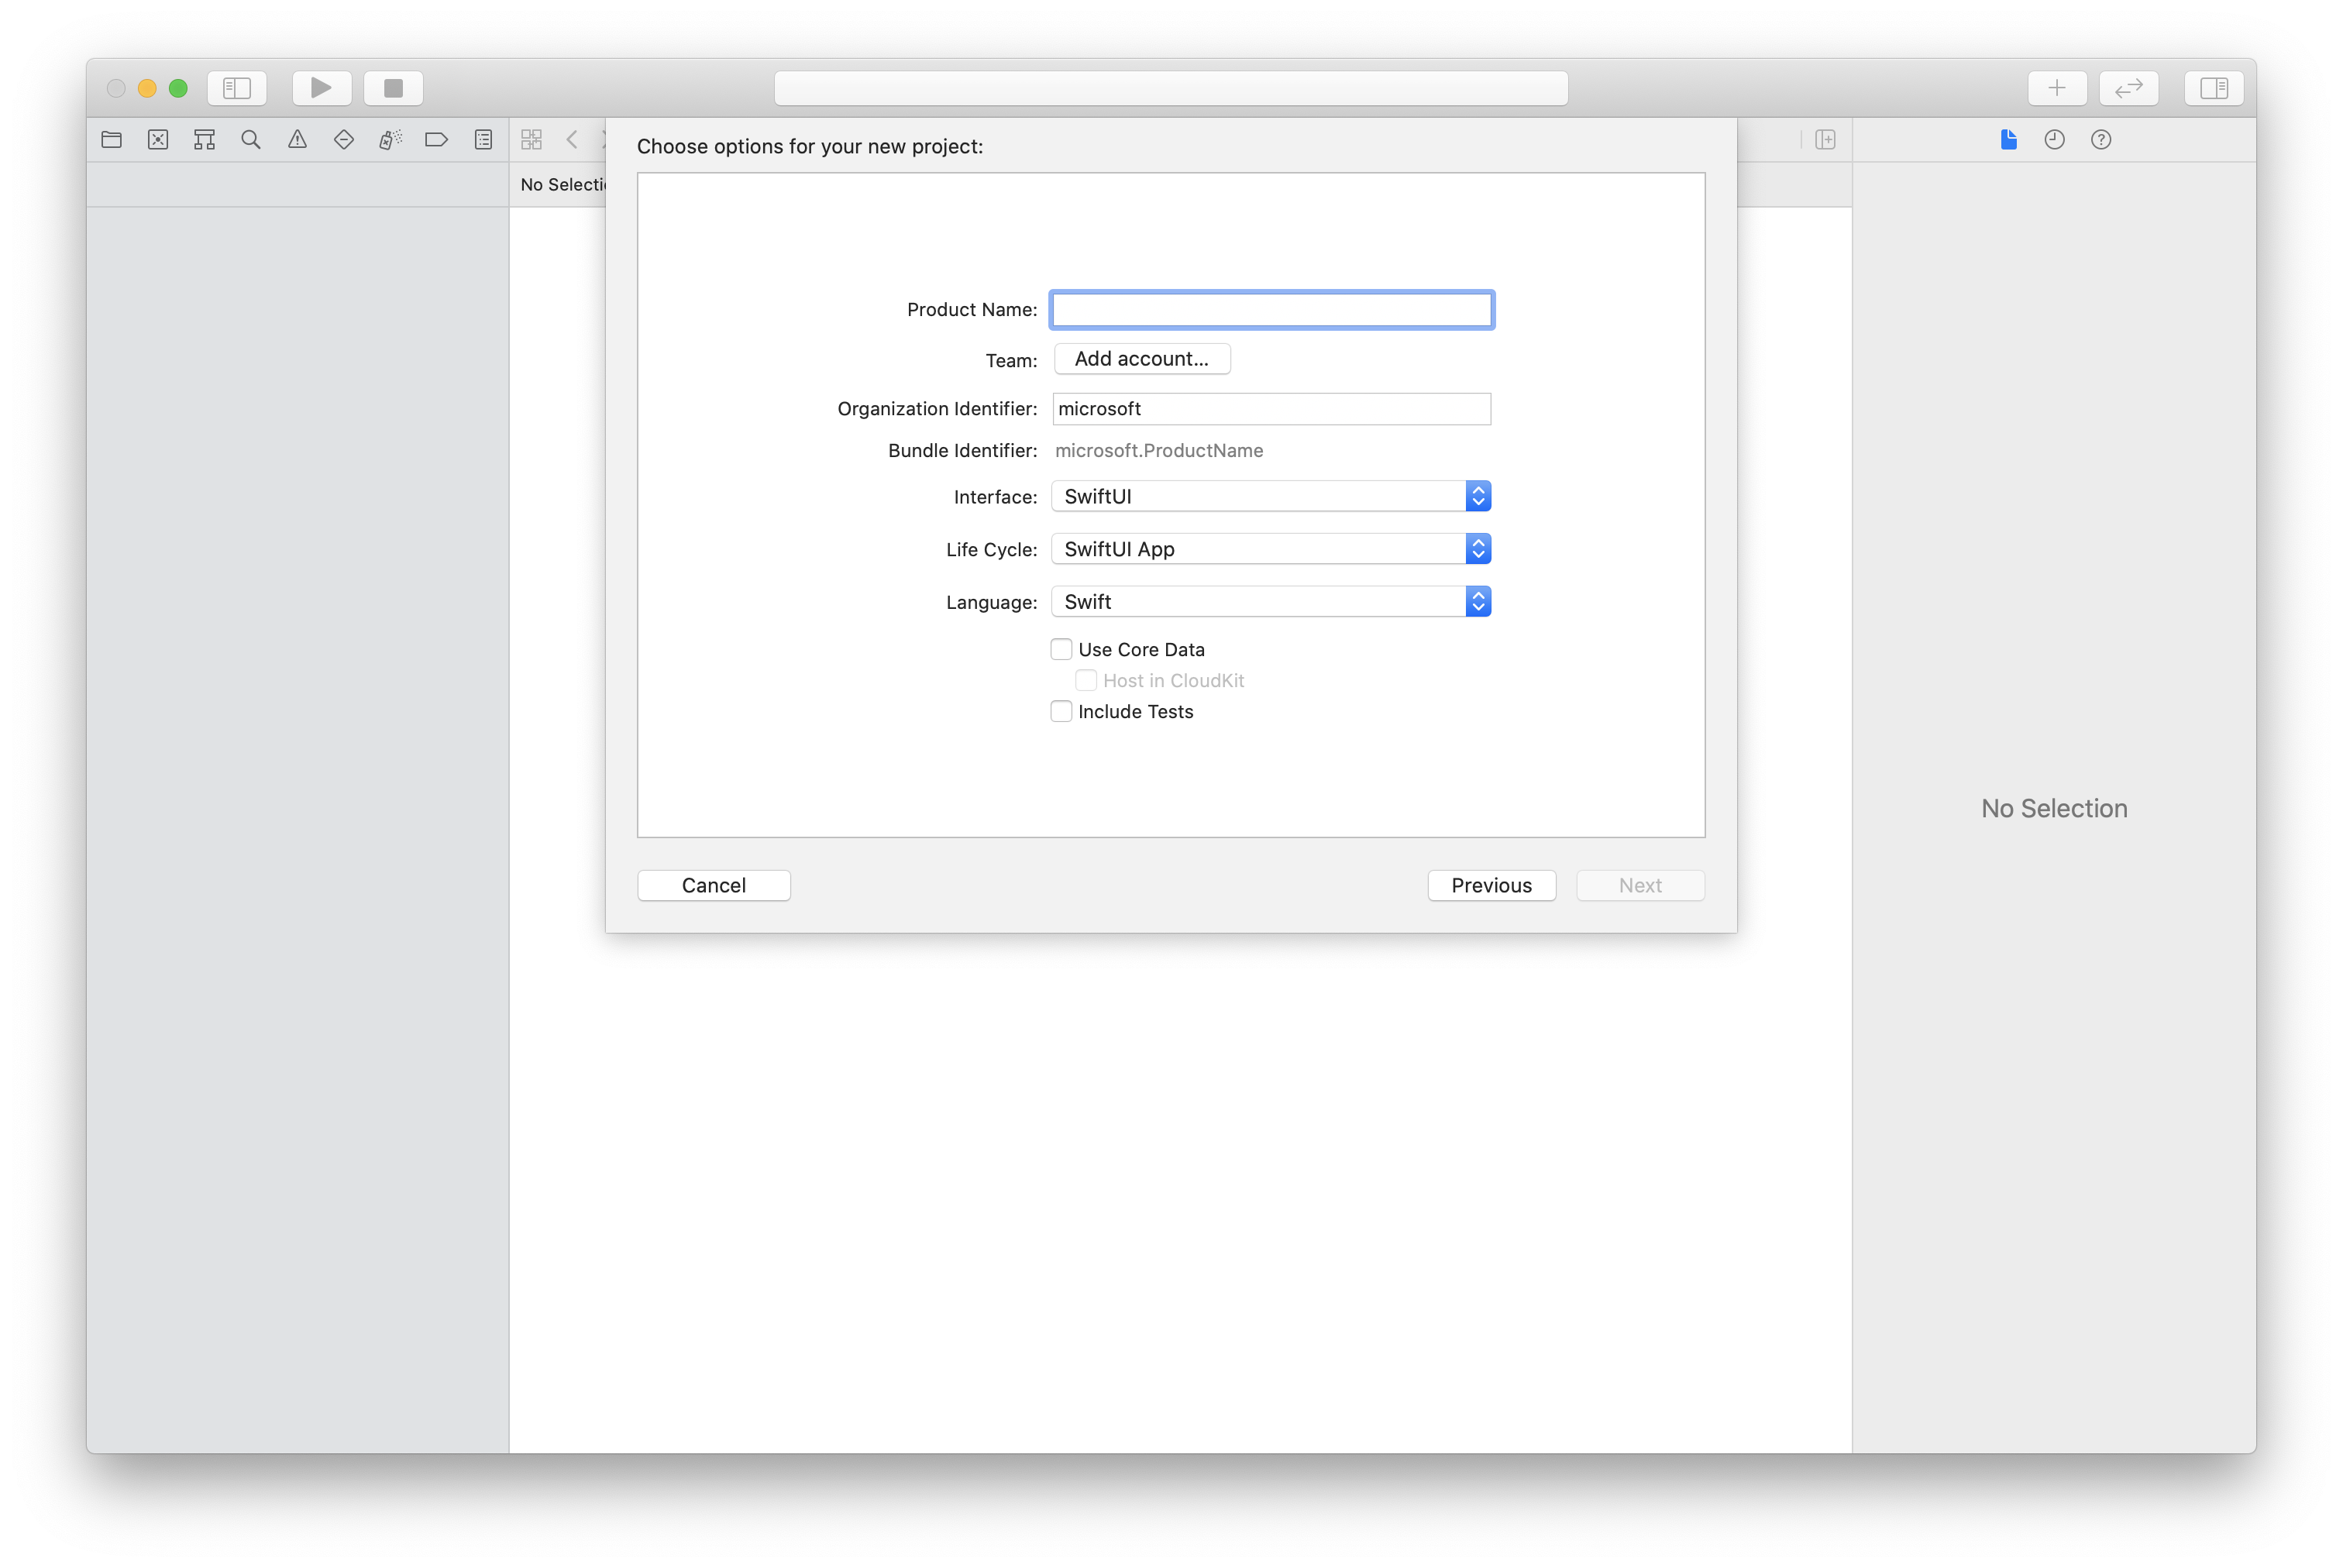
No Xcode, crie um novo projeto iOS e selecione o modelo Single View App. Este tutorial usa a estrutura SwiftUI, portanto, você deve definir o idioma como Swift e a interface do usuário como SwiftUI. Você não vai criar testes durante esse início rápido. Sinta-se à vontade para desmarcar Incluir testes.
Instalação do CocoaPods
Use este guia para instalar o CocoaPods no seu Mac.
Instale o pacote e as dependências com o CocoaPods
Para criar um
Podfilepara seu aplicativo, abra o terminal e navegue até a pasta do projeto e execute pod init.Adicione o seguinte código ao
Podfilee salve. Consulte Versões de suporte do SDK.
platform :ios, '13.0'
use_frameworks!

target 'VideoCallingQuickstart' do
  pod 'AzureCommunicationCalling', '~> 2.10.0'
end
Execute a instalação do pod.
Abra o com Xcode
.xcworkspace.
Solicitar acesso ao microfone e à câmara
Para acessar o microfone e a câmera do dispositivo, você precisa atualizar a Lista de Propriedades de Informações do seu aplicativo com um NSMicrophoneUsageDescription e NSCameraUsageDescription. Você define o valor associado como uma cadeia de caracteres que inclui a caixa de diálogo que o sistema usa para solicitar acesso do usuário.
Clique com o botão direito do mouse na Info.plist entrada da árvore do projeto e selecione Abrir como > código-fonte. Adicione as seguintes linhas à secção de nível <dict> superior e, em seguida, guarde o ficheiro.
<key>NSMicrophoneUsageDescription</key>
<string>Need microphone access for VOIP calling.</string>
<key>NSCameraUsageDescription</key>
<string>Need camera access for video calling</string>
Configurar a estrutura do aplicativo
Abra o arquivo do ContentView.swift projeto e adicione uma declaração de importação à parte superior do arquivo para importar a biblioteca e AVFoundationo AzureCommunicationCalling . AVFoundation é usado para capturar permissão de áudio do código.
import AzureCommunicationCalling
import AVFoundation
Modelo de objeto
As classes e interfaces a seguir lidam com alguns dos principais recursos do SDK de Chamada dos Serviços de Comunicação do Azure para iOS.
| Nome | Descrição |
|---|---|
CallClient |
O CallClient é o principal ponto de entrada para o SDK de chamada. |
TeamsCallAgent |
O TeamsCallAgent é usado para iniciar e gerenciar chamadas. |
TeamsIncomingCall |
O TeamsIncomingCall é usado para aceitar ou rejeitar chamadas de equipes de entrada. |
CommunicationTokenCredential |
O CommunicationTokenCredential é usado como a credencial de token para instanciar o TeamsCallAgent. |
CommunicationIdentifier |
O CommunicationIdentifier é usado para representar a identidade do usuário, que pode ser uma das seguintes opções: CommunicationUserIdentifier, PhoneNumberIdentifier ou CallingApplication. |
Criar o Teams Call Agent
Substitua a implementação do ContentView struct por alguns controles de interface do usuário simples que permitem que um usuário inicie e termine uma chamada. Adicionamos lógica de negócios a esses controles neste início rápido.
struct ContentView: View {
    @State var callee: String = ""
    @State var callClient: CallClient?
    @State var teamsCallAgent: TeamsCallAgent?
    @State var teamsCall: TeamsCall?
    @State var deviceManager: DeviceManager?
    @State var localVideoStream:[LocalVideoStream]?
    @State var teamsIncomingCall: TeamsIncomingCall?
    @State var sendingVideo:Bool = false
    @State var errorMessage:String = "Unknown"

    @State var remoteVideoStreamData:[Int32:RemoteVideoStreamData] = [:]
    @State var previewRenderer:VideoStreamRenderer? = nil
    @State var previewView:RendererView? = nil
    @State var remoteRenderer:VideoStreamRenderer? = nil
    @State var remoteViews:[RendererView] = []
    @State var remoteParticipant: RemoteParticipant?
    @State var remoteVideoSize:String = "Unknown"
    @State var isIncomingCall:Bool = false

    @State var callObserver:CallObserver?
    @State var remoteParticipantObserver:RemoteParticipantObserver?

    var body: some View {
        NavigationView {
            ZStack{
                Form {
                    Section {
                        TextField("Who would you like to call?", text: $callee)
                        Button(action: startCall) {
                            Text("Start Teams Call")
                        }.disabled(teamsCallAgent == nil)
                        Button(action: endCall) {
                            Text("End Teams Call")
                        }.disabled(teamsCall == nil)
                        Button(action: toggleLocalVideo) {
                            HStack {
                                Text(sendingVideo ? "Turn Off Video" : "Turn On Video")
                            }
                        }
                    }
                }
                // Show incoming call banner
                if (isIncomingCall) {
                    HStack() {
                        VStack {
                            Text("Incoming call")
                                .padding(10)
                                .frame(maxWidth: .infinity, alignment: .topLeading)
                        }
                        Button(action: answerIncomingCall) {
                            HStack {
                                Text("Answer")
                            }
                            .frame(width:80)
                            .padding(.vertical, 10)
                            .background(Color(.green))
                        }
                        Button(action: declineIncomingCall) {
                            HStack {
                                Text("Decline")
                            }
                            .frame(width:80)
                            .padding(.vertical, 10)
                            .background(Color(.red))
                        }
                    }
                    .frame(maxWidth: .infinity, alignment: .topLeading)
                    .padding(10)
                    .background(Color.gray)
                }
                ZStack{
                    VStack{
                        ForEach(remoteViews, id:\.self) { renderer in
                            ZStack{
                                VStack{
                                    RemoteVideoView(view: renderer)
                                        .frame(width: .infinity, height: .infinity)
                                        .background(Color(.lightGray))
                                }
                            }
                            Button(action: endCall) {
                                Text("End Call")
                            }.disabled(teamsCall == nil)
                            Button(action: toggleLocalVideo) {
                                HStack {
                                    Text(sendingVideo ? "Turn Off Video" : "Turn On Video")
                                }
                            }
                        }

                    }.frame(maxWidth: .infinity, maxHeight: .infinity, alignment: .topLeading)
                    VStack{
                        if(sendingVideo)
                        {
                            VStack{
                                PreviewVideoStream(view: previewView!)
                                    .frame(width: 135, height: 240)
                                    .background(Color(.lightGray))
                            }
                        }
                    }.frame(maxWidth:.infinity, maxHeight:.infinity,alignment: .bottomTrailing)
                }
            }
     .navigationBarTitle("Video Calling Quickstart")
        }.onAppear{
            // Authenticate the client

            // Initialize the TeamsCallAgent and access Device Manager

            // Ask for permissions
        }
    }
}

//Functions and Observers

struct PreviewVideoStream: UIViewRepresentable {
    let view:RendererView
    func makeUIView(context: Context) -> UIView {
        return view
    }
    func updateUIView(_ uiView: UIView, context: Context) {}
}

struct RemoteVideoView: UIViewRepresentable {
    let view:RendererView
    func makeUIView(context: Context) -> UIView {
        return view
    }
    func updateUIView(_ uiView: UIView, context: Context) {}
}

struct ContentView_Previews: PreviewProvider {
    static var previews: some View {
        ContentView()
    }
}
Autenticar o cliente
Para inicializar uma TeamsCallAgent instância, você precisa de um Token de Acesso de Usuário que permita que ela faça e receba chamadas. Consulte a documentação do token de acesso do usuário, se você não tiver um token disponível.
Depois de ter um token, adicione o seguinte código ao retorno de onAppear chamada em ContentView.swift. Você precisa substituir <USER ACCESS TOKEN> por um token de acesso de usuário válido para seu recurso:
var userCredential: CommunicationTokenCredential?
do {
    userCredential = try CommunicationTokenCredential(token: "<USER ACCESS TOKEN>")
} catch {
    print("ERROR: It was not possible to create user credential.")
    return
}
Inicialize o Teams CallAgent e acesse o Gerenciador de Dispositivos
Para criar uma TeamsCallAgent instância a partir de um CallClient, use o callClient.createTeamsCallAgent método que retorna assincronamente um TeamsCallAgent objeto depois que ele é inicializado.
DeviceManager Permite enumerar dispositivos locais que podem ser usados em uma chamada para transmitir fluxos de áudio/vídeo. Ele também permite que você solicite permissão de um usuário para acessar microfone / câmera.
self.callClient = CallClient()
let options = TeamsCallAgentOptions()
// Enable CallKit in the SDK
options.callKitOptions = CallKitOptions(with: createCXProvideConfiguration())
self.callClient?.createTeamsCallAgent(userCredential: userCredential, options: options) { (agent, error) in
    if error != nil {
        print("ERROR: It was not possible to create a Teams call agent.")
        return
    } else {
        self.teamsCallAgent = agent
        print("Teams Call agent successfully created.")
        self.teamsCallAgent!.delegate = teamsIncomingCallHandler
        self.callClient?.getDeviceManager { (deviceManager, error) in
            if (error == nil) {
                print("Got device manager instance")
                self.deviceManager = deviceManager
            } else {
                print("Failed to get device manager instance")
            }
        }
    }
}
Pedir permissões
Precisamos adicionar o seguinte código ao retorno de onAppear chamada para pedir permissões para áudio e vídeo.
AVAudioSession.sharedInstance().requestRecordPermission { (granted) in
    if granted {
        AVCaptureDevice.requestAccess(for: .video) { (videoGranted) in
            /* NO OPERATION */
        }
    }
}
Fazer uma chamada de saída
O startCall método é definido como a ação que é executada quando o botão Iniciar chamada é tocado. Neste início rápido, as chamadas de saída são apenas áudio por padrão. Para iniciar uma chamada com vídeo, precisamos definir VideoOptions com LocalVideoStream e passá-lo com startCallOptions para definir as opções iniciais para a chamada.
let startTeamsCallOptions = StartTeamsCallOptions()
if sendingVideo  {
    if self.localVideoStream == nil  {
        self.localVideoStream = [LocalVideoStream]()
    }
    let videoOptions = VideoOptions(localVideoStreams: localVideoStream!)
    startTeamsCallOptions.videoOptions = videoOptions
}
let callees: [CommunicationIdentifier] = [CommunicationUserIdentifier(self.callee)]
self.teamsCallAgent?.startCall(participants: callees, options: startTeamsCallOptions) { (call, error) in
    // Handle call object if successful or an error.
}
Participar numa reunião do Teams
O join método permite que o usuário participe de uma reunião de equipes.
let joinTeamsCallOptions = JoinTeamsCallOptions()
if sendingVideo
{
    if self.localVideoStream == nil {
        self.localVideoStream = [LocalVideoStream]()
    }
    let videoOptions = VideoOptions(localVideoStreams: localVideoStream!)
    joinTeamsCallOptions.videoOptions = videoOptions
}

// Join the Teams meeting muted
if isMuted
{
    let outgoingAudioOptions = OutgoingAudioOptions()
    outgoingAudioOptions.muted = true
    joinTeamsCallOptions.outgoingAudioOptions = outgoingAudioOptions
}

let teamsMeetingLinkLocator = TeamsMeetingLinkLocator(meetingLink: "https://meeting_link")

self.teamsCallAgent?.join(with: teamsMeetingLinkLocator, options: joinTeamsCallOptions) { (call, error) in
    // Handle call object if successful or an error.
}
TeamsCallObserver e RemoteParticipantObserver são usados para gerenciar eventos de chamada intermediária e participantes remotos. Colocamos os observadores na setTeamsCallAndObserver função.
func setTeamsCallAndObserver(call:TeamsCall, error:Error?) {
    if (error == nil) {
        self.teamsCall = call
        self.teamsCallObserver = TeamsCallObserver(self)
        self.teamsCall!.delegate = self.teamsCallObserver
        // Attach a RemoteParticipant observer
        self.remoteParticipantObserver = RemoteParticipantObserver(self)
    } else {
        print("Failed to get teams call object")
    }
}
Atender uma chamada recebida
Para atender uma chamada de entrada, implemente um TeamsIncomingCallHandler para exibir o banner de chamada de entrada para atender ou recusar a chamada. Coloque a seguinte implementação em TeamsIncomingCallHandler.swift.
final class TeamsIncomingCallHandler: NSObject, TeamsCallAgentDelegate, TeamsIncomingCallDelegate {
    public var contentView: ContentView?
    private var teamsIncomingCall: TeamsIncomingCall?

    private static var instance: TeamsIncomingCallHandler?
    static func getOrCreateInstance() -> TeamsIncomingCallHandler {
        if let c = instance {
            return c
        }
        instance = TeamsIncomingCallHandler()
        return instance!
    }

    private override init() {}

    func teamsCallAgent(_ teamsCallAgent: TeamsCallAgent, didReceiveIncomingCall incomingCall: TeamsIncomingCall) {
        self.teamsIncomingCall = incomingCall
        self.teamsIncomingCall.delegate = self
        contentView?.showIncomingCallBanner(self.teamsIncomingCall!)
    }

    func teamsCallAgent(_ teamsCallAgent: TeamsCallAgent, didUpdateCalls args: TeamsCallsUpdatedEventArgs) {
        if let removedCall = args.removedCalls.first {
            contentView?.callRemoved(removedCall)
            self.teamsIncomingCall = nil
        }
    }
}
Precisamos criar uma instância de adicionando o seguinte código ao retorno de TeamsIncomingCallHandler chamada em ContentView.swift:onAppear
Defina um delegado para o TeamsCallAgent após a TeamsCallAgent criação bem-sucedida:
self.teamsCallAgent!.delegate = incomingCallHandler
Uma vez que há uma chamada recebida, as TeamsIncomingCallHandler chamadas a função showIncomingCallBanner para exibir answer e decline botão.
func showIncomingCallBanner(_ incomingCall: TeamsIncomingCall) {
    self.teamsIncomingCall = incomingCall
}
As ações anexadas e answerdecline são implementadas como o código a seguir. A fim de atender a chamada com vídeo, precisamos ativar o vídeo local e definir as opções de AcceptCallOptions com localVideoStream.
func answerIncomingCall() {
    let options = AcceptTeamsCallOptions()
    guard let teamsIncomingCall = self.teamsIncomingCall else {
      print("No active incoming call")
      return
    }

    guard let deviceManager = deviceManager else {
      print("No device manager instance")
      return
    }

    if self.localVideoStreams == nil {
        self.localVideoStreams = [LocalVideoStream]()
    }

    if sendingVideo
    {
        guard let camera = deviceManager.cameras.first else {
            // Handle failure
            return
        }
        self.localVideoStreams?.append( LocalVideoStream(camera: camera))
        let videoOptions = VideoOptions(localVideoStreams: localVideosStreams!)
        options.videoOptions = videoOptions
    }

    teamsIncomingCall.accept(options: options) { (call, error) in
        // Handle call object if successful or an error.
    }
}

func declineIncomingCall() {
    self.teamsIncomingCall?.reject { (error) in
        // Handle if rejection was successfully or not.
    }
}
Subscrever eventos
Podemos implementar uma TeamsCallObserver classe para se inscrever em uma coleção de eventos a serem notificados quando os valores mudarem durante a chamada.
public class TeamsCallObserver: NSObject, TeamsCallDelegate, TeamsIncomingCallDelegate {
    private var owner: ContentView
    init(_ view:ContentView) {
            owner = view
    }

    public func teamsCall(_ teamsCall: TeamsCall, didChangeState args: PropertyChangedEventArgs) {
        if(teamsCall.state == CallState.connected) {
            initialCallParticipant()
        }
    }

    // render remote video streams when remote participant changes
    public func teamsCall(_ teamsCall: TeamsCall, didUpdateRemoteParticipant args: ParticipantsUpdatedEventArgs) {
        for participant in args.addedParticipants {
            participant.delegate = self.remoteParticipantObserver
        }
    }

    // Handle remote video streams when the call is connected
    public func initialCallParticipant() {
        for participant in owner.teamsCall.remoteParticipants {
            participant.delegate = self.remoteParticipantObserver
            for stream in participant.videoStreams {
                renderRemoteStream(stream)
            }
            owner.remoteParticipant = participant
        }
    }
}
Executar o código
Você pode criar e executar seu aplicativo no simulador do iOS selecionando Execução de produto > ou usando o atalho de teclado (⌘-R).
Clean up resources (Limpar recursos)
Se quiser limpar e remover uma assinatura dos Serviços de Comunicação, você pode excluir o recurso ou grupo de recursos. A exclusão do grupo de recursos também exclui quaisquer outros recursos associados a ele. Saiba mais sobre a limpeza de recursos.
Próximos passos
Para obter mais informações, consulte os seguintes artigos:
- Confira nosso exemplo de chamada pela web
- Saiba mais sobre os recursos do SDK de chamada
- Saiba mais sobre como as chamadas funcionam
