Краткое руководство. Создание приложения Иммерсивное средство чтения
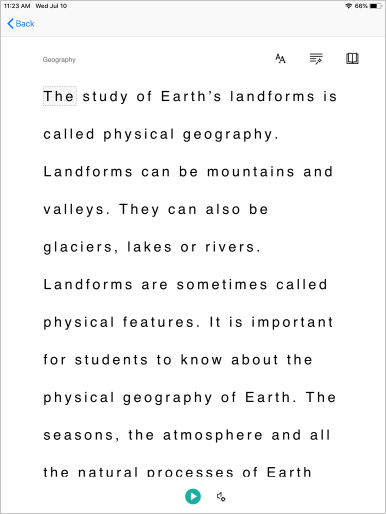
Иммерсивное средство чтения — это инклюзивное решение, в котором реализованы проверенные методы, улучшающие понимание текста при чтении у людей, которые учатся читать или изучают язык, а также у людей, которые испытывают определенные трудности при обучении, например, из-за дислексии. Вы можете использовать иммерсивное средство чтения в своих приложениях, чтобы изолировать текст для фокусировки, отображать рисунки, связанные с часто используемыми словами, выделять части речи, читать вслух выделенный текст, переводить слова и фразы в реальном времени и многое другое.
В этом кратком руководстве описано, как создать веб-приложение с нуля с помощью C#, а также интегрировать Иммерсивное средство чтения с помощью клиентской библиотеки. Полностью рабочий пример этого краткого руководства доступен на GitHub.
Необходимые компоненты
- Подписка Azure. Вы можете создать бесплатную учетную запись.
- Ресурс Иммерсивное средство чтения, настроенный для проверки подлинности Microsoft Entra. Инструкции по настройке см. здесь. Сохраните выходные данные сеанса в текстовый файл, чтобы настроить свойства среды.
- Visual Studio 2022.
Создание проекта веб-приложения
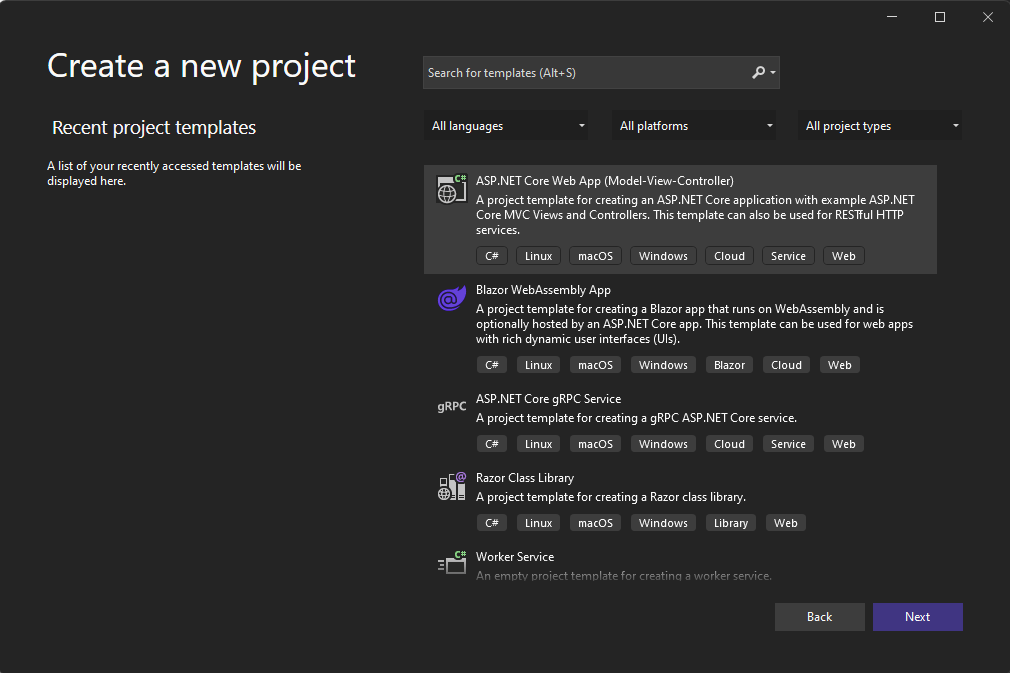
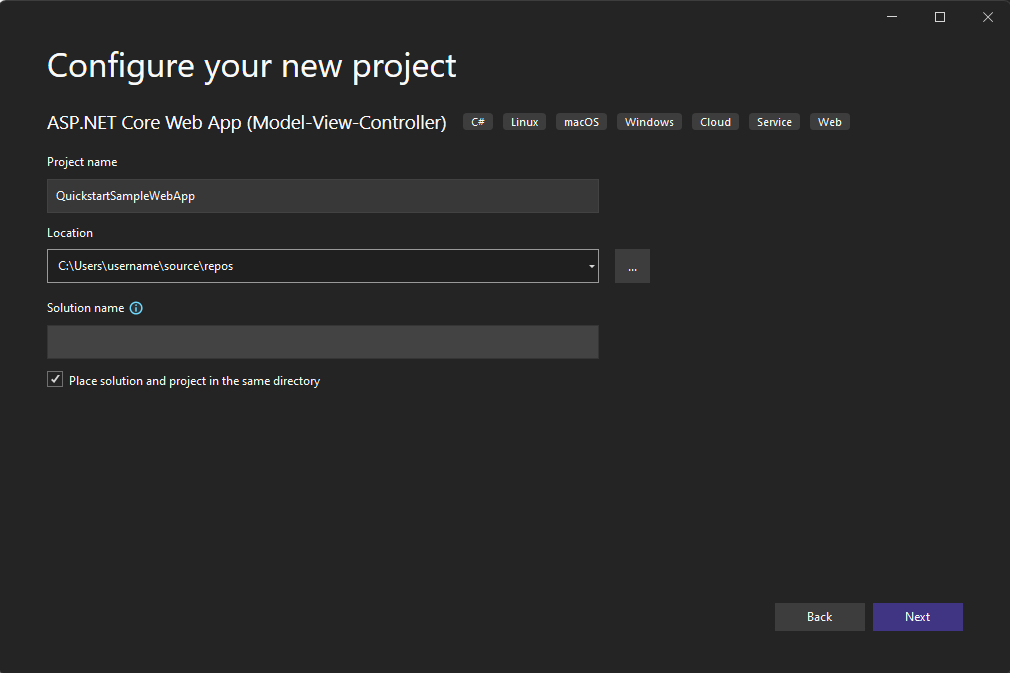
В Visual Studio создайте проект с использованием шаблона веб-приложений ASP.NET Core со встроенным MVC и ASP.NET Core 6. Назовите проект QuickstartSampleWebApp.

Настройка проверки подлинности
Щелкните правой кнопкой мыши проект в обозревателе решений, а затем выберите Управление секретами пользователей. Откроется файл с именем secrets.json. Этот файл не возвращен в систему управления версиями. Дополнительные сведения см. в статье "Безопасное хранилище секретов приложений". Замените содержимое secrets.json следующим параметром, указав значения, заданные при создании ресурса "Иммерсивное средство чтения".
Внимание
Ни в коем случае не публикуйте секреты в общем доступе. Для рабочей среды используйте безопасный способ хранения и доступа к учетным данным, например Azure Key Vault.
{
  "TenantId": "YOUR_TENANT_ID",
  "ClientId": "YOUR_CLIENT_ID",
  "ClientSecret": "YOUR_CLIENT_SECRET",
  "Subdomain": "YOUR_SUBDOMAIN"
}
Установка пакета NuGet для клиента удостоверений
Следующий код использует объекты из Microsoft.Identity.Client пакета NuGet, поэтому необходимо добавить ссылку на этот пакет в проекте.
Внимание
Пакет NuGet Microsoft.IdentityModel.Clients.ActiveDirectory и библиотека проверки подлинности Active Directory (ADAL) объявлены нерекомендуемыми. С 30 июня 2020 г. в них не добавлено никаких новых функций. Мы настоятельно рекомендуем вам выполнить обновление. Дополнительные сведения см. в руководстве по миграции.
Откройте консоль NuGet диспетчер пакетов из инструментов ->NuGet диспетчер пакетов ->диспетчер пакетов консоли и выполните следующую команду:
Install-Package Microsoft.Identity.Client -Version 4.59.0
Обновление контроллера для получения токена
Откройте controllers\HomeController.cs и добавьте следующий код после using инструкций в верхней части файла.
using Microsoft.Identity.Client;
Настройте контроллер для получения значений идентификатора Microsoft Entra из secrets.json. В верхней части HomeController класса добавьте public class HomeController : Controller {следующий код.
private readonly string TenantId;     // Azure subscription TenantId
private readonly string ClientId;     // Microsoft Entra ApplicationId
private readonly string ClientSecret; // Microsoft Entra Application Service Principal password
private readonly string Subdomain;    // Immersive Reader resource subdomain (resource 'Name' if the resource was created in the Azure portal, or 'CustomSubDomain' option if the resource was created with Azure CLI PowerShell. Check the Azure portal for the subdomain on the Endpoint in the resource Overview page, for example, 'https://[SUBDOMAIN].cognitiveservices.azure.com/')

private IConfidentialClientApplication _confidentialClientApplication;
private IConfidentialClientApplication ConfidentialClientApplication
{
    get {
        if (_confidentialClientApplication == null) {
            _confidentialClientApplication = ConfidentialClientApplicationBuilder.Create(ClientId)
            .WithClientSecret(ClientSecret)
            .WithAuthority($"https://login.windows.net/{TenantId}")
            .Build();
        }

        return _confidentialClientApplication;
    }
}

public HomeController(Microsoft.Extensions.Configuration.IConfiguration configuration)
{
    TenantId = configuration["TenantId"];
    ClientId = configuration["ClientId"];
    ClientSecret = configuration["ClientSecret"];
    Subdomain = configuration["Subdomain"];

    if (string.IsNullOrWhiteSpace(TenantId))
    {
        throw new ArgumentNullException("TenantId is null! Did you add that info to secrets.json?");
    }

    if (string.IsNullOrWhiteSpace(ClientId))
    {
        throw new ArgumentNullException("ClientId is null! Did you add that info to secrets.json?");
    }

    if (string.IsNullOrWhiteSpace(ClientSecret))
    {
        throw new ArgumentNullException("ClientSecret is null! Did you add that info to secrets.json?");
    }

    if (string.IsNullOrWhiteSpace(Subdomain))
    {
        throw new ArgumentNullException("Subdomain is null! Did you add that info to secrets.json?");
    }
}

/// <summary>
/// Get a Microsoft Entra ID authentication token
/// </summary>
public async Task<string> GetTokenAsync()
{
    const string resource = "https://cognitiveservices.azure.com/";

    var authResult = await ConfidentialClientApplication.AcquireTokenForClient(
        new[] { $"{resource}/.default" })
        .ExecuteAsync()
        .ConfigureAwait(false);

    return authResult.AccessToken;
}

[HttpGet]
public async Task<JsonResult> GetTokenAndSubdomain()
{
    try
    {
        string tokenResult = await GetTokenAsync();

        return new JsonResult(new { token = tokenResult, subdomain = Subdomain });
    }
    catch (Exception e)
    {
        string message = "Unable to acquire Microsoft Entra token. Check the console for more information.";
        Debug.WriteLine(message, e);
        return new JsonResult(new { error = message });
    }
}
Добавление примеров содержимого
Сначала откройте Views\Shared\Layout.cshtml. Перед строкой </head>добавьте следующие строки:
@RenderSection("Styles", required: false)
Теперь добавьте пример содержимого в это веб-приложение. Откройте файл Views\Home\Index.cshtml и замените автоматически созданный код приведенным ниже.
@{
    ViewData["Title"] = "Immersive Reader C# Quickstart";
}

@section Styles {
    <style type="text/css">
        .immersive-reader-button {
            background-color: white;
            margin-top: 5px;
            border: 1px solid black;
            float: right;
        }
    </style>
}

<div class="container">
    <button class="immersive-reader-button" data-button-style="iconAndText" data-locale="en"></button>

    <h1 id="ir-title">About Immersive Reader</h1>
    <div id="ir-content" lang="en-us">
        <p>
            Immersive Reader is a tool that implements proven techniques to improve reading comprehension for emerging readers, language learners, and people with learning differences.
            The Immersive Reader is designed to make reading more accessible for everyone. The Immersive Reader
            <ul>
                <li>
                    Shows content in a minimal reading view
                </li>
                <li>
                    Displays pictures of commonly used words
                </li>
                <li>
                    Highlights nouns, verbs, adjectives, and adverbs
                </li>
                <li>
                    Reads your content out loud to you
                </li>
                <li>
                    Translates your content into another language
                </li>
                <li>
                    Breaks down words into syllables
                </li>
            </ul>
        </p>
        <h3>
            The Immersive Reader is available in many languages.
        </h3>
        <p lang="es-es">
            El Lector inmersivo está disponible en varios idiomas.
        </p>
        <p lang="zh-cn">
            沉浸式阅读器支持许多语言
        </p>
        <p lang="de-de">
            Der plastische Reader ist in vielen Sprachen verfügbar.
        </p>
        <p lang="ar-eg" dir="rtl" style="text-align:right">
            يتوفر \"القارئ الشامل\" في العديد من اللغات.
        </p>
    </div>
</div>
Обратите внимание, что весь текст содержит lang атрибут, описывающий языки текста. Этот атрибут помогает Иммерсивному средству чтения предоставить соответствующие функции языка и грамматики.
Добавление JavaScript для обработки запуска иммерсивного средства чтения
Иммерсивное средство чтения предоставляет такие функциональные возможности, как запуск Иммерсивного средства чтения и рендеринг кнопок Иммерсивного средства чтения. Дополнительные сведения см. в справочнике по пакету SDK для JavaScript.
В нижней части Views\Home\Index.cshtml добавьте следующий код:
@section Scripts
{
    <script src="https://ircdname.azureedge.net/immersivereadersdk/immersive-reader-sdk.1.4.0.js"></script>
    <script>
        function getTokenAndSubdomainAsync() {
            return new Promise(function (resolve, reject) {
                $.ajax({
                    url: "@Url.Action("GetTokenAndSubdomain", "Home")",
                    type: "GET",
                    success: function (data) {
                        if (data.error) {
                            reject(data.error);
                        } else {
                            resolve(data);
                        }
                    },
                    error: function (err) {
                        reject(err);
                    }
                });
            });
        }

        $(".immersive-reader-button").click(function () {
            handleLaunchImmersiveReader();
        });

        function handleLaunchImmersiveReader() {
            getTokenAndSubdomainAsync()
                .then(function (response) {
                    const token = response["token"];
                    const subdomain = response["subdomain"];

                    // Learn more about chunk usage and supported MIME types https://video2.skills-academy.com/azure/ai-services/immersive-reader/reference#chunk
                    const data = {
                        title: $("#ir-title").text(),
                        chunks: [{
                            content: $("#ir-content").html(),
                            mimeType: "text/html"
                        }]
                    };

                    // Learn more about options https://video2.skills-academy.com/azure/ai-services/immersive-reader/reference#options
                    const options = {
                        "onExit": exitCallback,
                        "uiZIndex": 2000
                    };

                    ImmersiveReader.launchAsync(token, subdomain, data, options)
                        .catch(function (error) {
                            alert("Error in launching the Immersive Reader. Check the console.");
                            console.log(error);
                        });
                })
                .catch(function (error) {
                    alert("Error in getting the Immersive Reader token and subdomain. Check the console.");
                    console.log(error);
                });
        }

        function exitCallback() {
            console.log("This is the callback function. It is executed when the Immersive Reader closes.");
        }
    </script>
}
Сборка и запуск приложения
В строке меню выберите Отладка > Начать отладку или нажмите клавишу F5, чтобы запустить приложение.
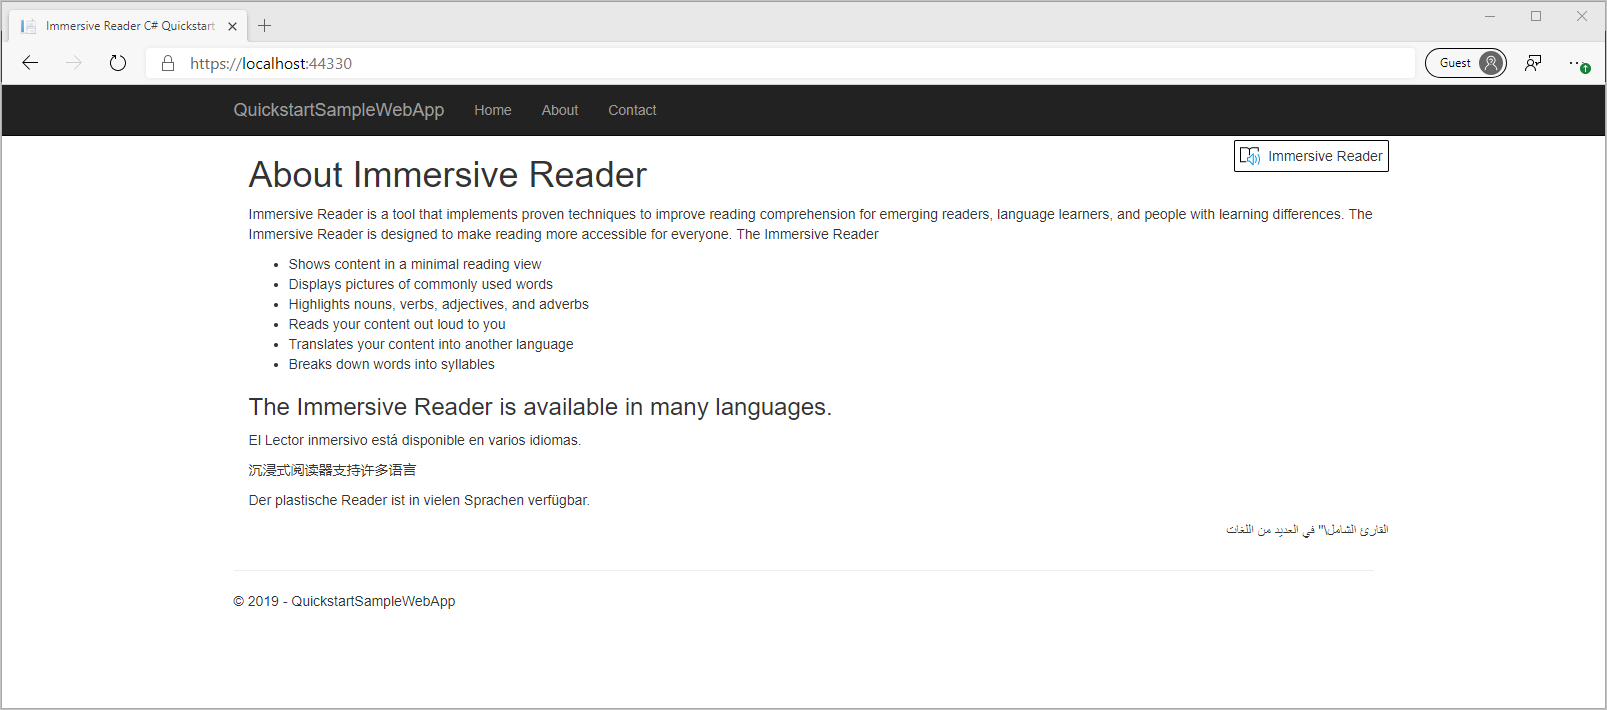
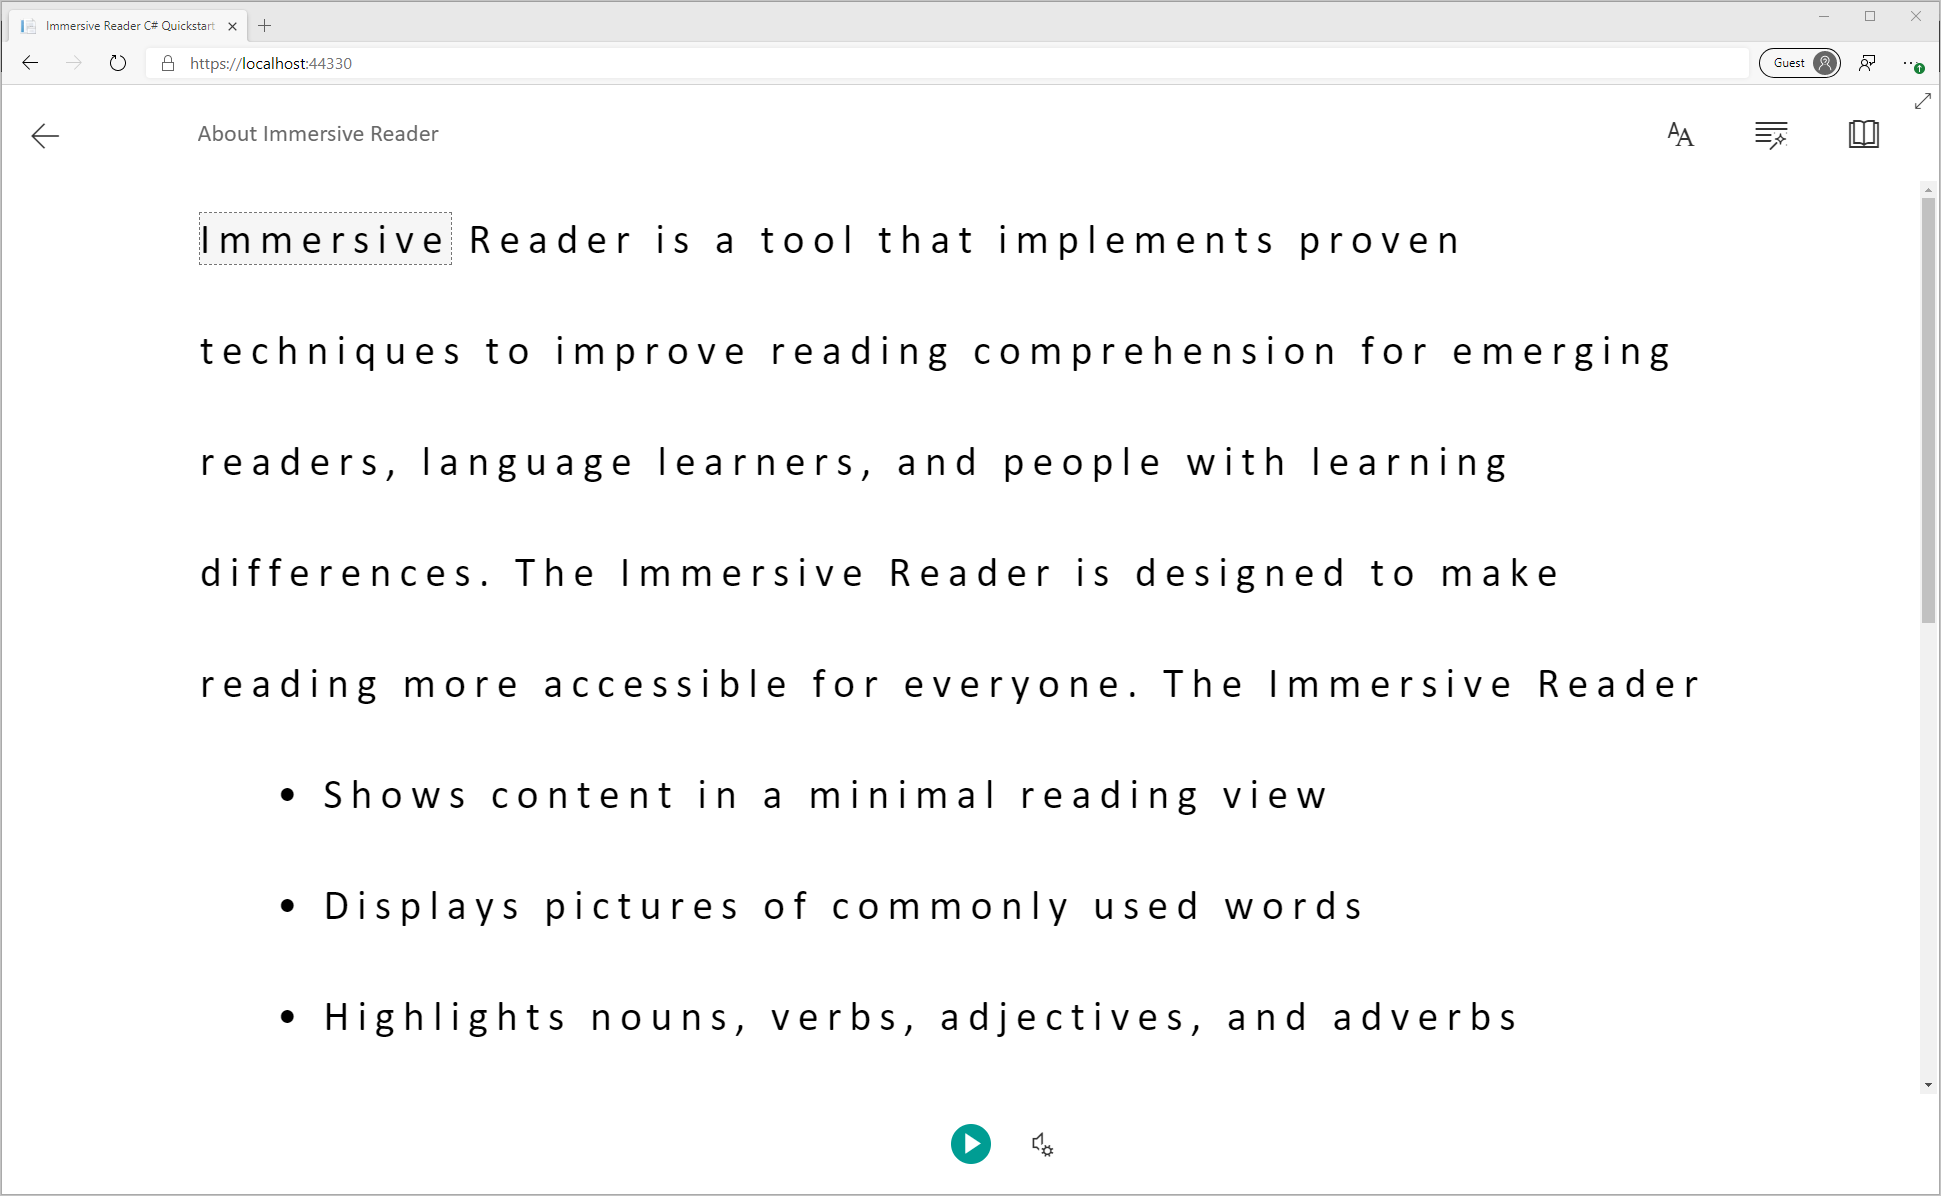
В браузере вы уведите:
Запуск Иммерсивного средства чтения
При нажатии кнопки Иммерсивное средство чтения Иммерсивное средство чтения запускается с содержимым на странице.
Следующий шаг
В этом кратком руководстве показано, как создать веб-приложение с нуля и интегрировать иммерсивное средство чтения с помощью соответствующей клиентской библиотеки. Полностью рабочий пример этого краткого руководства доступен на GitHub.
Необходимые компоненты
- Подписка Azure. Вы можете создать бесплатную учетную запись.
- Ресурс Иммерсивное средство чтения, настроенный для проверки подлинности Microsoft Entra. Инструкции по настройке см. здесь. Сохраните выходные данные сеанса в текстовый файл, чтобы настроить свойства среды.
- Интегрированная среда разработки, такая как Visual Studio Code.
Создание веб-приложения Node.js с помощью средства Express
Создайте веб-приложение Node.js с помощью express-generator средства.
npm install express-generator -g
express --view=pug quickstart-nodejs
cd quickstart-nodejs
Установите зависимости yarn и добавьте зависимости request и dotenv.
yarn
yarn add request
yarn add dotenv
axios Установите и qs библиотеки.
npm install axios qs
Настройка проверки подлинности
Создайте новый файл с именем .env в корневом каталоге проекта. Вставьте в него следующий код, указав значения, заданные при создании ресурса "Иммерсивное средство чтения". Не включайте кавычки или { } символы.
Внимание
Ни в коем случае не публикуйте секреты в общем доступе. Для рабочей среды используйте безопасный способ хранения и доступа к учетным данным, например Azure Key Vault.
TENANT_ID={YOUR_TENANT_ID}
CLIENT_ID={YOUR_CLIENT_ID}
CLIENT_SECRET={YOUR_CLIENT_SECRET}
SUBDOMAIN={YOUR_SUBDOMAIN}
Не зафиксируйте этот файл в системе управления версиями, так как он содержит секреты, которые не должны быть общедоступными.
Затем откройте app.js и добавьте следующий код в начало файла. При этом свойства, определенные в env-файле, загружаются в виде переменных среды в Node.
require('dotenv').config();
Обновление маршрутизатора для получения токена
Откройте файл routes\index.js и замените автоматически созданный код приведенным ниже кодом.
Этот код создает конечную точку API, которая получает маркер проверки подлинности идентификатора Microsoft Entra с помощью пароля субъекта-службы. Кроме того, этот код возвращает дочерний домен, а также объект, содержащий токен и поддомен.
var axios = require('axios');
var express = require('express');
var router = express.Router();
var qs = require('qs');

/* GET home page. */
router.get('/', function(req, res, next) {
  res.render('index', { title: 'Express' });
});

router.get('/GetTokenAndSubdomain', function(req, res) {
    try {
        var config ={
            headers: {
                'content-type': 'application/x-www-form-urlencoded'
            }
        }
        var data = {
            grant_type: 'client_credentials',
            client_id: process.env.CLIENT_ID,
            client_secret: process.env.CLIENT_SECRET,
            resource: 'https://cognitiveservices.azure.com/'
        };
        var url = `https://login.windows.net/${process.env.TENANT_ID}/oauth2/token`
        console.log(qs.stringify(data));
        axios.post(url, qs.stringify(data), config)
        .then(function (response) {
            var token = response.data.access_token;
            var subdomain = process.env.SUBDOMAIN;
            return res.send({token, subdomain});
        })
        .catch(function (response) {
            if (response.status !== 200) {
                return res.send({error :  "Unable to acquire Microsoft Entra token. Check the debugger for more information."})
            }
        });
    } catch (error) {
        console.log(error);
        return res.status(500).send('CogSvcs IssueToken error');
    }
});

module.exports = router;
Конечная точка API GetTokenAndSubdomain должна быть защищена за какой-то формой проверки подлинности, такой как OAuth, чтобы запретить несанкционированным пользователям получать маркеры для использования с Иммерсивное средство чтения службой и выставлением счетов; эта работа выходит за рамки этого краткого руководства.
Добавление примеров содержимого
Теперь добавьте пример содержимого в это веб-приложение. Откройте файл views\index.pug и замените автоматически созданный код приведенным ниже примером.
doctype html
html
   head
      title Immersive Reader Quickstart Node.js

      link(rel='icon', href='data:;base64,iVBORw0KGgo=')

      link(rel='stylesheet', href='https://stackpath.bootstrapcdn.com/bootstrap/3.4.1/css/bootstrap.min.css')

      // A polyfill for Promise is needed for IE11 support.
      script(src='https://cdn.jsdelivr.net/npm/promise-polyfill@8/dist/polyfill.min.js')

      script(src='https://ircdname.azureedge.net/immersivereadersdk/immersive-reader-sdk.1.4.0.js')
      script(src='https://code.jquery.com/jquery-3.3.1.min.js')

      style(type="text/css").
        .immersive-reader-button {
          background-color: white;
          margin-top: 5px;
          border: 1px solid black;
          float: right;
        }
   body
      div(class="container")
        button(class="immersive-reader-button" data-button-style="iconAndText" data-locale="en")

        h1(id="ir-title") About Immersive Reader
        div(id="ir-content" lang="en-us")
          p Immersive Reader is a tool that implements proven techniques to improve reading comprehension for emerging readers, language learners, and people with learning differences. The Immersive Reader is designed to make reading more accessible for everyone. The Immersive Reader

            ul
                li Shows content in a minimal reading view
                li Displays pictures of commonly used words
                li Highlights nouns, verbs, adjectives, and adverbs
                li Reads your content out loud to you
                li Translates your content into another language
                li Breaks down words into syllables

          h3 The Immersive Reader is available in many languages.

          p(lang="es-es") El Lector inmersivo está disponible en varios idiomas.
          p(lang="zh-cn") 沉浸式阅读器支持许多语言
          p(lang="de-de") Der plastische Reader ist in vielen Sprachen verfügbar.
          p(lang="ar-eg" dir="rtl" style="text-align:right") يتوفر \"القارئ الشامل\" في العديد من اللغات.

script(type="text/javascript").
  function getTokenAndSubdomainAsync() {
        return new Promise(function (resolve, reject) {
            $.ajax({
                url: "/GetTokenAndSubdomain",
                type: "GET",
                success: function (data) {
                    if (data.error) {
                        reject(data.error);
                    } else {
                        resolve(data);
                    }
                },
                error: function (err) {
                    reject(err);
                }
            });
        });
    }

    $(".immersive-reader-button").click(function () {
        handleLaunchImmersiveReader();
    });

    function handleLaunchImmersiveReader() {
        getTokenAndSubdomainAsync()
            .then(function (response) {
                const token = response["token"];
                const subdomain = response["subdomain"];
                // Learn more about chunk usage and supported MIME types https://video2.skills-academy.com/azure/ai-services/immersive-reader/reference#chunk
                const data = {
                    title: $("#ir-title").text(),
                    chunks: [{
                        content: $("#ir-content").html(),
                        mimeType: "text/html"
                    }]
                };
                // Learn more about options https://video2.skills-academy.com/azure/ai-services/immersive-reader/reference#options
                const options = {
                    "onExit": exitCallback,
                    "uiZIndex": 2000
                };
                ImmersiveReader.launchAsync(token, subdomain, data, options)
                    .catch(function (error) {
                        alert("Error in launching the Immersive Reader. Check the console.");
                        console.log(error);
                    });
            })
            .catch(function (error) {
                alert("Error in getting the Immersive Reader token and subdomain. Check the console.");
                console.log(error);
            });
    }

    function exitCallback() {
        console.log("This is the callback function. It is executed when the Immersive Reader closes.");
    }
Обратите внимание, что весь текст содержит lang атрибут, описывающий языки текста. Этот атрибут помогает Иммерсивному средству чтения предоставить соответствующие функции языка и грамматики.
Сборка и запуск приложения
Теперь наше веб-приложение готово. Запустите приложение, выполнив следующую команду:
npm start
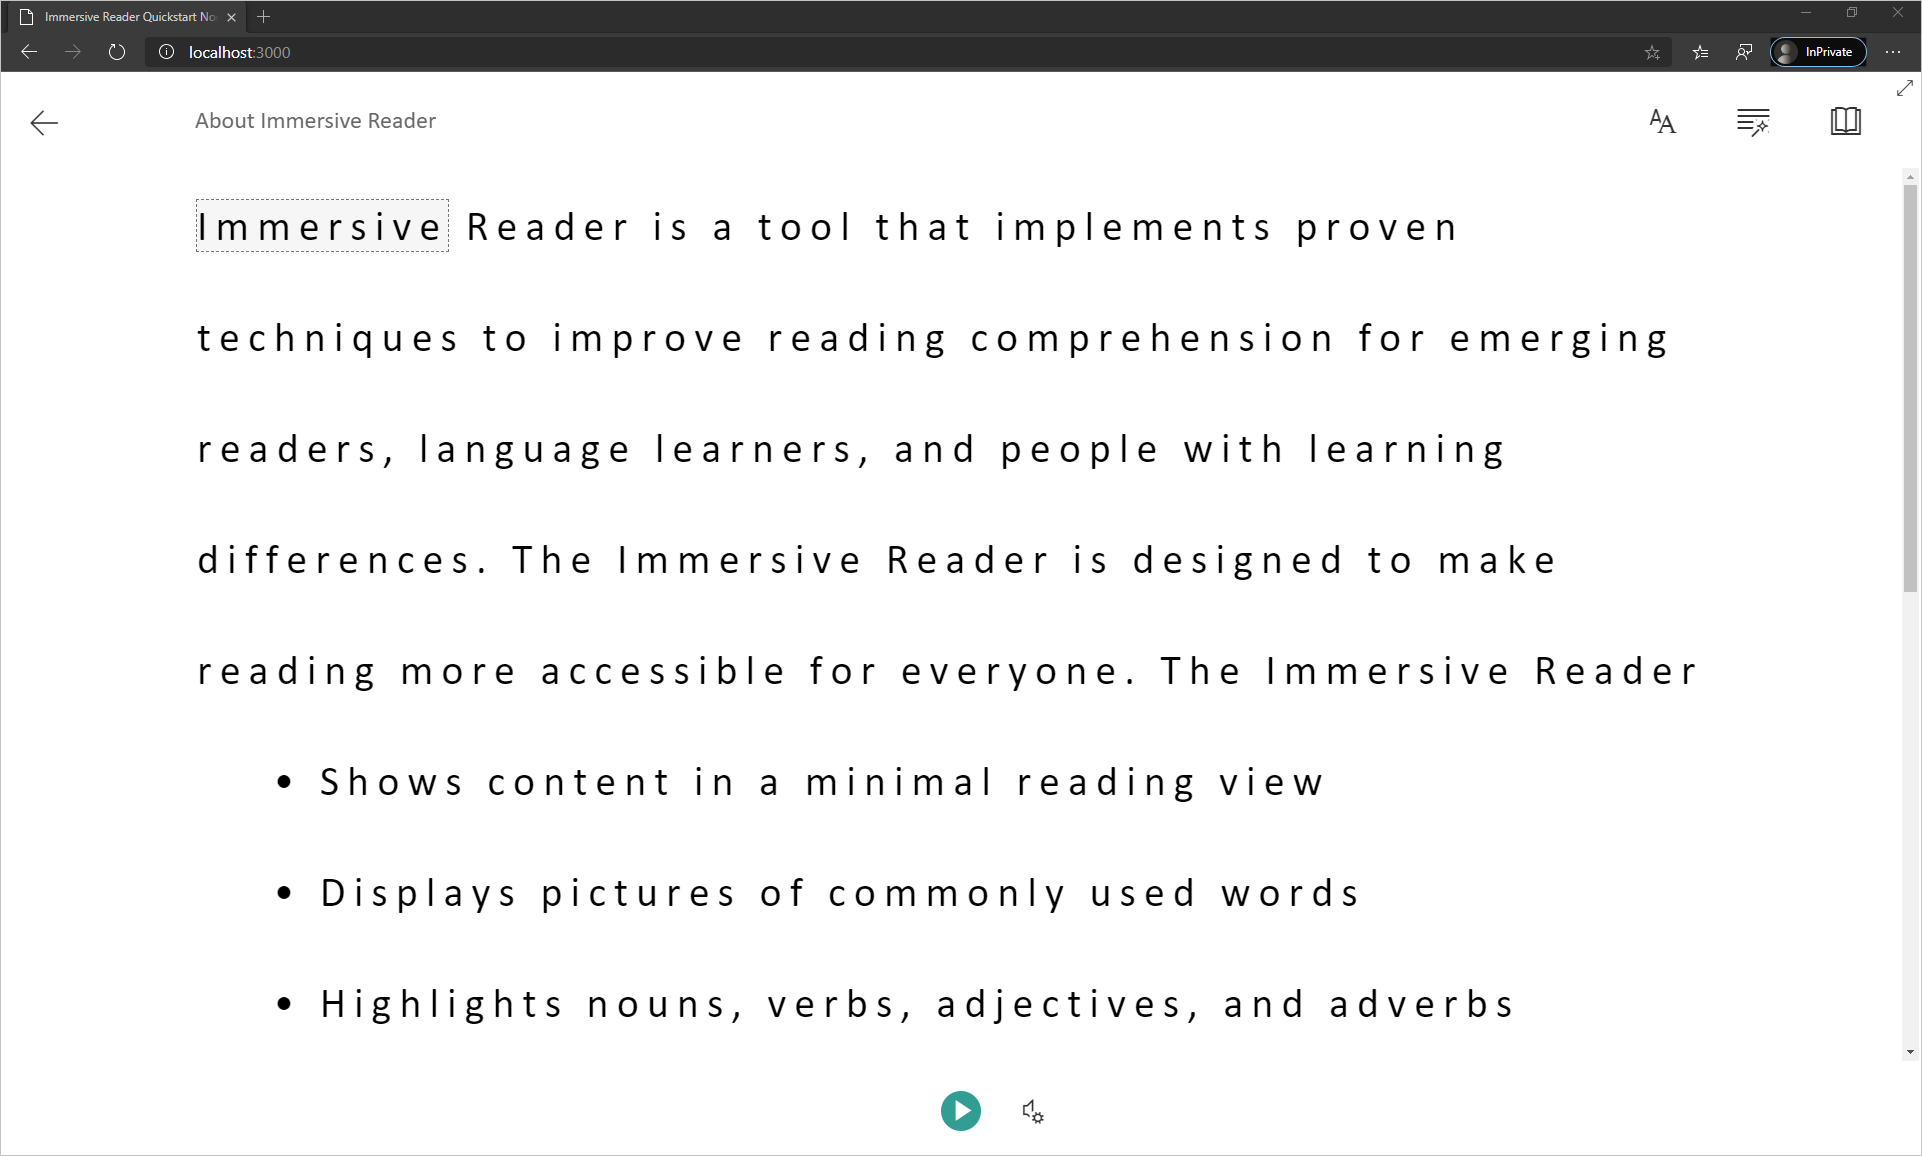
Откройте браузер и перейдите по адресу http://localhost:3000. Должно отображаться следующее:

Запуск Иммерсивного средства чтения
При нажатии кнопки Иммерсивное средство чтения Иммерсивное средство чтения запускается с содержимым на странице.
Следующий шаг
В рамках этого краткого руководства вы создадите с нуля приложение Android и интегрируете в него иммерсивное средство чтения. Полностью рабочий пример этого краткого руководства доступен на GitHub.
Необходимые компоненты
- Подписка Azure. Вы можете создать бесплатную учетную запись.
- Ресурс Иммерсивное средство чтения, настроенный для проверки подлинности Microsoft Entra. Инструкции по настройке см. здесь. Сохраните выходные данные сеанса в текстовый файл, чтобы настроить свойства среды.
- Git.
- Android Studio.
Создание проекта Android
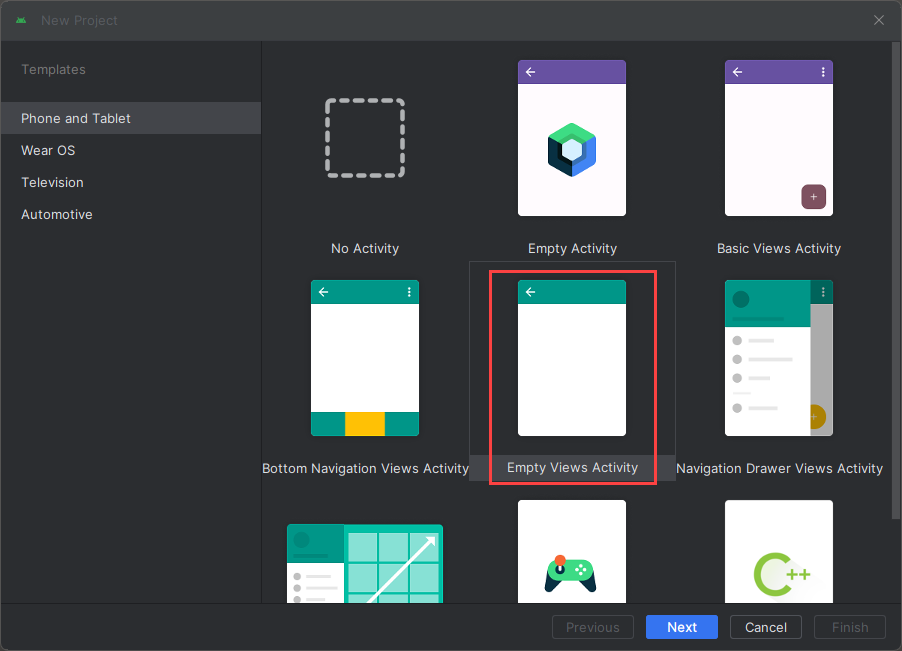
Создайте новый проект в Android Studio.

В окне "Шаблоны" выберите "Пустое представление" и нажмите кнопку "Далее".
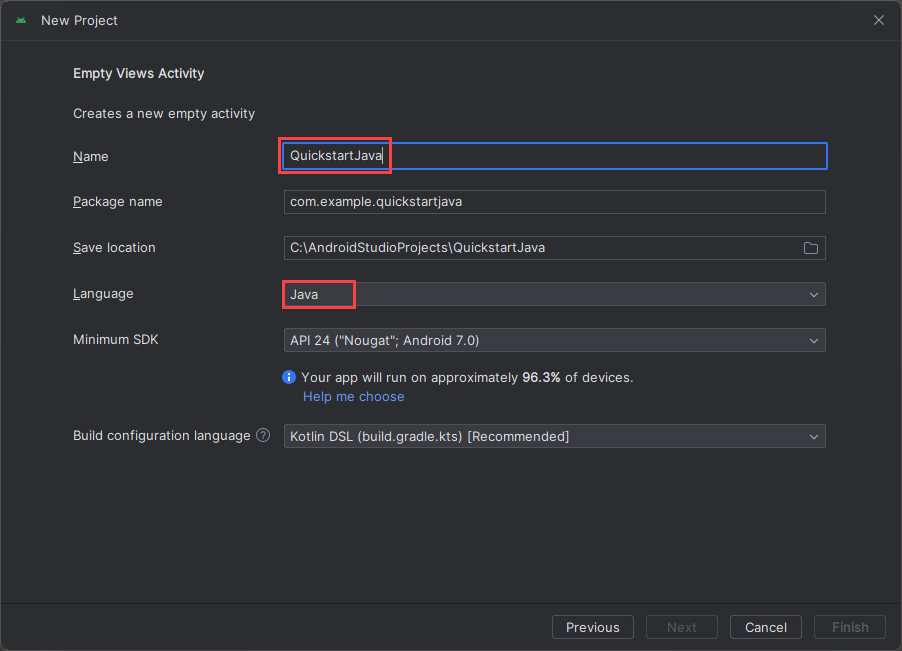
Настройка проекта
Присвойте проекту имя QuickstartJava и выберите расположение для его сохранения. Выберите язык программирования Java, а затем щелкните Finish (Завершить).
Настройка папки assets и аутентификации
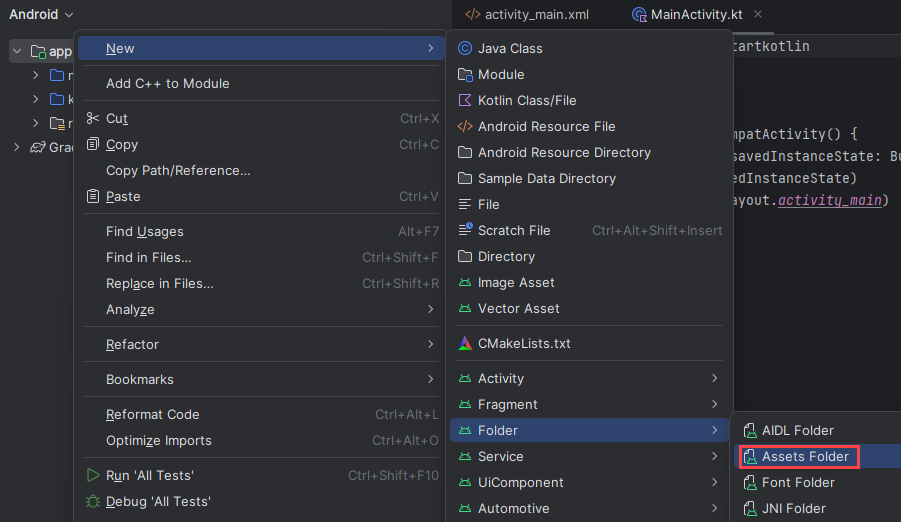
Чтобы создать новую папку ресурсов, щелкните правой кнопкой мыши приложение и выберите папку "Папка ->Активы" в раскрывающемся списке.
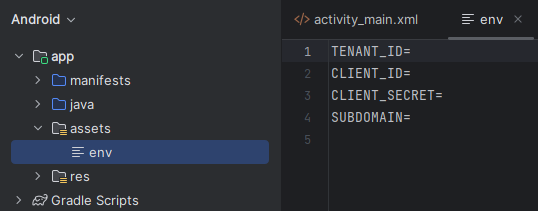
Щелкните правой кнопкой мыши ресурсы и выберите "Создать файл>". Назовите файл env.

Добавьте следующие имена и значения, используя данные о вашей среде. Не фиксируйте этот ENV-файл в системе управления версиями, так как он содержит секреты, не предназначенные для публикации.
TENANT_ID=<YOUR_TENANT_ID>
CLIENT_ID=<YOUR_CLIENT_ID>
CLIENT_SECRET=<YOUR_CLIENT_SECRET>
SUBDOMAIN=<YOUR_SUBDOMAIN>
Внимание
Ни в коем случае не публикуйте секреты в общем доступе. Для рабочей среды используйте безопасный способ хранения и доступа к учетным данным, например Azure Key Vault.
Добавление зависимостей
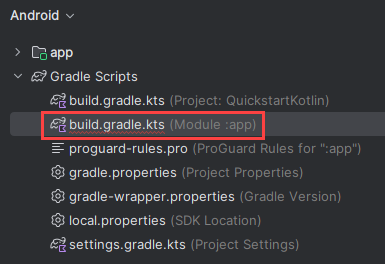
Замените существующие зависимости в файле build.gradle указанными ниже реализациями, чтобы средства gson (синтаксический анализ JSON и сериализация) и dotenv могли ссылаться на переменные, определенные в ENV-файле. Возможно, при выполнении последующих действий в этом кратком руководстве вам придется повторно синхронизировать проект.
dependencies {
    implementation fileTree(dir: 'libs', include: ['*.jar'])
    implementation 'androidx.appcompat:appcompat:1.0.2'
    implementation 'androidx.constraintlayout:constraintlayout:1.1.3'
    implementation 'com.google.code.gson:gson:2.8.6'
    implementation 'io.github.cdimascio:java-dotenv:5.1.3'
    testImplementation 'junit:junit:4.12'
    androidTestImplementation 'androidx.test.ext:junit:1.1.0'
    androidTestImplementation 'androidx.test.espresso:espresso-core:3.1.1'
}
Обновление ресурсов строк и макета для приложения
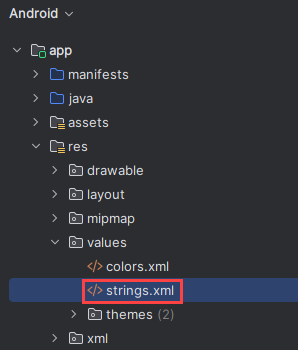
Замените содержимое в res/values/strings.xml следующими строками, которые будут использоваться в приложении.
<resources>

    <!-- Copyright (c) Microsoft Corporation. All rights reserved. -->
    <!-- Licensed under the MIT License. -->

    <string name="app_name">ImmersiveReaderSDK</string>
    <string name="geographyTitle">Geography</string>
    <string name="geographyTextEn">The study of Earth's landforms is called physical geography. Landforms can be mountains and valleys. They can also be glaciers, lakes or rivers. Landforms are sometimes called physical features. It is important for students to know about the physical geography of Earth. The seasons, the atmosphere and all the natural processes of Earth affect where people are able to live. Geography is one of a combination of factors that people use to decide where they want to live. The physical features of a region are often rich in resources. Within a nation, mountain ranges become natural borders for settlement areas. In the U.S., major mountain ranges are the Sierra Nevada, the Rocky Mountains, and the Appalachians. Fresh water sources also influence where people settle. People need water to drink. They also need it for washing. Throughout history, people have settled near fresh water. Living near a water source helps ensure that people have the water they need. There was an added bonus, too. Water could be used as a travel route for people and goods. Many Americans live near popular water sources, such as the Mississippi River, the Colorado River and the Great Lakes.Mountains and deserts have been settled by fewer people than the plains areas. However, they have valuable resources of their own.</string>
    <string name="geographyTextFr">L\'étude des reliefs de la Terre est appelée géographie physique. Les reliefs peuvent être des montagnes et des vallées. Il peut aussi s\'agira de glaciers, delacs ou de rivières. Les reliefs sont parfois appelés caractéristiques physiques. Il est important que les élèves connaissent la géographie physique de laTerre. Les saisons, l\'atmosphère et tous les processus naturels de la Terre affectent l\'endroit où les gens sont capables de vivre. La géographie est l\'un desfacteurs que les gens utilisent pour décider où ils veulent vivre. Les caractéristiques physiques d\'une région sont souvent riches en ressources. Àl\'intérieur d\'une nation, les chaînes de montagnes deviennent des frontières naturelles pour les zones de peuplement. Aux États-Unis, les principaleschaînes de montagnes sont la Sierra Nevada, les montagnes Rocheuses et les Appalaches.Les sources d\'eau douce influencent également l\'endroit où lesgens s\'installent. Les gens ont besoin d\'eau pour boire. Ils en ont aussi besoin pour se laver. Tout au long de l\'histoire, les gens se sont installés près del\'eau douce. Vivre près d\'une source d\'eau permet de s\'assurer que les gens ont l\'eau dont ils ont besoin. Il y avait un bonus supplémentaire, aussi. L\'eaupourrait être utilisée comme voie de voyage pour les personnes et les marchandises. Beaucoup d\'Américains vivent près des sources d\'eau populaires,telles que le fleuve Mississippi, le fleuve Colorado et les Grands Lacs.Mountains et les déserts ont été installés par moins de gens que les zones desplaines. Cependant, ils disposent de ressources précieuses.Les gens ont une réponse.</string>
    <string name="immersiveReaderButtonText">Immersive Reader</string>
</resources>
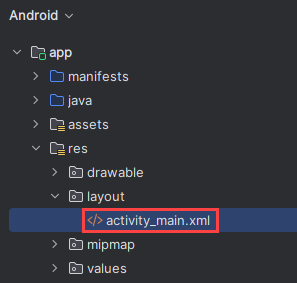
Замените содержимое файла res/layout/activity_main.xml следующим кодом XML, который будет использоваться в приложении. Это макет пользовательского интерфейса для приложения в формате XML. Если код не отображается в файле activity_main.xml , щелкните правой кнопкой мыши холст и выберите "Перейти к XML".
<?xml version="1.0" encoding="utf-8"?>

<!-- Copyright (c) Microsoft Corporation. All rights reserved. -->
<!-- Licensed under the MIT License. -->

<androidx.constraintlayout.widget.ConstraintLayout xmlns:android="http://schemas.android.com/apk/res/android"
    xmlns:app="http://schemas.android.com/apk/res-auto"
    xmlns:tools="http://schemas.android.com/tools"
    android:layout_width="match_parent"
    android:layout_height="match_parent"
    android:background="#FFFFFF"
    tools:context=".MainActivity">

    <LinearLayout
        android:id="@+id/linearLayout"
        android:layout_width="match_parent"
        android:layout_height="0dp"
        android:background="#FFFFFF"
        android:orientation="vertical"
        app:layout_constraintBottom_toBottomOf="parent"
        app:layout_constraintEnd_toEndOf="parent"
        app:layout_constraintHorizontal_bias="0.0"
        app:layout_constraintStart_toStartOf="parent"
        app:layout_constraintTop_toTopOf="parent"
        app:layout_constraintVertical_bias="0.0">

        <TextView
            android:id="@+id/Title"
            android:layout_width="match_parent"
            android:layout_height="wrap_content"
            android:layout_marginLeft="48dp"
            android:layout_marginTop="24dp"
            android:layout_marginRight="48dp"
            android:layout_marginBottom="24dp"
            android:text="@string/geographyTitle"
            android:textSize="24sp"
            android:textStyle="bold" />

        <ScrollView
            android:id="@+id/ContentPane"
            android:layout_width="match_parent"
            android:layout_height="480dp"
            android:layout_marginBottom="48dp"
            android:clipToPadding="false"
            android:fillViewport="false"
            android:paddingLeft="48dp"
            android:paddingRight="48dp"
            android:scrollbarStyle="outsideInset"
            android:visibility="visible"
            tools:visibility="visible">

        <LinearLayout
            android:layout_width="match_parent"
            android:layout_height="match_parent"
            android:orientation="vertical">

            <TextView
                android:id="@+id/Content1"
                android:layout_width="match_parent"
                android:layout_height="wrap_content"
                android:background="#00FFFFFF"
                android:text="@string/geographyTextEn"
                android:textSize="18sp" />

            <TextView
                android:id="@+id/Content2"
                android:layout_width="match_parent"
                android:layout_height="wrap_content"
                android:background="#00FFFFFF"
                android:text="@string/geographyTextFr"
                android:textSize="18sp" />

            </LinearLayout>

        </ScrollView>

        <Button
            android:id="@+id/LaunchImmersiveReaderButton"
            android:layout_width="match_parent"
            android:layout_height="60dp"
            android:layout_marginLeft="40dp"
            android:layout_marginRight="40dp"
            android:layout_marginBottom="80dp"
            android:text="@string/immersiveReaderButtonText"
            android:textAllCaps="false"
            android:textSize="24sp"
            android:visibility="visible"
            tools:visibility="visible" />

    </LinearLayout>

</androidx.constraintlayout.widget.ConstraintLayout>
Добавление макета веб-представления
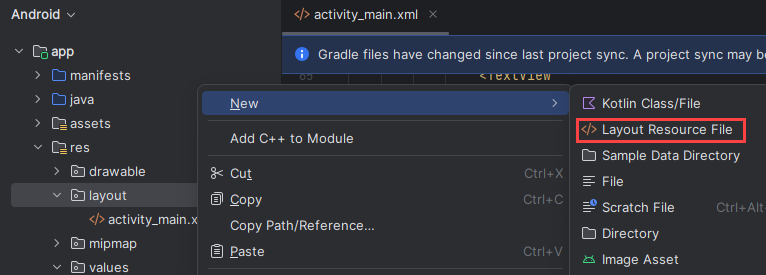
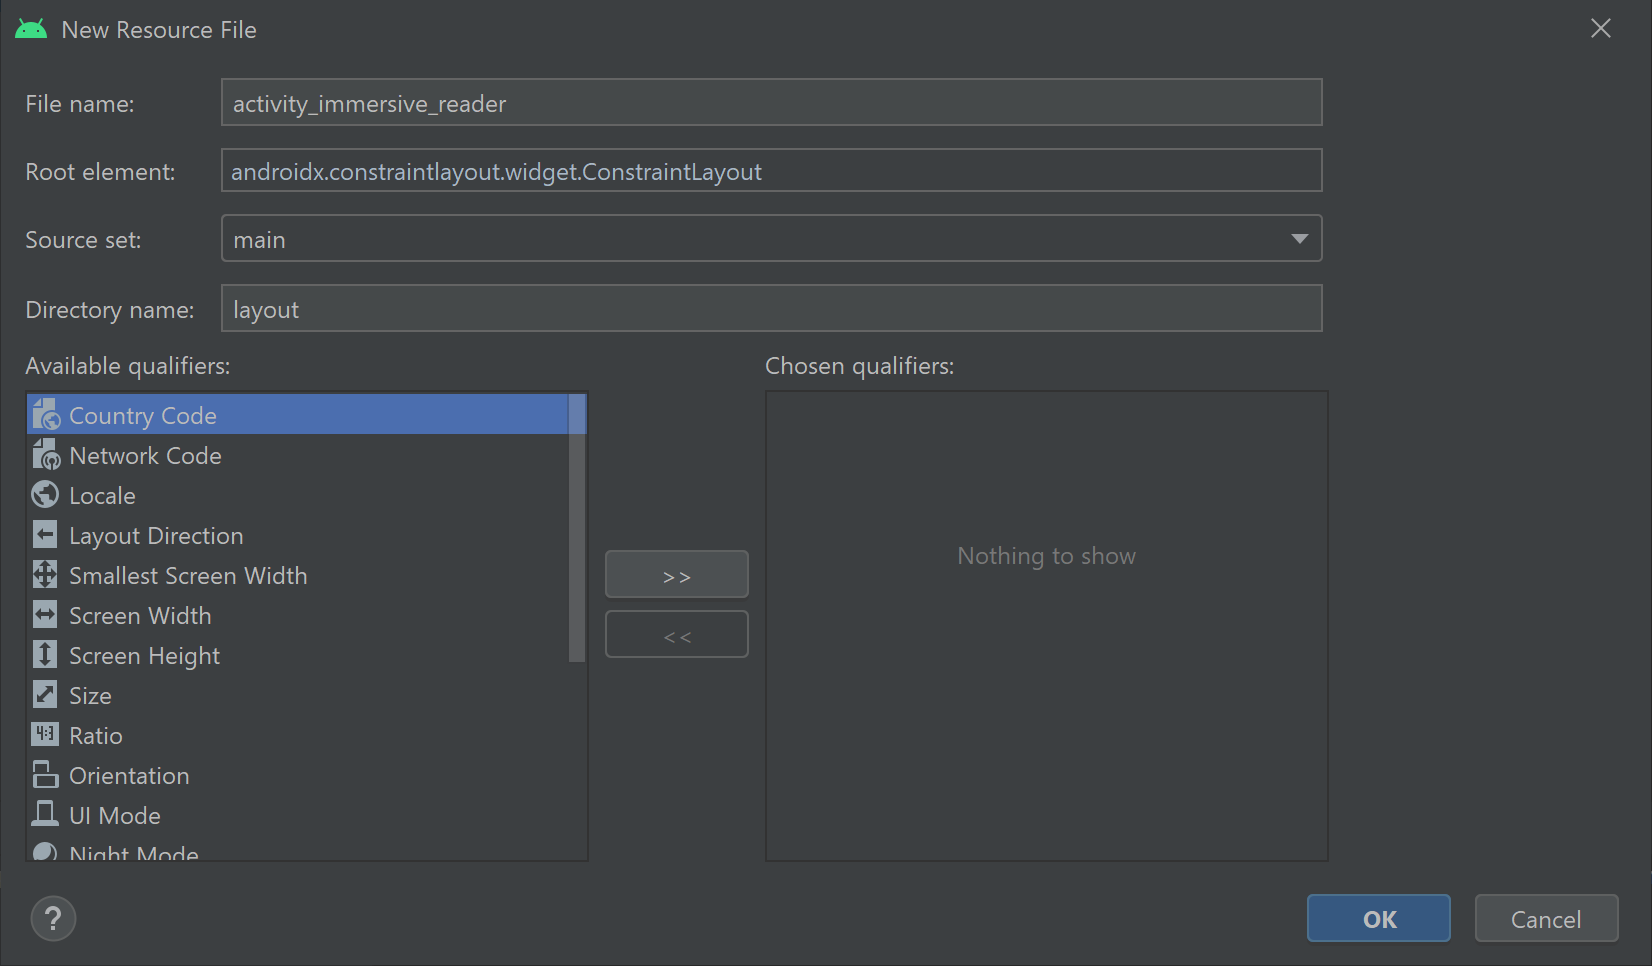
В папке res/layout/ folder создайте файл ресурса макета и назовите его activity_immersive_reader. Затем замените содержимое приведенным ниже кодом XML. Этот XML-код добавляет компонент WebView для использования кодом JAVA IRActivity на следующем шаге. В настоящее время это не определено и вызывает ошибки.
<?xml version="1.0" encoding="utf-8"?>

<!-- Copyright (c) Microsoft Corporation. All rights reserved. -->
<!-- Licensed under the MIT License. -->

<androidx.constraintlayout.widget.ConstraintLayout xmlns:android="http://schemas.android.com/apk/res/android"
    xmlns:tools="http://schemas.android.com/tools"
    android:layout_width="match_parent"
    android:layout_height="match_parent"
    android:background="#FFFFFF"
    tools:context=".IRActivity">

    <WebView
        android:id="@+id/webView"
        android:layout_width="match_parent"
        android:layout_height="match_parent" />

</androidx.constraintlayout.widget.ConstraintLayout>
Настройка кода Java для приложения
В папке java/com.example.quickstartjava/ есть существующий файл класса MainActivity.java Java. Именно в этой папке следует создавать логику приложения.
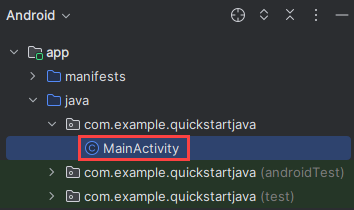
Замените содержимое файла MainActivity.java следующим кодом. В этом коде есть ссылки на несколько классов, которые еще не существуют и будут созданы позже.
/**
 * Copyright (c) Microsoft Corporation. All rights reserved.
 * Licensed under the MIT License.
 */

package com.example.quickstartjava;

import android.app.Activity;
import android.os.Bundle;
import android.view.View;
import android.widget.Button;
import android.widget.TextView;

import java.util.ArrayList;
import java.util.List;

/**
 * Creates a new activity, finds its content and the Immersive Reader button.
 * When clicked, the app sends the content to the Immersive Reader SDK and
 * launches the Immersive Reader.
 */
public class MainActivity extends Activity {

    @Override
    public void onCreate(Bundle savedInstanceState) {
        super.onCreate(savedInstanceState);
        setContentView(R.layout.activity_main);
        final TextView irTitle = findViewById(R.id.Title);
        final TextView irText1 = findViewById(R.id.Content1);
        final TextView irText2 = findViewById(R.id.Content2);

        final Button immersiveReaderButton = findViewById(R.id.LaunchImmersiveReaderButton);
        immersiveReaderButton.setOnClickListener(new View.OnClickListener() {
            @Override
            public void onClick(View view) {
                List<ReadableTextChunk> readableTextChunks = new ArrayList<>();
                readableTextChunks.add(new ReadableTextChunk(irText1.getText().toString(), "en"));
                readableTextChunks.add(new ReadableTextChunk(irText2.getText().toString(), "fr"));
                ReadableContent readableContent = new ReadableContent(irTitle.getText().toString(), readableTextChunks);

                ImmersiveReader immersiveReader = new ImmersiveReader(MainActivity.this, new IRAuthenticator());
                immersiveReader.read(readableContent);
            }
        });
    }
}
Мы создадим 16 файлов классов Java в папке java/com.example.quickstartjava/ . Каждый из этих классов используется приложением для интеграции пакета SDK для иммерсивного средства чтения. В каждом новом файле есть ссылки на несколько классов, которые еще не существуют и будут созданы позже. Когда вы завершите создание всех классов, ошибки пустых ссылок должны исчезнуть.
Чтобы создать файл класса Java ImmersiveReader.java , щелкните правой кнопкой мыши папку java/com.example.quickstartjava/, выберите "Создать" и выберите класс Java. Введите иммерсивныйReader.
Используйте этот же метод для создания файлов классов Java для каждого создаваемого файла класса Java.
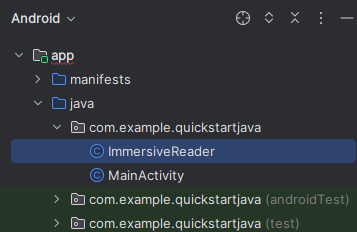
Замените содержимое файла ImmersiveReader.java следующим кодом.
/**
 * Copyright (c) Microsoft Corporation. All rights reserved.
 * Licensed under the MIT License.
 */

package com.example.quickstartjava;

import android.app.Activity;
import android.content.Intent;
import androidx.annotation.Keep;

import java.lang.ref.WeakReference;

/**
 * This is the client facing class for invoking the new Immersive Reader functionality.
 * Usage:
 * ImmersiveReader immersiveReader = new ImmersiveReader(Activity, IRAuthenticator);
 * immersiveReader.read(ReadableTextChunk);
 */

@Keep
public class ImmersiveReader {

    WeakReference<Activity> mActivityWR;

    /**
     * Interface to accept access token from client app.
     * Note that it is client's responsibility to give a valid Access Token whenever getAccessToken() is requested.
     * In favor of latency perf, there would be no further validation by Immersive Reader module except to ensure that the provided access token is non-empty string
     */
    @Keep
    public interface IAuthenticator {
        String getAccessToken();
    }

    public ImmersiveReader(Activity activity, IAuthenticator authenticator) {
        mActivityWR = new WeakReference<>(activity);
        IRDataHolder.getInstance().setAuthenticator(authenticator);
    }

    public ImmersiveReader(Activity activity) {
        this(activity, null);
    }

    /**
     * Launches a new activity to speak the content as described by ReadableContent object.
     *
     * @param dataToRead - Content to be read
     * @return IRError - IRError, with following error codes:
     * a) Error.NONE in case of successful launch of Immersive Reader
     * b) Error.INVALID_ACCESS_TOKEN in case of empty access token
     * c) Error.INVALID_STATE in case of empty activity
     * d) Error.INVALID_CONTENT in case of empty list of text chunks
     */

    public IRError read(ReadableContent dataToRead) {

        Activity activity = mActivityWR.get();
        if (activity == null) {
            return new IRError(Error.INVALID_STATE, "Client activity is null");
        }

        if (dataToRead == null || dataToRead.getTextChunks().size() == 0) {
            return new IRError(Error.INVALID_CONTENT, "Readable Text Chunks not passed to Immersive Reader");
        }

        IRDataHolder.getInstance().setContentToRead(dataToRead);
        Intent intent = new Intent(mActivityWR.get(), IRActivity.class);
        activity.startActivity(intent);

        return new IRError(Error.NONE, "Immersive Reader launched");
    }

}
Создайте новый файл класса Java IRActivity.java.

Замените содержимое файла IRActivity.java следующим кодом.
/**
 * Copyright (c) Microsoft Corporation. All rights reserved.
 * Licensed under the MIT License.
 */

package com.example.quickstartjava;

import android.app.Activity;
import android.content.Intent;
import androidx.annotation.Keep;

import java.lang.ref.WeakReference;

/**
 * This is the client facing class for invoking the new Immersive Reader functionality.
 * Usage:
 * ImmersiveReader immersiveReader = new ImmersiveReader(Activity, IRAuthenticator);
 * immersiveReader.read(ReadableTextChunk);
 */

@Keep
public class ImmersiveReader {

    WeakReference<Activity> mActivityWR;

    /**
     * Interface to accept access token from client app.
     * Note that it is the client's responsibility to give a valid Access Token whenever getAccessToken() is requested.
     * In favor of latency perf, there would be no further validation by Immersive Reader module except to ensure that the provided access token is non-empty string.
     */
    @Keep
    public interface IAuthenticator {
        String getAccessToken();
    }

    public ImmersiveReader(Activity activity, IAuthenticator authenticator) {
        mActivityWR = new WeakReference<>(activity);
        IRDataHolder.getInstance().setAuthenticator(authenticator);
    }

    public ImmersiveReader(Activity activity) {
        this(activity, null);
    }

    /**
     * Launches a new activity to speak the content as described by ReadableContent object.
     *
     * @param dataToRead - Content to be read
     * @return IRError - IRError, with following error codes:
     * a) Error.NONE in case of successful launch of Immersive Reader
     * b) Error.INVALID_ACCESS_TOKEN in case of empty access token.
     * c) Error.INVALID_STATE in case of empty activity
     * d) Error.INVALID_CONTENT in case of empty list of text chunks
     */

    public IRError read(ReadableContent dataToRead) {

        Activity activity = mActivityWR.get();
        if (activity == null) {
            return new IRError(Error.INVALID_STATE, "Client activity is null");
        }

        if (dataToRead == null || dataToRead.getTextChunks().size() == 0) {
            return new IRError(Error.INVALID_CONTENT, "Readable Text Chunks not passed to Immersive Reader");
        }

        IRDataHolder.getInstance().setContentToRead(dataToRead);
        Intent intent = new Intent(mActivityWR.get(), IRActivity.class);
        activity.startActivity(intent);

        return new IRError(Error.NONE, "Immersive Reader launched");
    }

}
Создайте новый файл класса Java IRError.java.
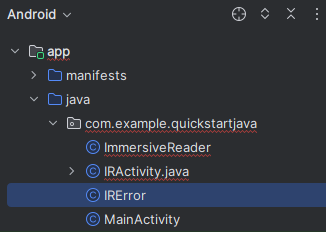
Замените содержимое файла IRError.java следующим кодом.
/**
 * Copyright (c) Microsoft Corporation. All rights reserved.
 * Licensed under the MIT License.
 */

package com.example.quickstartjava;

import android.os.Parcel;
import android.os.Parcelable;
import androidx.annotation.Keep;

/**
 * Shared error handling of the app.
 */

@Keep
public class IRError implements Parcelable {

    private int errorId;
    private String errorMessage = "";

    public String getErrorMessage() {
        return errorMessage;
    }

    public void setErrorMessage(String errorMessage) {
        this.errorMessage = errorMessage;
    }

    public int getErrorId() {
        return errorId;
    }

    public void setErrorId(int errorId) {
        this.errorId = errorId;
    }

    public IRError(int errorId, String errorMessage) {
        this.errorId = errorId;
        this.errorMessage = errorMessage;
    }

    // parcelable
    @Override
    public int describeContents() {
        return 0;
    }

    @Override
    public void writeToParcel(Parcel out, int flags) {
        out.writeInt(this.errorId);
        out.writeString(this.errorMessage);
    }

    public static final Creator<IRError> CREATOR
            = new Creator<IRError>() {
        public IRError createFromParcel(Parcel in) {
            return new IRError(in);
        }

        public IRError[] newArray(int size) {
            return new IRError[size];
        }
    };

    private IRError(Parcel in) {
        this.errorId = in.readInt();
        this.errorMessage = in.readString();
    }
}
Создайте новый файл класса Java Error.java.
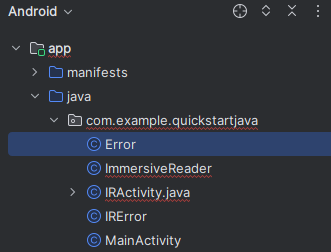
Замените содержимое файла Error.java следующим кодом.
/**
 * Copyright (c) Microsoft Corporation. All rights reserved.
 * Licensed under the MIT License.
 */

package com.example.quickstartjava;

import androidx.annotation.Keep;

/**
 * Adds some default error status codes.
 */

@Keep
public class Error {

    public static final int NONE = 1000;
    public static final int INVALID_ACCESS_TOKEN = 8001;
    public static final int INVALID_STATE = 8002;
    public static final int INVALID_CONTENT = 8003;

}
Создайте новый файл класса Java ReadableContent.java.

Замените содержимое файла ReadableContent.java следующим кодом.
/**
 * Copyright (c) Microsoft Corporation. All rights reserved.
 * Licensed under the MIT License.
 */

package com.example.quickstartjava;

import androidx.annotation.Keep;

import java.util.List;

/**
 * Content data to be sent to the Immersive Reader SDK
 */

@Keep
public class ReadableContent {

    private String mTitle;
    private List<ReadableTextChunk> mTextChunks;

    public ReadableContent(String title, List<ReadableTextChunk> textChunks) {
        this.mTitle = title;
        this.mTextChunks = textChunks;
    }

    public String getTitle() {
        return mTitle;
    }

    public List<ReadableTextChunk> getTextChunks() {
        return mTextChunks;
    }

}
Создайте новый файл класса Java ReadableTextChunk.java.
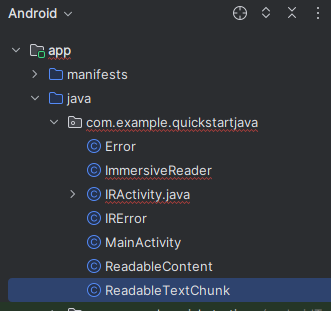
Замените содержимое файла ReadableTextChunk.java следующим кодом.
/**
 * Copyright (c) Microsoft Corporation. All rights reserved.
 * Licensed under the MIT License.
 */

import androidx.annotation.Keep;

/**
 * Content sent to the Immersive Reader SDK may be separated into chunks so that there may be
 * different types of content sent in the same document. This includes content of different
 * languages, math content, et cetera.
 */

@Keep
public class ReadableTextChunk {
    public String mText;
    public String mLocale;

    public ReadableTextChunk(String text, String locale) {
        this.mText = text;
        this.mLocale = locale;
    }
}
Создайте новый файл класса Java IRDataHolder.java.
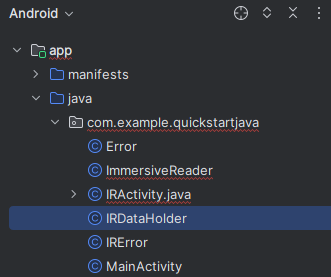
Замените содержимое файла IRDataHolder.java следующим кодом.
/**
 * Copyright (c) Microsoft Corporation. All rights reserved.
 * Licensed under the MIT License.
 */

package com.example.quickstartjava;

import androidx.annotation.Keep;

/**
 * A thin singleton class that is used to hold the Client's IAuthenticator's implementation and the Content to be read.
 * This is required for two reasons:
 * 1) As per Android guidelines, data being passed via intent should be limited to a few KBs. Alternative is to use Singleton holder classes like this one.
 * 2) We need a way to make callbacks survive app configuration changes and killed in background scenarios.
 */

@Keep
public class IRDataHolder {

    private static IRDataHolder mInstance = null;
    private ReadableContent mActiveContent = null;
    private ImmersiveReader.IAuthenticator mAuthenticator = null;

    public static IRDataHolder getInstance() {

        if (mInstance == null) {
            synchronized (IRDataHolder.class) {
                if (mInstance == null) {
                    mInstance = new IRDataHolder();
                }
            }
        }
        return mInstance;
    }

    public void setContentToRead(ReadableContent content) {
        mActiveContent = content;
    }

    public ReadableContent getContentToRead() {
        return mActiveContent;
    }

    public ImmersiveReader.IAuthenticator getAuthenticator() {
        return mAuthenticator;
    }

    public void setAuthenticator(ImmersiveReader.IAuthenticator accessTokenProvider) {
        this.mAuthenticator = accessTokenProvider;
    }

    public void clearContent() {
        mActiveContent = null;
    }

}
Создайте новый файл класса Java IRAuthenticator.java.
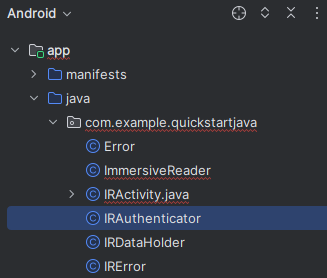
Замените содержимое файла IRAuthenticator.java следующим кодом.
/**
 * Copyright (c) Microsoft Corporation. All rights reserved.
 * Licensed under the MIT License.
 */

package com.example.quickstartjava;

import android.text.TextUtils;
import android.util.Log;

import org.json.JSONException;
import org.json.JSONObject;

import io.github.cdimascio.dotenv.Dotenv;
import java.io.BufferedReader;
import java.io.DataOutputStream;
import java.io.IOException;
import java.io.InputStreamReader;
import java.net.HttpURLConnection;
import java.net.MalformedURLException;
import java.net.URL;

import static java.net.HttpURLConnection.HTTP_OK;

// This sample app uses the Dotenv. It's a module that loads environment variables from a .env file to better manage secrets.
// https://github.com/cdimascio/java-dotenv
// Be sure to add a "env" file to the /assets folder.
// Instead of '.env', use 'env'.

public class IRAuthenticator implements ImmersiveReader.IAuthenticator {
    private static final String LOG_TAG = "IRAuthenticator";
    Dotenv dotEnv = Dotenv.configure()
            .directory("/assets")
            .filename("env")
            .ignoreIfMalformed()
            .ignoreIfMissing()
            .load();

    @Override
    public String getAccessToken() {
        String clientId = dotEnv.get("CLIENT_ID");
        String clientSecret = dotEnv.get("CLIENT_SECRET");
        String tenantId = dotEnv.get("TENANT_ID");
        String accessToken = null;

        try {
            StringBuilder urlStringBuilder = new StringBuilder();
            urlStringBuilder.append("https://login.windows.net/");
            urlStringBuilder.append(tenantId);
            urlStringBuilder.append("/oauth2/token");
            URL tokenUrl = new URL(urlStringBuilder.toString());

            StringBuilder formStringBuilder = new StringBuilder();
            formStringBuilder.append("grant_type=client_credentials&resource=https://cognitiveservices.azure.com/&client_id=");
            formStringBuilder.append(clientId);
            formStringBuilder.append("&client_secret=");
            formStringBuilder.append(clientSecret);
            String form = formStringBuilder.toString();

            HttpURLConnection httpURLConnection = (HttpURLConnection) tokenUrl.openConnection();
            httpURLConnection.setRequestMethod("POST");
            httpURLConnection.setRequestProperty("content-type", "application/x-www-form-urlencoded");
            httpURLConnection.setDoOutput(true);

            DataOutputStream dataOutputStream = new DataOutputStream(httpURLConnection.getOutputStream());
            dataOutputStream.writeBytes(form);
            dataOutputStream.flush();
            dataOutputStream.close();

            int responseCode = httpURLConnection.getResponseCode();

            if (responseCode == HTTP_OK) {
                BufferedReader bufferedReader = new BufferedReader(new InputStreamReader(httpURLConnection.getInputStream()));
                StringBuffer response = new StringBuffer();

                String line = bufferedReader.readLine();
                while (!TextUtils.isEmpty(line)) {
                    response.append(line);
                    line = bufferedReader.readLine();
                }

                bufferedReader.close();

                JSONObject accessTokenJson = new JSONObject(response.toString());
                accessToken = accessTokenJson.getString("access_token");
            }

        } catch (MalformedURLException e) {
            e.printStackTrace();
        } catch (IOException e) {
            e.printStackTrace();
        } catch (JSONException e) {
            e.printStackTrace();
        }

        //  accessToken = Constants.ACCESS_TOKEN;
        Log.i(LOG_TAG, "Accesstoken: " + accessToken);
        return accessToken;
    }
}
Создайте новый файл класса Java IRLauncher.java.
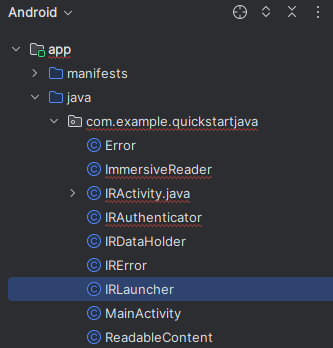
Замените содержимое файла IRLauncher.java следующим кодом.
/**
 * Copyright (c) Microsoft Corporation. All rights reserved.
 * Licensed under the MIT License.
 */

package com.example.quickstartjava;

import android.content.Context;
import android.os.Build;
import android.text.TextUtils;
import android.view.View;
import android.webkit.CookieManager;
import android.webkit.WebView;
import android.webkit.WebViewClient;
import android.widget.Toast;

import com.google.gson.Gson;
import com.google.gson.GsonBuilder;

import java.util.ArrayList;
import java.util.Date;
import java.util.List;
import java.util.concurrent.Callable;

import io.github.cdimascio.dotenv.Dotenv;

/**
 * Responsible for setting up the web view with appropriate bridging between JavaScript and Java to launch the Immersive Reader url for reading the content.
 */

public class IRLauncher {
    Dotenv dotEnv = Dotenv.configure()
            .directory("/assets")
            .filename("env")
            .ignoreIfMalformed()
            .ignoreIfMissing()
            .load();

    private WebView mWebView;
    private Context mContext;
    public final String SUBDOMAIN = dotEnv.get("SUBDOMAIN");

    interface IRLaunchListener {

        // Invoked in case of successful launch of Immersive Reader Activity. Note that content reading can still fail due to multiple reasons including expired access token.
        void onSuccess();

        // Invoked in case of empty access token or empty content request to be read
        void onFailure(IRError error);

        // Invoked when Immersive Reader is exiting (e.g.) user pressed back in the Immersive Reader experience
        void onExit();
    }

    public IRLauncher(Context context, WebView webView) {
        this.mContext = context;
        this.mWebView = webView;
    }

    public void launch(final IRLaunchListener launchListener) {

        AuthenticationTask authenticationTask = new AuthenticationTask();
        AuthenticationTask.TaskParams params = authenticationTask.new TaskParams(IRDataHolder.getInstance().getAuthenticator(), new AuthenticationTask.ITaskListener() {
            @Override
            public void onAccessTokenObtained(String accessToken) {

                // Basic validation for access token
                if (TextUtils.isEmpty(accessToken)) {
                    launchListener.onFailure(new IRError(Error.INVALID_ACCESS_TOKEN, "Access token is empty"));
                }

                // Create list of chunks from data that was passed originally by the client and stored in the data holder
                List<Chunk> chunkList = new ArrayList<>();
                for (ReadableTextChunk textChunk : IRDataHolder.getInstance().getContentToRead().getTextChunks()) {
                    chunkList.add(new Chunk(textChunk.mText, textChunk.mLocale, "text/plain"));
                }
                Content content = new Content(IRDataHolder.getInstance().getContentToRead().getTitle(), chunkList);
                Options options = new Options(new Callable<Void>() {
                    public Void call() {
                        launchListener.onExit();
                        return null;
                    }
                }, "en", 0);

                // Prepare the webview
                prepareWebView(accessToken, content, options, launchListener);
                mWebView.loadUrl("file:///android_asset/immersiveReader.html");
                launchListener.onSuccess();
            }
        });

        authenticationTask.setParams(params);
        authenticationTask.execute();
    }

    private void prepareWebView(String accessToken, Content content, Options options, final IRLaunchListener launchListener) {
        mWebView.getSettings().setAllowContentAccess(true);
        mWebView.getSettings().setJavaScriptEnabled(true);
        mWebView.getSettings().setLoadsImagesAutomatically(true);
        mWebView.getSettings().setLoadWithOverviewMode(true);
        mWebView.getSettings().setUseWideViewPort(true);
        mWebView.getSettings().setUserAgentString("Android");
        mWebView.getSettings().setDomStorageEnabled(true);
        mWebView.getSettings().setAppCacheEnabled(false);
        mWebView.getSettings().setSupportZoom(true);
        mWebView.setInitialScale(1);

        // Enable web view cookies
        if (android.os.Build.VERSION.SDK_INT >= android.os.Build.VERSION_CODES.LOLLIPOP) {
            CookieManager.getInstance().setAcceptThirdPartyCookies(mWebView, true);
        } else {
            CookieManager.getInstance().setAcceptCookie(true);
        }

        final Date startPostMessageSentDurationInMs = new Date();

        // Create the Message
        final Message messageData = new Message(accessToken, SUBDOMAIN, content, 0, options);

        // Set WebView Client
        mWebView.setWebViewClient(new WebViewClient() {

            @Override
            public boolean shouldOverrideUrlLoading(WebView view, String url) {
                mWebView.loadUrl(url);
                return true;
            }

            @Override
            public void onPageFinished(WebView view, String url) {
                Date endPostMessageSentDurationInMs = new Date();
                long postMessageSentDurationInMs = endPostMessageSentDurationInMs.getTime() - startPostMessageSentDurationInMs.getTime();

                // Updates launchToPostMessageSentDurationInMs
                if (Build.VERSION.SDK_INT >= Build.VERSION_CODES.N) {
                    messageData.launchToPostMessageSentDurationInMs = Math.toIntExact(postMessageSentDurationInMs);
                } else {
                    messageData.launchToPostMessageSentDurationInMs = 0;
                }

                GsonBuilder gsonBuilder = new GsonBuilder();
                Gson gson = gsonBuilder.create();
                String messageJson = gson.toJson(messageData);

                if (Build.VERSION.SDK_INT >= Build.VERSION_CODES.KITKAT) {
                    StringBuilder scriptStringBuilder = new StringBuilder().append("handleLaunchImmersiveReader(").append(messageJson).append(")");
                    view.evaluateJavascript(scriptStringBuilder.toString(), null);
                } else {
                    StringBuilder urlStringBuilder = new StringBuilder().append("javascript:handleLaunchImmersiveReader(").append(messageJson).append(")");
                    view.loadUrl(urlStringBuilder.toString());
                }
                mWebView.setVisibility(View.VISIBLE);
            }
        });

        // Prepare and set the WebAppInterface to hear back from the JavaScript
        WebAppInterface jsInterface = new WebAppInterface(new WebAppInterface.WebAppListener() {
            @Override
            public void onShowToast(String toast) {
                Toast.makeText(mContext, toast, Toast.LENGTH_SHORT).show();
            }

            @Override
            public void onImmersiveReaderExit() {
                IRDataHolder.getInstance().clearContent();
                mWebView.post(new Runnable() {
                    @Override
                    public void run() {
                        mWebView.clearHistory();
                        mWebView.clearCache(true);
                        mWebView.loadUrl("about:blank");
                        mWebView.onPause();
                        mWebView.removeAllViews();
                        mWebView.pauseTimers();
                        mWebView.destroy();
                    }
                });
                launchListener.onExit();
            }
        });

        mWebView.addJavascriptInterface(jsInterface, "Android");
    }
}
Создайте новый файл класса Java IRStore.java.

Замените содержимое файла IRStore.java следующим кодом.
/**
 * Copyright (c) Microsoft Corporation. All rights reserved.
 * Licensed under the MIT License.
 */

package com.example.quickstartjava;

import androidx.annotation.Keep;

@Keep
public final class IRStore {
    @Keep
    public final static class Output {
        public final static String ERROR = "Error";
    }
}
Создайте новый файл класса Java AuthenticationTask.java.

Замените содержимое файла AuthenticationTask.java следующим кодом.
/**
 * Copyright (c) Microsoft Corporation. All rights reserved.
 * Licensed under the MIT License.
 */

package com.example.quickstartjava;

import android.os.AsyncTask;

/**
 * Async task to request the client for the access token in background thread.
 */

public class AuthenticationTask extends AsyncTask<Void, Void, String> {

    private TaskParams mParams;

    public interface ITaskListener {
        void onAccessTokenObtained(String accessToken);
    }

    public class TaskParams {
        ImmersiveReader.IAuthenticator mAccessTokenProvider;
        ITaskListener mTaskListener;

        public TaskParams(ImmersiveReader.IAuthenticator accessTokenProvider, ITaskListener taskListener) {
            this.mAccessTokenProvider = accessTokenProvider;
            this.mTaskListener = taskListener;
        }
    }

    public void setParams(TaskParams mParams) {
        this.mParams = mParams;
    }

    @Override
    protected String doInBackground(Void... voids) {
        return mParams.mAccessTokenProvider.getAccessToken();
    }

    @Override
    protected void onPostExecute(String accessToken) {
        super.onPostExecute(accessToken);
        if (mParams.mTaskListener != null) {
            mParams.mTaskListener.onAccessTokenObtained(accessToken);
        }
    }
}
Создайте новый файл класса Java Chunk.java.
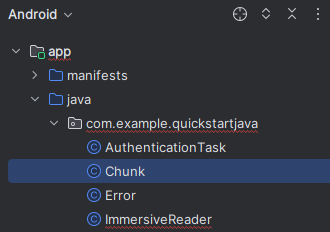
Замените содержимое файла Chunk.java следующим кодом.
/**
 * Copyright (c) Microsoft Corporation. All rights reserved.
 * Licensed under the MIT License.
 */

package com.example.quickstartjava;

import androidx.annotation.Keep;

/**
 * The chunk object that will be sent to the Immersive Reader SDK.
 * The content is a string of text, the lang is a string, e.g. 'll-cc',
 * and the mimeType is also a string, e.g. 'text/plain'.
 */

@Keep
public class Chunk {

    public String content;
    public String lang;
    public String mimeType;

    public Chunk(String content, String lang, String mimeType) {
        this.content = content;
        this.lang = lang;
        this.mimeType = mimeType;
    }
}
Создайте новый файл класса Java Content.java.
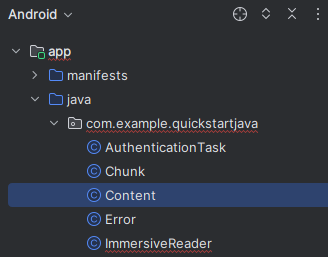
Замените содержимое файла Content.java следующим кодом.
/**
 * Copyright (c) Microsoft Corporation. All rights reserved.
 * Licensed under the MIT License.
 */

package com.example.quickstartjava;

import androidx.annotation.Keep;
import java.util.List;

/**
 * The content object that will be sent to the Immersive Reader SDK.
 * This object contains the title and a list of Chunk objects.
 */

@Keep
public class Content {

    public String title;
    public List<Chunk> chunks;

    public Content(String title, List<Chunk> chunks) {
        this.title = title;
        this.chunks = chunks;
    }

}
Создайте новый файл класса Java Options.java.
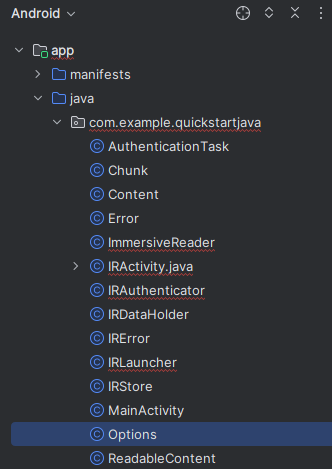
Замените содержимое файла Options.java следующим кодом.
/**
 * Copyright (c) Microsoft Corporation. All rights reserved.
 * Licensed under the MIT License.
 */

import java.util.concurrent.Callable;
import androidx.annotation.Keep;

/**
 * The options object that will be sent to the Immersive Reader SDK.
 */

@Keep
public class Options {

    public Callable<Void> onExit;
    public String uiLang;
    public Integer timeout;

    public Options(Callable<Void> exitCallback, String uiLang, Integer timeout) {
        this.onExit = exitCallback;
        this.uiLang = uiLang;
        this.timeout = timeout;
    }
}
Создайте новый файл класса Java Message.java.

Замените содержимое файла Message.java следующим кодом.
/**
 * Copyright (c) Microsoft Corporation. All rights reserved.
 * Licensed under the MIT License.
 */

import androidx.annotation.Keep;

/**
 * The message object that will be sent to the Immersive Reader SDK.
 * This object contains the access token, sub domain, Content, and Options.
 */

@Keep
public class Message {

    public String cogSvcsAccessToken;
    public String cogSvcsSubdomain;
    public Content request;
    public Integer launchToPostMessageSentDurationInMs;
    public Options options;

    public Message(String cogSvcsAccessToken, String cogSvcsSubdomain, Content request, Integer launchToPostMessageSentDurationInMs, Options options) {
        this.cogSvcsAccessToken = cogSvcsAccessToken;
        this.cogSvcsSubdomain = cogSvcsSubdomain;
        this.request = request;
        this.launchToPostMessageSentDurationInMs = launchToPostMessageSentDurationInMs;
        this.options = options;
    }
}
Создайте новый файл класса Java WebAppInterface.java.
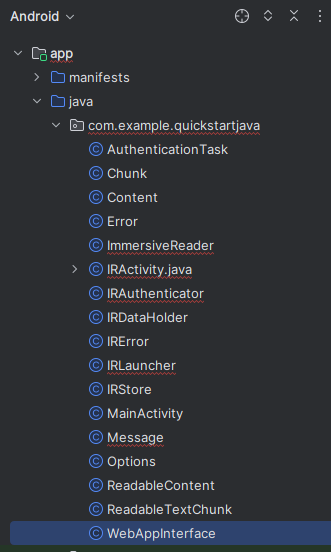
Замените содержимое файла WebAppInterface.java следующим кодом.
/**
 * Copyright (c) Microsoft Corporation. All rights reserved.
 * Licensed under the MIT License.
 */

package com.example.quickstartjava;

import androidx.annotation.Keep;
import android.webkit.JavascriptInterface;

/**
 * JavaScript interface implementation passed to the WebView to enable talking between JavaScript and Java.
 */

@Keep
public class WebAppInterface {

    public static WebAppListener mListener;

    interface WebAppListener {
        void onShowToast(String toast);

        void onImmersiveReaderExit();
    }

    public WebAppInterface(WebAppListener listener) {
        this.mListener = listener;
    }

    @JavascriptInterface
    public void showToast(String toast) {
        mListener.onShowToast(toast);
    }

    @JavascriptInterface
    public void immersiveReaderExit() {
        mListener.onImmersiveReaderExit();
    }

}
Добавление HTML-кода для приложения в веб-представление
Для работы реализации веб-представления требуется HTML-код. Щелкните правой кнопкой папку /assets, создайте здесь файл и присвойте ему имя immersiveReader.html.

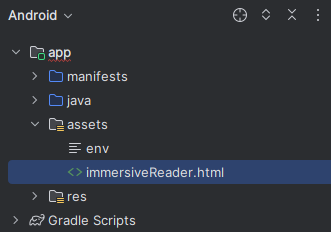
Добавьте следующий код HTML и JavaScript. Этот код добавляет пакет SDK Иммерсивное средство чтения в приложение и использует его для открытия Иммерсивное средство чтения с помощью написанного кода приложения.
<!-- Copyright (c) Microsoft Corporation. All rights reserved.
Licensed under the MIT License. -->

<!DOCTYPE html>
<html>
<head>
    <meta charset="utf-8">
    <meta name="viewport" content="width=device-width, initial-scale=1, shrink-to-fit=no">
    <script type="text/javascript" src="https://ircdname.azureedge.net/immersivereadersdk/immersive-reader-sdk.1.4.0.js"></script>
</head>
<body>
    <script type="text/javascript">
        function handleLaunchImmersiveReader(message) {
            if (!message) {
                Android.showToast('Message is null or undefined!');
            } else {
                // Learn more about chunk usage and supported MIME types https://video2.skills-academy.com/azure/ai-services/immersive-reader/reference#chunk
                var data = {
                    title: message.request.title,
                    chunks: []
                };

                for (var chunkIndex = 0; chunkIndex < message.request.chunks.length; chunkIndex++) {
                    data.chunks.push({
                        content: message.request.chunks[chunkIndex].content,
                        lang: message.request.chunks[chunkIndex].lang,
                        mimeType: message.request.chunks[chunkIndex].mimeType
                    });
                }

                // Learn more about options https://video2.skills-academy.com/azure/ai-services/immersive-reader/reference#options
                var options = {
                    onExit: exitCallback,
                    uiZIndex: 2000
                };

                // Use the JavaScript SDK to launch the Immersive Reader.
                ImmersiveReader.launchAsync(message.cogSvcsAccessToken, message.cogSvcsSubdomain, data, options);

                // A simple declarative function used to close the Immersive Reader WebView via @JavaScriptInterface
                function exitCallback() {
                    Android.immersiveReaderExit();
                }
            }
        }
    </script>
</body>
</html>
Настройка разрешений приложения
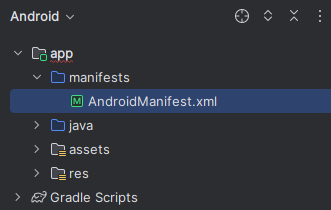
При работе это приложение будет выполнять сетевые вызовы к пакету SDK для иммерсивного средства чтения, поэтому нам нужно предоставить приложению разрешения на доступ к сети. Замените содержимое файла /manifests/AndroidManifest.xml следующим кодом XML.
<?xml version="1.0" encoding="utf-8"?>
<manifest xmlns:android="http://schemas.android.com/apk/res/android"
    package="com.example.quickstartjava">

    <uses-permission android:name="android.permission.INTERNET" />

    <application
        android:allowBackup="true"
        android:icon="@mipmap/ic_launcher"
        android:label="@string/app_name"
        android:roundIcon="@mipmap/ic_launcher_round"
        android:supportsRtl="true"
        android:theme="@style/AppTheme">
        <activity android:name=".MainActivity">
            <intent-filter>
                <action android:name="android.intent.action.MAIN" />

                <category android:name="android.intent.category.LAUNCHER" />
            </intent-filter>
        </activity>
        <activity
            android:name=".IRActivity"
            android:multiprocess="true" />
    </application>

</manifest>
Выполнить приложение
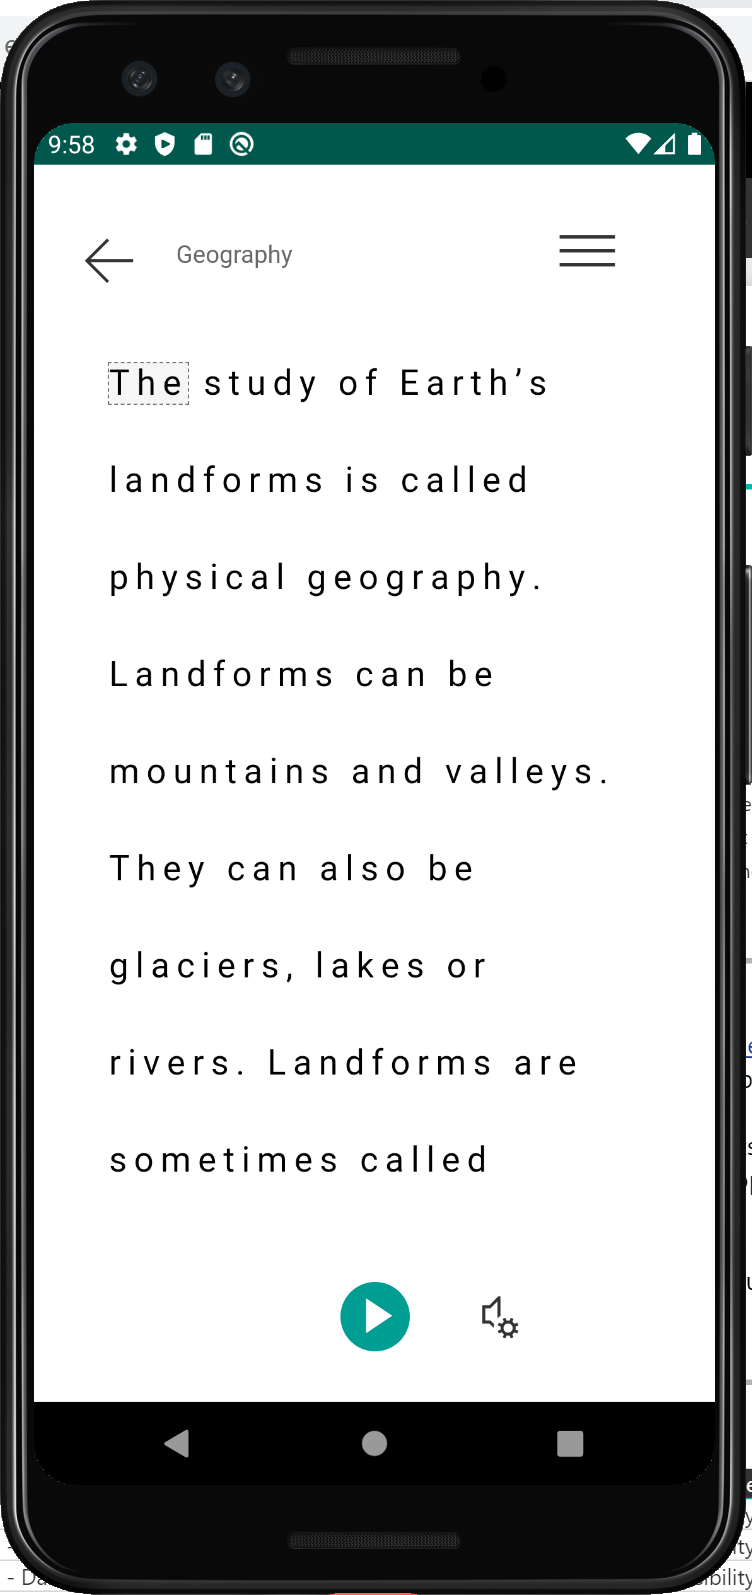
С помощью Android Studio запустите приложение на эмуляторе устройства. Теперь, когда вы выберете иммерсивное средство чтения, откроется иммерсивное средство чтения с содержимым приложения.
Следующий шаг
В рамках этого краткого руководства вы создадите с нуля приложение Android и интегрируете в него иммерсивное средство чтения. Полностью рабочий пример этого краткого руководства доступен на GitHub.
Необходимые компоненты
- Подписка Azure. Вы можете создать бесплатную учетную запись.
- Ресурс Иммерсивное средство чтения, настроенный для проверки подлинности Microsoft Entra. Инструкции по настройке см. здесь. Сохраните выходные данные сеанса в текстовый файл, чтобы настроить свойства среды.
- Git.
- Android Studio.
Создание проекта Android
Создайте новый проект в Android Studio.
В окне "Шаблоны" выберите "Пустое представление" и нажмите кнопку "Далее".

Настройка проекта
Присвойте проекту имя QuickstartKotlin и выберите расположение для его сохранения. Выберите язык программирования Kotlin, а затем щелкните Finish (Завершить).

Настройка папки assets и аутентификации
Чтобы создать новую папку ресурсов, щелкните правой кнопкой мыши приложение и выберите папку "Папка ->Активы" в раскрывающемся списке.

Щелкните правой кнопкой мыши ресурсы и выберите "Создать файл>". Назовите файл env.

Добавьте следующие имена и значения, используя данные о вашей среде. Не фиксируйте этот ENV-файл в системе управления версиями, так как он содержит секреты, не предназначенные для публикации.
TENANT_ID=<YOUR_TENANT_ID>
CLIENT_ID=<YOUR_CLIENT_ID>
CLIENT_SECRET=<YOUR_CLIENT_SECRET>
SUBDOMAIN=<YOUR_SUBDOMAIN>

Внимание
Ни в коем случае не публикуйте секреты в общем доступе. Для рабочей среды используйте безопасный способ хранения и доступа к учетным данным, например Azure Key Vault.
Добавление зависимостей
Замените существующие зависимости в файле build.gradle приведенными ниже реализациями, чтобы средства coroutines (асинхронное программирование), gson (синтаксический анализ JSON и сериализация) и dotenv могли ссылаться на переменные, определенные в ENV-файле. При реализации MainActivity.kt в этом кратком руководстве может потребоваться снова синхронизировать проект.

dependencies {
    implementation fileTree(dir: 'libs', include: ['*.jar'])
    implementation"org.jetbrains.kotlin:kotlin-stdlib-jdk7:$kotlin_version"
    implementation 'androidx.appcompat:appcompat:1.0.2'
    implementation 'androidx.core:core-ktx:1.0.2'
    implementation 'androidx.constraintlayout:constraintlayout:1.1.3'
    implementation "org.jetbrains.kotlinx:kotlinx-coroutines-core:1.1.1"
    implementation "org.jetbrains.kotlinx:kotlinx-coroutines-android:1.1.1"
    implementation 'com.google.code.gson:gson:2.8.6'
    implementation 'io.github.cdimascio:java-dotenv:5.1.3'
    testImplementation 'junit:junit:4.12'
    androidTestImplementation 'androidx.test.ext:junit:1.1.0'
    androidTestImplementation 'androidx.test.espresso:espresso-core:3.1.1'
}
Обновление ресурсов строк и макета для приложения
Замените содержимое в res/values/strings.xml следующими строками, которые будут использоваться в приложении.

<resources>

    <!-- Copyright (c) Microsoft Corporation. All rights reserved. -->
    <!-- Licensed under the MIT License. -->

    <string name="app_name">ImmersiveReaderSDK</string>
    <string name="geographyTitle">Geography</string>
    <string name="geographyTextEn">The study of Earth's landforms is called physical geography. Landforms can be mountains and valleys. They can also be glaciers, lakes or rivers. Landforms are sometimes called physical features. It is important for students to know about the physical geography of Earth. The seasons, the atmosphere and all the natural processes of Earth affect where people are able to live. Geography is one of a combination of factors that people use to decide where they want to live.The physical features of a region are often rich in resources. Within a nation, mountain ranges become natural borders for settlement areas. In the U.S., major mountain ranges are the Sierra Nevada, the Rocky Mountains, and the Appalachians. Fresh water sources also influence where people settle. People need water to drink. They also need it for washing. Throughout history, people have settled near fresh water. Living near a water source helps ensure that people have the water they need. There was an added bonus, too. Water could be used as a travel route for people and goods. Many Americans live near popular water sources, such as the Mississippi River, the Colorado River and the Great Lakes.Mountains and deserts have been settled by fewer people than the plains areas. However, they have valuable resources of their own.</string>
    <string name="geographyTextFr">L\'étude des reliefs de la Terre est appelée géographie physique. Les reliefs peuvent être des montagnes et des vallées. Il peut aussi s\'agira de glaciers, delacs ou de rivières. Les reliefs sont parfois appelés caractéristiques physiques. Il est important que les élèves connaissent la géographie physique de laTerre. Les saisons, l\'atmosphère et tous les processus naturels de la Terre affectent l\'endroit où les gens sont capables de vivre. La géographie est l\'un desfacteurs que les gens utilisent pour décider où ils veulent vivre. Les caractéristiques physiques d\'une région sont souvent riches en ressources. Àl\'intérieur d\'une nation, les chaînes de montagnes deviennent des frontières naturelles pour les zones de peuplement. Aux États-Unis, les principaleschaînes de montagnes sont la Sierra Nevada, les montagnes Rocheuses et les Appalaches.Les sources d\'eau douce influencent également l\'endroit où lesgens s\'installent. Les gens ont besoin d\'eau pour boire. Ils en ont aussi besoin pour se laver. Tout au long de l\'histoire, les gens se sont installés près del\'eau douce. Vivre près d\'une source d\'eau permet de s\'assurer que les gens ont l\'eau dont ils ont besoin. Il y avait un bonus supplémentaire, aussi. L\'eaupourrait être utilisée comme voie de voyage pour les personnes et les marchandises. Beaucoup d\'Américains vivent près des sources d\'eau populaires,telles que le fleuve Mississippi, le fleuve Colorado et les Grands Lacs.Mountains et les déserts ont été installés par moins de gens que les zones desplaines. Cependant, ils disposent de ressources précieuses.Les gens ont une réponse.</string>
    <string name="immersiveReaderButtonText">Immersive Reader</string>
</resources>
Замените содержимое файла res/layout/activity_main.xml следующим кодом XML, который будет использоваться в приложении. Это макет пользовательского интерфейса для приложения в формате XML. Если код не отображается в файле activity_main.xml , щелкните правой кнопкой мыши холст и выберите "Перейти к XML".

<?xml version="1.0" encoding="utf-8"?>

<!-- Copyright (c) Microsoft Corporation. All rights reserved. -->
<!-- Licensed under the MIT License. -->

<androidx.constraintlayout.widget.ConstraintLayout xmlns:android="http://schemas.android.com/apk/res/android"
    xmlns:app="http://schemas.android.com/apk/res-auto"
    xmlns:tools="http://schemas.android.com/tools"
    android:layout_width="match_parent"
    android:layout_height="match_parent"
    android:background="#FFFFFF"
    tools:context=".MainActivity">

    <LinearLayout
        android:id="@+id/linearLayout"
        android:layout_width="match_parent"
        android:layout_height="0dp"
        android:background="#FFFFFF"
        android:orientation="vertical"
        app:layout_constraintBottom_toBottomOf="parent"
        app:layout_constraintEnd_toEndOf="parent"
        app:layout_constraintHorizontal_bias="0.0"
        app:layout_constraintStart_toStartOf="parent"
        app:layout_constraintTop_toTopOf="parent"
        app:layout_constraintVertical_bias="0.0">

        <TextView
            android:id="@+id/Title"
            android:layout_width="match_parent"
            android:layout_height="wrap_content"
            android:layout_marginLeft="48dp"
            android:layout_marginTop="24dp"
            android:layout_marginRight="48dp"
            android:layout_marginBottom="24dp"
            android:text="@string/geographyTitle"
            android:textSize="24sp"
            android:textStyle="bold" />

        <ScrollView
            android:id="@+id/ContentPane"
            android:layout_width="match_parent"
            android:layout_height="480dp"
            android:layout_marginBottom="48dp"
            android:clipToPadding="false"
            android:fillViewport="false"
            android:paddingLeft="48dp"
            android:paddingRight="48dp"
            android:scrollbarStyle="outsideInset"
            android:visibility="visible"
            tools:visibility="visible">

            <LinearLayout
                android:layout_width="match_parent"
                android:layout_height="match_parent"
                android:orientation="vertical">

                <TextView
                    android:id="@+id/Content1"
                    android:layout_width="match_parent"
                    android:layout_height="wrap_content"
                    android:background="#00FFFFFF"
                    android:text="@string/geographyTextEn"
                    android:textSize="18sp" />

                <TextView
                    android:id="@+id/Content2"
                    android:layout_width="match_parent"
                    android:layout_height="wrap_content"
                    android:background="#00FFFFFF"
                    android:text="@string/geographyTextFr"
                    android:textSize="18sp" />

            </LinearLayout>

        </ScrollView>

        <Button
            android:id="@+id/LaunchImmersiveReaderButton"
            android:layout_width="match_parent"
            android:layout_height="60dp"
            android:layout_marginLeft="40dp"
            android:layout_marginRight="40dp"
            android:layout_marginBottom="80dp"
            android:text="@string/immersiveReaderButtonText"
            android:textAllCaps="false"
            android:textSize="24sp"
            android:visibility="visible"
            tools:visibility="visible" />

    </LinearLayout>

</androidx.constraintlayout.widget.ConstraintLayout>
Настройка интерфейса для JavaScript в коде Kotlin приложения
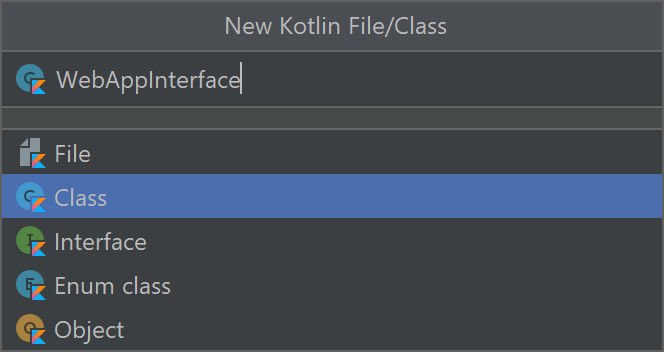
В папке kotlin+java/com.example.quickstartkotlin/ folder создайте класс Kotlin и назовите его WebAppInterface. Добавьте в него приведенный ниже код. Этот код позволит приложению взаимодействовать с функциями JavaScript в HTML, который мы добавим на следующем шаге.

// Copyright (c) Microsoft Corporation. All rights reserved.
// Licensed under the MIT License.

package com.example.quickstartkotlin

import android.content.Context
import android.webkit.JavascriptInterface
import android.webkit.WebView
import android.widget.LinearLayout
import android.widget.Toast

class WebAppInterface(private val mContext: Context, var parentLayout: LinearLayout, var webView: WebView) {

    // Show a toast from html.
    @JavascriptInterface
    fun showToast(toast: String) {
        Toast.makeText(mContext, toast, Toast.LENGTH_SHORT).show()
    }

    // Exit the Immersive Reader.
    @JavascriptInterface
    fun immersiveReaderExit() {
        webView.post(Runnable { destroyWebView(parentLayout, webView) })

        // Any additional functionality may be added here.
        Toast.makeText(mContext, "The Immersive Reader has been closed!", Toast.LENGTH_SHORT).show()
    }

    // Disposes of the WebView when the back arrow is tapped.
    private fun destroyWebView(parentLayout: LinearLayout, webView: WebView) {

        // Removes the WebView from its parent view before doing anything.
        parentLayout.removeView(webView)

        // Cleans things up before destroying the WebView.
        webView.clearHistory()
        webView.clearCache(true)
        webView.loadUrl("about:blank")
        webView.onPause()
        webView.removeAllViews()
        webView.pauseTimers()
        webView.destroy()
    }
}
Настройка действия Main в коде Kotlin приложения
В папке kotlin+java/com.example.quickstartkotlin/ folder есть существующий файл класса MainActivity.kt Kotlin. Именно в этом файле следует создавать логику приложения. Замените содержимое файла приведенным ниже кодом.
// Copyright (c) Microsoft Corporation. All rights reserved.
// Licensed under the MIT License.

package com.example.quickstartkotlin

import android.app.Activity
import androidx.appcompat.app.AppCompatActivity
import android.os.Bundle
import android.webkit.CookieManager
import android.webkit.WebView
import android.widget.Button
import android.webkit.WebViewClient
import android.widget.LinearLayout
import android.widget.TextView
import com.google.gson.*
import io.github.cdimascio.dotenv.dotenv
import java.io.IOException
import java.io.*
import java.net.HttpURLConnection
import java.net.HttpURLConnection.HTTP_OK
import java.net.URL
import kotlinx.coroutines.*
import org.json.JSONObject
import java.util.*

// This sample app uses the Dotenv. It's a module that loads environment variables from a .env file to better manage secrets.
// https://github.com/cdimascio/java-dotenv
// Be sure to add a "env" file to the /assets folder.
// Instead of '.env', use 'env'.

class MainActivity : AppCompatActivity() {
    private val dotEnv = dotenv {
        directory = "/assets"
        filename = "env"
        ignoreIfMalformed = true
        ignoreIfMissing = true
    }

    private lateinit var contextualWebView: WebView

    override fun onCreate(savedInstanceState: Bundle?) {
        super.onCreate(savedInstanceState)
        this.supportActionBar!!.hide()
        setContentView(R.layout.activity_main)
        val immersiveReaderButton = findViewById<Button>(R.id.LaunchImmersiveReaderButton)
        immersiveReaderButton.setOnClickListener { GlobalScope.launch { handleLoadImmersiveReaderWebView() } }
    }

    // Assigns values to the objects sent to the Immersive Reader SDK,
    // acquires the token and authorizes the app, then launches
    // the Web View to get the response and load the Immersive Reader
    // when the button is clicked in HTML.
    private suspend fun handleLoadImmersiveReaderWebView() {
        val exampleActivity = this
        val subdomain = dotEnv["SUBDOMAIN"]
        val irTitle = findViewById<TextView>(R.id.Title)
        val irText1 = findViewById<TextView>(R.id.Content1)
        val irText2 = findViewById<TextView>(R.id.Content2)

        // The content of the request that's shown in the Immersive Reader.
        // This basic example contains chunks of two different languages.
        val chunk1 = Chunk()
        chunk1.content = irText1.text.toString()
        chunk1.lang = "en"
        chunk1.mimeType = "text/plain"

        val chunk2 = Chunk()
        chunk2.content = irText2.text.toString()
        chunk2.lang = "fr"
        chunk2.mimeType = "text/plain"

        val chunks = ArrayList<Chunk>()
        chunks.add(chunk1)
        chunks.add(chunk2)

        val content = Content()
        content.title = irTitle.text.toString()
        content.chunks = chunks

        // Options may be assigned values here (e.g. options.uiLang = "en").
        val options = Options()

        var token: String

        runBlocking{
            val resp = async { getImmersiveReaderTokenAsync() }
            token = resp.await()
            val jsonResp = JSONObject(token)
            loadImmersiveReaderWebView(exampleActivity, jsonResp.getString("access_token"), subdomain, content, options)
        }
    }

    // The next two functions get the token from the Immersive Reader SDK
    // and authorize the app.
    private suspend fun getImmersiveReaderTokenAsync(): String {
        return getToken()
    }

    @Throws(IOException::class)
    fun getToken(): String {
        val clientId = dotEnv["CLIENT_ID"]
        val clientSecret = dotEnv["CLIENT_SECRET"]
        val tenantId = dotEnv["TENANT_ID"]
        val tokenUrl = URL("https://login.windows.net/$tenantId/oauth2/token")
        val form = "grant_type=client_credentials&resource=https://cognitiveservices.azure.com/&client_id=$clientId&client_secret=$clientSecret"

        val connection = tokenUrl.openConnection() as HttpURLConnection
        connection.requestMethod = "POST"
        connection.setRequestProperty("content-type", "application/x-www-form-urlencoded")
        connection.doOutput = true

        val writer = DataOutputStream(connection.outputStream)
        writer.writeBytes(form)
        writer.flush()
        writer.close()

        val responseCode = connection.responseCode

        if (responseCode == HTTP_OK) {
            val readerIn = BufferedReader(InputStreamReader(connection.inputStream))
            var inputLine = readerIn.readLine()
            val response = StringBuffer()

            do {
                response.append(inputLine)
            } while (inputLine.length < 0)
            readerIn.close()

            // Return token
            return response.toString()
        } else {
            val responseError = Error(code = "BadRequest", message = "There was an error getting the token.")
            throw IOException(responseError.toString())
        }
    }

    // To be assigned values and sent to the Immersive Reader SDK
    class Chunk(var content: String? = null,
                var lang: String? = null,
                var mimeType: String? = null)

    class Content(var title: String? = null,
                  var chunks: List<Chunk>? = null)

    class Message(var cogSvcsAccessToken: String? = null,
                  var cogSvcsSubdomain: String? = null,
                  var content: Content? = null,
                  var launchToPostMessageSentDurationInMs: Int? = null,
                  var options: Options? = null)

    // Only includes Immersive Reader options relevant to Android apps.
    // For a complete list, visit https://video2.skills-academy.com/azure/ai-services/immersive-reader/reference
    class Options(var uiLang: String? = null, // Language of the UI, e.g. en, es-ES (optional). Defaults to browser language if not specified.
                  var timeout: Int? = null, // Duration (in milliseconds) before launchAsync fails with a timeout error (default is 15000 ms).
                  var uiZIndex: Int? = null, // Z-index of the iframe that will be created (default is 1000)
                  var onExit: (() -> Any)? = null, // Executes a callback function when the Immersive Reader exits
                  var customDomain: String? = null, // Reserved for internal use. Custom domain where the Immersive Reader webapp is hosted (default is null).
                  var allowFullscreen: Boolean? = null, // The ability to toggle fullscreen (default is true).
                  var hideExitButton: Boolean? = null // Whether or not to hide the Immersive Reader's exit button arrow (default is false). This should only be true if there is an alternative mechanism provided to exit the Immersive Reader (e.g a mobile toolbar's back arrow).
    )

    class Error(var code: String? = null,
                var message: String? = null)

    // A custom Web View component that launches inside the app
    @Throws(IOException::class)
    fun loadImmersiveReaderWebView(
        exampleActivity: Activity,
        token: String,
        subdomain: String?,
        content: Content,
        options: Options
    ) {
        val startPostMessageSentDurationInMs = Date()

        // Populate the message
        val messageData = Message()
        messageData.cogSvcsAccessToken = token
        messageData.cogSvcsSubdomain = subdomain
        messageData.content = content
        messageData.options = options

        GlobalScope.launch {
            withContext(Dispatchers.Main) {
                contextualWebView = WebView(exampleActivity)
                val parentLayout = findViewById<LinearLayout>(R.id.linearLayout)
                val contextualWebViewSettings = contextualWebView.settings

                contextualWebViewSettings.allowContentAccess = true
                contextualWebViewSettings.builtInZoomControls = true
                contextualWebViewSettings.javaScriptEnabled = true
                contextualWebViewSettings.loadsImagesAutomatically = true
                contextualWebViewSettings.loadWithOverviewMode = true
                contextualWebViewSettings.useWideViewPort = true
                contextualWebViewSettings.userAgentString = "Android"
                contextualWebViewSettings.domStorageEnabled = true

                contextualWebViewSettings.setAppCacheEnabled(false)
                contextualWebViewSettings.setSupportZoom(true)
                contextualWebView.setInitialScale(1)

                // Enables WebView Cookies
                if (android.os.Build.VERSION.SDK_INT >= android.os.Build.VERSION_CODES.LOLLIPOP) {
                    CookieManager.getInstance().setAcceptThirdPartyCookies(contextualWebView, true)
                } else {
                    CookieManager.getInstance().setAcceptCookie(true)
                }

                val contextualWebViewLayout = LinearLayout.LayoutParams(LinearLayout.LayoutParams.MATCH_PARENT, LinearLayout.LayoutParams.MATCH_PARENT)
                parentLayout.addView(contextualWebView, 0, contextualWebViewLayout)

                // This is required to launch the WebView *inside* the host application.
                contextualWebView.webViewClient = object : WebViewClient() {
                    override fun shouldOverrideUrlLoading(view: WebView, url: String): Boolean {
                        view.loadUrl(url)
                        return true
                    }

                    // Send message JSON object to Immersive Reader html
                    override fun onPageFinished(view: WebView, url: String) {
                        val endPostMessageSentDurationInMs = Date()
                        val postMessageSentDurationInMs = (endPostMessageSentDurationInMs.time - startPostMessageSentDurationInMs.time).toInt()

                        // Updates launchToPostMessageSentDurationInMs
                        messageData.launchToPostMessageSentDurationInMs = postMessageSentDurationInMs

                        // Serializes message data class to JSON
                        val gson = Gson()
                        val message = gson.toJson(messageData)

                        // Calls the handleLaunchImmersiveReader function in HTML
                        if (android.os.Build.VERSION.SDK_INT >= android.os.Build.VERSION_CODES.KITKAT) {
                            view.evaluateJavascript("handleLaunchImmersiveReader($message)", null)
                        } else {
                            view.loadUrl("javascript:handleLaunchImmersiveReader($message)")
                        }

                        // Sets the visibility of the WebView after the function has been called.
                        view.visibility = WebView.VISIBLE
                    }
                }

                // This is where the WebAppInterface Class is used.
                // Affords a way for JavaScript to work with the app directly from
                // the Web View's HTML.
                val jsInterface = WebAppInterface(exampleActivity, parentLayout, contextualWebView)
                contextualWebView.addJavascriptInterface(jsInterface, "Android")
                contextualWebView.loadUrl("file:///android_asset/immersiveReader.html")
            }
        }
    }
}
Возможно, потребуется снова синхронизировать проект.
Добавление HTML-кода для приложения в веб-представление
Для работы реализации веб-представления требуется HTML-код. Щелкните правой кнопкой папку /assets, создайте здесь файл и присвойте ему имя immersiveReader.html.


Добавьте следующий код HTML и JavaScript. Этот код добавляет пакет SDK Иммерсивное средство чтения в приложение и использует его для открытия Иммерсивное средство чтения с помощью написанного кода приложения.
<!-- Copyright (c) Microsoft Corporation. All rights reserved.
Licensed under the MIT License. -->

<!DOCTYPE html>
<html>
<head>
    <meta charset="utf-8">
    <meta name="viewport" content="width=device-width, initial-scale=1, shrink-to-fit=no">
    <script type="text/javascript" src="https://ircdname.azureedge.net/immersivereadersdk/immersive-reader-sdk.1.4.0.js"></script>
</head>
<body>
<script type="text/javascript">
        function handleLaunchImmersiveReader(message) {
            if (!message) {
                Android.showToast('Message is null or undefined!');
            } else {
                // Learn more about chunk usage and supported MIME types https://video2.skills-academy.com/azure/ai-services/immersive-reader/reference#chunk
                var data = {
                    title: message.content.title,
                    chunks: message.content.chunks
                };

                // A simple declarative function used to close the Immersive Reader WebView via @JavaScriptInterface
                var exitCallback = function() {
                    Android.immersiveReaderExit();
                }

                // Learn more about options https://video2.skills-academy.com/azure/ai-services/immersive-reader/reference#options
                var options = {
                    onExit: exitCallback,
                    uiZIndex: 2000
                };

                // Use the JavaScript SDK to launch the Immersive Reader.
                ImmersiveReader.launchAsync(message.cogSvcsAccessToken, message.cogSvcsSubdomain, data, options);
            }
        }
    </script>
</body>
</html>
Настройка разрешений приложения
При работе это приложение будет выполнять сетевые вызовы к пакету SDK для иммерсивного средства чтения, поэтому нам нужно предоставить приложению разрешения на доступ к сети. Замените содержимое /manifests/AndroidManifest.xml следующим XML.

<?xml version="1.0" encoding="utf-8"?>
<manifest xmlns:android="http://schemas.android.com/apk/res/android"
    package="com.example.quickstartkotlin">

    <uses-permission android:name="android.permission.INTERNET" />

    <application
        android:allowBackup="true"
        android:icon="@mipmap/ic_launcher"
        android:label="@string/app_name"
        android:roundIcon="@mipmap/ic_launcher_round"
        android:supportsRtl="true"
        android:theme="@style/AppTheme">
        <activity android:name=".MainActivity">
            <intent-filter>
                <action android:name="android.intent.action.MAIN" />

                <category android:name="android.intent.category.LAUNCHER" />
            </intent-filter>
        </activity>
    </application>

</manifest>
Выполнить приложение
С помощью Android Studio запустите приложение на эмуляторе устройства. Теперь, когда вы выберете иммерсивное средство чтения, откроется иммерсивное средство чтения с содержимым приложения.

Следующий шаг
В рамках этого краткого руководства вы создадите с нуля приложение iOS и интегрируете Иммерсивное средство чтения. Полностью рабочий пример этого краткого руководства доступен на GitHub.
Необходимые компоненты
- Подписка Azure. Вы можете создать бесплатную учетную запись.
- Ресурс Иммерсивное средство чтения, настроенный для проверки подлинности Microsoft Entra. Инструкции по настройке см. здесь. Сохраните выходные данные сеанса в текстовый файл, чтобы настроить свойства среды.
- macOS и Xcode.
Создание проекта Xcode
Создайте проект в Xcode.

Выберите Приложение одного представления.
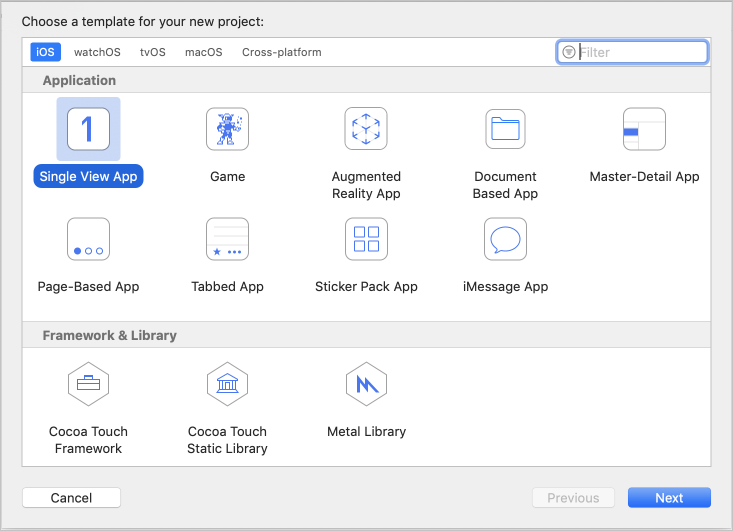
Настройка проверки подлинности
В верхнем меню выберите "Схема редактирования схемы > продукта>...".
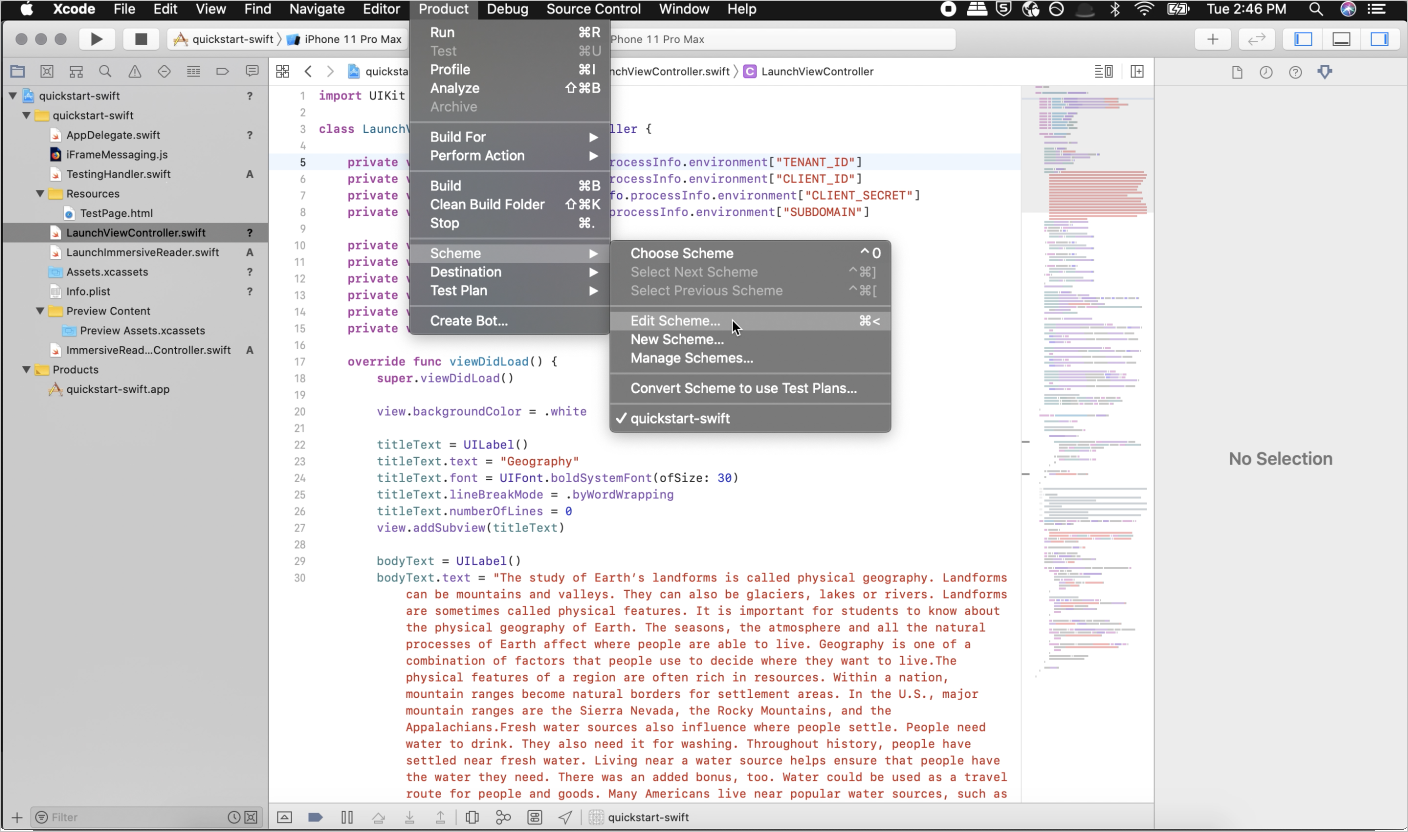
В представлении "Запуск" перейдите на вкладку "Аргументы".
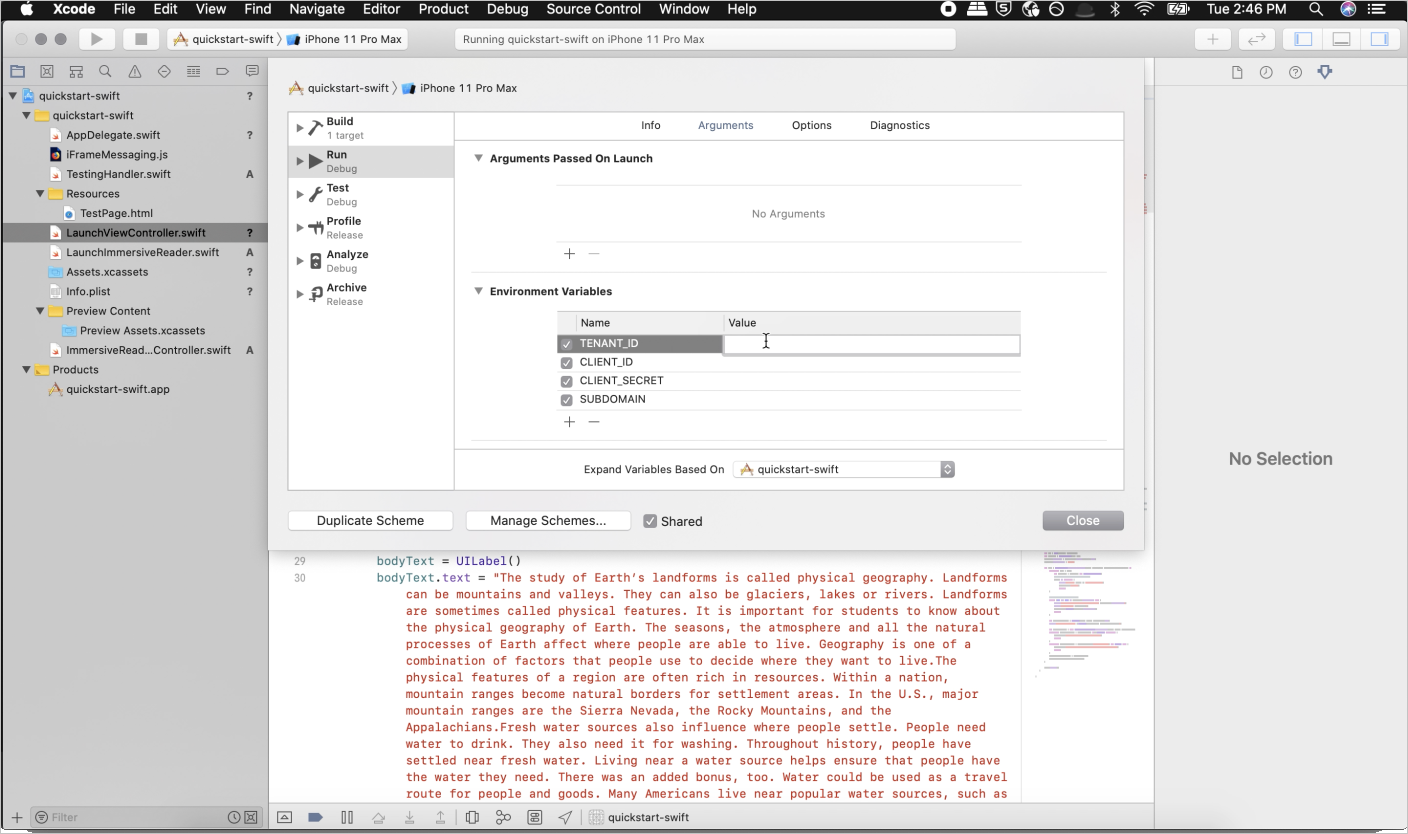
В разделе Переменные среды добавьте следующие имена и значения, указав значения, заданные при создании ресурса "Иммерсивное средство чтения".
Внимание
Ни в коем случае не публикуйте секреты в общем доступе. Для рабочей среды используйте безопасный способ хранения и доступа к учетным данным, например Azure Key Vault.
TENANT_ID=<YOUR_TENANT_ID>
CLIENT_ID=<YOUR_CLIENT_ID>
CLIENT_SECRET<YOUR_CLIENT_SECRET>
SUBDOMAIN=<YOUR_SUBDOMAIN>
Настройка приложения для запуска без раскадровки
Откройте файл AppDelegate.swift и замените его содержимое следующим кодом.
import UIKit

@UIApplicationMain
class AppDelegate: UIResponder, UIApplicationDelegate {
    var window: UIWindow?

    var navigationController: UINavigationController?

    func application(_ application: UIApplication, didFinishLaunchingWithOptions launchOptions: [UIApplication.LaunchOptionsKey: Any]?) -> Bool {
        // Override point for customization after application launch.

        window = UIWindow(frame: UIScreen.main.bounds)

        if let window = window {
            let mainViewController = LaunchViewController()
            navigationController = UINavigationController(rootViewController: mainViewController)
            window.rootViewController = navigationController
            window.makeKeyAndVisible()
        }
        return true
    }

    func applicationWillResignActive(_ application: UIApplication) {
        // Sent when the application is about to move from active to inactive state. This can occur for certain types of temporary interruptions (such as an incoming phone call or SMS message) or when the user quits the application and it begins the transition to the background state.
        // Use this method to pause ongoing tasks, disable timers, and invalidate graphics rendering callbacks. Games should use this method to pause the game.
    }

    func applicationDidEnterBackground(_ application: UIApplication) {
        // Use this method to release shared resources, save user data, invalidate timers, and store enough application state information to restore your application to its current state in case it is terminated later.
        // If your application supports background execution, this method is called instead of applicationWillTerminate: when the user quits.
    }

    func applicationWillEnterForeground(_ application: UIApplication) {
        // Called as part of the transition from the background to the active state; here you can undo many of the changes made on entering the background.
    }

    func applicationDidBecomeActive(_ application: UIApplication) {
        // Restart any tasks that were paused (or not yet started) while the application was inactive. If the application was previously in the background, optionally refresh the user interface.
    }

    func applicationWillTerminate(_ application: UIApplication) {
        // Called when the application is about to terminate. Save data if appropriate. See also applicationDidEnterBackground:.
    }
}
Создание контроллеров представления и добавление примера содержимого
Переименуйте ViewController.swift на LaunchViewController.swift и замените его содержимое следующим кодом.
import UIKit

class LaunchViewController: UIViewController {
    private var tenantId = ProcessInfo.processInfo.environment["TENANT_ID"]
    private var clientId = ProcessInfo.processInfo.environment["CLIENT_ID"]
    private var clientSecret = ProcessInfo.processInfo.environment["CLIENT_SECRET"]
    private var subdomain = ProcessInfo.processInfo.environment["SUBDOMAIN"]

    private var launchButton: UIButton!
    private var titleText: UILabel!
    private var bodyText: UILabel!
    private var sampleContent: Content!
    private var sampleChunk: Chunk!
    private var sampleOptions: Options!

    override func viewDidLoad() {
        super.viewDidLoad()

        view.backgroundColor = .white

        titleText = UILabel()
        titleText.text = "Geography"
        titleText.font = UIFont.boldSystemFont(ofSize: 30)
        titleText.lineBreakMode = .byWordWrapping
        titleText.numberOfLines = 0
        view.addSubview(titleText)

        bodyText = UILabel()
        bodyText.text = "The study of Earth's landforms is called physical geography. Landforms can be mountains and valleys. They can also be glaciers, lakes or rivers. Landforms are sometimes called physical features. It is important for students to know about the physical geography of Earth. The seasons, the atmosphere and all the natural processes of Earth affect where people are able to live. Geography is one of a combination of factors that people use to decide where they want to live.The physical features of a region are often rich in resources. Within a nation, mountain ranges become natural borders for settlement areas. In the U.S., major mountain ranges are the Sierra Nevada, the Rocky Mountains, and the Appalachians.Fresh water sources also influence where people settle. People need water to drink. They also need it for washing. Throughout history, people have settled near fresh water. Living near a water source helps ensure that people have the water they need. There was an added bonus, too. Water could be used as a travel route for people and goods. Many Americans live near popular water sources, such as the Mississippi River, the Colorado River and the Great Lakes.Mountains and deserts have been settled by fewer people than the plains areas. However, they have valuable resources of their own."
        bodyText.lineBreakMode = .byWordWrapping
        bodyText.numberOfLines = 0
        let screenSize = self.view.frame.height
        if screenSize <= 667 {
            // Font size for smaller iPhones.
            bodyText.font = bodyText.font.withSize(14)

         } else if screenSize <= 812 {
            // Font size for medium iPhones.
            bodyText.font = bodyText.font.withSize(15)

         } else if screenSize <= 896 {
            // Font size for larger iPhones.
            bodyText.font = bodyText.font.withSize(17)

         } else if screenSize <= 1024 {
            // Font size for iPads.
            bodyText.font = bodyText.font.withSize(25)
        } else {
            // Font size for large iPads.
            bodyText.font = bodyText.font.withSize(28)
        }
        view.addSubview(bodyText)

        launchButton = UIButton()
        launchButton.backgroundColor = .darkGray
        launchButton.contentEdgeInsets = UIEdgeInsets(top: 10, left: 10, bottom: 10, right: 10)
        launchButton.setTitleColor(.white, for: .normal)
        launchButton.setTitle("Immersive Reader", for: .normal)
        launchButton.addTarget(self, action: #selector(launchImmersiveReaderButton(sender:)), for: .touchUpInside)
        view.addSubview(launchButton)

        let layoutGuide = view.safeAreaLayoutGuide

        titleText.translatesAutoresizingMaskIntoConstraints = false
        titleText.topAnchor.constraint(equalTo: layoutGuide.topAnchor, constant: 20).isActive = true
        titleText.leadingAnchor.constraint(equalTo: layoutGuide.leadingAnchor, constant: 20).isActive = true
        titleText.trailingAnchor.constraint(equalTo: layoutGuide.trailingAnchor, constant: -20).isActive = true

        bodyText.translatesAutoresizingMaskIntoConstraints = false
        bodyText.topAnchor.constraint(equalTo: titleText.bottomAnchor, constant: 15).isActive = true
        bodyText.leadingAnchor.constraint(equalTo: layoutGuide.leadingAnchor, constant: 20).isActive = true
        bodyText.trailingAnchor.constraint(equalTo: layoutGuide.trailingAnchor, constant: -20).isActive = true

        launchButton.translatesAutoresizingMaskIntoConstraints = false
        launchButton.widthAnchor.constraint(equalToConstant: 200).isActive = true
        launchButton.heightAnchor.constraint(equalToConstant: 50).isActive = true
        launchButton.centerXAnchor.constraint(equalTo: layoutGuide.centerXAnchor).isActive = true
        launchButton.bottomAnchor.constraint(equalTo: layoutGuide.bottomAnchor, constant: -10).isActive = true

        // Create content and options.
        sampleChunk = Chunk(content: bodyText.text!, lang: nil, mimeType: nil)
        sampleContent = Content(title: titleText.text!, chunks: [sampleChunk])
        sampleOptions = Options(uiLang: nil, timeout: nil, uiZIndex: nil)
    }

    @IBAction func launchImmersiveReaderButton(sender: AnyObject) {
        launchButton.isEnabled = false

        // Callback to get token.
        getToken(onSuccess: {cognitiveToken in
            DispatchQueue.main.async {
                launchImmersiveReader(navController: self.navigationController!, token: cognitiveToken, subdomain: self.subdomain!, content: self.sampleContent, options: self.sampleOptions, onSuccess: {
                    self.launchButton.isEnabled = true
                }, onFailure: { error in
                    self.launchButton.isEnabled = true
                })
            }
        }, onFailure: { error in
            print("an error occurred: \(error)")
        })
    }

    func getToken(onSuccess: @escaping (_ theToken: String) -> Void, onFailure: @escaping ( _ theError: String) -> Void) {
        let tokenForm = "grant_type=client_credentials&resource=https://cognitiveservices.azure.com/&client_id=" + self.clientId! + "&client_secret=" + self.clientSecret!
        let tokenUrl = "https://login.windows.net/" + self.tenantId! + "/oauth2/token"

        var responseTokenString: String = "0"

        let url = URL(string: tokenUrl)!
        var request = URLRequest(url: url)
        request.httpBody = tokenForm.data(using: .utf8)
        request.httpMethod = "POST"

        let task = URLSession.shared.dataTask(with: request) { data, response, error in
            guard let data = data,
                let response = response as? HTTPURLResponse,
                error == nil else {
                    onFailure("Error")
                    return
                }

            guard (200 ... 299) ~= response.statusCode else {
                onFailure(String(response.statusCode))
                return
            }

            let responseString = String(data: data, encoding: .utf8)

            let jsonResponse = try? JSONSerialization.jsonObject(with: data, options: [])
            guard let jsonDictonary = jsonResponse as? [String: Any] else {
                onFailure("Error parsing JSON response.")
                return
            }
            guard let responseToken = jsonDictonary["access_token"] as? String else {
                onFailure("Error retrieving token from JSON response.")
                return
            }
            responseTokenString = responseToken
            onSuccess(responseTokenString)
        }

        task.resume()
    }
}
Добавьте новый файл в корневую папку проекта с именем ImmersiveReaderViewController.swift и добавьте следующий код.
import UIKit
import Foundation
import WebKit

@available(iOS 11.0, *)
public class ImmersiveReaderWebView: WKWebView {

    init(frame: CGRect, contentController: WKUserContentController) {
        let conf = WKWebViewConfiguration()
        conf.userContentController = contentController
        super.init(frame: frame, configuration: conf)
    }

    required init?(coder: NSCoder) {
        fatalError("init(coder:) has not been implemented")
    }
}

public class ImmersiveReaderViewController: UIViewController, WKUIDelegate, WKNavigationDelegate {
    let tokenToSend: String
    let subdomainToSend: String
    let contentToSend: Content
    let optionsToSend: Options?
    let onSuccessImmersiveReader: (() -> Void)?
    let onFailureImmersiveReader: ((_ error: Error) -> Void)?
    let onTimeout: ((_ timeoutValue: TimeInterval) -> Void)?
    let onError: ((_ error: String) -> Void)?

    let startTime = Date().timeIntervalSince1970*1000
    var src: String
    var webView: WKWebView!
    var timer: Timer!
    var timeoutValue: TimeInterval!

    public init(tokenToPass: String, subdomainToPass: String, contentToPass: Content, optionsToPass: Options?, onSuccessImmersiveReader: @escaping () -> Void, onFailureImmersiveReader: @escaping (_ status: Error) -> Void, onTimeout: @escaping (_ timeoutValue: TimeInterval) -> Void, onError: @escaping (_ error: String) -> Void) {
        self.tokenToSend = tokenToPass
        self.subdomainToSend = subdomainToPass
        self.contentToSend = contentToPass
        self.optionsToSend = optionsToPass
        self.onSuccessImmersiveReader = onSuccessImmersiveReader
        self.onFailureImmersiveReader = onFailureImmersiveReader
        self.onTimeout = onTimeout
        self.onError = onError
        self.src = "https://" + subdomainToPass + ".cognitiveservices.azure.com/immersivereader/webapp/v1.0/reader"
        super.init(nibName: nil, bundle: nil)
    }

    required init?(coder aDecoder: NSCoder) {
        fatalError("init(coder:) has not been implemented")
    }

    override public func viewDidLoad() {
        super.viewDidLoad()

        // If uiLang options are set update src to reflect this.
        switch optionsToSend?.uiLang {
        case .none: break
        case .some(let value):
            src = src + "?omkt=" + value
        }

        // Set timeout to default or value user specifies.
        switch optionsToSend?.timeout {
        case .none:
            timeoutValue = 15
        case .some(let value):
            timeoutValue = value
        }

        view.backgroundColor = .white
        webView = WKWebView()

        let contentController = WKUserContentController()
        if #available(iOS 11.0, *) {
            webView = ImmersiveReaderWebView(frame: .zero, contentController: contentController)
        } else {
            // Fallback on earlier versions
            webView = WKWebView()
            let config = WKWebViewConfiguration()
            config.userContentController = contentController
            webView = WKWebView(frame: .zero, configuration: config)
        }
        webView.navigationDelegate = self
        webView.uiDelegate = self

        contentController.add(self, name: "readyForContent")
        contentController.add(self, name: "launchSuccessful")
        contentController.add(self, name: "tokenExpired")
        contentController.add(self, name: "throttled")

        view.addSubview(webView)
        webView.translatesAutoresizingMaskIntoConstraints = false

        if #available(iOS 11.0, *) {
            let layoutGuide = view.safeAreaLayoutGuide
            webView.leadingAnchor.constraint(equalTo: layoutGuide.leadingAnchor).isActive = true
            webView.trailingAnchor.constraint(equalTo: layoutGuide.trailingAnchor).isActive = true
            webView.topAnchor.constraint(equalTo: layoutGuide.topAnchor).isActive = true
            webView.bottomAnchor.constraint(equalTo: layoutGuide.bottomAnchor).isActive = true

        } else {
            webView.leadingAnchor.constraint(equalTo: view.leadingAnchor).isActive = true
            webView.trailingAnchor.constraint(equalTo: view.trailingAnchor).isActive = true
            webView.topAnchor.constraint(equalTo: view.topAnchor).isActive = true
            webView.bottomAnchor.constraint(equalTo: view.bottomAnchor).isActive = true
        }
        // Get path to JavaScript file.
        guard let scriptPath = Bundle.main.path(forResource: "iFrameMessaging", ofType: "js") else {
            onError!("Could not create script path from resource.")
            return
        }
        do {
            let scriptSource = try String(contentsOfFile: scriptPath)
            let userScript = WKUserScript(source: scriptSource, injectionTime: .atDocumentStart, forMainFrameOnly: true)
            contentController.addUserScript(userScript)
        } catch {
            onError!("Could not parse JavaScript file.")
            return
        }

        // Start the timer.
        timer = Timer.scheduledTimer(timeInterval: timeoutValue, target: self, selector: #selector(self.timedOut), userInfo: nil, repeats: false)

        // Load the iframe from HTML.
        webView.loadHTMLString("<!DOCTYPE html><html style='width: 100%; height: 100%; margin: 0; padding: 0;'><head><meta name='viewport' content='width=device-width, initial-scale=1, shrink-to-fit=no'></head><body style='width: 100%; height: 100%; margin: 0; padding: 0;'><iframe id='immersiveReaderIframe' src = '\(src)' width='100%' height='100%' style='border: 0'></iframe></body></html>", baseURL: URL(string: "test://learningtools.onenote.com/learningtoolsapp/cognitive/reader"))
    }

    @objc func timedOut(_ timer: AnyObject) {
        onTimeout!(timeoutValue)
    }

    public func webView(_ webView: WKWebView, decidePolicyFor navigationAction: WKNavigationAction, decisionHandler: @escaping (WKNavigationActionPolicy) -> Void) {
        decisionHandler(.allow)
    }

    public func webView(_ webView: WKWebView, decidePolicyFor navigationResponse: WKNavigationResponse, decisionHandler: @escaping (WKNavigationResponsePolicy) -> Void ) {
        decisionHandler(.allow)
    }
}

extension ImmersiveReaderViewController: WKScriptMessageHandler {
    public func userContentController(_ userContentController: WKUserContentController, didReceive message: WKScriptMessage) {
        if message.name == "readyForContent" {
            // Stop the timer.
            timer.invalidate()

            // Create the message variable
            let message = Message(cogSvcsAccessToken: tokenToSend, cogSvcsSubdomain: subdomainToSend, resourceName: nil, request: contentToSend, launchToPostMessageSentDurationInMs: Int(Date().timeIntervalSince1970*1000 - startTime))
            do {
                let jsonData = try JSONEncoder().encode(message)
                let jsonString = String(data: jsonData, encoding: .utf8)
                self.webView.evaluateJavaScript("sendContentToReader(\(jsonString!))") { (result, error) in
                    if error != nil {
                        self.onError!("Error evaluating JavaScript \(String(describing: error))")
                    }
                }
            } catch { print(error)}
        }

        if message.name == "launchSuccessful" {
            onSuccessImmersiveReader!()
        }

        if message.name == "tokenExpired" {
            let tokenExpiredError = Error(code: "TokenExpired", message: "The access token supplied is expired.")
            onFailureImmersiveReader!(tokenExpiredError)
        }

        if message.name == "throttled" {
            let throttledError = Error(code: "Throttled", message: "You have exceeded the call rate limit.")
            onFailureImmersiveReader!(throttledError)
        }
    }
}
Добавьте еще один новый файл в корневую папку проекта с именем LaunchImmersiveReader.swift и добавьте следующий код.
import UIKit
import Foundation

var navigationController: UINavigationController?

public struct Content: Encodable {
    var title: String
    var chunks: [Chunk]

    public init(title: String, chunks: [Chunk]) {
        self.title = title
        self.chunks = chunks
    }
}

public struct Chunk: Encodable {
    var content: String
    var lang: String?
    var mimeType: String?

    public init(content: String, lang: String?, mimeType: String?) {
        self.content = content
        self.lang = lang
        self.mimeType = mimeType
    }
}

public struct Options {
    var uiLang: String?
    var timeout: TimeInterval?

    public init(uiLang: String?, timeout: TimeInterval?, uiZIndex: NSNumber?) {
        self.uiLang = uiLang
        self.timeout = timeout
    }
}

public struct Error {
    public var code: String
    public var message: String

    public init(code: String, message: String) {
        self.code = code
        self.message = message
    }
}

struct Message: Encodable {
    let cogSvcsAccessToken: String
    let cogSvcsSubdomain: String
    let resourceName: String?
    let request: Content
    let launchToPostMessageSentDurationInMs: Int

    init(cogSvcsAccessToken: String, cogSvcsSubdomain: String, resourceName: String?, request: Content, launchToPostMessageSentDurationInMs: Int) {
        self.cogSvcsAccessToken = cogSvcsAccessToken
        self.cogSvcsSubdomain = cogSvcsSubdomain
        self.resourceName = resourceName
        self.request = request
        self.launchToPostMessageSentDurationInMs = launchToPostMessageSentDurationInMs
    }
}

public func launchImmersiveReader(navController: UINavigationController, token: String, subdomain: String, content: Content, options: Options?, onSuccess: @escaping () -> Void, onFailure: @escaping (_ error: Error) -> Void) {
    if (content.chunks.count == 0) {
        let badArgumentError = Error(code: "BadArgument", message: "Chunks must not be empty.")
        onFailure(badArgumentError)
    }

    navigationController = navController
    let immersiveReaderViewController = ImmersiveReaderViewController(tokenToPass: token, subdomainToPass: subdomain, contentToPass: content, optionsToPass: options, onSuccessImmersiveReader: {
        onSuccess()
    }, onFailureImmersiveReader: { error in
        onFailure(error)
    }, onTimeout: { timeout in
        navigationController?.popViewController(animated: true)
        let timeoutError = Error(code: "Timeout", message: "Page failed to load after timeout \(timeout) ms.")
        onFailure(timeoutError)
    }, onError: { error in
        navigationController?.popViewController(animated: true)
        let errorMessage = Error(code: "Internal Error", message: error)
        onFailure(errorMessage)
    })
    navigationController!.pushViewController(immersiveReaderViewController, animated: true)
}
Добавьте в папку Ресурсы файл с именем iFrameMessaging.js и следующий код.
window.addEventListener("message", function(message) {
    if(message.data == "ImmersiveReader-ReadyForContent") {
        window.webkit.messageHandlers.readyForContent.postMessage(null);
    }

    if(message.data == "ImmersiveReader-LaunchSuccessful") {
        window.webkit.messageHandlers.launchSuccessful.postMessage(null);
    }

    if(message.data == "ImmersiveReader-TokenExpired") {
        window.webkit.messageHandlers.tokenExpired.postMessage(null);
    }

    if(message.data == "ImmersiveReader-Throttled") {
        window.webkit.messageHandlers.throttled.postMessage(null);
    }
});

function sendContentToReader(message) {
    document.getElementById('immersiveReaderIframe').contentWindow.postMessage(JSON.stringify({messageType:'Content', messageValue: message}), '*');
}
Сборка и запуск приложения
Настройте схему архивации в Xcode, выбрав симулятор или цель устройства.

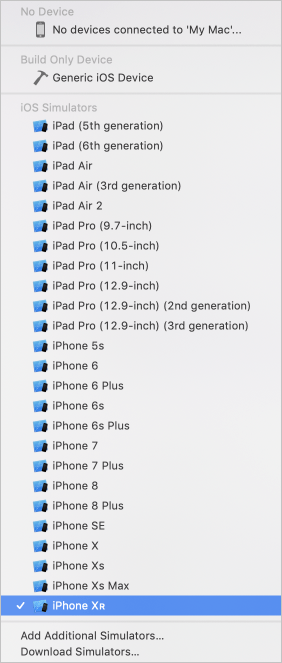
В Xcode нажмите клавиши CTRL+R или нажмите кнопку воспроизведения, чтобы запустить проект. Приложение должно запускаться на указанном симуляторе или устройстве.
В приложении вы должны увидеть:
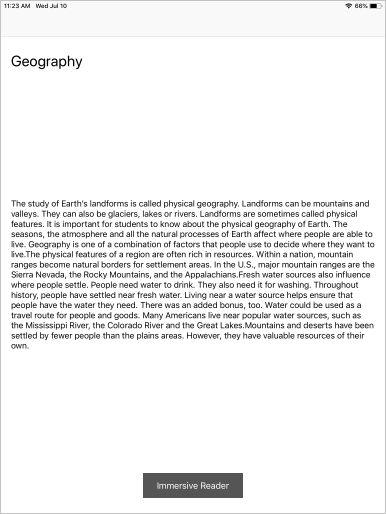
При нажатии кнопки Иммерсивное средство чтения вы увидите Иммерсивное средство чтения, запущенные с содержимым в приложении.
