Install Azure DevOps on-premises on a single server
Azure DevOps Server 2022 | Azure DevOps Server 2020 | Azure DevOps Server 2019 | TFS 2018
The simplest way to set up Azure DevOps Server is to put everything on a single server. To confirm that this configuration is appropriate for your team, see the hardware recommendations. If not, consider a dual-server or multiple-server configuration instead.
If you're upgrading from an earlier version, learn more about compatibility, release notes, and getting started with your upgrade.
Prerequisites
Prepare a single computer that satisfies the system requirements.
If you don't plan to use SQL Server Express, set up a supported version of SQL Server. When you set up SQL Server for Azure DevOps on-premises, at a minimum install the Database Engine and Full-Text and Semantic Extractions for Search features.
We recommend that you use SQL Server Express only for personal or evaluation deployments. Paid copies of Azure DevOps on-premises include a SQL Server Standard license. For more information, see Azure DevOps Server pricing and Team Foundation Server pricing. If you use the included license, you can use it only for databases created with those products.
The account you use to configure the installation must be a member of the sysadmin server role in SQL Server.
Note
Installing Azure DevOps on-premises involves a complex set of operations that require a high degree of privilege. These operations include creating databases, provisioning logins for service accounts, and more. Technically, all that's required is:
Membership in the serveradmin role.
ALTER ANY LOGIN, CREATE ANY DATABASE, and VIEW ANY DEFINITION server-scoped permissions.
CONTROL permission on the master database.
Membership in the sysadmin server role confers all these memberships and permissions. It's the easiest way to ensure that configuration succeeds. If necessary, you can revoke these memberships and permissions after installation.
To support installation and configuration of the Search extension, you need to provide a user name and password. Installing and configuring Search supports Code, Work Item and Wiki search features. For more information, see Configure search. Note that user names can't include a hyphen or special characters.
Note
Search also requires Oracle Server JRE 8 (Update 60 or higher). You can download and install or update to the latest version by accepting the Oracle Binary Code License Agreement for Server JRE and selecting Configure. Note that this will set the JAVA_HOME environment variable to point to the Java installation directory, and that Server JRE does not provide automatic updates.
When configuring the application-tier you have a choice of web site settings. Review Web site settings to understand the choices and requirements.
Download and install
-
Download Azure DevOps Server through one of the following channels:
- Visual Studio Downloads, which is the simplest method (scroll down to All downloads, Azure DevOps Server 2019)
- Visual Studio Dev Essentials
- Volume Licensing Service Center
Start the installation.
The installer copies files onto your machine, and then starts the Azure DevOps Server Configuration Center wizard.
You can configure your installation by choosing Start Wizard, or return at a later time and launch the Server Configuration Wizard wizard as described in the next section.
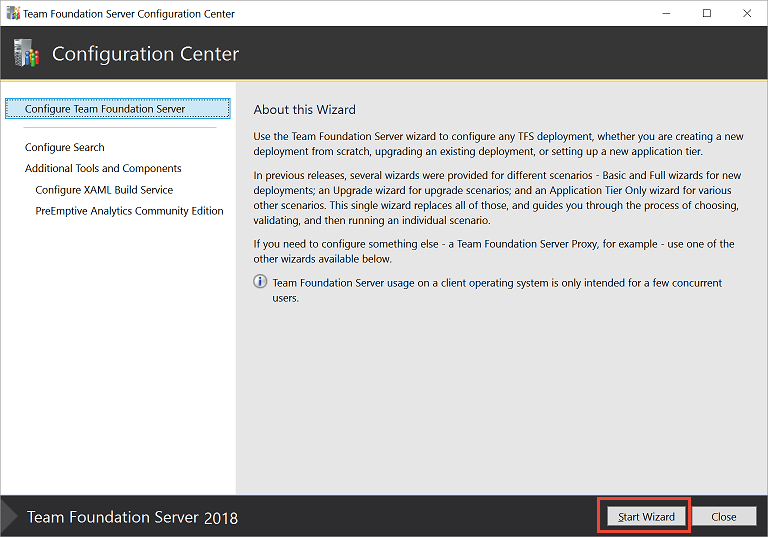
Choose Basic or Advanced for a new deployment
The first step to configuring your server is to choose between the two deployment options.
Choose the New Deployment - Basic scenario to install on a single server. This scenario is optimized for simplicity by using default options for most inputs.

With the New Deployment - Basic scenario, you will specify the following settings:
- Language: Select the language to use for configuring.
- SQL Server Instance: Select whether to install SQL Server Express or use an existing SQL Server instance.
- Application Tier: Select the website settings to use, which includes whether to use HTTP or HTTPS bindings. For more information, see Web site settings.
- Search: Select whether to install and configure Code Search features or use an existing search service. For more information, see Configure search.
Choose the New Deployment - Advanced scenario when you want full control over all inputs.

You will specify the following additional settings:
- Account: Select the service account that your processes run as. The default value used in the Basic scenario is
NT AUTHORITY\NETWORK SERVICEin domain-joined scenarios andLOCAL SERVICEin workgroup scenarios. - Application Tier:
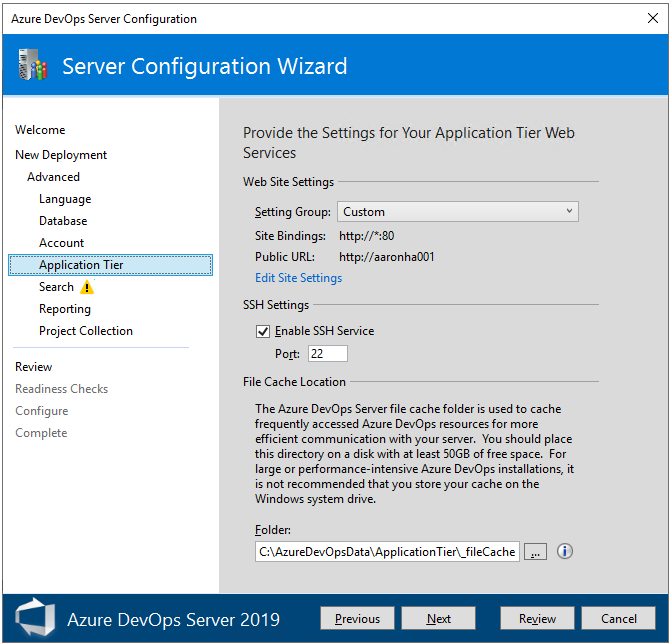
- Under SSH Settings, select whether to enable SSH and the port it should listen on. The default value used in the Basic scenario is to configure SSH on port 22.
- Under File Cache Location, select the location of the file cache used for frequently accessed resources. The default value used in the Basic scenario is the path
AzureDevOpsServerData\ApplicationTier\_fileCacheon the local drive, which has the most free space..
- Reporting: (Optional) Choose if you want to use SQL Server Reporting Services to create reports. You'll need to specify the following information to support this selection:
- Reporting Services Instance
- Report Server URL
- Report Manager URL
- SQL Server Analysis Services Instance
- Report Reader Account Name
- Project Collection: Specify the name of the project collection to use to store your projects. The Basic scenario default behavior is to create a project collection named DefaultCollection.
- Account: Select the service account that your processes run as. The default value used in the Basic scenario is
After you review your selections and select Verify, the wizard runs readiness checks to validate your environment and your setting selections. If it's successful, you can configure your deployment. Otherwise, fix any errors and rerun the readiness checks.
Configure using the Basic option
This section walks you through configuring your Azure DevOps Server using the Basic option selected from the Server Configuration Wizard, New Deployment page.
From the Welcome page, choose your options and then select Next.
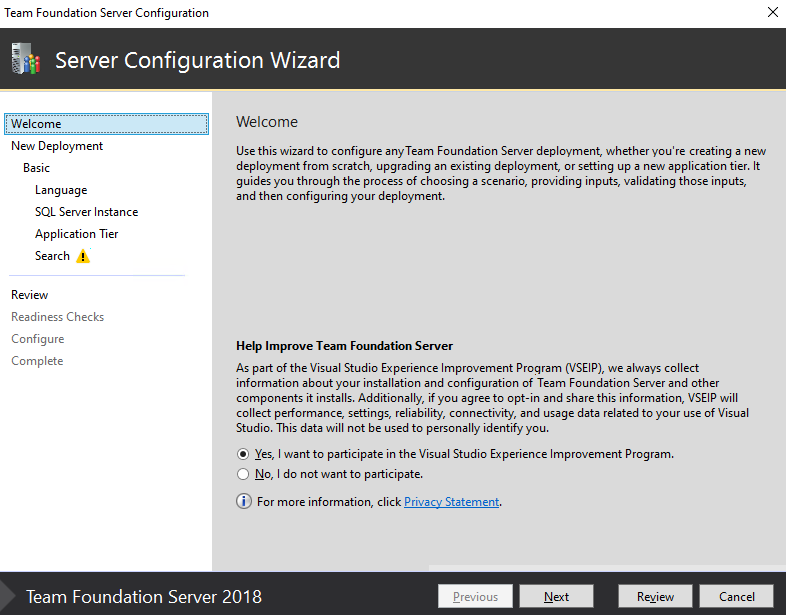
From the New Deployment page, choose your deployment type, and then select Next.

On the next page, choose New Deployment - Basic, and then select Next.

From the Language page, choose your preferred Language option and then select Next.
From the SQL Server Instancepage, select the SQL Server instance you want to use. For evaluation purposes, choose Install SQL Server Express. For production purposes, choose Use an existing SQL Server Instance. Then, choose Next.
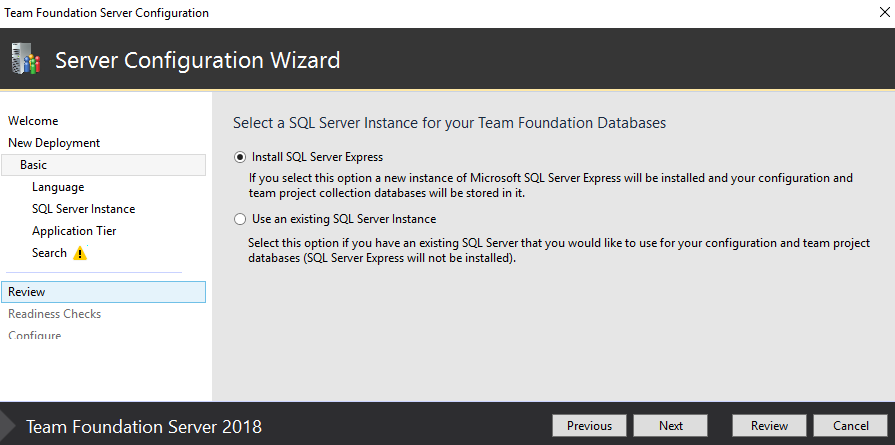
If you chose Use an existing SQL Server Instance, enter the database information in the next page and choose Test to verify. Then choose Next.
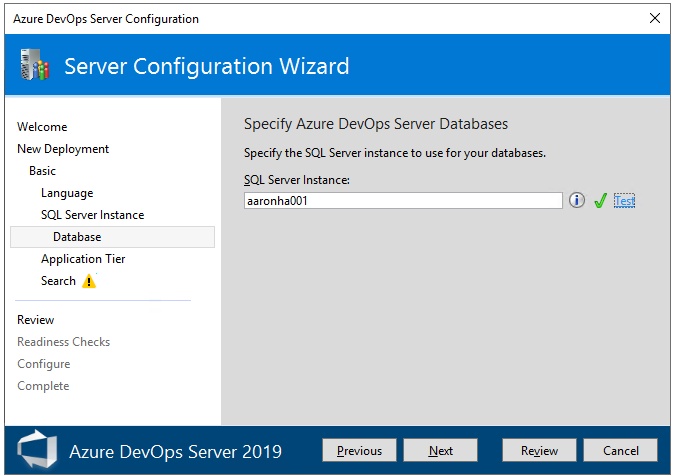
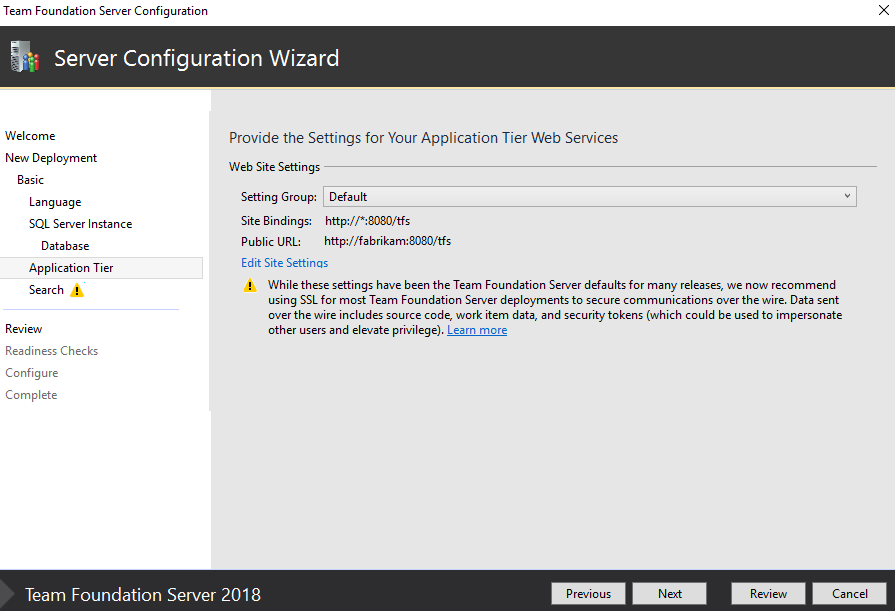
From the Application Tier page, choose the web site settings you want to use, which includes whether to use HTTP or HTTPS bindings, and then choose Next. For more information, see Web site settings.
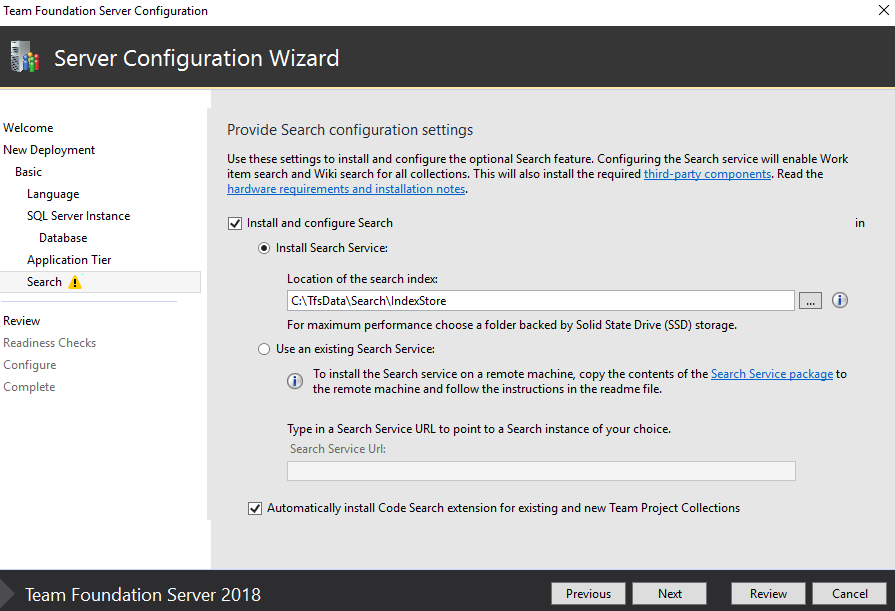
From the Search page, select whether to install and configure Search features or use an existing search service. Installing and configuring Search supports Code, Work Item and Wiki search features. For more information, see Configure search. Choose Next.
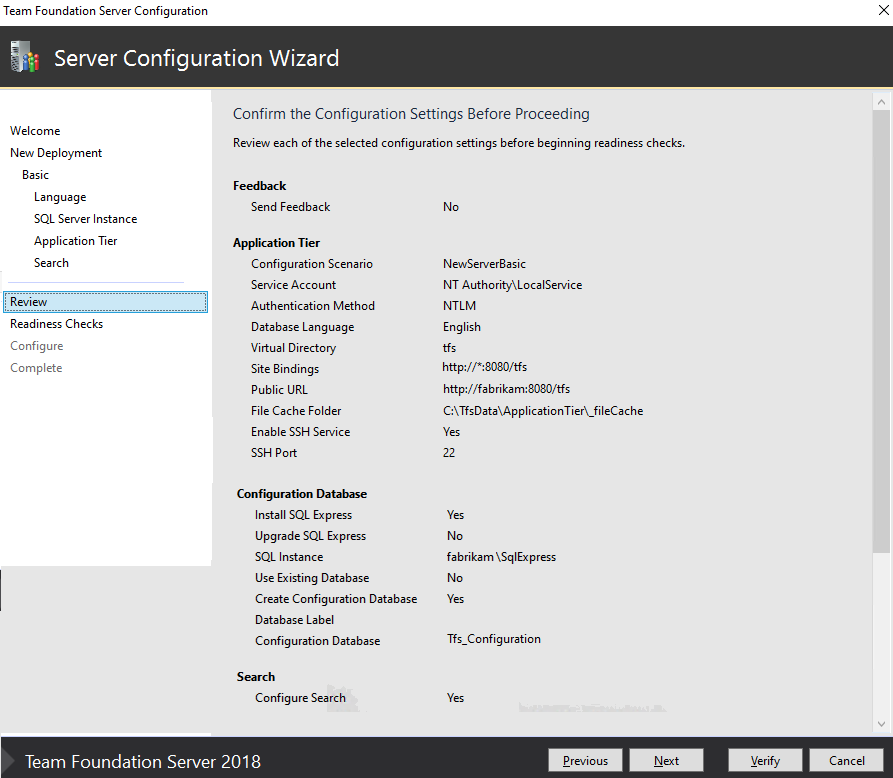
From the Review page, review your selections and then choose Verify, the wizard runs readiness checks to validate your environment and your setting selections. If it's successful, you can configure your deployment. Otherwise, fix any errors and rerun the readiness checks.
Readiness Checks. When all checks have passed, you're ready to complete the configuration. Choose Configure.
Tip
You can return to any previous page by choosing Previous or the page name in the left pane. If you change a configuration setting, then you need to verify the settings by choosing Click here to rerun readiness Checks.
The wizard advances to the Configure page and starts configuring each feature and displays the progress. This step can take several minutes. If all configurations succeed, you'll get the following success message. Select Next.

From the Complete page, review the results of the configuration. Review your configuration results and choose Copy Full Path to copy the link to the configuration log file. Choose the Azure DevOps Server URL link to connect to the web portal of your configured server.
In this example, the link is
/http:aaronha001/.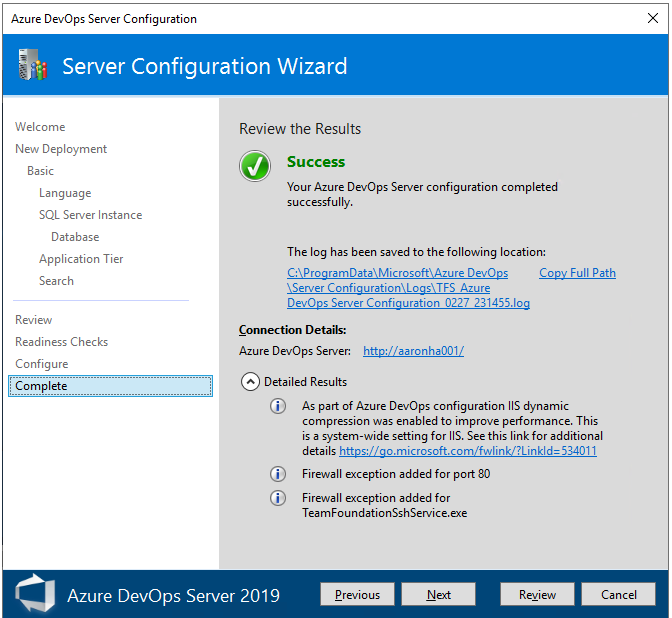
Configure using the Advanced option
This section walks you through configuring your Azure DevOps Server using the Advanced option.
Note
The procedures to install a new deployment with the Advanced option is similar for all versions of Azure DevOps Server and Team Foundation Server 2018, except that Reporting isn't supported for Azure DevOps Server 2022 and later versions. Images shown in this section reference Azure DevOps Server 2019, however, the information configured is the same unless otherwise noted.
From the Welcome page, choose your options and then select Next.
From the New Deployment page, choose the deployment type, and then select Next.
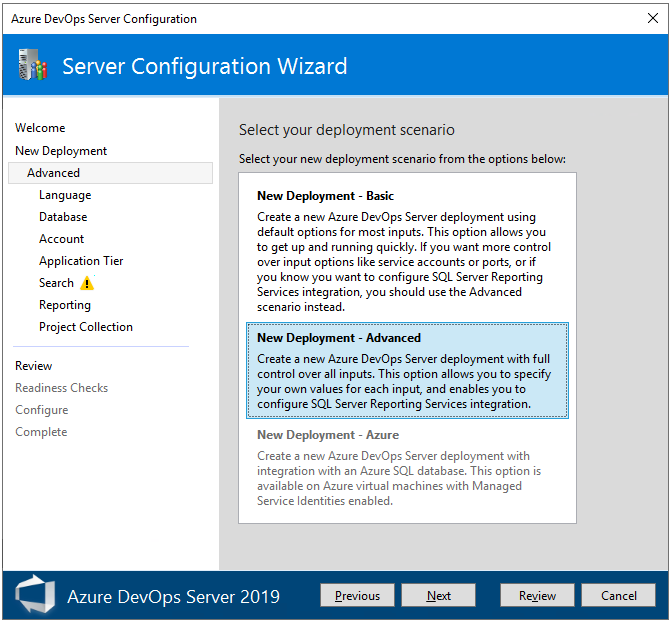
On the next page, choose New Deployment - Advanced, and then select Next.
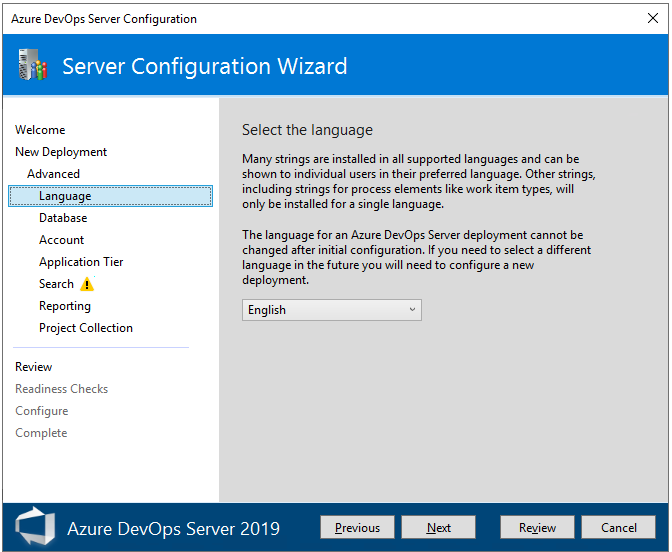
From the Language page, choose your preferred Language option and then select Next.
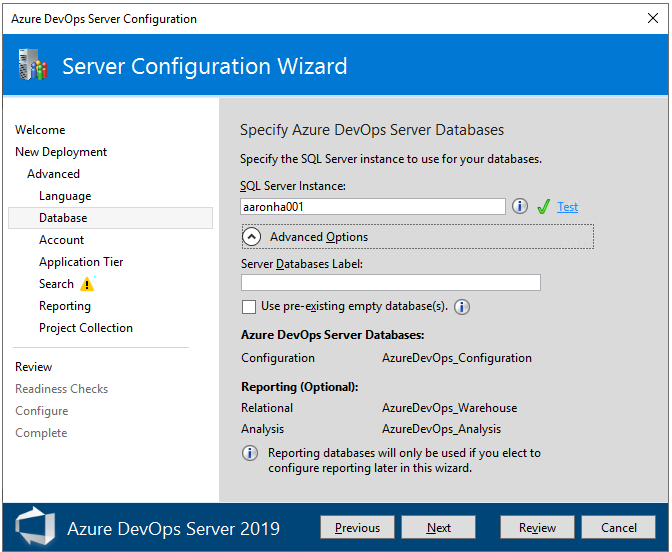
From the Database page, specify the SQL Server instance you have set up for use with Azure DevOps Server. Then, choose Next.
From the Account page, specify the service account to use.

From the Application Tier page, choose the web site settings you want to use, which includes whether to use HTTP or HTTPS bindings, and then choose Next. For more information, see Web site settings.
From the Search page, select whether to install and configure Search features or use an existing search service. Installing and configuring Search supports Code, Work Item and Wiki search features. For more information, see Configure search. Choose Next.

From the Reporting page, uncheck the Configure Reporting checkbox if you don't plan on using SQL Server Reporting Services or haven't yet installed SQL Server Analysis Services and SQL Server Reporting Services. Otherwise, keep the box checked and choose Next.

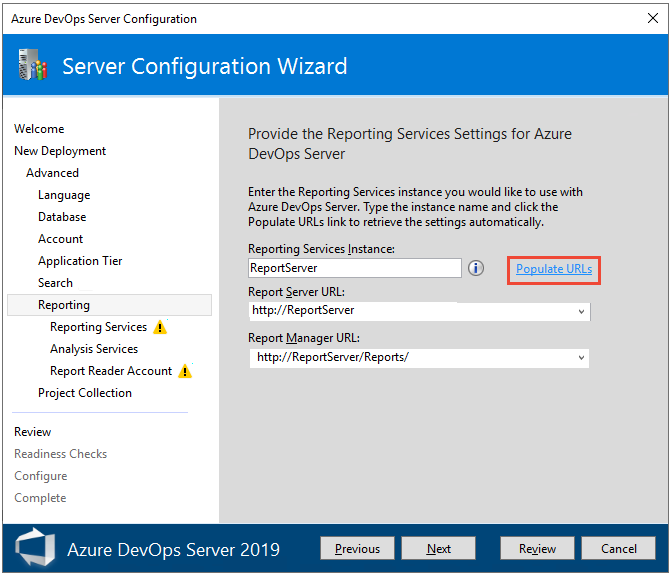
Reporting Services. Enter the name of the server where you installed SQL Server Reporting Services. Then, choose Populate URLs. Choose Next.
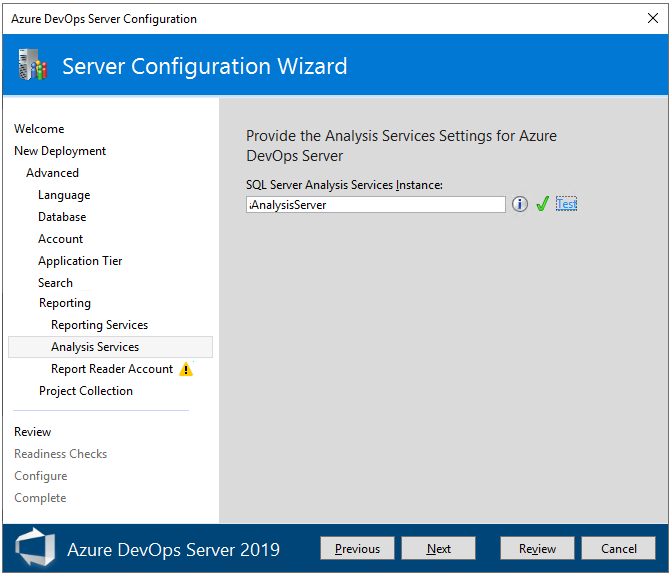
Analysis Services. Enter the name of the server where you installed SQL Server Reporting Services, and then choose Test. Choose Next.
Report Reader Account. Enter the credentials for the service account you've set up for reporting, and then choose Test. Choose Next.
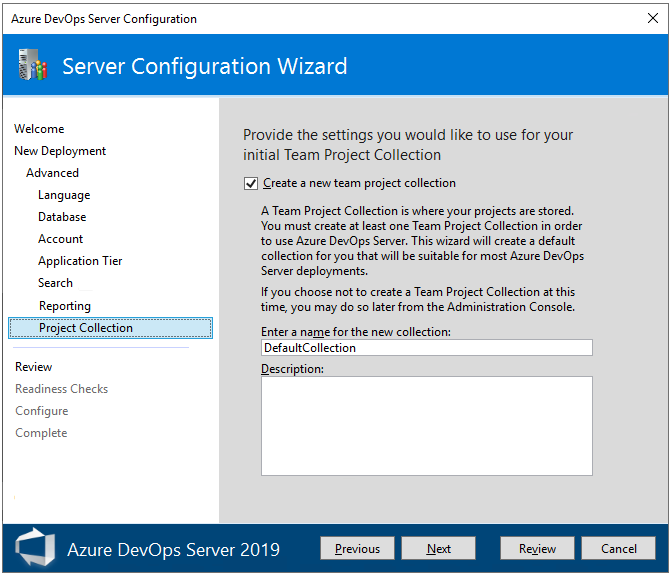
From the Project Collection page, leave the Create a new team project collection checkbox checked. You must have at least one project collection in which to define projects. Leave the project name as is, DefaultCollection, or give it a new name and optionally a description.
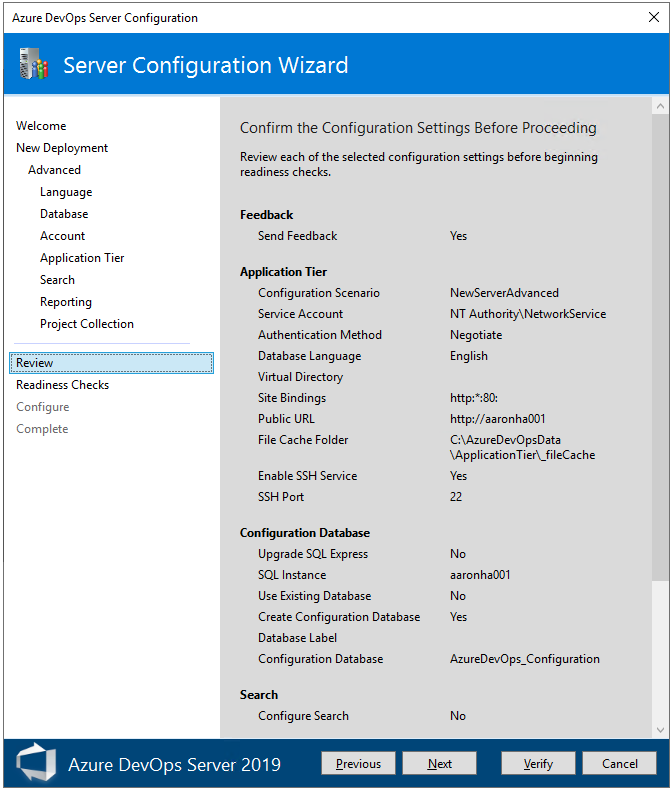
From the Review page, review your selections and then choose Verify, the wizard runs readiness checks to validate your environment and your setting selections. If it's successful, you can configure your deployment. Otherwise, fix any errors and rerun the readiness checks.
From the Readiness Checks page, the system performs a final pass to ensure the configuration settings are valid. When all checks have passed, you're ready to complete the configuration. Choose Configure.
Tip
You can return to any previous page by choosing Previous or the page name in the left pane. If you change a configuration setting, then you need to verify the settings by choosing Click here to rerun readiness Checks.
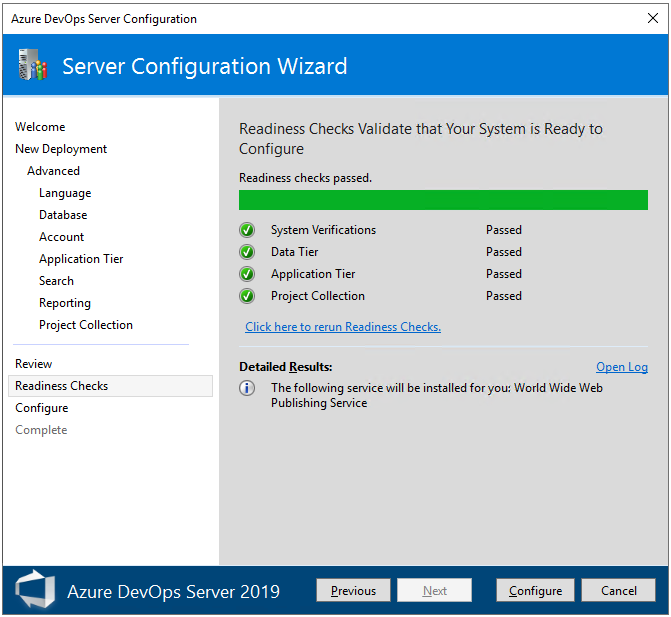
The wizard advances to the Configure page and starts configuring each feature and displays the progress. This step can take several minutes. If all configurations succeed, you'll get the following success message. Select Next.
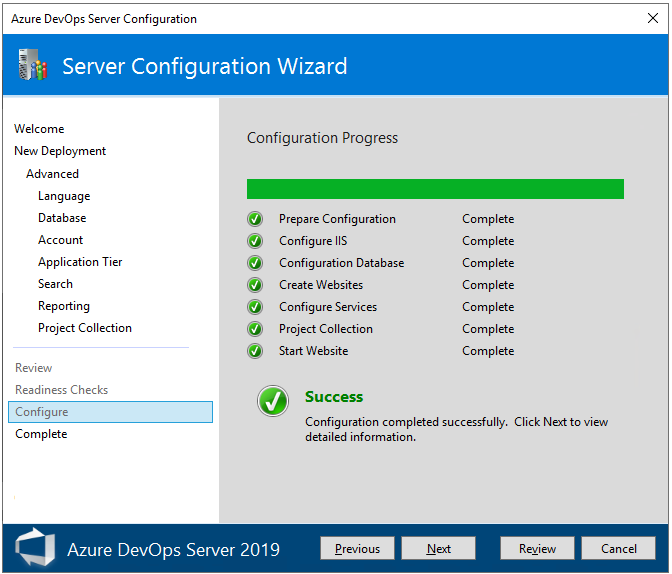
From the Complete page, review the results of the configuration. Review your configuration results and choose Copy Full Path to copy the link to the configuration log file. Choose the Azure DevOps Server URL link to connect to the web portal of your configured server.
In this example, the link is
/http:aaronha001/.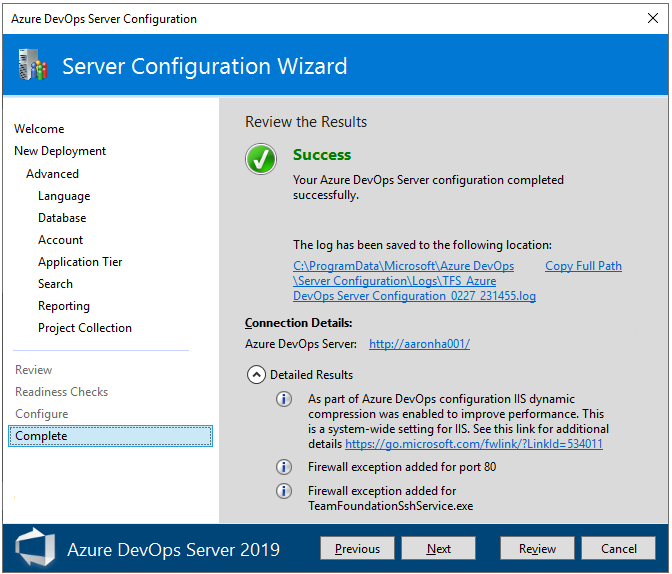
Create a project
Your web portal will open to the Create a project page.
Provide a project name and optional description. The project name can't contain spaces or special characters (such as / : \ ~ & % ; @ ' " ? < > | # $ * } { , + = [ ]), can't begin with an underscore, can't begin or end with a period, and must be 64 characters or less.
The default settings configure a Git repository for version control and the Agile process for work tracking. To choose different options, expand Advanced.
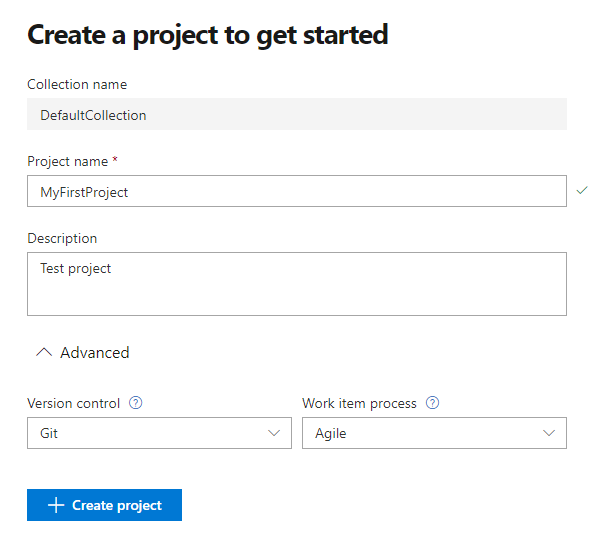
For a comparison of version control options, see Choose the right version control for your project. For a review of work tracking processes, see Choose a process.
Once your project is created, the project summary page appears. To learn more, see Share your project mission, view project activity.
Next steps
For administrators:
For developers: