Create a Git branch in Visual Studio
It's easy to create a new branch in Visual Studio; all you have to do is base it off an existing branch.
Here's how.
To start, make sure you've got a previously created or cloned repo open.
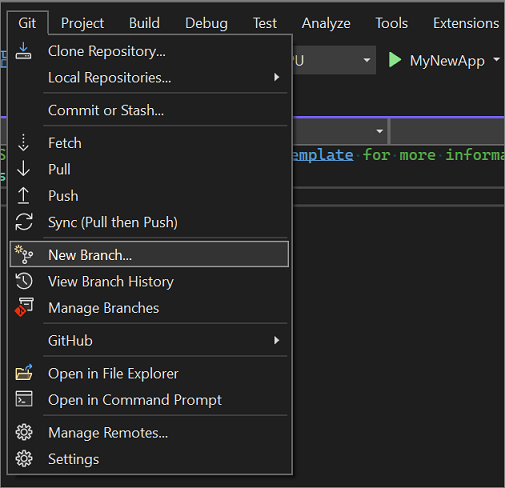
From the Git menu, select New Branch.

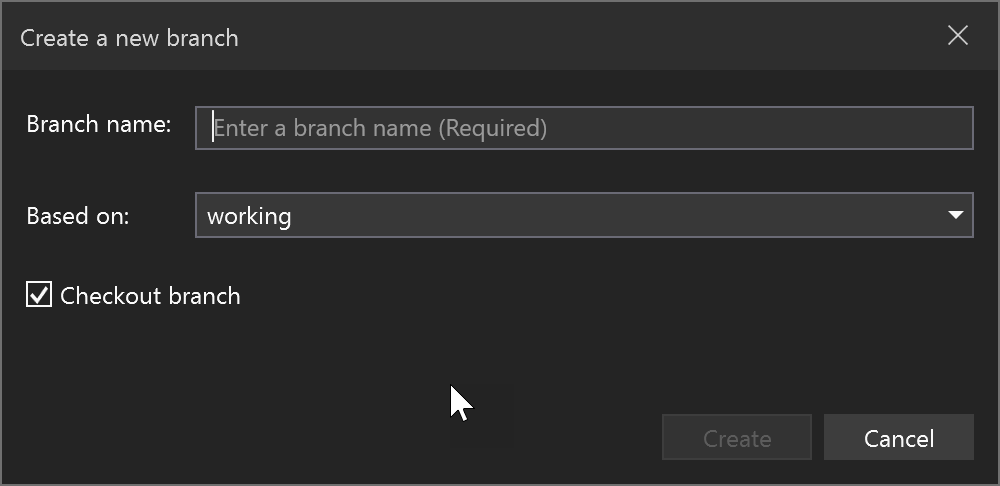
In the Create a new branch dialog box, enter a branch name.
Tip
For branch naming details, see Special characters in branch and tag names.

In the Based on section, use the drop-down list to choose whether you want to base your new branch off an existing local branch or a remote branch.
The Checkout branch checkbox, which is on by default, automatically switches to the newly created branch. Toggle this option if you want to remain in the current branch.
The Track remote branch checkbox, which only appears if you select Remote in the Based on section, is selected by default if the remote has a matching branch name. If the branch is intended to be a local version of the remote branch, this should be selected; otherwise, clear the checkbox. See Remote branches.
There you have it; you've created a new branch.
Tip
The equivalent command for this action is git checkout -b <new-branch> <existing-branch>.
Note
For more information about the latest updates that improve branch switching, see the Visual Studio 2022 Performance Enhancements: Git Branch Switching blog post.