你当前正在访问 Microsoft Azure Global Edition 技术文档网站。 如果需要访问由世纪互联运营的 Microsoft Azure 中国技术文档网站,请访问 https://docs.azure.cn。
如何使用 Azure Maps 空间 IO 模块
Azure Maps Web SDK 提供空间 IO 模块,该模块通过使用 JavaScript 或 TypeScript,将空间数据与 Azure Maps Web SDK 相集成。 此模块具有强大功能,使开发者能够:
- 读取和写入空间数据。 受支持的文件格式包括:KML、KMZ、GPX、GeoRSS、GML、GeoJSON,以及包含了空间信息相关列的 CSV 文件。 还支持已知文本 (WKT)。
- 连接到开放地理空间信息联盟 (OGC) 服务并与 Azure Maps WEB SDK 集成,并作为地图上的图层覆盖 Web 地图服务 (WMS) 和 Web 地图图块服务 (WMTS)。 有关详细信息,请参阅从开放地理空间信息联盟 (OGC) 添加地图层。
- 在 Web 地理要素服务 (WFS) 中查询数据。 有关详细信息,请参阅连接到 WFS 服务。
- 覆盖包含样式信息的复杂数据集,并让它们自动呈现。 有关详细信息,请参阅添加简单的数据层。
- 利用高速 XML 和带分隔符的文件读取器和编写器类。 有关详细信息,请参阅核心 IO 操作。
本指南演示了如何在 Web 应用程序中集成和使用空间 IO 模块。
此视频提供了 Azure Maps Web SDK 中空间 IO 模块的概述。
警告
仅使用可信来源的数据和服务,尤其是从另一个域进行引用时更应如此。 空间 IO 模块会执行一定措施来最大程度地降低风险,不过最安全的方法还是从一开始就不允许任何危险数据进入应用程序。
先决条件
安装空间 IO 模块
可以使用以下两个选项之一,加载 Azure Maps 空间 IO 模块:
用于 Azure Maps 空间 IO 模块的全局托管 Azure CDN。 对于此选项,请在 HTML 文件的
<head>元素中添加对 JavaScript 的引用。<script src="https://atlas.microsoft.com/sdk/javascript/spatial/0/atlas-spatial.js"></script>可在本地加载 azure-maps-spatial-io 的源代码,然后由应用进行托管。 此程序包还包括了 TypeScript 定义。 对于此选项,请使用以下命令来安装包:
npm install azure-maps-spatial-io然后,使用导入声明将模块添加到源文件中:
import * as spatial from "azure-maps-spatial-io";若要了解详细信息,请参阅如何使用 Azure Maps 地图控件 npm 包。
使用空间 IO 模块
创建新的 HTML 文件。
加载 Azure Maps Web SDK 并初始化地图控件。 有关详细信息,请参阅 Azure Maps 地图控件指南。 完成此步骤后,HTML 文件应如下所示:
<!DOCTYPE html>
<html>

<head>
    <title></title>

    <meta charset="utf-8">

    <!-- Ensures that Internet Explorer and Edge uses the latest version and doesn't emulate an older version -->
    <meta http-equiv="x-ua-compatible" content="IE=Edge">

    <!-- Ensures the web page looks good on all screen sizes. -->
    <meta name="viewport" content="width=device-width, initial-scale=1, shrink-to-fit=no">

    <!-- Add references to the Azure Maps Map control JavaScript and CSS files. -->
    <link rel="stylesheet" href="https://atlas.microsoft.com/sdk/javascript/mapcontrol/3/atlas.min.css" type="text/css" />
    <script src="https://atlas.microsoft.com/sdk/javascript/mapcontrol/3/atlas.js"></script>

    <script type='text/javascript'>

        var map;

        function GetMap() {
            //Initialize a map instance.
            map = new atlas.Map('myMap', {
                view: 'Auto',

                //Add your Azure Maps subscription key to the map SDK. Get an Azure Maps key at https://azure.com/maps
                authOptions: {
                    authType: 'subscriptionKey',
                    subscriptionKey: '<Your Azure Maps Key>'
                }
            });

            //Wait until the map resources are ready.
            map.events.add('ready', function() {

                // Write your code here to make sure it runs once the map resources are ready

            });
        }
    </script>
</head>

<body onload="GetMap()">
    <div id="myMap" style="position:relative;width:100%;min-width:290px;height:600px;"></div>
</body>

</html>
加载 Azure Maps 空间 IO 模块。 对于本练习,请使用针对 Azure Maps 空间 IO 模块的 CDN。 向 HTML 文件的
<head>元素添加以下引用:<script src="https://atlas.microsoft.com/sdk/javascript/spatial/0/atlas-spatial.js"></script>初始化
datasource,并将数据源添加到地图上。 初始化layer,并将数据源添加到地图层。 然后,呈现数据源和图层。 在继续向下滚动以查看完整代码之前,请先考虑好放置数据源和图层代码片段的最佳位置。 请注意,在以编程方式操作地图之前,应等待地图资源准备就绪。var datasource, layer;和
//Create a data source and add it to the map.
datasource = new atlas.source.DataSource();
map.sources.add(datasource);

//Add a simple data layer for rendering the data.
layer = new atlas.layer.SimpleDataLayer(datasource);
map.layers.add(layer);
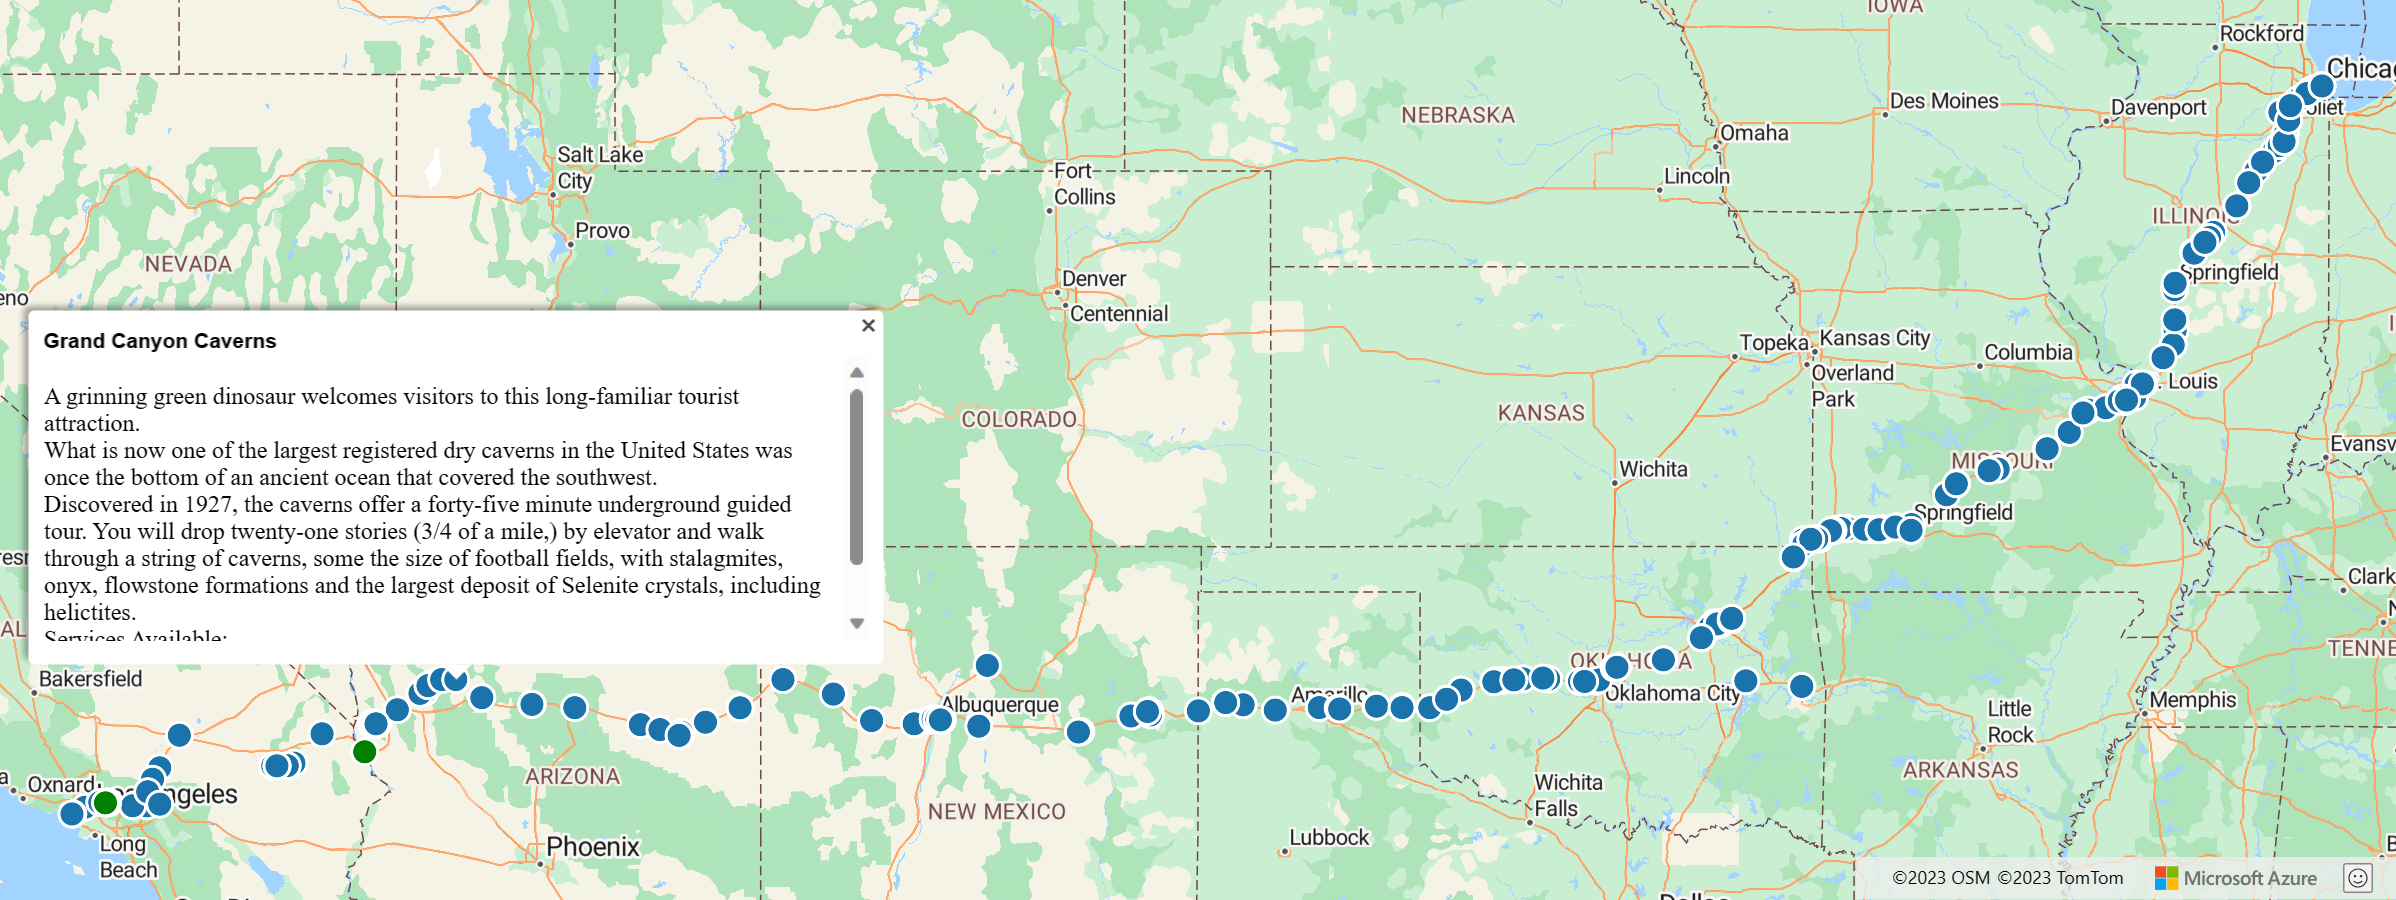
你的 HTML 代码现在应如以下代码所示。 此示例演示如何在地图上显示 XML 文件的特征数据。
注意
此示例使用 Route66Attractions.xml。
<!DOCTYPE html>
<html>
<head>
    <title>Spatial IO Module Example</title>

    <meta charset="utf-8">

    <!-- Ensures that Internet Explorer and Edge uses the latest version and doesn't emulate an older version -->
    <meta http-equiv="x-ua-compatible" content="IE=Edge">

    <!-- Ensures the web page looks good on all screen sizes. -->
    <meta name="viewport" content="width=device-width, initial-scale=1, shrink-to-fit=no">

    <!-- Add references to the Azure Maps Map control JavaScript and CSS files. -->
    <link rel="stylesheet" href="https://atlas.microsoft.com/sdk/javascript/mapcontrol/3/atlas.min.css" type="text/css" />
    <script src="https://atlas.microsoft.com/sdk/javascript/mapcontrol/3/atlas.js"></script>

    <!-- Add reference to the Azure Maps Spatial IO module. -->
    <script src="https://atlas.microsoft.com/sdk/javascript/spatial/0/atlas-spatial.js"></script>

    <script type='text/javascript'>
        var map, datasource, layer;

        function GetMap() {
            //Initialize a map instance.
            map = new atlas.Map('myMap', {
                view: 'Auto',

                //Add your Azure Maps subscription key to the map SDK. Get an Azure Maps key at https://azure.com/maps
                authOptions: {
                    authType: 'subscriptionKey',
                    subscriptionKey: '<Your Azure Maps Key>'
                }
            });

            //Wait until the map resources are ready.
            map.events.add('ready', function() {

                //Create a data source and add it to the map.
                datasource = new atlas.source.DataSource();
                map.sources.add(datasource);

                //Add a simple data layer for rendering the data.
                layer = new atlas.layer.SimpleDataLayer(datasource);
                map.layers.add(layer);

                //Read an XML file from a URL or pass in a raw XML string.
                atlas.io.read('Route66Attractions.xml').then(r => {
                    if (r) {
                        //Add the feature data to the data source.
                        datasource.add(r);

                        //If bounding box information is known for data, set the map view to it.
                        if (r.bbox) {
                            map.setCamera({
                                bounds: r.bbox,
                                padding: 50
                            });
                        }
                    }
                });
            });
        }
    </script>
</head>
<body onload='GetMap()'>
    <div id="myMap" style="position:relative;width:100%;min-width:290px;height:600px;"></div>
</body>
</html>
请记住要将
<Your Azure Maps Key>替换为订阅密钥。 HTML 文件中显示的结果应类似于下图:
后续步骤
我们演示的功能只是空间 IO 模块的众多功能之一。 阅读下面的指南,了解如何使用空间 IO 模块中的其他功能:
请参阅 Azure Maps 空间 IO 文档:
