教程:基本 Active Directory 环境
本教程将指导你创建基本 Active Directory 环境。
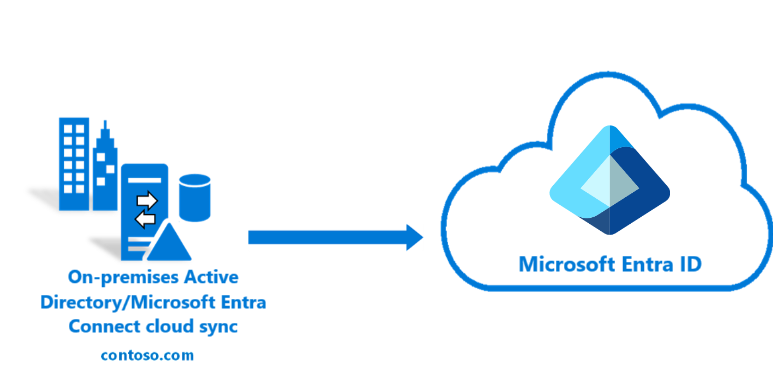
你可以使用在本教程中创建的环境来测试混合标识方案的各个方面,这将作为某些教程的先决条件。 如果已有现有 Active Directory 环境,则可以使用它作为替代环境。 此信息适用于可能尚未接触过相关内容的个人。
先决条件
以下是完成本教程所需的先决条件
- 安装了 Hyper-V 的计算机。 建议在 Windows 10 或 Windows Server 2016 计算机上执行此操作。
- 允许虚拟机与 Internet 通信的外部网络适配器。
- Azure 订阅
- Windows Server 2016 的副本
- Microsoft .NET framework 4.7.1
注意
本教程使用 PowerShell 脚本,以便可以在最短的时间内创建教程环境。 每个脚本都使用在脚本开头声明的变量。 你可以而且应该更改变量以反映你的环境。
在安装 Microsoft Entra Connect 云预配代理之前,所使用的脚本会创建常规 Active Directory 环境。 它们与所有教程相关。
GitHub 此处提供了本教程中使用的 PowerShell 脚本的副本。
创建虚拟机
你需要做的第一件事就是创建一个将用作我们的本地 Active Directory 服务器的虚拟机,以便启动并运行我们的混合标识环境。 请执行以下操作:
- 以管理员身份打开 PowerShell ISE。
- 运行以下脚本。
#Declare variables
$VMName = 'DC1'
$Switch = 'External'
$InstallMedia = 'D:\ISO\en_windows_server_2016_updated_feb_2018_x64_dvd_11636692.iso'
$Path = 'D:\VM'
$VHDPath = 'D:\VM\DC1\DC1.vhdx'
$VHDSize = '64424509440'

#Create New Virtual Machine
New-VM -Name $VMName -MemoryStartupBytes 16GB -BootDevice VHD -Path $Path -NewVHDPath $VHDPath -NewVHDSizeBytes $VHDSize -Generation 2 -Switch $Switch

#Set the memory to be non-dynamic
Set-VMMemory $VMName -DynamicMemoryEnabled $false

#Add DVD Drive to Virtual Machine
Add-VMDvdDrive -VMName $VMName -ControllerNumber 0 -ControllerLocation 1 -Path $InstallMedia

#Mount Installation Media
$DVDDrive = Get-VMDvdDrive -VMName $VMName

#Configure Virtual Machine to Boot from DVD
Set-VMFirmware -VMName $VMName -FirstBootDevice $DVDDrive
完成操作系统部署
要完成虚拟机的构建,需要完成操作系统安装。
- Hyper-V 管理器,双击虚拟机
- 单击“开始”按钮。
- 系统将提示你“按任意键以从 CD 或 DVD 启动”。 继续执行此操作。
- 在“Windows Server 启动”屏幕上,选择语言,然后单击“下一步”。
- 单击“立即安装”。
- 输入许可证密钥并单击“下一步”。
- 勾选“我接受许可条款”,然后单击“下一步”。
- 选择“自定义:仅安装 Windows(高级)”
- 点击“下一步”
- 安装完成后,重新启动虚拟机,登录并运行 Windows 更新,以确保 VM 是最新的。 安装最新更新。
安装 Active Directory 的先决条件
现在你已经启动了虚拟机,你需要在安装 Active Directory 之前完成一些操作。 也就是说,你需要重命名虚拟机,设置静态 IP 地址和 DNS 信息,并安装远程服务器管理工具。 请执行以下操作:
- 以管理员身份打开 PowerShell ISE。
- 运行以下脚本。
#Declare variables
$ipaddress = "10.0.1.117"
$ipprefix = "24"
$ipgw = "10.0.1.1"
$ipdns = "10.0.1.117"
$ipdns2 = "8.8.8.8"
$ipif = (Get-NetAdapter).ifIndex
$featureLogPath = "c:\poshlog\featurelog.txt"
$newname = "DC1"
$addsTools = "RSAT-AD-Tools"

#Set static IP address
New-NetIPAddress -IPAddress $ipaddress -PrefixLength $ipprefix -InterfaceIndex $ipif -DefaultGateway $ipgw

# Set the DNS servers
Set-DnsClientServerAddress -InterfaceIndex $ipif -ServerAddresses ($ipdns, $ipdns2)

#Rename the computer
Rename-Computer -NewName $newname -force

#Install features
New-Item $featureLogPath -ItemType file -Force
Add-WindowsFeature $addsTools
Get-WindowsFeature | Where installed >>$featureLogPath

#Restart the computer
Restart-Computer
创建 Windows Server AD 环境
现在你已经创建了 VM 并且已经重命名并且具有静态 IP 地址,你可以继续安装和配置 Active Directory 域服务。 请执行以下操作:
- 以管理员身份打开 PowerShell ISE。
- 运行以下脚本。
#Declare variables
$DatabasePath = "c:\windows\NTDS"
$DomainMode = "WinThreshold"
$DomainName = "contoso.com"
$DomaninNetBIOSName = "CONTOSO"
$ForestMode = "WinThreshold"
$LogPath = "c:\windows\NTDS"
$SysVolPath = "c:\windows\SYSVOL"
$featureLogPath = "c:\poshlog\featurelog.txt"
$Password = "Pass1w0rd"
$SecureString = ConvertTo-SecureString $Password -AsPlainText -Force

#Install AD DS, DNS and GPMC
start-job -Name addFeature -ScriptBlock {
Add-WindowsFeature -Name "ad-domain-services" -IncludeAllSubFeature -IncludeManagementTools
Add-WindowsFeature -Name "dns" -IncludeAllSubFeature -IncludeManagementTools
Add-WindowsFeature -Name "gpmc" -IncludeAllSubFeature -IncludeManagementTools }
Wait-Job -Name addFeature
Get-WindowsFeature | Where installed >>$featureLogPath

#Create New AD Forest
Install-ADDSForest -CreateDnsDelegation:$false -DatabasePath $DatabasePath -DomainMode $DomainMode -DomainName $DomainName -SafeModeAdministratorPassword $SecureString -DomainNetbiosName $DomainNetBIOSName -ForestMode $ForestMode -InstallDns:$true -LogPath $LogPath -NoRebootOnCompletion:$false -SysvolPath $SysVolPath -Force:$true
创建 Windows Server AD 用户
现在你拥有了 Active Directory 环境,你还需要一个测试帐户。 此帐户将在我们的本地 AD 环境中创建,然后同步到 Microsoft Entra ID。 请执行以下操作:
- 以管理员身份打开 PowerShell ISE。
- 运行以下脚本。
# Filename:  4_CreateUser.ps1
# Description: Creates a user in Active Directory. This is part of
#       the Azure AD Connect password hash sync tutorial.
#
# DISCLAIMER:
# Copyright (c) Microsoft Corporation. All rights reserved. This
# script is made available to you without any express, implied or
# statutory warranty, not even the implied warranty of
# merchantability or fitness for a particular purpose, or the
# warranty of title or non-infringement. The entire risk of the
# use or the results from the use of this script remains with you.
#
#
#
#
#Declare variables
$Givenname = "Allie"
$Surname = "McCray"
$Displayname = "Allie McCray"
$Name = "amccray"
$Password = "Pass1w0rd"
$Identity = "CN=ammccray,CN=Users,DC=contoso,DC=com"
$SecureString = ConvertTo-SecureString $Password -AsPlainText -Force


#Create the user
New-ADUser -Name $Name -GivenName $Givenname -Surname $Surname -DisplayName $Displayname -AccountPassword $SecureString

#Set the password to never expire
Set-ADUser -Identity $Identity -PasswordNeverExpires $true -ChangePasswordAtLogon $false -Enabled $true
创建 Microsoft Entra 租户
提示
本文中的步骤可能因开始使用的门户而略有不同。
现在需要创建一个 Microsoft Entra 租户,以便可以将用户同步到云。 若要创建新的 Microsoft Entra 租户,请执行以下操作。
- 登录到 Microsoft Entra 管理中心,并使用具有 Microsoft Entra 订阅的帐户登录。
- 单击“概览”。
- 单击“管理租户”。
- 选择“创建”。
- 提供“组织名称”以及“初始域名”。 然后选择“创建”。 随即创建目录。
- 完成此操作后,单击此处链接以管理目录。
在 Microsoft Entra ID 中创建混合标识管理员
创建 Microsoft Entra 租户后,接下来请创建混合标识管理员帐户。 若要创建混合标识管理员帐户,请执行以下操作。
- 在“管理”下选择“用户”。
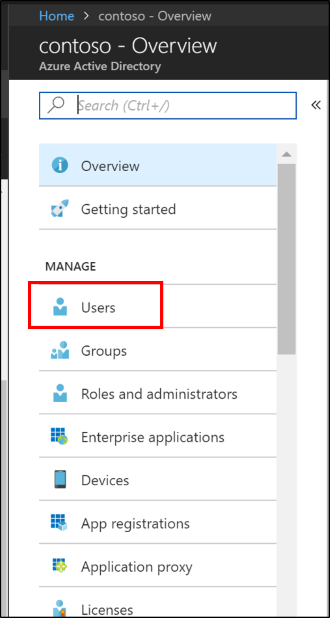
- 选择“所有用户”,然后选择“+ 新建用户”。
- 为此用户提供名称和用户名。 这将是租户的混合标识管理员。 还需要将“目录角色”更改为“混合标识管理员”。还可显示临时密码。 完成后,选择“创建”。
- 完成此操作后,使用新的混合标识管理员帐户和临时密码打开新的 Web 浏览器并登录 myapps.microsoft.com。
- 将混合标识管理员的密码更改为你可以记住的密码。
可选:另一个服务器和林
以下是可选部分,它提供了创建其他服务器和/或林的步骤。 可在一些更高级的教程(如 Microsoft Entra Connect 云同步试点)中使用它。
如果仅需要其他服务器,则可以在创建虚拟机步骤后停止并将服务器加入到上面创建的现有域。
创建虚拟机
- 以管理员身份打开 PowerShell ISE。
- 运行以下脚本。
# Filename:  1_CreateVM_CP.ps1
# Description: Creates a VM to be used in the tutorial.
#
# DISCLAIMER:
# Copyright (c) Microsoft Corporation. All rights reserved. #This script is made available to you without any express, implied or statutory warranty, not even the implied warranty of merchantability or fitness for a particular purpose, or the warranty of title or non-infringement. The entire risk of the use or the results from the use of this script remains with you.
#
#
#
#
#Declare variables
$VMName = 'CP1'
$Switch = 'External'
$InstallMedia = 'D:\ISO\en_windows_server_2016_updated_feb_2018_x64_dvd_11636692.iso'
$Path = 'D:\VM'
$VHDPath = 'D:\VM\CP1\CP1.vhdx'
$VHDSize = '64424509440'

#Create New Virtual Machine
New-VM -Name $VMName -MemoryStartupBytes 16GB -BootDevice VHD -Path $Path -NewVHDPath $VHDPath -NewVHDSizeBytes $VHDSize -Generation 2 -Switch $Switch

#Set the memory to be non-dynamic
Set-VMMemory $VMName -DynamicMemoryEnabled $false

#Add DVD Drive to Virtual Machine
Add-VMDvdDrive -VMName $VMName -ControllerNumber 0 -ControllerLocation 1 -Path $InstallMedia

#Mount Installation Media
$DVDDrive = Get-VMDvdDrive -VMName $VMName

#Configure Virtual Machine to Boot from DVD
Set-VMFirmware -VMName $VMName -FirstBootDevice $DVDDrive
完成操作系统部署
要完成虚拟机的构建,需要完成操作系统安装。
- Hyper-V 管理器,双击虚拟机
- 单击“开始”按钮。
- 系统将提示你“按任意键以从 CD 或 DVD 启动”。 继续执行此操作。
- 在“Windows Server 启动”屏幕上,选择语言,然后单击“下一步”。
- 单击“立即安装”。
- 输入许可证密钥并单击“下一步”。
- 勾选“我接受许可条款”,然后单击“下一步”。
- 选择“自定义:仅安装 Windows(高级)”
- 点击“下一步”
- 安装完成后,重新启动虚拟机,登录并运行 Windows 更新,以确保 VM 是最新的。 安装最新更新。
安装 Active Directory 的先决条件
现在你已经启动了虚拟机,你需要在安装 Active Directory 之前完成一些操作。 也就是说,你需要重命名虚拟机,设置静态 IP 地址和 DNS 信息,并安装远程服务器管理工具。 请执行以下操作:
- 以管理员身份打开 PowerShell ISE。
- 运行以下脚本。
# Filename:  2_ADPrep_CP.ps1
# Description: Prepares your environment for Active Directory. This is part of
#       the Azure AD Connect password hash sync tutorial.
#
# DISCLAIMER:
# Copyright (c) Microsoft Corporation. All rights reserved. This
# script is made available to you without any express, implied or
# statutory warranty, not even the implied warranty of
# merchantability or fitness for a particular purpose, or the
# warranty of title or non-infringement. The entire risk of the
# use or the results from the use of this script remains with you.
#
#
#
#
#Declare variables
$ipaddress = "10.0.1.118"
$ipprefix = "24"
$ipgw = "10.0.1.1"
$ipdns = "10.0.1.118"
$ipdns2 = "8.8.8.8"
$ipif = (Get-NetAdapter).ifIndex
$featureLogPath = "c:\poshlog\featurelog.txt"
$newname = "CP1"
$addsTools = "RSAT-AD-Tools"

#Set static IP address
New-NetIPAddress -IPAddress $ipaddress -PrefixLength $ipprefix -InterfaceIndex $ipif -DefaultGateway $ipgw

#Set the DNS servers
Set-DnsClientServerAddress -InterfaceIndex $ipif -ServerAddresses ($ipdns, $ipdns2)

#Rename the computer
Rename-Computer -NewName $newname -force

#Install features
New-Item $featureLogPath -ItemType file -Force
Add-WindowsFeature $addsTools
Get-WindowsFeature | Where installed >>$featureLogPath

#Restart the computer
Restart-Computer
创建 Windows Server AD 环境
现在你已经创建了 VM 并且已经重命名并且具有静态 IP 地址,你可以继续安装和配置 Active Directory 域服务。 请执行以下操作:
- 以管理员身份打开 PowerShell ISE。
- 运行以下脚本。
# Filename:  3_InstallAD_CP.ps1
# Description: Creates an on-premises AD environment. This is part of
#       the Azure AD Connect password hash sync tutorial.
#
# DISCLAIMER:
# Copyright (c) Microsoft Corporation. All rights reserved. This
# script is made available to you without any express, implied or
# statutory warranty, not even the implied warranty of
# merchantability or fitness for a particular purpose, or the
# warranty of title or non-infringement. The entire risk of the
# use or the results from the use of this script remains with you.
#
#
#
#
#Declare variables
$DatabasePath = "c:\windows\NTDS"
$DomainMode = "WinThreshold"
$DomainName = "fabrikam.com"
$DomaninNetBIOSName = "FABRIKAM"
$ForestMode = "WinThreshold"
$LogPath = "c:\windows\NTDS"
$SysVolPath = "c:\windows\SYSVOL"
$featureLogPath = "c:\poshlog\featurelog.txt"
$Password = "Pass1w0rd"
$SecureString = ConvertTo-SecureString $Password -AsPlainText -Force

#Install AD DS, DNS and GPMC
start-job -Name addFeature -ScriptBlock {
Add-WindowsFeature -Name "ad-domain-services" -IncludeAllSubFeature -IncludeManagementTools
Add-WindowsFeature -Name "dns" -IncludeAllSubFeature -IncludeManagementTools
Add-WindowsFeature -Name "gpmc" -IncludeAllSubFeature -IncludeManagementTools }
Wait-Job -Name addFeature
Get-WindowsFeature | Where installed >>$featureLogPath

#Create New AD Forest
Install-ADDSForest -CreateDnsDelegation:$false -DatabasePath $DatabasePath -DomainMode $DomainMode -DomainName $DomainName -SafeModeAdministratorPassword $SecureString -DomainNetbiosName $DomainNetBIOSName -ForestMode $ForestMode -InstallDns:$true -LogPath $LogPath -NoRebootOnCompletion:$false -SysvolPath $SysVolPath -Force:$true
创建 Windows Server AD 用户
现在你拥有了 Active Directory 环境,你还需要一个测试帐户。 此帐户将在我们的本地 AD 环境中创建,然后同步到 Microsoft Entra ID。 请执行以下操作:
- 以管理员身份打开 PowerShell ISE。
- 运行以下脚本。
# Filename:  4_CreateUser_CP.ps1
# Description: Creates a user in Active Directory. This is part of
#       the Azure AD Connect password hash sync tutorial.
#
# DISCLAIMER:
# Copyright (c) Microsoft Corporation. All rights reserved. This
# script is made available to you without any express, implied or
# statutory warranty, not even the implied warranty of
# merchantability or fitness for a particular purpose, or the
# warranty of title or non-infringement. The entire risk of the
# use or the results from the use of this script remains with you.
#
#
#
#
#Declare variables
$Givenname = "Anna"
$Surname = "Ringdal"
$Displayname = "Anna Ringdal"
$Name = "aringdal"
$Password = "Pass1w0rd"
$Identity = "CN=aringdal,CN=Users,DC=fabrikam,DC=com"
$SecureString = ConvertTo-SecureString $Password -AsPlainText -Force


#Create the user
New-ADUser -Name $Name -GivenName $Givenname -Surname $Surname -DisplayName $Displayname -AccountPassword $SecureString

#Set the password to never expire
Set-ADUser -Identity $Identity -PasswordNeverExpires $true -ChangePasswordAtLogon $false -Enabled $true
结束语
现在,你的环境可用于现有教程,并可测试云同步提供的其他功能。