结合使用服务标记和 Power BI
可以将 Azure 服务标记与 Power BI 结合使用来启用 Azure SQL 托管实例 (MI),以允许来自 Power BI 服务的传入连接。 在 Azure 中,服务标记是定义的一组 IP 地址,可以将其配置为一个组进行自动管理,以最大程度地降低更新或更改网络安全规则的复杂性。 将服务标记与 Power BI 结合使用,可以启用 SQL 托管实例以允许来自 Power BI 服务的传入连接。
若要成功启用终结点供在 Power BI 服中使用,需要以下配置:
- 在 SQL 托管实例中启用公共终结点。
- 创建用于允许入站流量的网络安全组规则。
- 在 Power BI 中输入凭据。
下面的几个部分将依次介绍这些步骤。
启用公共终结点
此过程的第一个部分是在 SQL 托管实例中启用公共终结点。 执行以下步骤:
登录到 Azure 门户,然后导航到你的 SQL 托管实例。
在页面左侧,选择“网络”。
将“公共终结点(数据)”滑动为“启用”,然后将“最低 TLS 版本”设置为“1.2”。 下图显示了 Azure 门户中的屏幕。
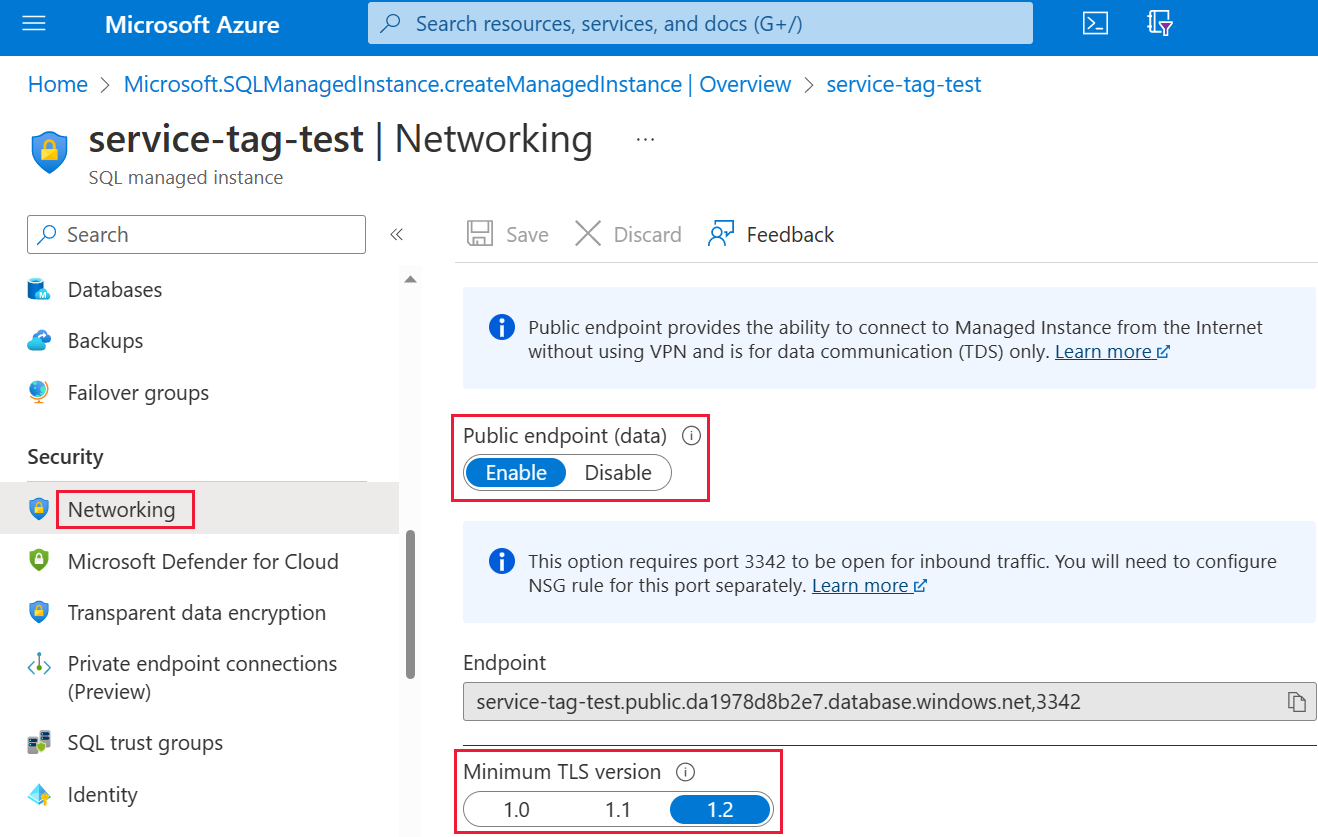
选择“保存”以保存设置。
创建网络安全组规则
接下来的几个步骤要求创建用于允许 Power BI 服务入站流量的网络安全组 (NSG) 规则。 可使用 Power BI 的“源服务标记”或使用命令行接口 (CLI) 或 PowerShell 在 Azure 门户中完成此操作。
注意
设置的规则优先级必须高于 4096 deny_all_inbound 规则,这意味着优先级值必须低于 4096。 在下面的示例中,使用的优先级值为 400。
以下 CLI 脚本作为参考示例提供。 有关详细信息,请参阅 az network nsg 规则。 你可能需要根据自己的情况更改多个值,才能使该示例正常工作。 PowerShell 脚本在之后提供。
#login to azure
az login

#set subscription that contains SQL MI instance
$subname = "mysubscriptionname"
az account set --subscription $subname

#set NSG rule for inbound PowerBI traffic

#update $RG to your resource group name
$rg = 'myresourcegroup'
#update $nsg to your Network Security Group name
$nsg = 'nsgresourcename'
# Name the NSG rule
$rule = 'allow_inbound_PowerBI'
#set the priority - this must be higher priority (lower number) than the deny_all_inbound rule
$priority = 400
#specifiy the service tag to use
$servicetag = 'PowerBI'
#specify the public endpoint port defined in step 1
$port = 3342
#set the rule to inbound direction
$direction = 'Inbound'
#set the access type to "Allow"
$access = 'Allow'
#Set the protocol as TCP
$protocol = 'tcp'
#Provide a description for the rule
$desc = 'Allow PowerBI Access to SQL MI for Direct Query or Data Refresh.'

#create the NSG rule
az network nsg rule create -g $rg \
--nsg-name $nsg -n $rule --priority $priority \
--source-address-prefixes $servicetag --destination-address-prefixes '*' \
--destination-port-ranges $port --direction $direction --access $access \
--protocol $protocol --description $desc
以下 PowerShell 脚本作为 NSG 规则的另一参考提供。 有关详细信息,请参阅在 PowerShell 中添加网络安全组规则。 你可能需要根据自己的情况更改多个值,才能使该示例正常工作。
#login to azure
Login-AzAccount

#get your subscription ID
Get-AzSubscription

####
#Script to create Network Security Group Rule
###

#enter your subscription ID
Set-AzContext -SubscriptionId "yoursubscriptionID"

#Provide the resource group for your Network Security Group
$RGname="yourRG"
#Enter the port for the SQL Managed Instance Public Endpoint
$port=3342
#name the NSG rule
$rulename="allow_inbound_PowerBI"
#provide the name of the Network Security Group to add the rule to
$nsgname="yourNSG"
#set direction to inbound to allow PowerBI to access SQL MI
$direction ="Inbound"
#set the priority of the rule. Priority must be higher (ie. lower number) than the deny_all_inbound (4096)
$priority=400
#set the service tags for the source to \u201cPowerBI\u201d
$serviceTag = "PowerBI"

# Get the NSG resource
$nsg = Get-AzNetworkSecurityGroup -Name $nsgname -ResourceGroupName $RGname

# Add the inbound security rule.
$nsg | Add-AzNetworkSecurityRuleConfig -Name $rulename -Description "Allow app port" -Access Allow `
    -Protocol * -Direction $direction -Priority $priority -SourceAddressPrefix $serviceTag -SourcePortRange * `
    -DestinationAddressPrefix * -DestinationPortRange $port

# Update the NSG.
$nsg | Set-AzNetworkSecurityGroup
在 Power BI 中输入凭据
该过程的最后一部分是在 Power BI 服务中输入凭据。
登录到 Power BI 服务,然后导航到包含使用 SQL 托管实例的数据集的工作区。 在下面的示例中,该工作区称为 ASAdataset,数据集称为“Contoso SQL MI 演示”。
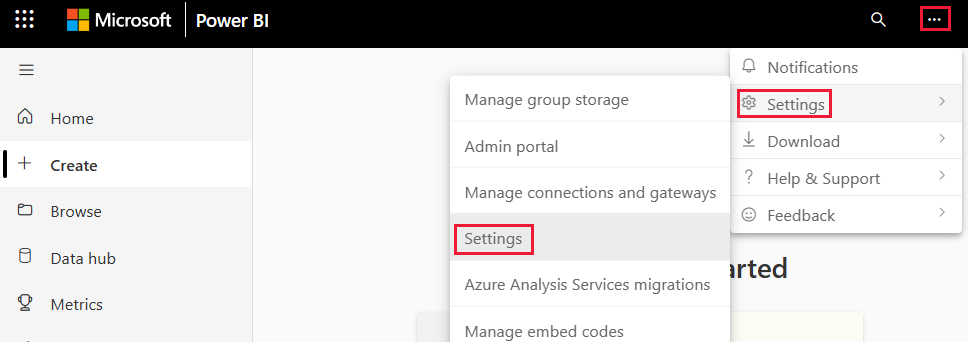
从右上角选择“设置”,然后从下拉菜单中选择“设置”。
在“数据集”下,展开“数据源凭据”部分。
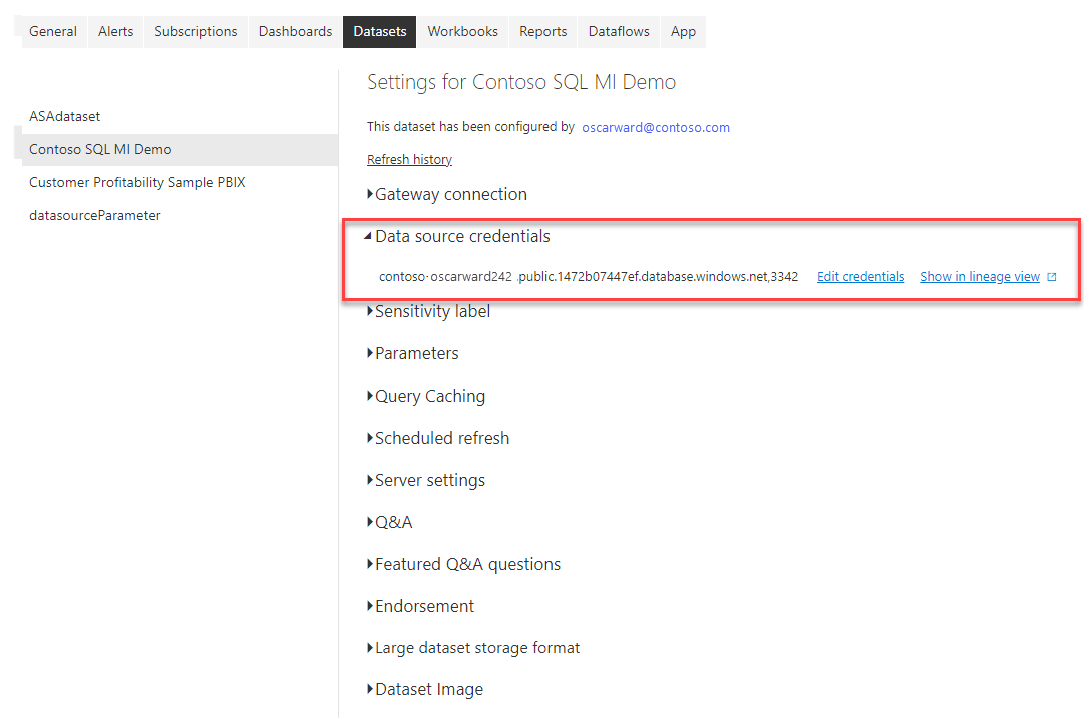
选择“编辑凭据”链接。 在出现的对话框中,输入有效的凭据。
保存设置再退出。 SQL 托管实例现在已配置为允许来自 Power BI 服务的传入连接。