在 Xamarin 中使用 tvOS 表视图
本文介绍如何设计和使用 Xamarin.tvOS 应用中的表视图和表视图控制器。
在 tvOS 中,表视图呈现为单列滚动行,可以选择将其组织成组或部分。 需要以清晰易懂的方式向用户有效显示大量数据时,应使用表视图。
表视图通常作为导航显示在拆分视图的一侧,而所选项的详细信息显示在另一侧:

关于表视图
UITableView 将单列可滚动行显示为分层信息列表,可以选择将其组织为组或部分:

Apple 在使用表方面提出了以下建议:
- 注意宽度 - 尝试在表宽度方面取得适当的平衡。 如果表太宽,则可能难以从远处进行扫描,并且可能会占用可用的内容区域。 如果表太窄,可能会导致信息被截断或换行,导致用户很难从房间另一端阅读。
- 快速显示表内容 - 对于大型数据列表,延迟加载内容并在表格呈现给用户后立即开始显示信息。 如果表加载时间过长,用户可能会对应用失去兴趣或认为它已被锁定。
- 内容加载时间过长时通知用户 - 如果表加载时间过长的情况不可避免,请显示进度条或活动指示器,让用户知道应用尚未锁定。
表视图单元格类型
UITableViewCell 用于表示表视图中的各个数据行。 Apple 定义了几种默认的表单元格类型:
- 默认 - 此类型在单元格左侧显示选项图像,在右侧显示左对齐标题。
- 副标题 - 此类型在第一行显示左对齐标题,在下一行显示较小的左对齐副标题。
- 值 1 - 此类型在同一行上显示左对齐标题和浅色右对齐副标题。
- 值 2 - 此类型在同一行上显示右对齐标题和浅色左对齐副标题。
所有默认的表视图单元格类型还支持图形元素,例如披露指示器或复选标记。
此外,还可以定义一种自定义表视图单元格类型,并提供在界面设计器中或通过代码创建的原型单元格。
Apple 在使用表视图单元格方面提出了以下建议:
- 避免文本剪裁 - 使各行文本保持较短,以免最终被截断。 用户很难从房间的另一边分析被截断的单词或短语。
- 考虑聚焦行状态 - 由于行在聚焦时会变得更大且圆角更多,因此需要测试单元格在所有状态下的外观。 在聚焦状态下,图像或文本可能会被剪裁或看起来不正确。
- 慎用可编辑表 - 在 tvOS 上移动或删除表行比在 iOS 上更耗时。 需要仔细决定此功能是否会增加或分散 tvOS 应用的注意力。
- 在适当的位置创建自定义单元格类型 - 虽然内置表视图单元格类型适用于许多情况,但请考虑为非标准信息创建自定义单元格类型,以提供更好的控制并更好地向用户呈现信息。
使用表视图
在 Xamarin.tvOS 应用中使用表视图的最简单方法是在界面设计器中创建和修改其外观。
若要开始,请执行以下操作:
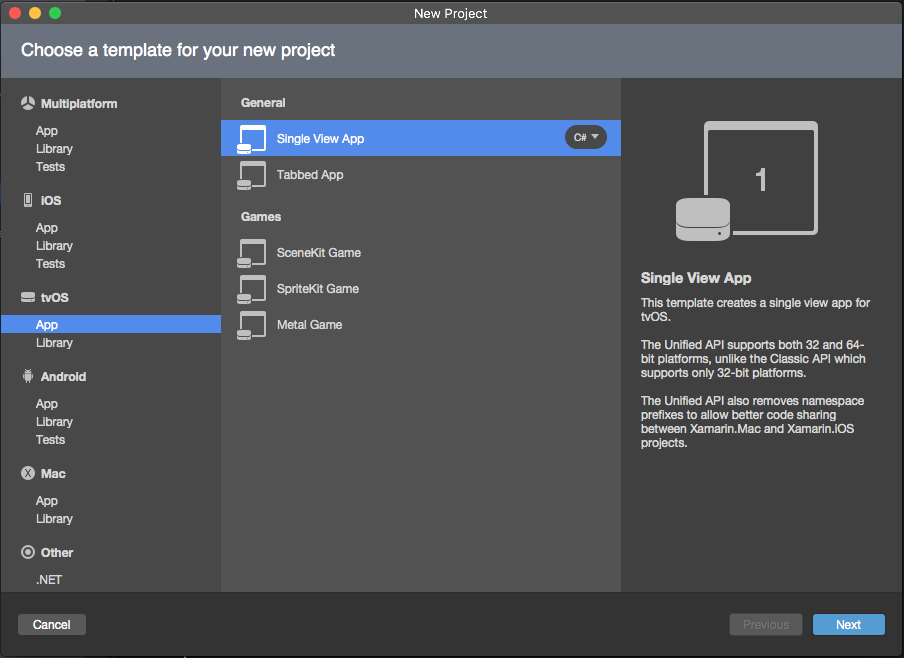
在 Visual Studio for Mac 中,启动一个新的 tvOS 应用项目并选择“tvOS”>“应用”>“单视图应用”,然后单击“下一步”按钮:
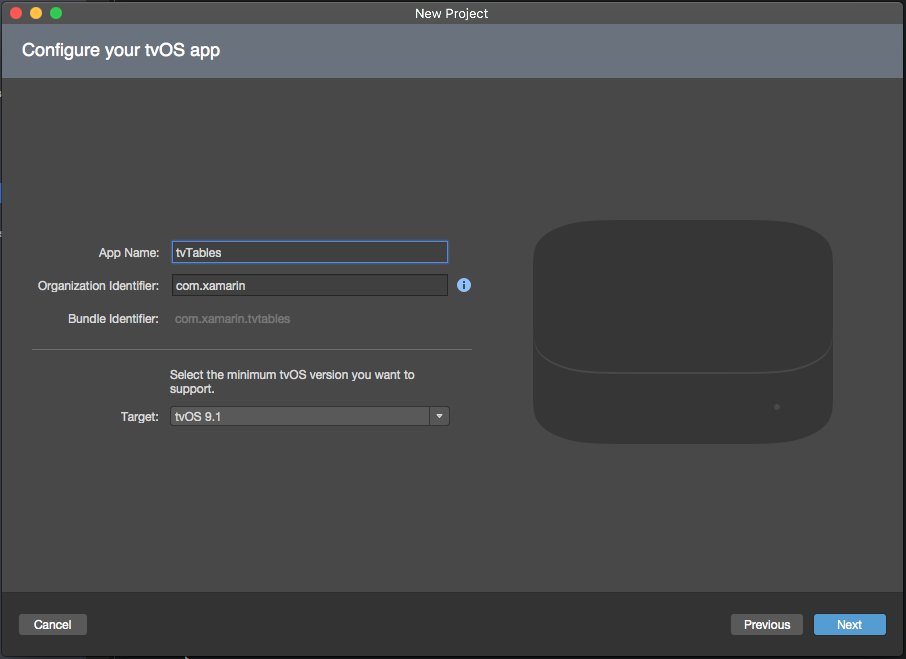
输入应用的名称,然后单击“下一步”:
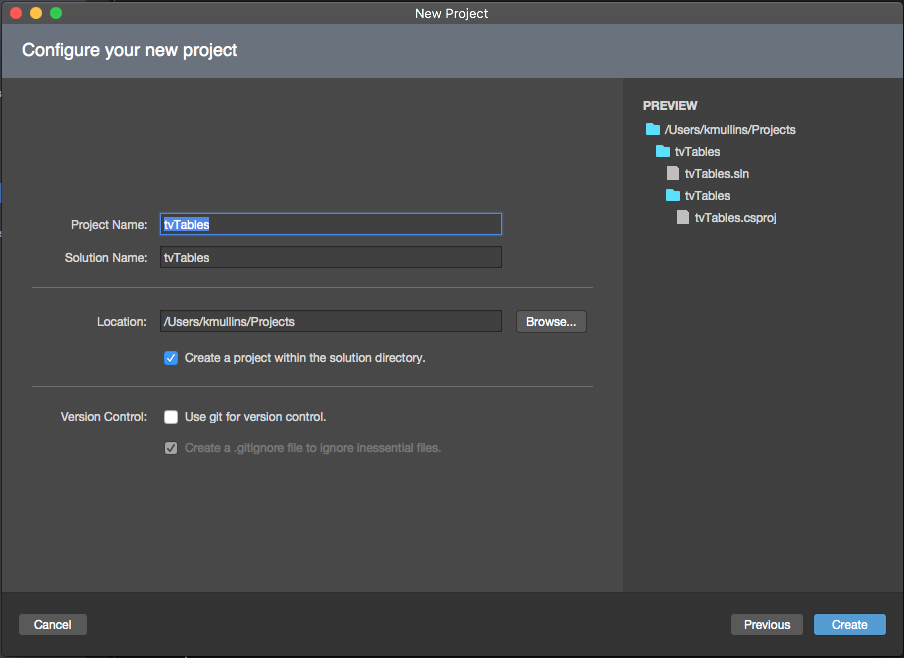
调整“项目名称”和“解决方案名称”或者接受默认值,然后单击“创建”按钮来创建新的解决方案:
在“Solution Pad”中,双击
Main.storyboard文件以在 iOS 设计器中将其打开:
选择并删除“默认视图控制器”:

从“工具箱”中选择“拆分视图控制器”并将其拖放到 Design Surface 上。
默认情况下,你将获得一个拆分视图,其左侧有一个导航视图控制器和一个表视图控制器,右侧有一个视图控制器。 Apple 对于在 tvOS 中使用表视图提出了以下建议:

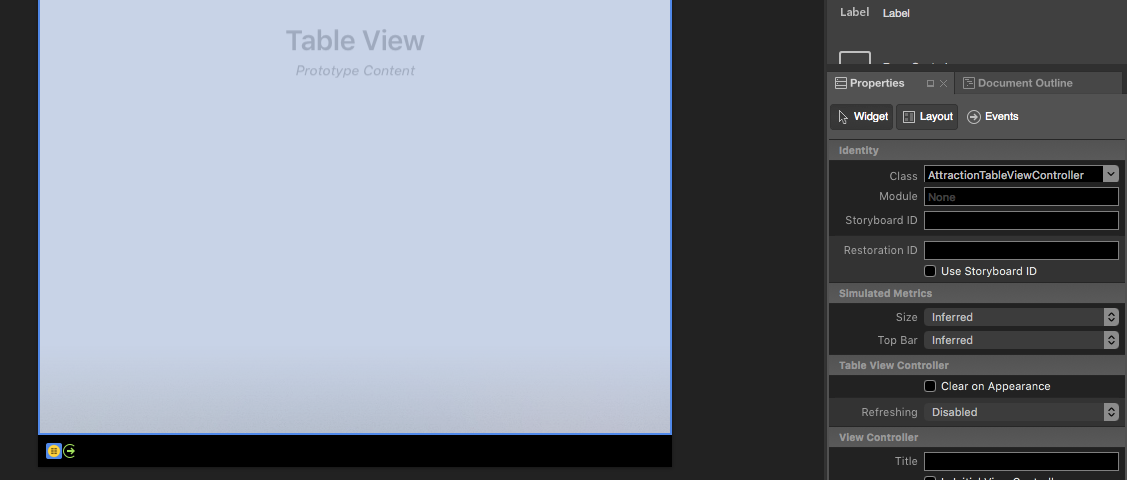
需要选择表视图的每个部分,并在“属性资源管理器”的“小组件”选项卡中为其指定一个自定义的类名,以便稍后可以在 C# 代码中访问它。 例如,表视图控制器:
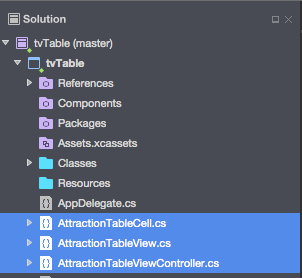
确保为表视图控制器、表视图和任何原型单元创建自定义类。 Visual Studio for Mac 会在创建自定义类时将其添加到项目树中:
接下来,在 Design Surface 中选择“表视图”并根据需要调整其属性。 例如原型单元格的数量和样式(普通或分组):

对于每个原型单元格,请选择它并在“属性资源管理器”的“小组件”选项卡中分配唯一的标识符。 此步骤非常重要,因为稍后在填充表时需要此标识符。 例如:
AttrCell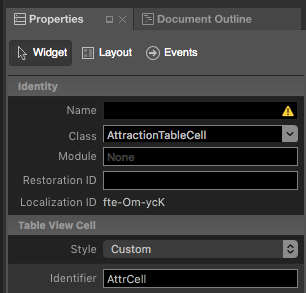
还可以通过“样式”下拉列表选择将单元格显示为默认表视图单元格类型之一,或者将其设置为“自定义”,并使用 Design Surface 通过从“工具箱”中拖入其他 UI 小组件来布局单元格:

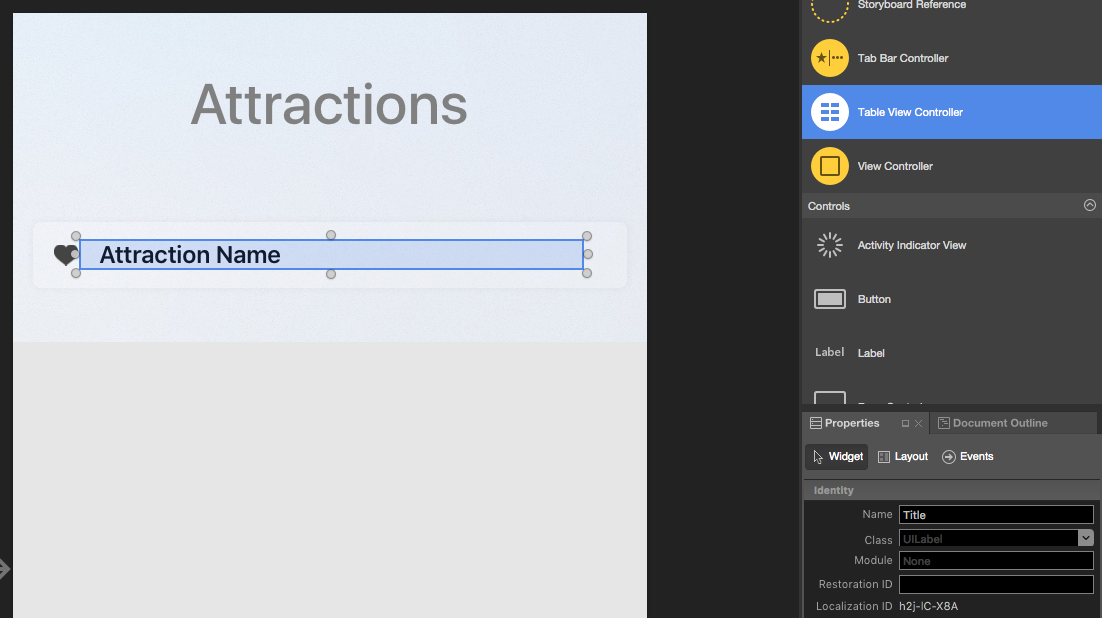
在“属性资源管理器”的“小组件”选项卡中,为原型单元格设计中的每个 UI 元素分配唯一的名称,以便稍后可以在 C# 代码中访问它们:
对表视图中的所有原型单元格重复上述步骤。
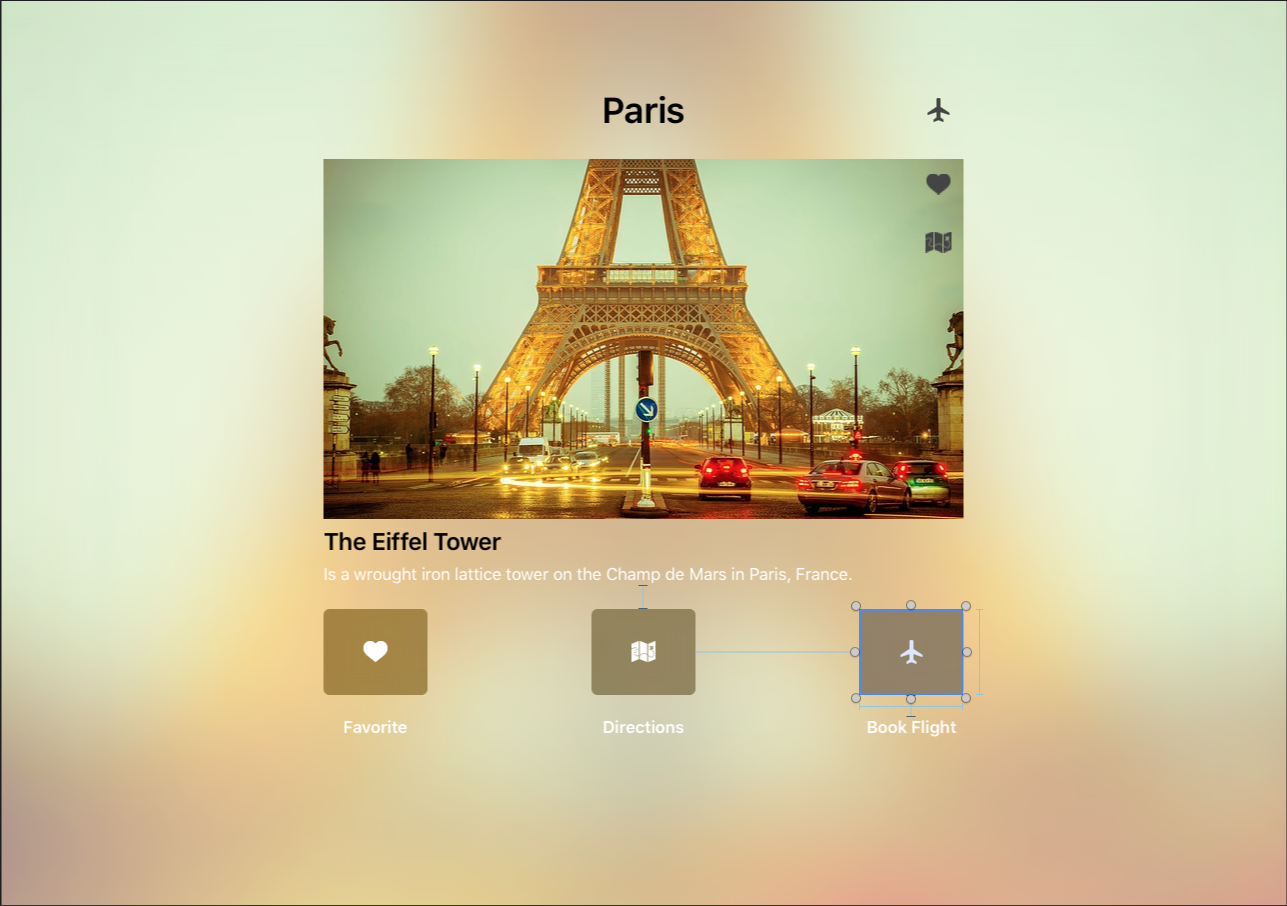
接下来,将自定义类分配到 UI 设计的其余部分,布局“详细信息”视图,并为“详细信息”视图中的每个 UI 元素分配唯一的名称,以便也可以在 C# 中访问它们。 例如:
保存对情节提要所做的更改。


设计数据模型
为了更轻松地处理表视图将要显示的信息并轻松呈现详细信息(当用户选择或突出显示表视图中的行时),请创建一个或多个自定义类来充当所呈现信息的数据模型。
以包含城市列表的旅行预订应用为例,每个城市都包含用户可以选择的唯一景点列表。 用户可以将景点标记为收藏项目、选择获取前往景点的路线,以及预订飞往指定城市的航班。
若要为景点创建数据模型,请右键单击“Solution Pad”中的“项目名称”,然后选择“添加”>“新文件...”。为“名称”输入 AttractionInformation,然后单击“新建”按钮:


编辑 AttractionInformation.cs 文件,使其如下所示:
using System;
using Foundation;

namespace tvTable
{
    public class AttractionInformation : NSObject
    {
        #region Computed Properties
        public CityInformation City { get; set;}
        public string Name { get; set;}
        public string Description { get; set;}
        public string ImageName { get; set;}
        public bool IsFavorite { get; set;}
        public bool AddDirections { get; set;}
        #endregion

        #region Constructors
        public AttractionInformation (string name, string description, string imageName)
        {
            // Initialize
            this.Name = name;
            this.Description = description;
            this.ImageName = imageName;
        }
        #endregion
    }
}
此类提供用于存储有关给定景点的信息的属性。
接下来,再次右键单击“Solution Pad”中的“项目名称”,然后选择“添加”>“新文件...”。对“名称”输入 CityInformation,然后单击“新建”按钮:


编辑 CityInformation.cs 文件,使其如下所示:
using System;
using System.Collections.Generic;
using Foundation;

namespace tvTable
{
    public class CityInformation : NSObject
    {
        #region Computed Properties
        public string Name { get; set; }
        public List<AttractionInformation> Attractions { get; set;}
        public bool FlightBooked { get; set;}
        #endregion

        #region Constructors
        public CityInformation (string name)
        {
            // Initialize
            this.Name = name;
            this.Attractions = new List<AttractionInformation> ();
        }
        #endregion

        #region Public Methods
        public void AddAttraction (AttractionInformation attraction)
        {
            // Mark as belonging to this city
            attraction.City = this;

            // Add to collection
            Attractions.Add (attraction);
        }

        public void AddAttraction (string name, string description, string imageName)
        {
            // Create attraction
            var attraction = new AttractionInformation (name, description, imageName);

            // Mark as belonging to this city
            attraction.City = this;

            // Add to collection
            Attractions.Add (attraction);
        }
        #endregion
    }
}
此类保存有关目标城市的所有信息、该城市的景点集合,并提供两个帮助器方法 (AddAttraction),以便更轻松地添加城市景点。
表视图数据源
每个表视图都需要一个数据源 (UITableViewDataSource) 来为表提供数据并生成表视图所需的行。
对于上面给出的示例,请在“解决方案资源管理器”中右键单击“项目名称”,选择“添加”>“新文件...”,将文件命名为 AttractionTableDatasource,然后单击“新建”按钮创建该文件。 接下来,编辑 AttractionTableDatasource.cs 文件,使其如下所示:
using System;
using System.Collections.Generic;
using UIKit;

namespace tvTable
{
    public class AttractionTableDatasource : UITableViewDataSource
    {
        #region Constants
        const string CellID = "AttrCell";
        #endregion

        #region Computed Properties
        public AttractionTableViewController Controller { get; set;}
        public List<CityInformation> Cities { get; set;}
        #endregion

        #region Constructors
        public AttractionTableDatasource (AttractionTableViewController controller)
        {
            // Initialize
            this.Controller = controller;
            this.Cities = new List<CityInformation> ();
            PopulateCities ();
        }
        #endregion

        #region Public Methods
        public void PopulateCities ()
        {
            // Clear existing
            Cities.Clear ();

            // Define cities and attractions
            var Paris = new CityInformation ("Paris");
            Paris.AddAttraction ("Eiffel Tower", "Is a wrought iron lattice tower on the Champ de Mars in Paris, France.", "EiffelTower");
            Paris.AddAttraction ("Musée du Louvre", "is one of the world's largest museums and a historic monument in Paris, France.", "Louvre");
            Paris.AddAttraction ("Moulin Rouge", "French for 'Red Mill', is a cabaret in Paris, France.", "MoulinRouge");
            Paris.AddAttraction ("La Seine", "Is a 777-kilometre long river and an important commercial waterway within the Paris Basin.", "RiverSeine");
            Cities.Add (Paris);

            var SanFran = new CityInformation ("San Francisco");
            SanFran.AddAttraction ("Alcatraz Island", "Is located in the San Francisco Bay, 1.25 miles (2.01 km) offshore from San Francisco.", "Alcatraz");
            SanFran.AddAttraction ("Golden Gate Bridge", "Is a suspension bridge spanning the Golden Gate strait between San Francisco Bay and the Pacific Ocean", "GoldenGateBridge");
            SanFran.AddAttraction ("San Francisco", "Is the cultural, commercial, and financial center of Northern California.", "SanFrancisco");
            SanFran.AddAttraction ("Telegraph Hill", "Is primarily a residential area, much quieter than adjoining North Beach.", "TelegraphHill");
            Cities.Add (SanFran);

            var Houston = new CityInformation ("Houston");
            Houston.AddAttraction ("City Hall", "It was constructed in 1938-1939, and is located in Downtown Houston.", "CityHall");
            Houston.AddAttraction ("Houston", "Is the most populous city in Texas and the fourth most populous city in the US.", "Houston");
            Houston.AddAttraction ("Texas Longhorn", "Is a breed of cattle known for its characteristic horns, which can extend to over 6 ft.", "LonghornCattle");
            Houston.AddAttraction ("Saturn V Rocket", "was an American human-rated expendable rocket used by NASA between 1966 and 1973.", "Rocket");
            Cities.Add (Houston);
        }
        #endregion

        #region Override Methods
        public override UITableViewCell GetCell (UITableView tableView, Foundation.NSIndexPath indexPath)
        {
            // Get cell
            var cell = tableView.DequeueReusableCell (CellID) as AttractionTableCell;

            // Populate cell
            cell.Attraction = Cities [indexPath.Section].Attractions [indexPath.Row];

            // Return new cell
            return cell;
        }

        public override nint NumberOfSections (UITableView tableView)
        {
            // Return number of cities
            return Cities.Count;
        }

        public override nint RowsInSection (UITableView tableView, nint section)
        {
            // Return the number of attractions in the given city
            return Cities [(int)section].Attractions.Count;
        }

        public override string TitleForHeader (UITableView tableView, nint section)
        {
            // Get the name of the current city
            return Cities [(int)section].Name;
        }
        #endregion
    }
}
让我们详细了解类的几个部分。
首先,我们定义了一个常量来保存原型单元格的唯一标识符(这与前面在界面设计器中分配的标识符相同),添加了返回表视图控制器的快捷方式并为数据创建了存储:
const string CellID = "AttrCell";
public AttractionTableViewController Controller { get; set;}
public List<CityInformation> Cities { get; set;}
接下来,保存表视图控制器,然后在创建类时生成并填充数据源(使用上面定义的数据模型):
public AttractionTableDatasource (AttractionTableViewController controller)
{
    // Initialize
    this.Controller = controller;
    this.Cities = new List<CityInformation> ();
    PopulateCities ();
}
举例而言,PopulateCities 方法只是在内存中创建数据模型对象,但可以轻松地从真实应用中的数据库或 Web 服务读取这些对象:
public void PopulateCities ()
{
    // Clear existing
    Cities.Clear ();

    // Define cities and attractions
    var Paris = new CityInformation ("Paris");
    Paris.AddAttraction ("Eiffel Tower", "Is a wrought iron lattice tower on the Champ de Mars in Paris, France.", "EiffelTower");
    ...
}
NumberOfSections 方法返回表中的部分数:
public override nint NumberOfSections (UITableView tableView)
{
    // Return number of cities
    return Cities.Count;
}
对于普通样式的表视图,始终返回 1。
RowsInSection 方法返回当前部分中的行数:
public override nint RowsInSection (UITableView tableView, nint section)
{
    // Return the number of attractions in the given city
    return Cities [(int)section].Attractions.Count;
}
同样,对于普通表视图,将返回数据源中的总项数。
TitleForHeader 方法返回给定部分的标题:
public override string TitleForHeader (UITableView tableView, nint section)
{
    // Get the name of the current city
    return Cities [(int)section].Name;
}
对于普通表视图类型,标题将留空 ("")。
最后,根据表视图的请求使用 GetCell 方法创建并填充原型单元格:
public override UITableViewCell GetCell (UITableView tableView, Foundation.NSIndexPath indexPath)
{
    // Get cell
    var cell = tableView.DequeueReusableCell (CellID) as AttractionTableCell;

    // Populate cell
    cell.Attraction = Cities [indexPath.Section].Attractions [indexPath.Row];

    // Return new cell
    return cell;
}
有关使用 UITableViewDatasource 的详细信息,请参阅 Apple 的 UITableViewDatasource 文档。
表视图委托
每个表视图都需要一个委托 (UITableViewDelegate) 来响应表上的用户交互或其他系统事件。
对于上面给出的示例,请在“解决方案资源管理器”中右键单击“项目名称”,选择“添加”>“新文件...”,将文件命名为 AttractionTableDelegate,然后单击“新建”按钮创建该文件。 接下来,编辑 AttractionTableDelegate.cs 文件,使其如下所示:
using System;
using System.Collections.Generic;
using UIKit;

namespace tvTable
{
    public class AttractionTableDelegate : UITableViewDelegate
    {
        #region Computed Properties
        public AttractionTableViewController Controller { get; set;}
        #endregion

        #region Constructors
        public AttractionTableDelegate (AttractionTableViewController controller)
        {
            // Initializw
            this.Controller = controller;
        }
        #endregion

        #region Override Methods
        public override void RowSelected (UITableView tableView, Foundation.NSIndexPath indexPath)
        {
            var attraction = Controller.Datasource.Cities [indexPath.Section].Attractions [indexPath.Row];
            attraction.IsFavorite = (!attraction.IsFavorite);

            // Update UI
            Controller.TableView.ReloadData ();
        }

        public override bool CanFocusRow (UITableView tableView, Foundation.NSIndexPath indexPath)
        {
            // Inform caller of highlight change
            RaiseAttractionHighlighted (Controller.Datasource.Cities [indexPath.Section].Attractions [indexPath.Row]);
            return true;
        }
        #endregion

        #region Events
        public delegate void AttractionHighlightedDelegate (AttractionInformation attraction);
        public event AttractionHighlightedDelegate AttractionHighlighted;

        internal void RaiseAttractionHighlighted (AttractionInformation attraction)
        {
            // Inform caller
            if (this.AttractionHighlighted != null) this.AttractionHighlighted (attraction);
        }
        #endregion
    }
}
让我们详细了解此类的几个部分。
首先,我们在创建类时将创建表视图控制器的快捷方式:
public AttractionTableViewController Controller { get; set;}
...

public AttractionTableDelegate (AttractionTableViewController controller)
{
    // Initialize
    this.Controller = controller;
}
然后,在选择一行(用户单击 Apple Remote 的触摸表面)时,我们希望将所选行代表的景点标记为收藏项目:
public override void RowSelected (UITableView tableView, Foundation.NSIndexPath indexPath)
{
    var attraction = Controller.Datasource.Cities [indexPath.Section].Attractions [indexPath.Row];
    attraction.IsFavorite = (!attraction.IsFavorite);

    // Update UI
    Controller.TableView.ReloadData ();
}
接下来,当用户突出显示一行(通过使用 Apple Remote 触摸表面为其提供焦点)时,我们希望在拆分视图控制器的“详细信息”部分显示该行所代表的景点的详细信息:
public override bool CanFocusRow (UITableView tableView, Foundation.NSIndexPath indexPath)
{
    // Inform caller of highlight change
    RaiseAttractionHighlighted (Controller.Datasource.Cities [indexPath.Section].Attractions [indexPath.Row]);
    return true;
}
...

public delegate void AttractionHighlightedDelegate (AttractionInformation attraction);
public event AttractionHighlightedDelegate AttractionHighlighted;

internal void RaiseAttractionHighlighted (AttractionInformation attraction)
{
    // Inform caller
    if (this.AttractionHighlighted != null) this.AttractionHighlighted (attraction);
}
对表视图中即将获得焦点的每一行调用 CanFocusRow 方法。 如果该行可以获得焦点,则返回 true,否则返回 false。 在此示例中,我们创建了一个自定义 AttractionHighlighted 事件,该事件将在每行接收焦点时引发。
有关使用 UITableViewDelegate 的详细信息,请参阅 Apple 的 UITableViewDelegate 文档。
表视图单元格
对于在界面设计器中添加到表视图的每个原型单元格,你还创建了表视图单元格的自定义实例 (UITableViewCell),以便能够在创建新单元格(行)时填充该实例。
对于示例应用,请双击 AttractionTableCell.cs 文件将其打开,并如下所示对其进行编辑:
using System;
using Foundation;
using UIKit;

namespace tvTable
{
    public partial class AttractionTableCell : UITableViewCell
    {
        #region Private Variables
        private AttractionInformation _attraction = null;
        #endregion

        #region Computed Properties
        public AttractionInformation Attraction {
            get { return _attraction; }
            set {
                _attraction = value;
                UpdateUI ();
            }
        }
        #endregion

        #region Constructors
        public AttractionTableCell (IntPtr handle) : base (handle)
        {
        }
        #endregion

        #region Private Methods
        private void UpdateUI ()
        {
            // Trap all errors
            try {
                Title.Text = Attraction.Name;
                Favorite.Hidden = (!Attraction.IsFavorite);
            } catch {
                // Since the UI might not be fully loaded, ignore
                // all errors at this point
            }
        }
        #endregion
    }
}
此类为给定行中显示的景点数据模型对象(上面定义的 AttractionInformation)提供存储:
private AttractionInformation _attraction = null;
...

public AttractionInformation Attraction {
    get { return _attraction; }
    set {
        _attraction = value;
        UpdateUI ();
    }
}
UpdateUI 方法根据需要填充 UI 小组件(已添加到界面设计器中的单元格原型中):
private void UpdateUI ()
{
    // Trap all errors
    try {
        Title.Text = Attraction.Name;
        Favorite.Hidden = (!Attraction.IsFavorite);
    } catch {
        // Since the UI might not be fully loaded, ignore
        // all errors at this point
    }
}
有关使用 UITableViewCell 的详细信息,请参阅 Apple 的 UITableViewCell 文档。
表视图控制器
表视图控制器 (UITableViewController) 管理已通过界面设计器添加到情节提要的表视图。
对于示例应用,请双击 AttractionTableViewController.cs 文件将其打开,并如下所示对其进行编辑:
using System;
using Foundation;
using UIKit;

namespace tvTable
{
    public partial class AttractionTableViewController : UITableViewController
    {
        #region Computed Properties
        public AttractionTableDatasource Datasource {
            get { return TableView.DataSource as AttractionTableDatasource; }
        }

        public AttractionTableDelegate TableDelegate {
            get { return TableView.Delegate as AttractionTableDelegate; }
        }
        #endregion

        #region Constructors
        public AttractionTableViewController (IntPtr handle) : base (handle)
        {
        }
        #endregion

        #region Override Methods
        public override void ViewDidLoad ()
        {
            base.ViewDidLoad ();

            // Setup table
            TableView.DataSource = new AttractionTableDatasource (this);
            TableView.Delegate = new AttractionTableDelegate (this);
            TableView.ReloadData ();
        }
        #endregion
    }
}
我们来详细了解此类。 首先,我们创建了快捷方式,以便更轻松地访问表视图的 DataSource 和 TableDelegate。 稍后我们将使用它们在拆分视图左侧的表视图和右侧的详细信息视图之间通信。
最后,当表视图加载到内存中时,我们将创建 AttractionTableDatasource 和 AttractionTableDelegate(均已在上面创建)的实例,并将其附加到表视图。
有关使用 UITableViewController 的详细信息,请参阅 Apple 的 UITableViewController 文档。
将所有元素整合到一起
如本文档开头所述,表视图通常作为导航显示在拆分视图的一侧,而所选项的详细信息显示在另一侧。 例如:
由于这是 tvOS 中的标准模式,因此让我们了解将所有元素组合在一起并使拆分视图的左侧和右侧相互交互的最终步骤。
详细信息视图
对于上面所示的旅行应用示例,为拆分视图右侧显示为详细信息视图的标准视图控制器定义了自定义类 (AttractionViewController):
using System;
using Foundation;
using UIKit;

namespace tvTable
{
    public partial class AttractionViewController : UIViewController
    {
        #region Private Variables
        private AttractionInformation _attraction = null;
        #endregion

        #region Computed Properties
        public AttractionInformation Attraction {
            get { return _attraction; }
            set {
                _attraction = value;
                UpdateUI ();
            }
        }

        public MasterSplitView SplitView { get; set;}
        #endregion

        #region Constructors
        public AttractionViewController (IntPtr handle) : base (handle)
        {
        }
        #endregion

        #region Public Methods
        public void UpdateUI ()
        {
            // Trap all errors
            try {
                City.Text = Attraction.City.Name;
                Title.Text = Attraction.Name;
                SubTitle.Text = Attraction.Description;

                IsFlighBooked.Hidden = (!Attraction.City.FlightBooked);
                IsFavorite.Hidden = (!Attraction.IsFavorite);
                IsDirections.Hidden = (!Attraction.AddDirections);
                BackgroundImage.Image = UIImage.FromBundle (Attraction.ImageName);
                AttractionImage.Image = BackgroundImage.Image;
            } catch {
                // Since the UI might not be fully loaded, ignore
                // all errors at this point
            }
        }
        #endregion

        #region Override Methods
        public override void ViewWillAppear (bool animated)
        {
            base.ViewWillAppear (animated);

            // Ensure the UI Updates
            UpdateUI ();
        }
        #endregion

        #region Actions
        partial void BookFlight (NSObject sender)
        {
            // Ask user to book flight
            AlertViewController.PresentOKCancelAlert ("Book Flight",
                                                      string.Format ("Would you like to book a flight to {0}?", Attraction.City.Name),
                                                      this,
                                                      (ok) => {
                Attraction.City.FlightBooked = ok;
                IsFlighBooked.Hidden = (!Attraction.City.FlightBooked);
            });
        }

        partial void GetDirections (NSObject sender)
        {
            // Ask user to add directions
            AlertViewController.PresentOKCancelAlert ("Add Directions",
                                                     string.Format ("Would you like to add directions to {0} to you itinerary?", Attraction.Name),
                                                     this,
                                                     (ok) => {
                                                         Attraction.AddDirections = ok;
                                                         IsDirections.Hidden = (!Attraction.AddDirections);
                                                     });
        }

        partial void MarkFavorite (NSObject sender)
        {
            // Flip favorite state
            Attraction.IsFavorite = (!Attraction.IsFavorite);
            IsFavorite.Hidden = (!Attraction.IsFavorite);

            // Reload table
            SplitView.Master.TableController.TableView.ReloadData ();
        }
        #endregion
    }
}
此处,我们提供了作为属性显示的景点 (AttractionInformation),并创建了一个 UpdateUI 方法来填充添加到界面设计器视图中的 UI 小组件。
我们还定义了返回拆分视图控制器 (SplitView) 的快捷方式,用于将更改传达回表视图 (AcctractionTableView)。
最后,已将自定义操作(事件)添加到界面设计器中创建的三个 UIButton 实例,使用户能够将某个景点标记为收藏项目,获取前往某个景点的路线,并预订飞往指定城市的航班。
导航视图控制器
由于表视图控制器嵌套在拆分视图左侧的导航视图控制器中,因此在界面设计器中为导航视图控制器分配了一个自定义类 (MasterNavigationController),定义如下:
using System;
using Foundation;
using UIKit;

namespace tvTable
{
    public partial class MasterNavigationController : UINavigationController
    {
        #region Computed Properties
        public MasterSplitView SplitView { get; set;}
        public AttractionTableViewController TableController {
            get { return TopViewController as AttractionTableViewController; }
        }
        #endregion

        #region Constructors
        public MasterNavigationController (IntPtr handle) : base (handle)
        {
        }
        #endregion
    }
}
同样,此类仅定义了少量几个快捷方式,以便更轻松地在拆分视图控制器的两端通信:
SplitView- 是导航视图控制器所属的拆分视图控制器 (MainSpiltViewController) 的链接。TableController- 获取在导航视图控制器中显示为顶部视图的表视图控制器 (AttractionTableViewController)。
拆分视图控制器
由于拆分视图控制器是应用程序的基础,因此我们在界面设计器中为其创建了一个自定义类 (MasterSplitViewController),并将其定义如下:
using System;
using Foundation;
using UIKit;

namespace tvTable
{
    public partial class MasterSplitView : UISplitViewController
    {
        #region Computed Properties
        public AttractionViewController Details {
            get { return ViewControllers [1] as AttractionViewController; }
        }

        public MasterNavigationController Master {
            get { return ViewControllers [0] as MasterNavigationController; }
        }
        #endregion

        #region Constructors
        public MasterSplitView (IntPtr handle) : base (handle)
        {
        }
        #endregion

        #region Override Methods
        public override void ViewDidLoad ()
        {
            base.ViewDidLoad ();

            // Initialize
            Master.SplitView = this;
            Details.SplitView = this;

            // Wire-up events
            Master.TableController.TableDelegate.AttractionHighlighted += (attraction) => {
                // Display new attraction
                Details.Attraction = attraction;
            };
        }
        #endregion
    }
}
首先,我们创建拆分视图的“详细信息”端 (AttractionViewController) 和“主控”端 (MasterNavigationController) 的快捷方式。 同样,这使得以后可以更轻松地在两端之间通信。
接下来,当拆分视图加载到内存中时,我们将拆分视图控制器附加到拆分视图的两端,并通过在拆分视图的“详细信息”端显示新景点,来响应用户在表视图 (AttractionHighlighted) 中突出显示景点的操作。
表视图细节
由于 tvOS 基于 iOS,因此表视图和表视图控制器的设计和行为方式类似。 有关在 Xamarin 应用中使用表视图的更多详细信息,请参阅适用于 iOS 的使用表和单元格文档。
总结
本文介绍了如何设计和使用 Xamarin.tvOS 应用中的表视图。 其中还演示了在拆分视图内使用表视图的示例,这是 tvOS 应用中表视图的典型用法。