在 Xamarin.iOS 中显示警报
从 iOS 8 开始,UIAlertController 已完成替换的 UIActionSheet 和 UIAlertView,这两者现已弃用。
与它替换的类不同,这些类是 UIView 的子类,UIAlertController 是 UIViewController 的子类。
使用UIAlertControllerStyle指示要显示的警报类型。 这些警报类型包括:
- UIAlertControllerStyleActionSheet
- iOS 8 之前,这会是 UIActionSheet
- UIAlertControllerStyleAlert
- iOS 8 之前,这会是 UIAlertView
创建警报控制器时需要执行三个步骤:
使用以下内容创建和配置警报:
- title
- message
- preferredStyle
(可选)添加文本字段
添加所需操作
显示视图控制器
最简单的警报包含单个按钮,如以下屏幕截图所示:
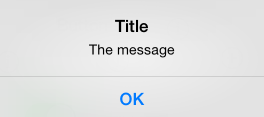
显示简单警报的代码如下所示:
okayButton.TouchUpInside += (sender, e) => {

    //Create Alert
    var okAlertController = UIAlertController.Create ("Title", "The message", UIAlertControllerStyle.Alert);

    //Add Action
    okAlertController.AddAction (UIAlertAction.Create ("OK", UIAlertActionStyle.Default, null));

    // Present Alert
    PresentViewController (okAlertController, true, null);
};
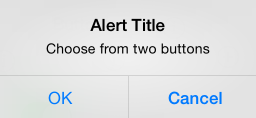
已以类似方式显示具有多个选项的警报,但添加两个操作。 例如,以下屏幕截图显示了包含两个按钮的警报:
okayCancelButton.TouchUpInside += ((sender, e) => {

    //Create Alert
    var okCancelAlertController = UIAlertController.Create("Alert Title", "Choose from two buttons", UIAlertControllerStyle.Alert);

    //Add Actions
    okCancelAlertController.AddAction(UIAlertAction.Create("OK", UIAlertActionStyle.Default, alert => Console.WriteLine ("Okay was clicked")));
    okCancelAlertController.AddAction(UIAlertAction.Create("Cancel", UIAlertActionStyle.Cancel, alert => Console.WriteLine ("Cancel was clicked")));

    //Present Alert
    PresentViewController(okCancelAlertController, true, null);
});
警报还可以显示操作表,类似于下面的屏幕截图:
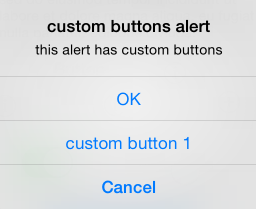
使用AddAction方法将按钮添加到警报:
actionSheetButton.TouchUpInside += ((sender, e) => {

    // Create a new Alert Controller
    UIAlertController actionSheetAlert = UIAlertController.Create("Action Sheet", "Select an item from below", UIAlertControllerStyle.ActionSheet);

    // Add Actions
    actionSheetAlert.AddAction(UIAlertAction.Create("OK",UIAlertActionStyle.Default, (action) => Console.WriteLine ("Item One pressed.")));

    actionSheetAlert.AddAction(UIAlertAction.Create("custom button 1",UIAlertActionStyle.Default, (action) => Console.WriteLine ("Item Two pressed.")));

    actionSheetAlert.AddAction(UIAlertAction.Create("Cancel",UIAlertActionStyle.Cancel, (action) => Console.WriteLine ("Cancel button pressed.")));

    // Required for iPad - You must specify a source for the Action Sheet since it is
    // displayed as a popover
    UIPopoverPresentationController presentationPopover = actionSheetAlert.PopoverPresentationController;
    if (presentationPopover!=null) {
        presentationPopover.SourceView = this.View;
        presentationPopover.PermittedArrowDirections = UIPopoverArrowDirection.Up;
    }

    // Display the alert
    this.PresentViewController(actionSheetAlert,true,null);
});