Xamarin.iOS 中的注释和覆盖
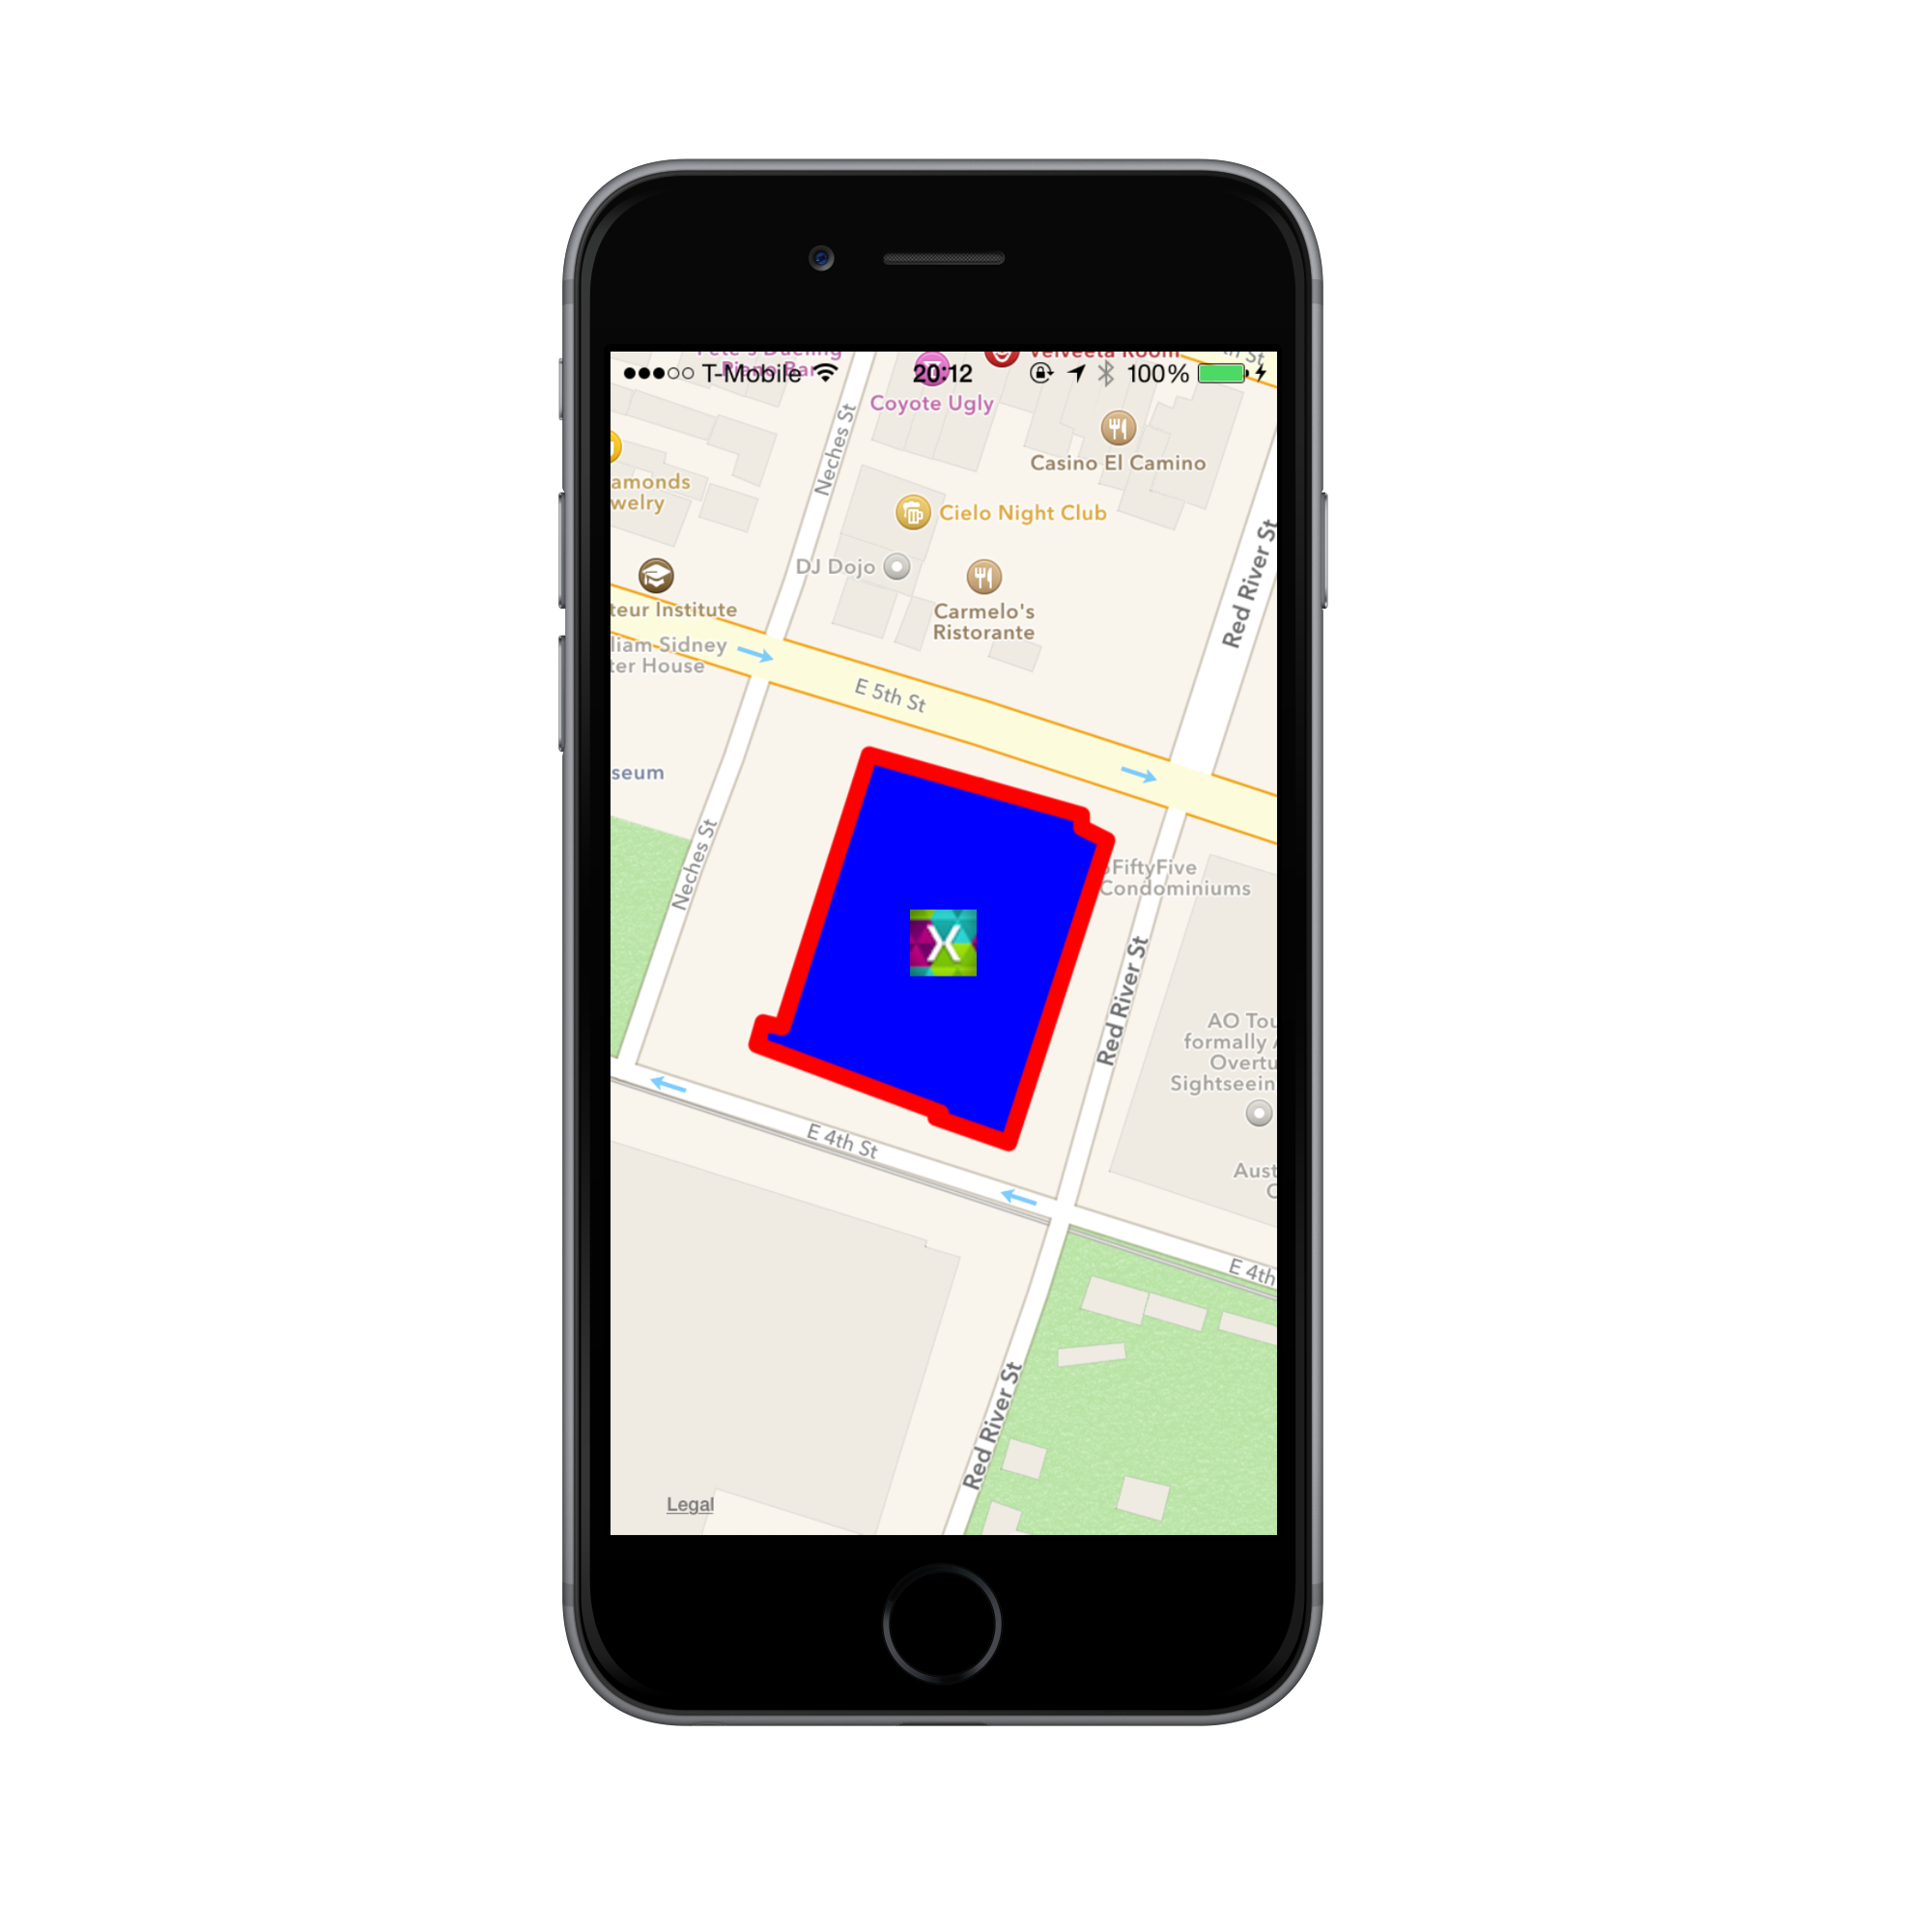
我们将在本演练中生成的应用程序如下所示:
让我们首先创建一个新的 iOS 空项目,并为其提供相关名称。 首先,将代码添加到视图控制器以显示 MapView,然后为 MapDelegate 和自定义注释创建新类。 为此,请按照以下步骤进行操作:
ViewController
将以下命名空间添加到
ViewController:using MapKit; using CoreLocation; using UIKit using CoreGraphics将
MKMapView实例变量以及MapDelegate实例添加到类。 我们将马上创建MapDelegate:public partial class ViewController : UIViewController { MKMapView map; MapDelegate mapDelegate; ...在控制器的
LoadView方法中,添加一个MKMapView并将其设置为控制器的View属性:public override void LoadView () { map = new MKMapView (UIScreen.MainScreen.Bounds); View = map; }接下来,我们将添加代码以在 `ViewDidLoad` 方法中初始化地图。
在
ViewDidLoad中添加代码以设置地图类型,显示用户位置并允许缩放和平移:// change map type, show user location and allow zooming and panning map.MapType = MKMapType.Standard; map.ShowsUserLocation = true; map.ZoomEnabled = true; map.ScrollEnabled = true;接下来,添加代码以将地图居中并设置其区域:
double lat = 30.2652233534254;
double lon = -97.73815460962083;
CLLocationCoordinate2D mapCenter = new CLLocationCoordinate2D (lat, lon);
MKCoordinateRegion mapRegion = MKCoordinateRegion.FromDistance (mapCenter, 100, 100);
map.CenterCoordinate = mapCenter;
map.Region = mapRegion;
创建一个
MapDelegate的新实例并将其分配给MKMapView的Delegate。 同样,我们将马上实现MapDelegate:mapDelegate = new MapDelegate (); map.Delegate = mapDelegate;从 iOS 8 开始,应从你的用户请求授权以使用其位置,因此让我们将它添加到我们的示例。 首先,定义
CLLocationManager类级变量:CLLocationManager locationManager = new CLLocationManager();在
ViewDidLoad方法中,我们希望检查运行应用程序的设备是否正在使用 iOS 8,如果是,我们将在应用使用时请求授权:if (UIDevice.CurrentDevice.CheckSystemVersion(8,0)){ locationManager.RequestWhenInUseAuthorization (); }最后,我们需要编辑 Info.plist 文件,以告知用户请求其位置的原因。 在 Info.plist 的 Source 菜单中,添加以下键:
NSLocationWhenInUseUsageDescription以及字符串:
Maps Walkthrough Docs Sample。
ConferenceAnnotation.cs – 自定义注释的类
我们将对名为
ConferenceAnnotation的注释使用自定义类。 将以下类添加到项目:using System; using CoreLocation; using MapKit; namespace MapsWalkthrough { public class ConferenceAnnotation : MKAnnotation { string title; CLLocationCoordinate2D coord; public ConferenceAnnotation (string title, CLLocationCoordinate2D coord) { this.title = title; this.coord = coord; } public override string Title { get { return title; } } public override CLLocationCoordinate2D Coordinate { get { return coord; } } } }
ViewController - 添加注释和覆盖
有了
ConferenceAnnotation,我们就可以将它添加到地图。 回到ViewController的ViewDidLoad方法,在地图的中心坐标处添加注释:map.AddAnnotations (new ConferenceAnnotation ("Evolve Conference", mapCenter));我们还想有一个酒店的覆盖。 添加以下代码以使用所提供的酒店坐标创建
MKPolygon,然后通过调用AddOverlay将其添加到地图:// add an overlay of the hotel MKPolygon hotelOverlay = MKPolygon.FromCoordinates( new CLLocationCoordinate2D[]{ new CLLocationCoordinate2D(30.2649977168594, -97.73863627705), new CLLocationCoordinate2D(30.2648461170005, -97.7381627734755), new CLLocationCoordinate2D(30.2648355402574, -97.7381750192576), new CLLocationCoordinate2D(30.2647791309417, -97.7379872505988), new CLLocationCoordinate2D(30.2654525150319, -97.7377341711021), new CLLocationCoordinate2D(30.2654807195004, -97.7377994819399), new CLLocationCoordinate2D(30.2655089239607, -97.7377994819399), new CLLocationCoordinate2D(30.2656428950368, -97.738346460207), new CLLocationCoordinate2D(30.2650364981811, -97.7385709662122), new CLLocationCoordinate2D(30.2650470749025, -97.7386199493406) }); map.AddOverlay (hotelOverlay);
这将在 ViewDidLoad 中完成代码。 现在,我们需要实现 MapDelegate 类来分别处理注释和覆盖视图的创建。
MapDelegate
创建一个名为
MapDelegate的类,该类继承自MKMapViewDelegate并包含要用作注释的重用标识符的annotationId变量:class MapDelegate : MKMapViewDelegate { static string annotationId = "ConferenceAnnotation"; ... }此处只有一个注释,因此重用代码并非严格必要,但最好包含它。
实现
GetViewForAnnotation方法以使用本演练中包含的 conference.png 图像返回ConferenceAnnotation的视图:public override MKAnnotationView GetViewForAnnotation (MKMapView mapView, NSObject annotation) { MKAnnotationView annotationView = null; if (annotation is MKUserLocation) return null; if (annotation is ConferenceAnnotation) { // show conference annotation annotationView = mapView.DequeueReusableAnnotation (annotationId); if (annotationView == null) annotationView = new MKAnnotationView (annotation, annotationId); annotationView.Image = UIImage.FromFile ("images/conference.png"); annotationView.CanShowCallout = true; } return annotationView; }当用户点击注释时,我们希望显示一张展示奥斯汀市的图像。 将以下变量添加到
MapDelegate,使图像和视图显示它:UIImageView venueView; UIImage venueImage;接下来,为了在点击注释时显示图像,请按如下所示实现
DidSelectAnnotation方法:public override void DidSelectAnnotationView (MKMapView mapView, MKAnnotationView view) { // show an image view when the conference annotation view is selected if (view.Annotation is ConferenceAnnotation) { venueView = new UIImageView (); venueView.ContentMode = UIViewContentMode.ScaleAspectFit; venueImage = UIImage.FromFile ("image/venue.png"); venueView.Image = venueImage; view.AddSubview (venueView); UIView.Animate (0.4, () => { venueView.Frame = new CGRect (-75, -75, 200, 200); }); } }为了在用户通过点击地图上的任何其他位置来取消选择注释时隐藏图像,请实现
DidDeselectAnnotationView方法,如下所示:public override void DidDeselectAnnotationView (MKMapView mapView, MKAnnotationView view) { // remove the image view when the conference annotation is deselected if (view.Annotation is ConferenceAnnotation) { venueView.RemoveFromSuperview (); venueView.Dispose (); venueView = null; } }我们现在已准备好注释的代码。 剩下的就是将代码添加到
MapDelegate,为酒店覆盖创建视图。将以下
GetViewForOverlay的实现添加到MapDelegate:public override MKOverlayView GetViewForOverlay (MKMapView mapView, NSObject overlay) { // return a view for the polygon MKPolygon polygon = overlay as MKPolygon; MKPolygonView polygonView = new MKPolygonView (polygon); polygonView.FillColor = UIColor.Blue; polygonView.StrokeColor = UIColor.Red; return polygonView; }
运行该应用程序。 我们现在有一个具有自定义注释和覆盖的交互式地图! 点击注释,奥斯汀的图像随即显示,如下所示:
总结
本文介绍了如何向地图添加注释,以及如何为指定的多边形添加覆盖。 我们还演示了如何向注释添加触控支持,以在地图上以动画形式显示图片。

