使用 Visual Studio 连接服务添加 Azure Cache for Redis
在 Visual Studio 中,通过使用连接服务功能可将以下任何服务连接到 Azure Cache for Redis:
- .NET Framework 控制台应用
- ASP.NET 模型-视图-控制器 (MVC) (.NET Framework)
- ASP.NET Core
- .NET Core(包括控制台应用、WPF、Windows 窗体、类库)
- .NET Core 辅助角色
- Azure Functions
- 通用 Windows 平台应用
- Xamarin
- Cordova
连接服务功能可将所有需要的引用和连接代码添加到项目,并相应地修改配置文件。
注意
本主题适用于 Visual Studio Windows 版。 有关 Visual Studio for Mac,请参阅 Visual Studio for Mac 中连接服务。
先决条件
- 安装有 Azure 工作负荷的 Visual Studio。
- 一个受支持类型的项目
- 一个 Azure 帐户。 如果没有 Azure 帐户,请激活你的 Visual Studio 订阅者 Azure 权益或注册免费试用版。
使用连接服务连接到 Azure Cache for Redis
在 Visual Studio 中打开项目。
在解决方案资源管理器中,右键单击连接服务节点,并在上下文菜单中选择添加连接服务。
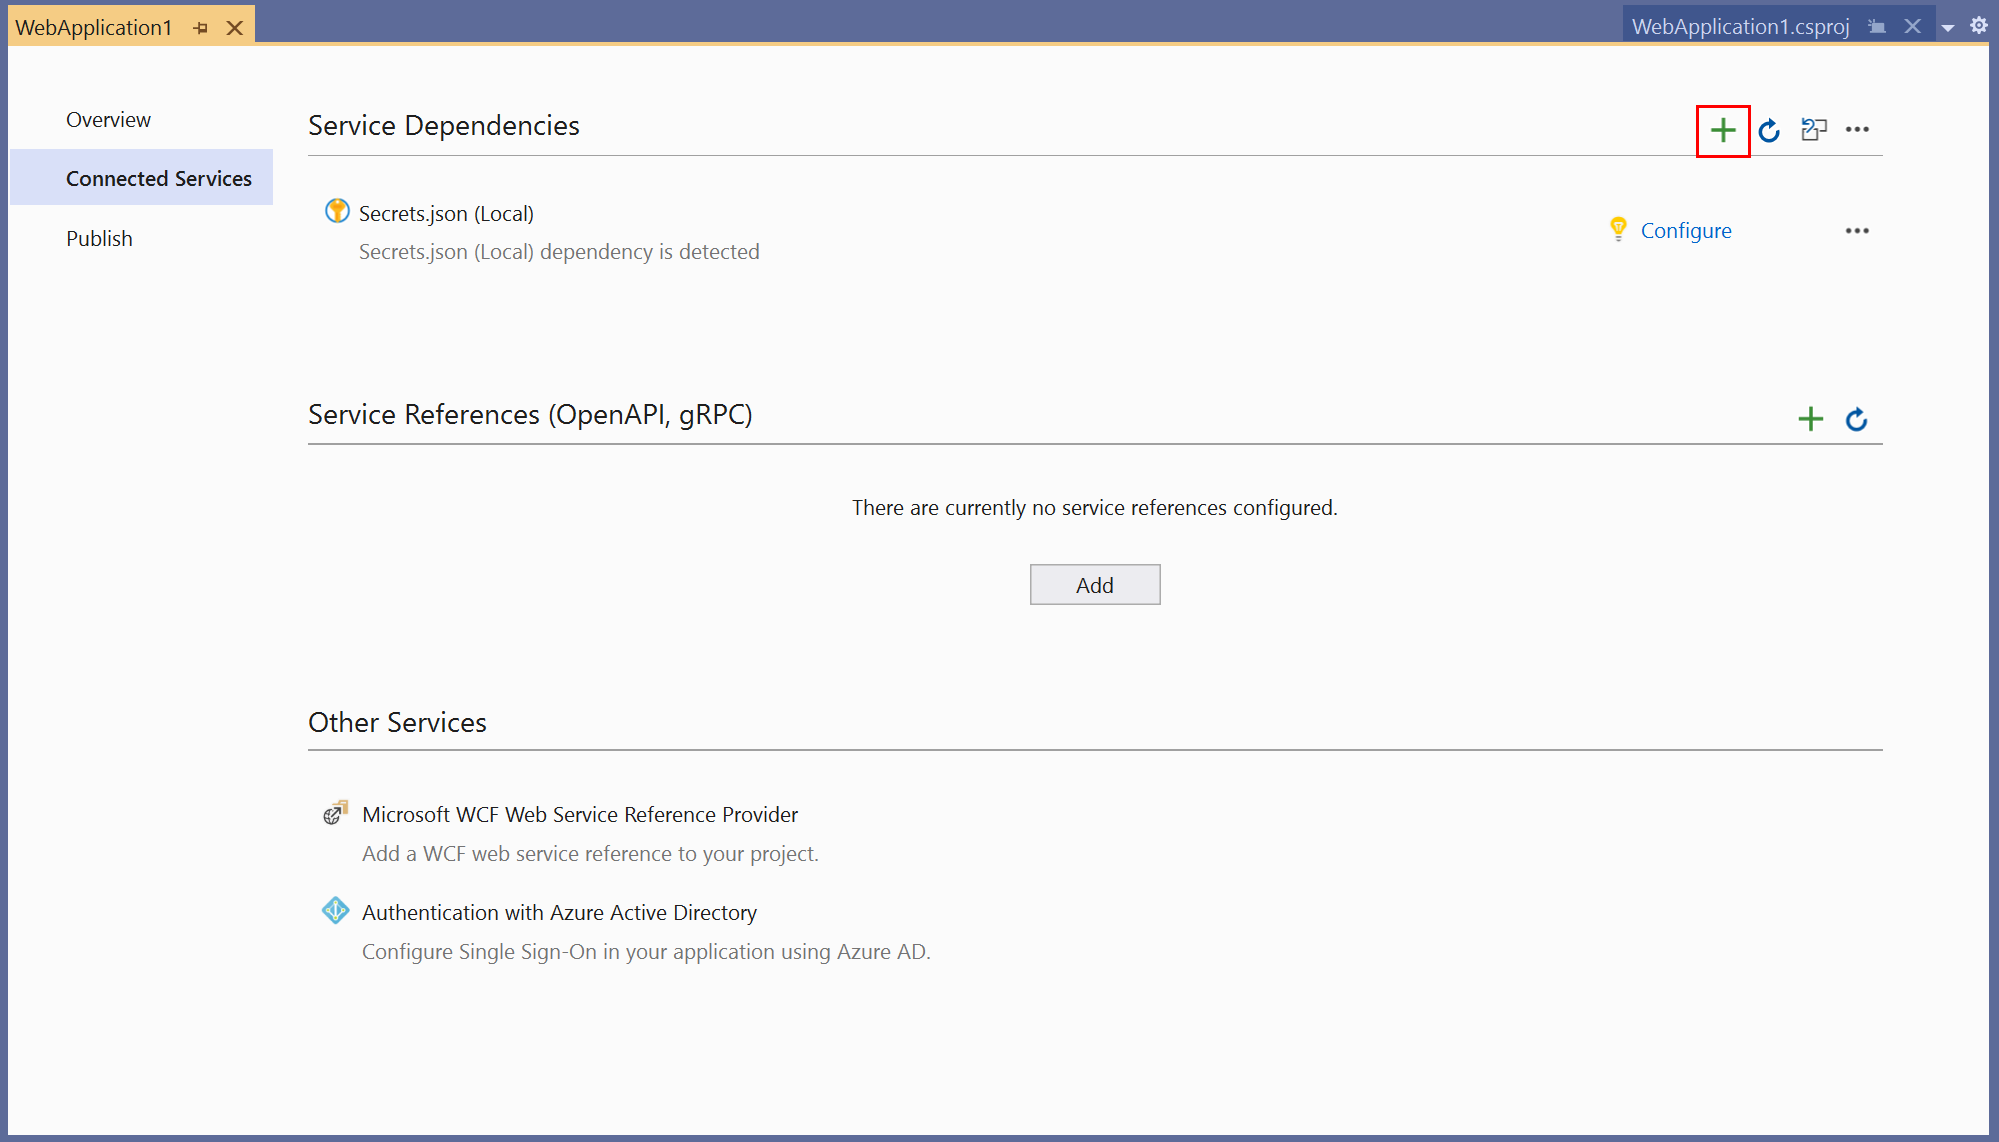
在连接服务选项卡中,选择服务依赖项的 + 图标。
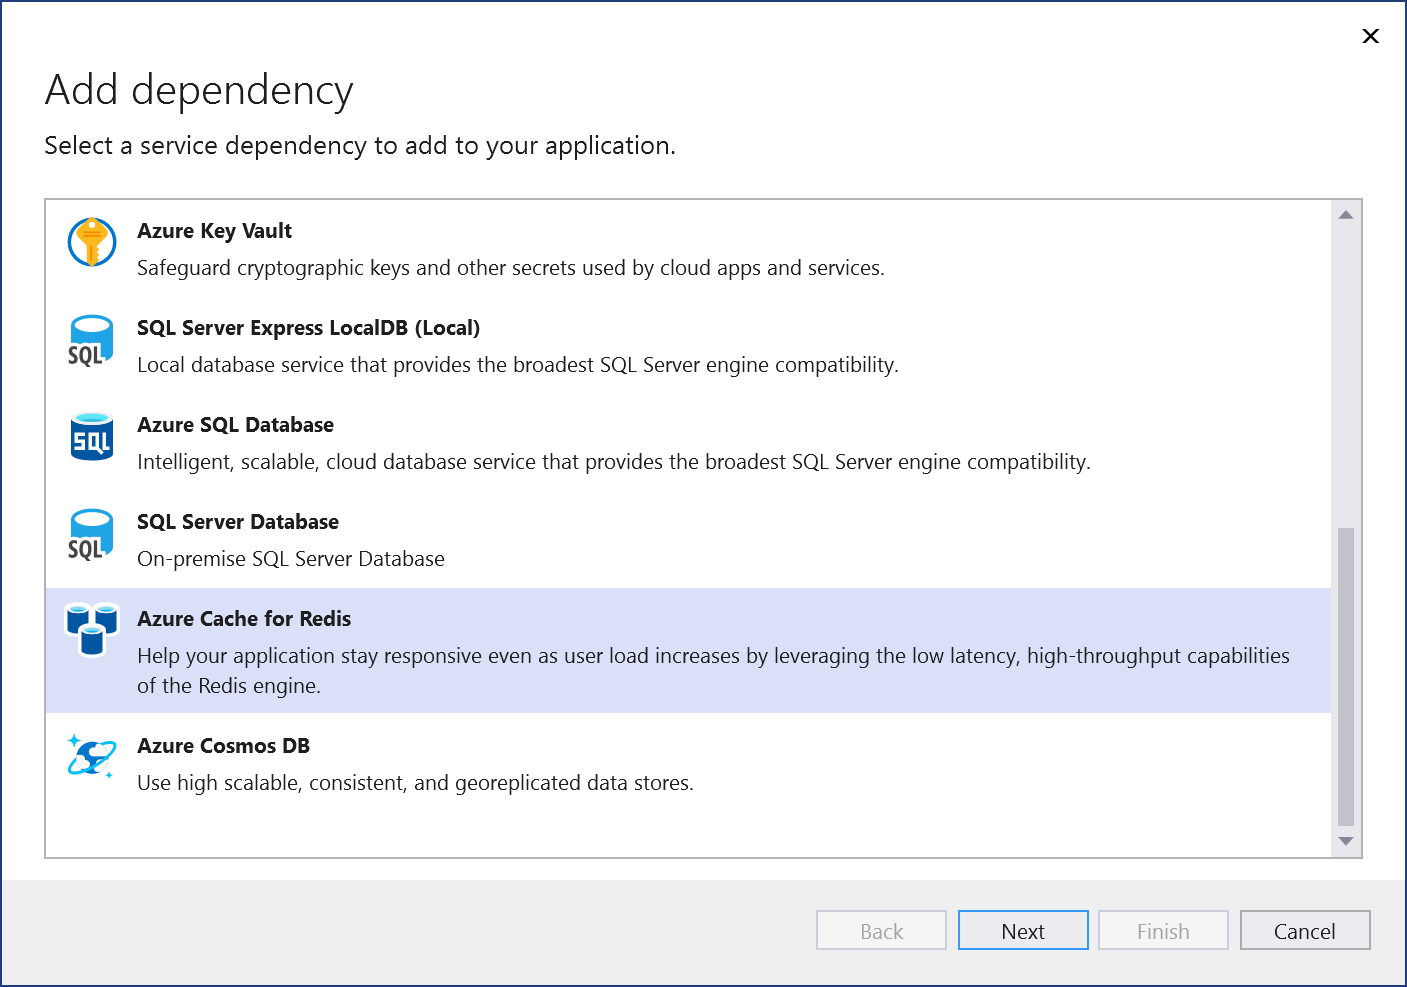
在添加依赖项页中,选择 Azure Cache for Redis。
如果还没有登录,请登录到 Azure 帐户。 如果没有 Azure 帐户,可以注册免费试用版。
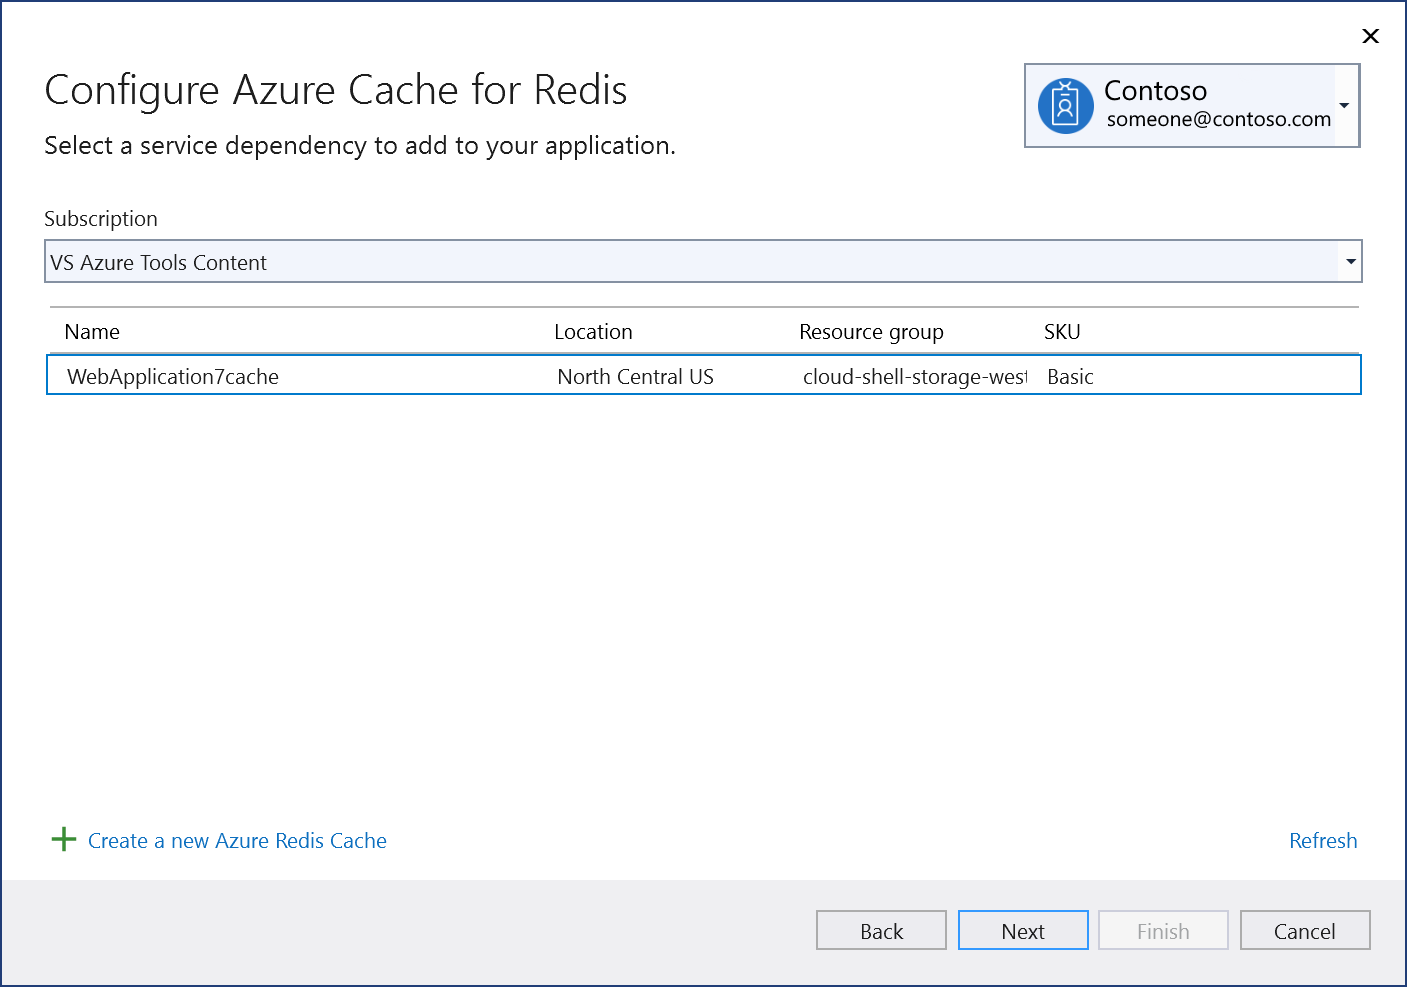
在配置 Azure Cache for Redis 屏幕中,选择现有 Azure Cache for Redis 组件,然后选择下一步。
如果需要创建新组件,请转到下一步。 否则,请跳到步骤 7。
若要创建 Azure Cache for Redis:
选择屏幕底部的创建新的 Azure Redis 缓存。
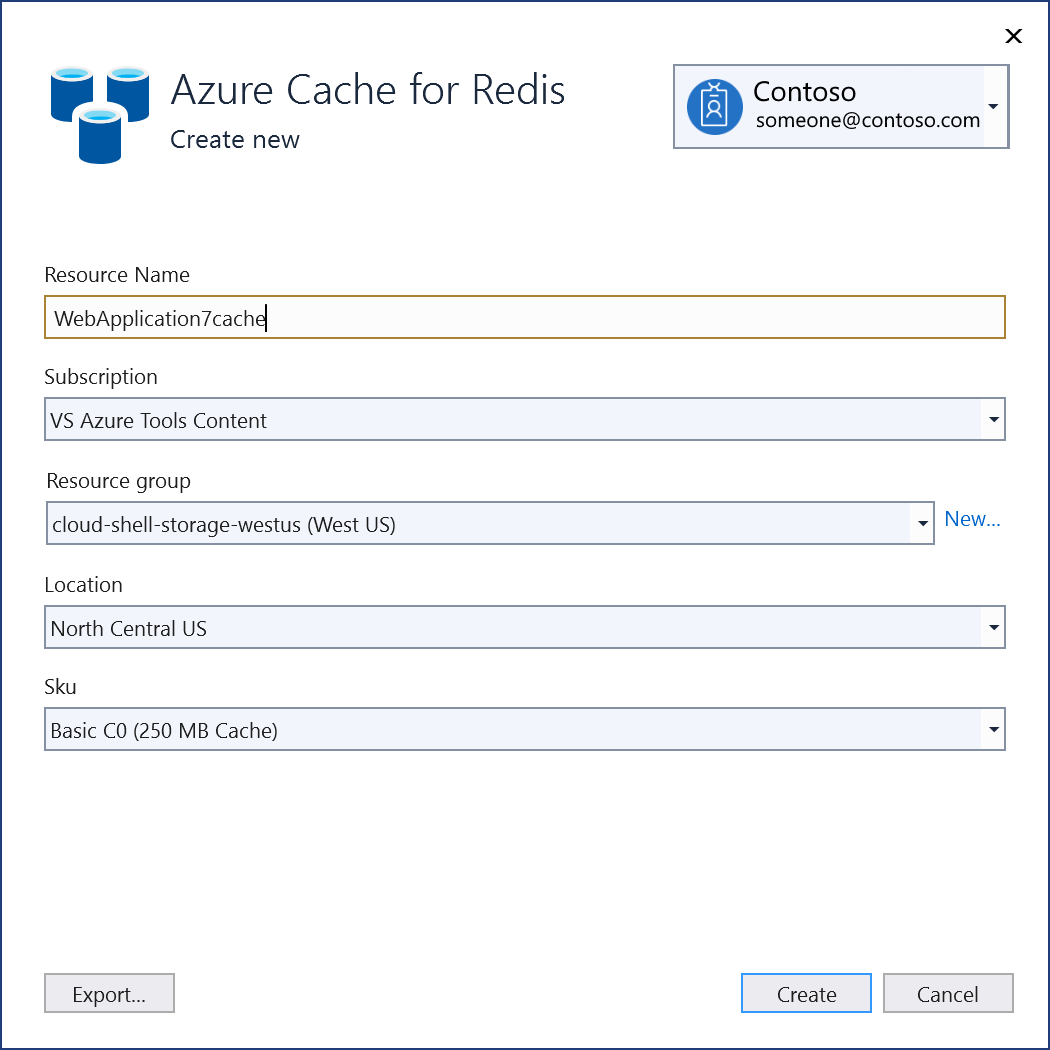
填写Azure Cache for Redis: 新建屏幕,然后选择创建。
当显示配置 Azure Cache for Redis 屏幕时,新数据库将出现在列表中。 在列表中选择新数据库,并选择下一步。
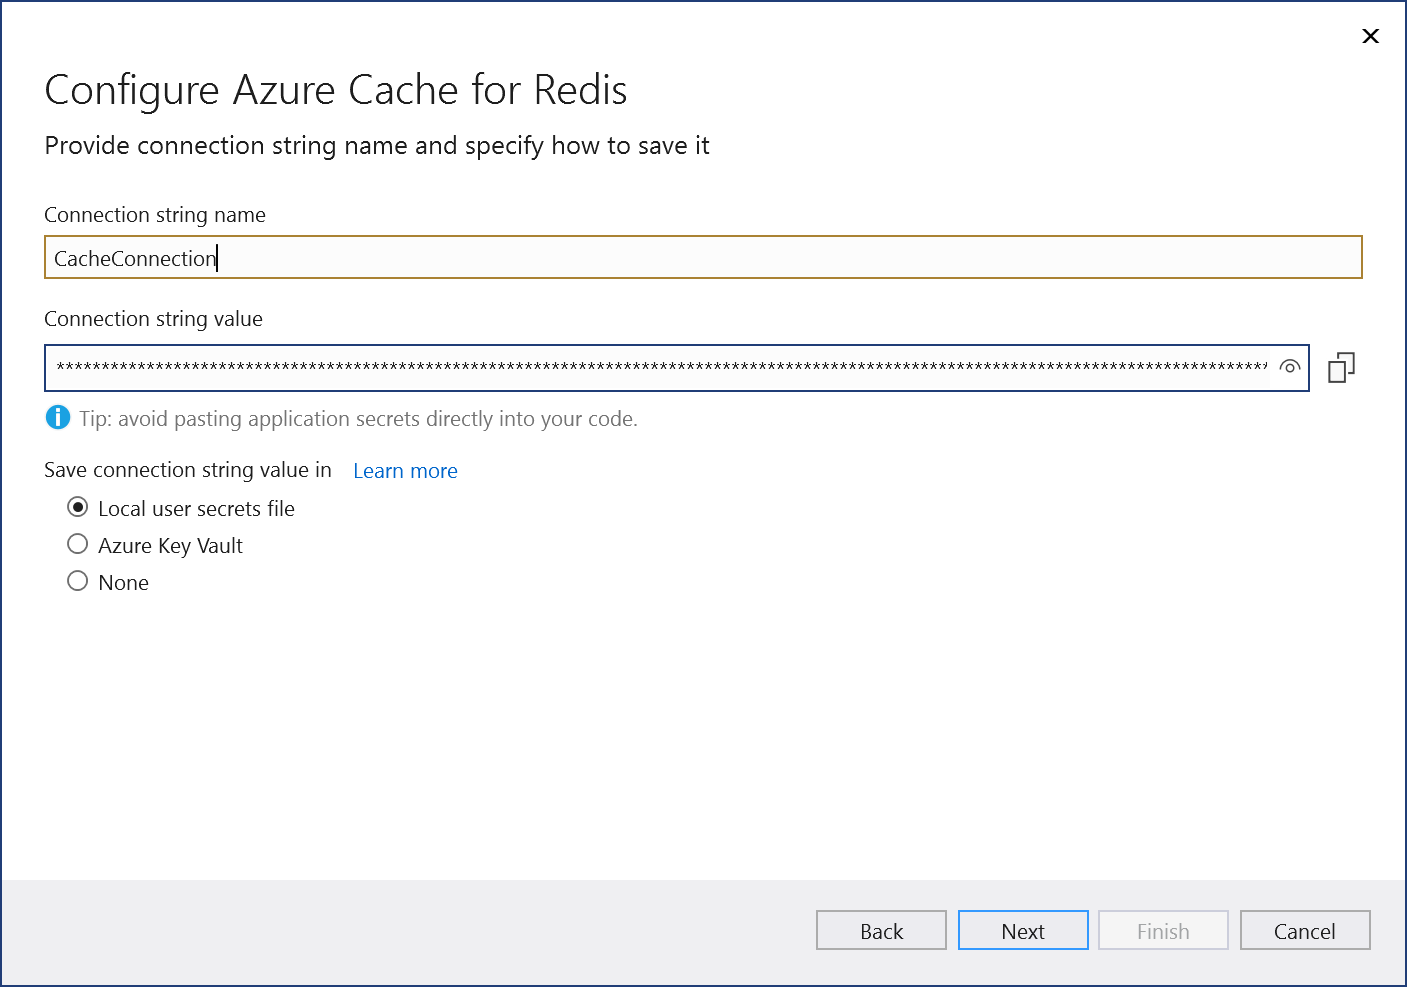
输入连接字符串名称或选择默认值,然后选择是希望连接字符串存储在本地机密文件中,还是存储在 Azure Key Vault 中。
更改摘要屏幕显示了在完成该过程后将对项目进行的所有修改。 如果更改看起来正常,请选择完成。

连接显示在连接服务选项卡的服务依赖项部分下。

注意
对于 .NET Framework 项目,连接的服务 UI 略有不同。 若要查看差异,请与此页面的 Visual Studio 2019 版本进行比较。
在 Visual Studio 中打开项目。
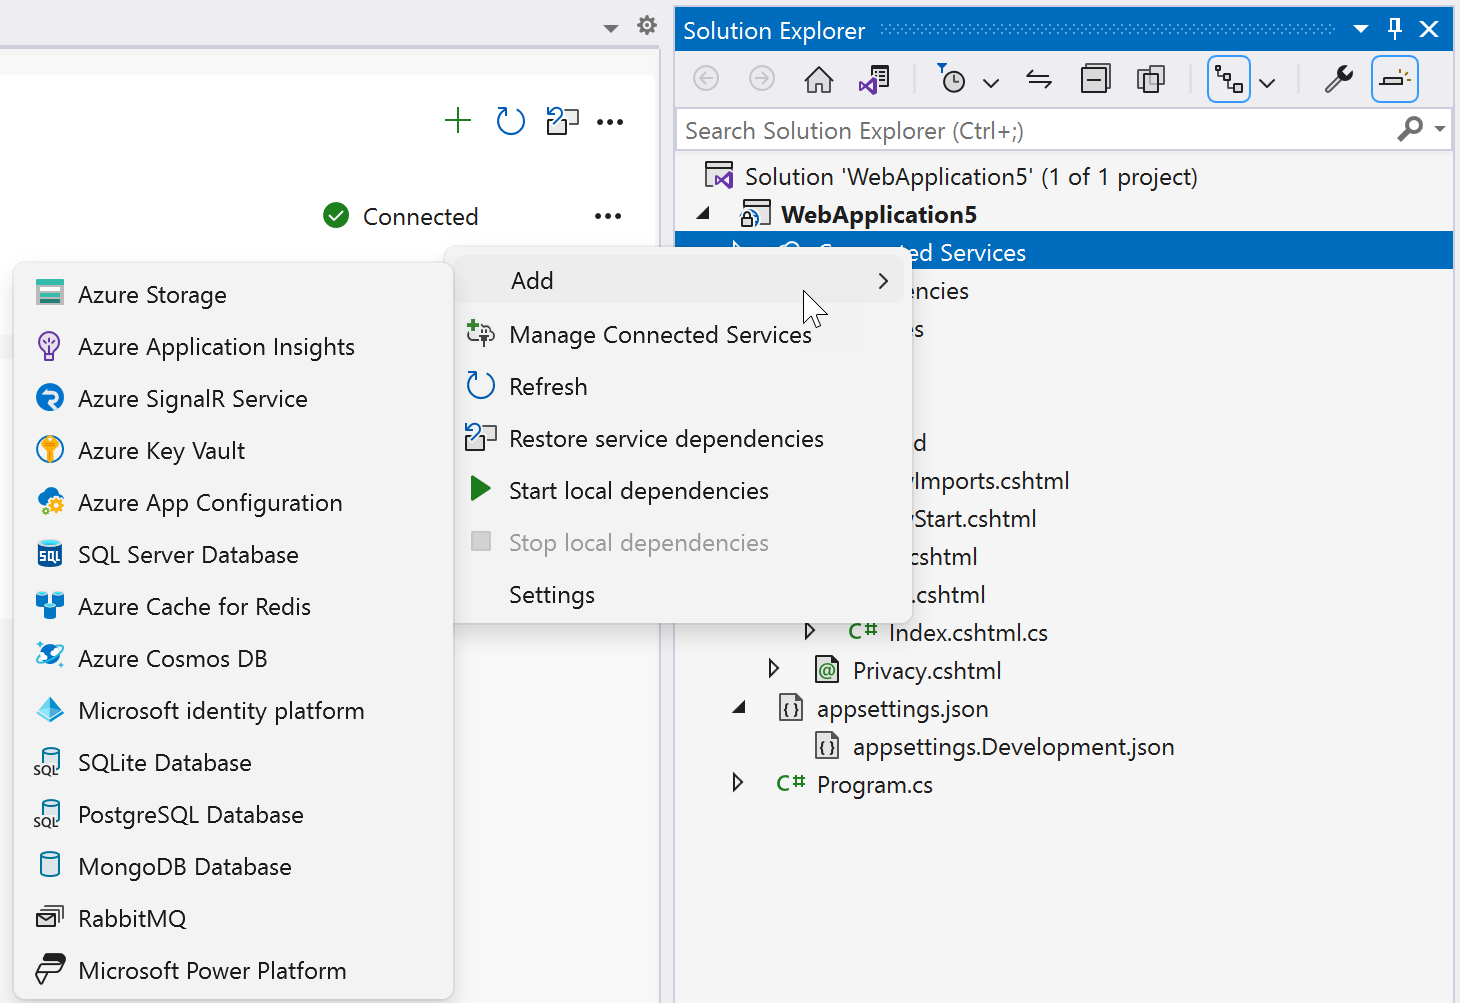
在解决方案资源管理器中,右键单击连接的服务节点,并在上下文菜单中选择添加,打开可用服务的菜单。
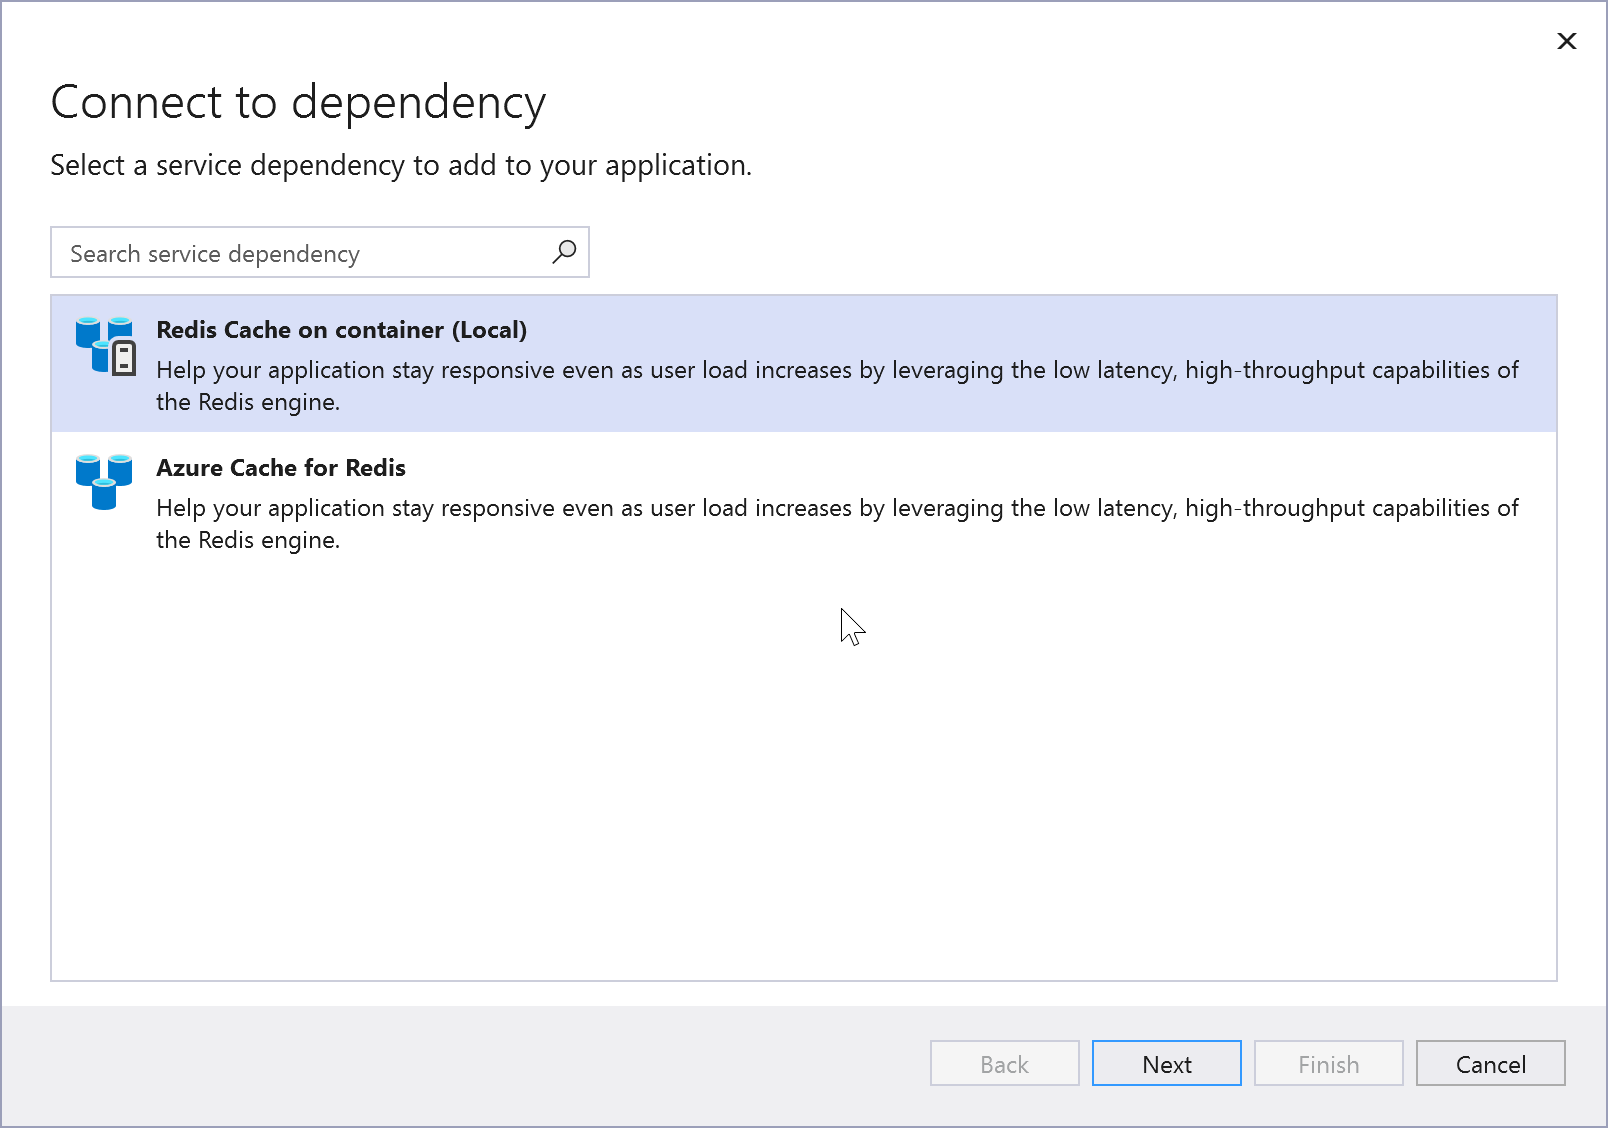
选择 Azure Cache for Redis。 随即显示连接到依赖项页。 应看到两个选项,一个用于本地模拟器,即容器上的 Redis 缓存(本地),另一个用于连接到实时 Azure Cache for Redis 服务。 可以从本地模拟器开始降低成本并简化早期开发。 稍后可以通过重复执行这些步骤并选择另一个选项来迁移到实时服务。
如果在本地选择 Azure Cache for Redis,则请单击下一步以进入连接到容器上的 Redis 缓存屏幕。
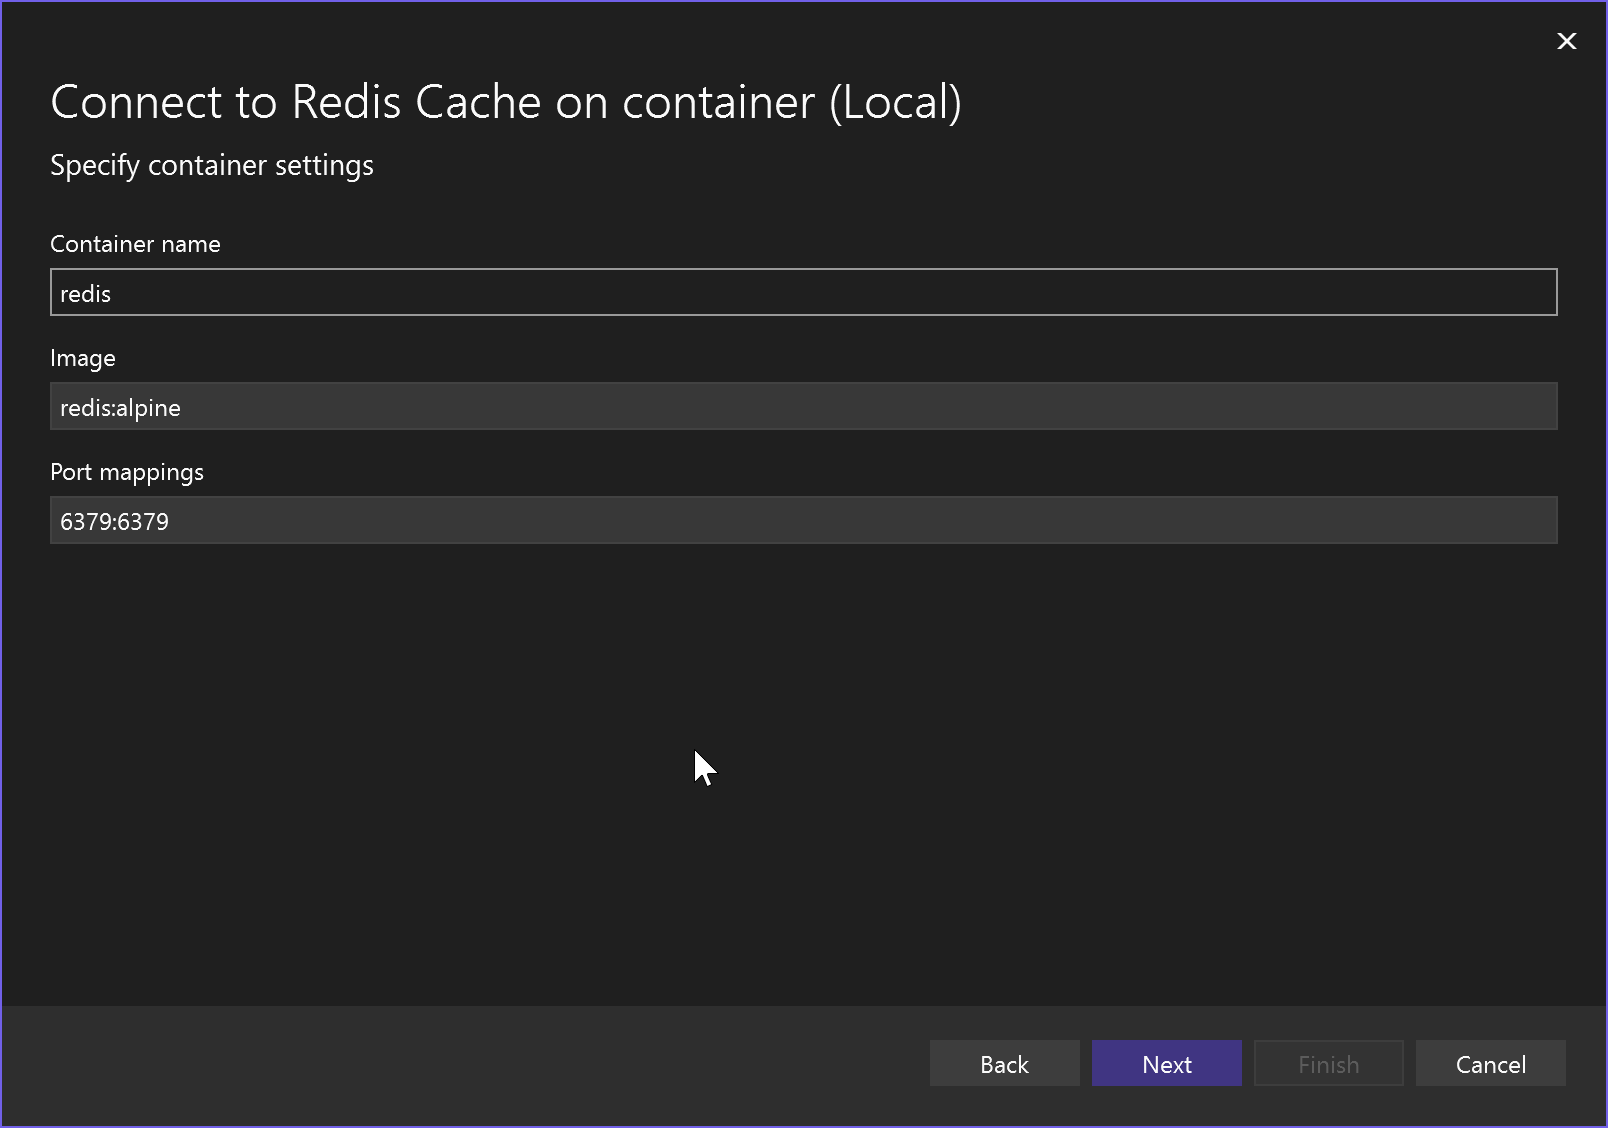
指定容器名称、容器映像和端口映射或接受默认值,然后单击下一步以查看更改摘要屏幕,其中显示了将对项目进行的更改。 NuGet 包引用和本地模拟器的连接代码被添加到项目中。
如果要连接到 Azure 服务,请继续执行下一步;如果尚未登录,请先登录到 Azure 帐户,然后再继续。 如果没有 Azure 帐户,可以注册免费试用版。
若要使用实时服务,请选择 Azure Cache for Redis。
如果还没有登录,请登录到 Azure 帐户。 如果没有 Azure 帐户,可以注册免费试用版。
在配置 Azure Cache for Redis 屏幕中,选择现有 Azure Cache for Redis 组件,然后选择下一步。
如果需要创建新组件,请转到下一步。 否则,请跳到步骤 7。
若要创建 Azure Cache for Redis:
选择屏幕底部的创建新的 Azure Redis 缓存。
填写Azure Cache for Redis: 新建屏幕,然后选择创建。
当显示配置 Azure Cache for Redis 屏幕时,新数据库将出现在列表中。 在列表中选择新数据库,并选择下一步。
输入连接字符串名称或选择默认值,然后选择是希望连接字符串存储在本地机密文件中,还是存储在 Azure Key Vault 中。
更改摘要屏幕显示了在完成该过程后将对项目进行的所有修改。 如果更改看起来正常,请选择完成。
在“解决方案资源管理器”中,双击连接的服务节点以打开连接的服务选项卡。连接显示在服务依赖项部分下:
如果单击添加的依赖项旁边的三个点,可以看到各种选项(例如连接)以重新打开向导并更改连接。 还可以单击窗口右上角的三个点,查看用于启动本地依赖项、更改设置等的选项。
后续步骤
对于 ASP.NET 应用,Azure Cache for Redis 的常见用例是缓存会话状态或页面输出(HTTP 响应)。 ASP.NET Core 为这些用例提供内置服务,应在使用 ASP.NET Core 时改用这些服务。
若要在 ASP.NET 应用中缓存会话状态,请参阅 ASP.NET 会话状态提供程序。
若要在 ASP.NET 应用中缓存页面输出,请参阅 ASP.NET 输出缓存提供程序。