教程:构建面向多个平台的简单照片查看器
创建入门级的简单照片查看器 WinUI 3 应用后,你可能想知道如何在不重写应用的情况下覆盖更多用户。 本教程使用 Uno Platform 扩大现有 C# WinUI 3 应用程序的覆盖范围,使业务逻辑和 UI 层能够在本机移动、Web 和桌面之间重复使用。 只需对简单照片查看器应用进行少量更改,即可运行移植到这些平台的应用的像素完美副本。

先决条件
设置开发计算机(请参阅 WinUI 入门)
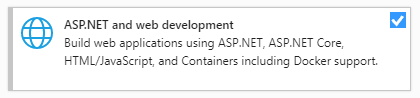
ASP.NET 和 Web 开发工作负载(适用于 WebAssembly 开发)
已安装 .NET Multi-Platform App UI 开发(适用于 iOS、Android、Mac Catalyst 开发)

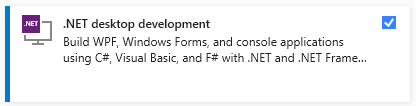
已安装 .NET 桌面开发(适用于 Gtk、Wpf 和 Linux Framebuffer 开发)
完成环境设置
打开命令行提示符 Windows 终端(如果已安装),或者从“开始”菜单中打开命令提示符或 Windows Powershell。
安装或更新
uno-check工具:使用以下命令:
dotnet tool install -g uno.check更新该工具(如果之前已安装旧版本):
dotnet tool update -g uno.check
使用以下命令运行该工具:
uno-check按照工具指示的说明进行操作。 由于它需要修改系统,系统可能会提示你需要提升的权限。
安装 Uno Platform 解决方案模板
启动 Visual Studio,然后单击 Continue without code。 在菜单栏中单击 Extensions ->Manage Extensions。

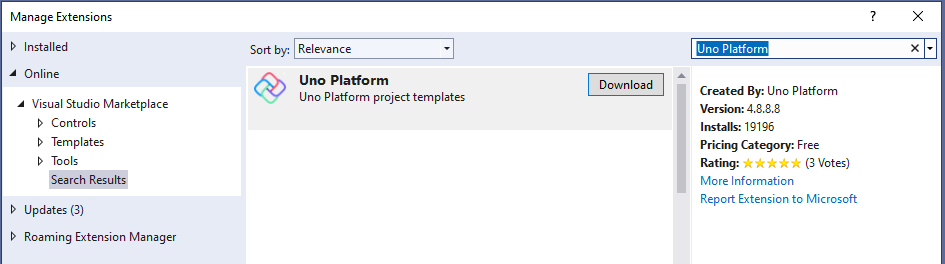
在扩展管理器中展开“联机”节点并搜索 Uno 来安装 Uno Platform 扩展,或从 Visual Studio Marketplace 下载并安装该扩展,然后重启 Visual Studio。
创建应用程序
现在我们已准备好创建多平台应用程序,将要采用的方法是创建新的 Uno Platform 应用程序。 我们会将上一教程的 SimplePhotos WinUI 3 项目中的代码复制到多平台项目中。 这是可行的,因为 Uno Platform 支持重复使用现有的代码库。 对于依赖于每个平台提供的 OS API 的功能,可随时间推移轻松使它们正常工作。 如果需要将现有应用程序移植到其他平台,此方法特别有用。
很快,你将能够从此方法中获益,因为你可通过熟悉的 XAML 风格和已有的代码库来面向更多平台。
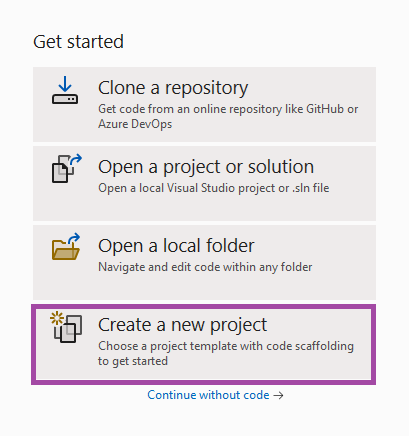
打开 Visual Studio 并通过 File>New>Project 新建项目:
搜索 Uno 并选择“Uno Platform 应用”项目模板:
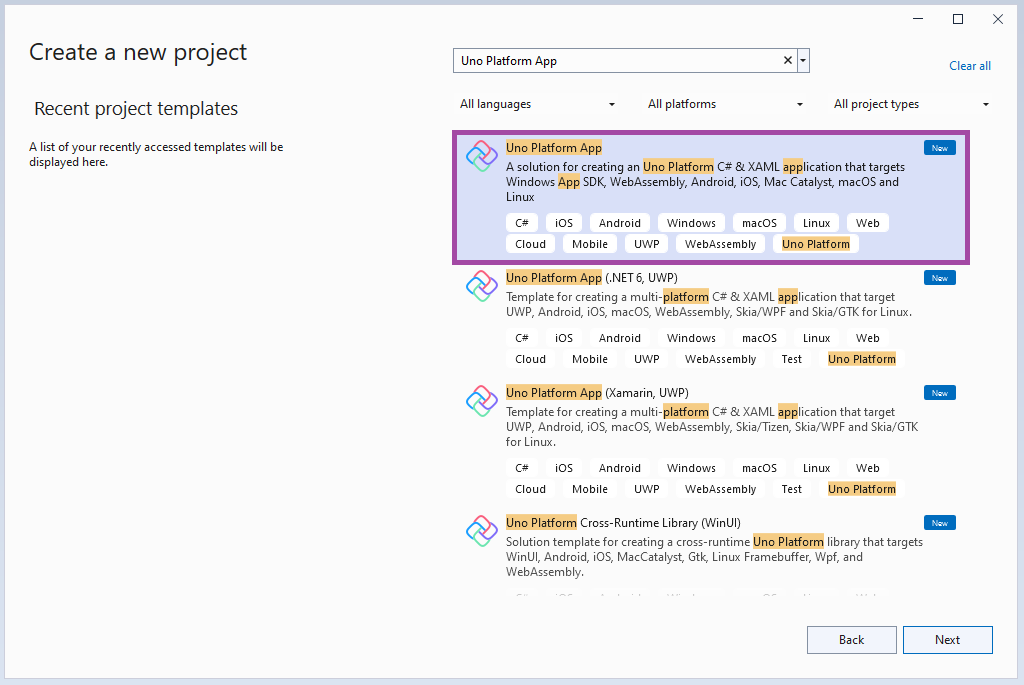
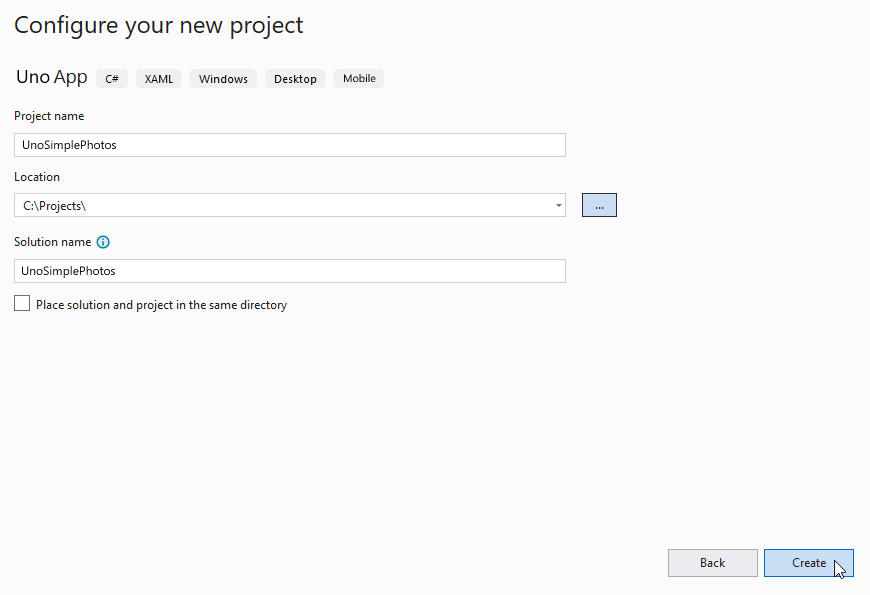
使用 Visual Studio 起始页中的“Uno Platform 应用”类型新建 C# 解决方案。 为了避免与上一教程中的代码冲突,我们将为此解决方案指定一个不同的名称,即“UnoSimplePhotos”。 指定项目名称、解决方案名称和目录。 在此示例中,我们的 UnoSimplePhotos 多平台项目属于 UnoSimplePhotos 解决方案,位于 C:\Projects 中:
现在你将选择一个基本模板使简单照片库应用程序实现多平台化。
“Uno Platform 应用”模板附带两个预设选项,可通过这两个选项快速开始使用“空白”解决方案或“默认”配置,“默认”配置包括对 Uno.Material 和 Uno.Toolkit 库的引用。 “默认”配置还包括用于依赖项注入、配置、导航和日志记录的 Uno.Extensions。 此外,它还使用 MVUX 代替 MVVM,使其成为快速生成真实应用程序的绝佳起点。
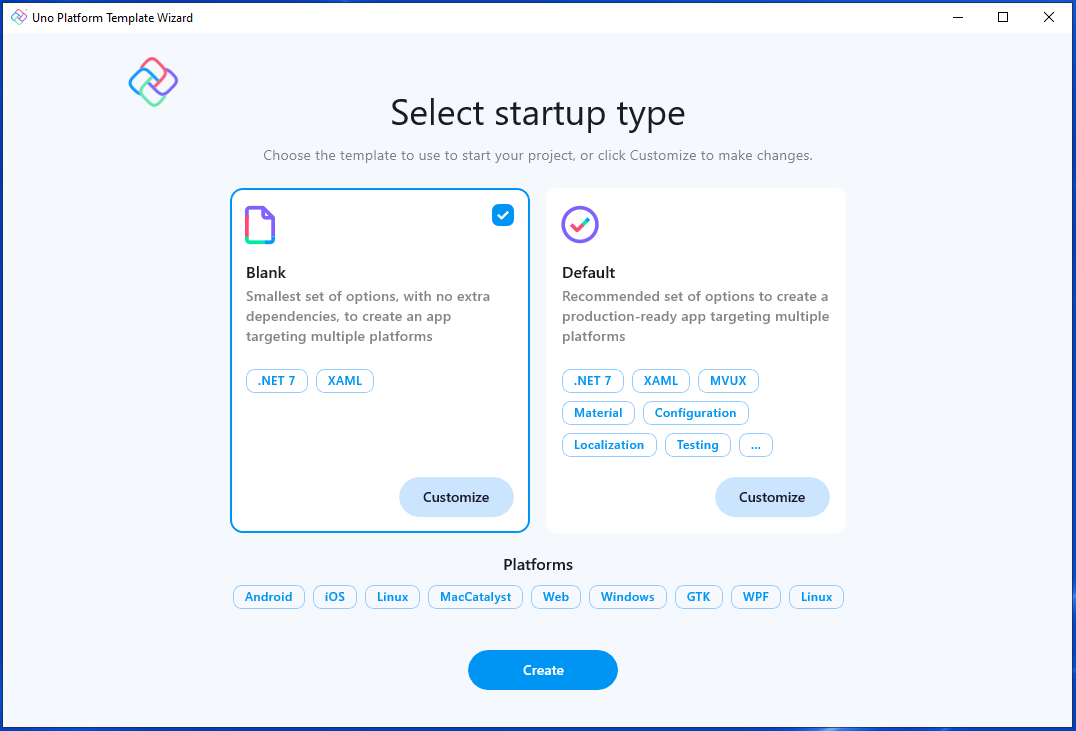
为简单起见,请选择“空白”预设。 然后单击“创建”按钮。 等待项目创建及其依赖项还原完成。
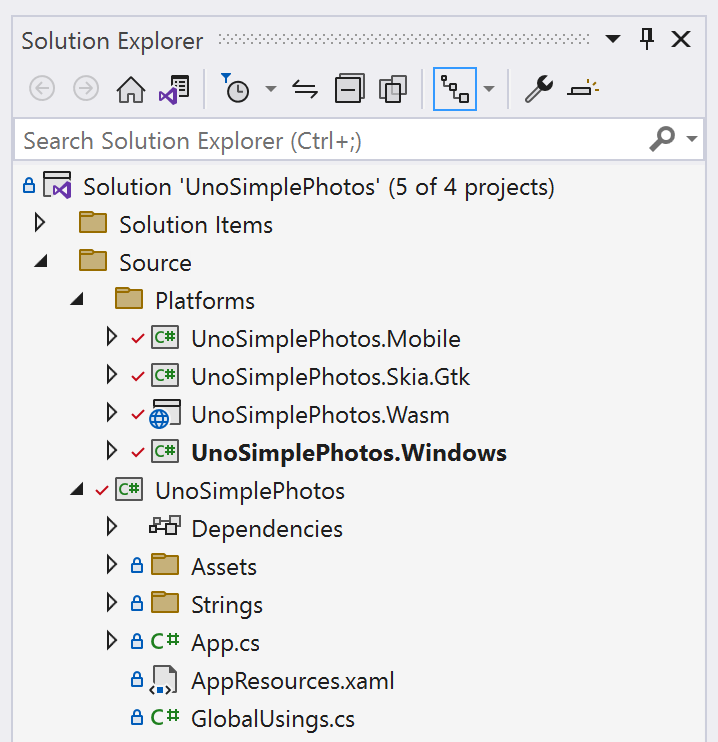
编辑器顶部的横幅可能要求重新加载项目,单击“重新加载项目”:

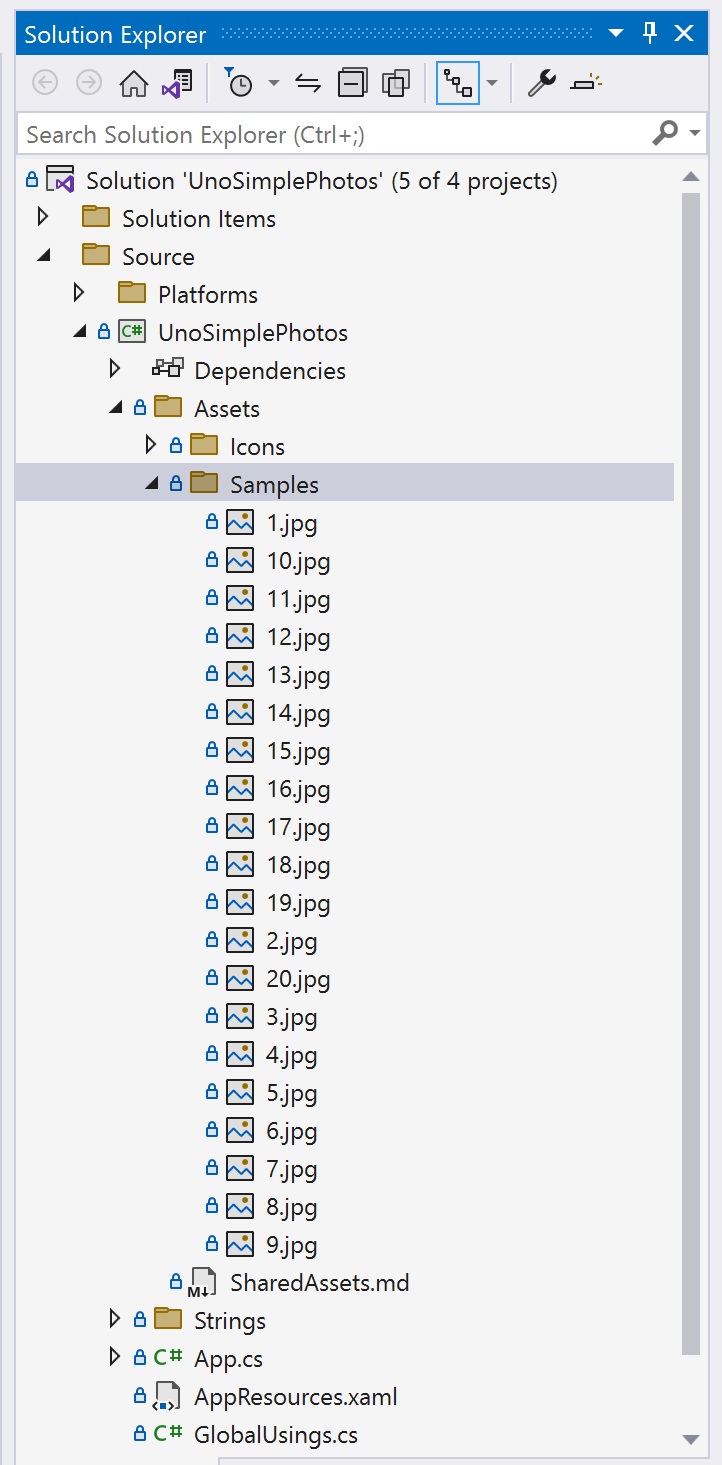
解决方案资源管理器应会显示以下默认文件结构:
向项目添加图像资产
你的应用需要一些图像才能显示。 可使用上一教程中的相同图像。
在 UnoSimplePhotos 项目中,创建一个名为 Assets 的新文件夹,并将 JPG 图像文件复制到 Samples 子文件夹。 Assets 文件夹结构应如下所示:
有关创建 Assets 文件夹和向其添加图像的详细信息,请参阅有关资产和图像显示的 Uno Platform 文档。
准备应用
现已生成多平台 WinUI 应用程序的功能起点,可将桌面项目的代码复制到其中。
复制视图
由于 Uno Platform 支持使用你已熟悉的 XAML 风格,你可复制在上一教程中创建的相同代码。
返回到上一教程中的 SimplePhotos 项目。 在解决方案资源管理器中,找到名为 MainWindow.xaml 的文件并将其打开。 请注意,视图的内容是在 Window 元素而不是在 Page 中定义的。 这是因为桌面项目是 WinUI 3 应用程序,它可使用 Window 元素来定义视图的内容:
<Window x:Class="SimplePhotos.MainWindow"
        xmlns="http://schemas.microsoft.com/winfx/2006/xaml/presentation"
        xmlns:x="http://schemas.microsoft.com/winfx/2006/xaml"
        xmlns:local="using:SimplePhotos"
        xmlns:d="http://schemas.microsoft.com/expression/blend/2008"
        xmlns:mc="http://schemas.openxmlformats.org/markup-compatibility/2006"
        mc:Ignorable="d">

    <Grid>
        <Grid.Resources>
            <DataTemplate x:Key="ImageGridView_ItemTemplate"
                          x:DataType="local:ImageFileInfo">
                <Grid Height="300"
                      Width="300"
                      Margin="8">
                    <Grid.RowDefinitions>
                        <RowDefinition />
                        <RowDefinition Height="Auto" />
                    </Grid.RowDefinitions>

                    <Image x:Name="ItemImage"
                           Source="Assets/StoreLogo.png"
                           Stretch="Uniform" />

                    <StackPanel Orientation="Vertical"
                                Grid.Row="1">
                        <TextBlock Text="{x:Bind ImageTitle}"
                                   HorizontalAlignment="Center"
                                   Style="{StaticResource SubtitleTextBlockStyle}" />
                        <StackPanel Orientation="Horizontal"
                                    HorizontalAlignment="Center">
                            <TextBlock Text="{x:Bind ImageFileType}"
                                       HorizontalAlignment="Center"
                                       Style="{StaticResource CaptionTextBlockStyle}" />
                            <TextBlock Text="{x:Bind ImageDimensions}"
                                       HorizontalAlignment="Center"
                                       Style="{StaticResource CaptionTextBlockStyle}"
                                       Margin="8,0,0,0" />
                        </StackPanel>

                        <RatingControl Value="{x:Bind ImageRating}"
                                       IsReadOnly="True"/>
                    </StackPanel>
                </Grid>
            </DataTemplate>

            <Style x:Key="ImageGridView_ItemContainerStyle"
                   TargetType="GridViewItem">
                <Setter Property="Background"
                        Value="Gray"/>
                <Setter Property="Margin"
                        Value="8"/>
            </Style>

            <ItemsPanelTemplate x:Key="ImageGridView_ItemsPanelTemplate">
                    <ItemsWrapGrid Orientation="Horizontal"
                                   HorizontalAlignment="Center"/>
                </ItemsPanelTemplate>
        </Grid.Resources>

        <GridView x:Name="ImageGridView"
                  ItemsSource="{x:Bind Images}"
                  ItemTemplate="{StaticResource ImageGridView_ItemTemplate}"
                  ItemContainerStyle="{StaticResource ImageGridView_ItemContainerStyle}"
                  ItemsPanel="{StaticResource ImageGridView_ItemsPanelTemplate}"
                  ContainerContentChanging="ImageGridView_ContainerContentChanging" />
    </Grid>
</Window>
Uno Platform 对 Window 元素中找到的控件(如 GridView、Image 和 RatingControl)的多平台实现可确保只需进行少量操作,视图本身即可在所有受支持的平台上正常工作。 复制此 Window 的内容并将其粘贴到“UnoSimplePhotos”Uno Platform 项目中 MainPage.xaml 文件的 Page 元素中。 MainPage 视图 XAML 应如下所示:
<Page x:Class="UnoSimplePhotos.MainPage"
      xmlns="http://schemas.microsoft.com/winfx/2006/xaml/presentation"
      xmlns:x="http://schemas.microsoft.com/winfx/2006/xaml"
      xmlns:local="using:UnoSimplePhotos"
      xmlns:d="http://schemas.microsoft.com/expression/blend/2008"
      xmlns:mc="http://schemas.openxmlformats.org/markup-compatibility/2006"
      mc:Ignorable="d">

    <Grid>
        <Grid.Resources>
            <DataTemplate x:Key="ImageGridView_ItemTemplate"
                          x:DataType="local:ImageFileInfo">
                <Grid Height="300"
                      Width="300"
                      Margin="8">
                    <Grid.RowDefinitions>
                        <RowDefinition />
                        <RowDefinition Height="Auto" />
                    </Grid.RowDefinitions>

                    <Image x:Name="ItemImage"
                           Source="Assets/StoreLogo.png"
                           Stretch="Uniform" />

                    <StackPanel Orientation="Vertical"
                                Grid.Row="1">
                        <TextBlock Text="{x:Bind ImageTitle}"
                                   HorizontalAlignment="Center"
                                   Style="{StaticResource SubtitleTextBlockStyle}" />
                        <StackPanel Orientation="Horizontal"
                                    HorizontalAlignment="Center">
                            <TextBlock Text="{x:Bind ImageFileType}"
                                       HorizontalAlignment="Center"
                                       Style="{StaticResource CaptionTextBlockStyle}" />
                            <TextBlock Text="{x:Bind ImageDimensions}"
                                       HorizontalAlignment="Center"
                                       Style="{StaticResource CaptionTextBlockStyle}"
                                       Margin="8,0,0,0" />
                        </StackPanel>

                        <RatingControl Value="{x:Bind ImageRating}"
                                       IsReadOnly="True"/>
                    </StackPanel>
                </Grid>
            </DataTemplate>

            <Style x:Key="ImageGridView_ItemContainerStyle"
                   TargetType="GridViewItem">
                <Setter Property="Background"
                        Value="Gray"/>
                <Setter Property="Margin"
                        Value="8"/>
            </Style>

            <ItemsPanelTemplate x:Key="ImageGridView_ItemsPanelTemplate">
                <ItemsWrapGrid Orientation="Horizontal"
                               HorizontalAlignment="Center"/>
            </ItemsPanelTemplate>
        </Grid.Resources>

        <GridView x:Name="ImageGridView"
                  ItemsSource="{x:Bind Images}"
                  ItemTemplate="{StaticResource ImageGridView_ItemTemplate}"
                  ItemContainerStyle="{StaticResource ImageGridView_ItemContainerStyle}"
                  ItemsPanel="{StaticResource ImageGridView_ItemsPanelTemplate}"
                  ContainerContentChanging="ImageGridView_ContainerContentChanging">
        </GridView>
    </Grid>
</Page>
你可能记得桌面解决方案还有一个 MainWindow.xaml.cs 文件,其中包含与视图相对应的代码隐藏。 在 Uno Platform 项目中,已复制到其中的 MainPage 视图的代码隐藏包含在 MainPage.xaml.cs 文件中。
要使此代码隐藏实现多平台化,应首先将以下内容移至 MainPage.xaml.cs 文件中:
Images属性:为GridView提供可观察的图像文件集合构造函数的内容:调用
GetItemsAsync()以使用表示图像文件的项来填充Images集合删除对
ImageGridView控件的ItemsSource属性的手动修改ImageGridView_ContainerContentChanging方法:用作策略的一部分,使GridView项在视图中滚动时进行渐进式加载ShowImage方法:将图像文件加载到GridView中GetItemsAsync方法:从Samples文件夹中获取图像资产文件LoadImageInfoAsync方法:从创建的StorageFile中构造ImageFileInfo对象
移完所有内容后,MainPage.xaml.cs 现应如下所示:
using Microsoft.UI.Xaml.Controls;
using System.Collections.ObjectModel;
using Windows.Storage;
using Windows.Storage.Search;

namespace UnoSimplePhotos;

public sealed partial class MainPage : Page
{
    public ObservableCollection<ImageFileInfo> Images { get; }
    = new ObservableCollection<ImageFileInfo>();

    public MainPage()
    {
        this.InitializeComponent();
        GetItemsAsync();
    }

    private void ImageGridView_ContainerContentChanging(ListViewBase sender,
        ContainerContentChangingEventArgs args)
    {
        if (args.InRecycleQueue)
        {
            var templateRoot = args.ItemContainer.ContentTemplateRoot as Grid;
            var image = templateRoot.FindName("ItemImage") as Image;
            image.Source = null;
        }

        if (args.Phase == 0)
        {
            args.RegisterUpdateCallback(ShowImage);
            args.Handled = true;
        }
    }

    private async void ShowImage(ListViewBase sender, ContainerContentChangingEventArgs args)
    {
        if (args.Phase == 1)
        {
            // It's phase 1, so show this item's image.
            var templateRoot = args.ItemContainer.ContentTemplateRoot as Grid;
            var image = templateRoot.FindName("ItemImage") as Image;
            var item = args.Item as ImageFileInfo;
            image.Source = await item.GetImageThumbnailAsync();
        }
    }

    private async Task GetItemsAsync()
    {
        StorageFolder appInstalledFolder = Package.Current.InstalledLocation;
        StorageFolder picturesFolder = await appInstalledFolder.GetFolderAsync("Assets\\Samples");

        var result = picturesFolder.CreateFileQueryWithOptions(new QueryOptions());

        IReadOnlyList<StorageFile> imageFiles = await result.GetFilesAsync();
        foreach (StorageFile file in imageFiles)
        {
            Images.Add(await LoadImageInfoAsync(file));
        }
    }

    public async static Task<ImageFileInfo> LoadImageInfoAsync(StorageFile file)
    {
        var properties = await file.Properties.GetImagePropertiesAsync();
        ImageFileInfo info = new(properties,
                                    file, file.DisplayName, file.DisplayType);

        return info;
    }
}
注意
Uno 应用项目中的文件应将 UnoSimplePhotos 用作命名空间。
到目前为止,我们正在处理的主视图的文件包含桌面解决方案的所有功能。 复制 ImageFileInfo.cs 模型文件后,我们将了解如何修改面向桌面的代码块以实现多平台兼容性。
从桌面项目中复制 ImageFileInfo 并将其粘贴到 ImageFileInfo.cs 文件中。 进行以下更改:
将命名空间重命名为
UnoSimplePhotos而不是SimplePhotos:// Found towards the top of the file namespace UnoSimplePhotos;将
OnPropertyChanged方法的参数类型更改为可为 null:// string -> string? protected void OnPropertyChanged([CallerMemberName] string? propertyName = null) ...使
PropertyChangedEventHandler可为 null:// PropertyChangedEventHandler -> PropertyChangedEventHandler? public event PropertyChangedEventHandler? PropertyChanged;
总之,文件应如下所示:
using Microsoft.UI.Xaml.Media.Imaging;
using System.ComponentModel;
using System.Runtime.CompilerServices;
using Windows.Storage;
using Windows.Storage.FileProperties;
using Windows.Storage.Streams;
using ThumbnailMode = Windows.Storage.FileProperties.ThumbnailMode;

namespace UnoSimplePhotos;

public class ImageFileInfo : INotifyPropertyChanged
{
    public ImageFileInfo(ImageProperties properties,
        StorageFile imageFile,
        string name,
        string type)
    {
        ImageProperties = properties;
        ImageName = name;
        ImageFileType = type;
        ImageFile = imageFile;
        var rating = (int)properties.Rating;
        var random = new Random();
        ImageRating = rating == 0 ? random.Next(1, 5) : rating;
    }

    public StorageFile ImageFile { get; }

    public ImageProperties ImageProperties { get; }

    public async Task<BitmapImage> GetImageSourceAsync()
    {
        using IRandomAccessStream fileStream = await ImageFile.OpenReadAsync();

        // Create a bitmap to be the image source.
        BitmapImage bitmapImage = new();
        bitmapImage.SetSource(fileStream);

        return bitmapImage;
    }

    public async Task<BitmapImage> GetImageThumbnailAsync()
    {
        StorageItemThumbnail thumbnail =
            await ImageFile.GetThumbnailAsync(ThumbnailMode.PicturesView);
        // Create a bitmap to be the image source.
        var bitmapImage = new BitmapImage();
        bitmapImage.SetSource(thumbnail);
        thumbnail.Dispose();

        return bitmapImage;
    }

    public string ImageName { get; }

    public string ImageFileType { get; }

    public string ImageDimensions => $"{ImageProperties.Width} x {ImageProperties.Height}";

    public string ImageTitle
    {
        get => string.IsNullOrEmpty(ImageProperties.Title) ? ImageName : ImageProperties.Title;
        set
        {
            if (ImageProperties.Title != value)
            {
                ImageProperties.Title = value;
                _ = ImageProperties.SavePropertiesAsync();
                OnPropertyChanged();
            }
        }
    }

    public int ImageRating
    {
        get => (int)ImageProperties.Rating;
        set
        {
            if (ImageProperties.Rating != value)
            {
                ImageProperties.Rating = (uint)value;
                _ = ImageProperties.SavePropertiesAsync();
                OnPropertyChanged();
            }
        }
    }

    public event PropertyChangedEventHandler? PropertyChanged;

    protected void OnPropertyChanged([CallerMemberName] string? propertyName = null) =>
        PropertyChanged?.Invoke(this, new PropertyChangedEventArgs(propertyName));
}
此类将用作表示 GridView 中图像文件的模型。 尽管在技术上应该可以在此时运行应用,但可能无法正确呈现图像或显示属性。 在接下来的部分中,我们将对这些复制的文件进行一系列的更改,使它们在多平台上下文中兼容。
使用预处理器指令
在上一教程的桌面项目中,MainPage.xaml.cs 文件包含 GetItemsAsync 方法,该方法枚举表示已安装的包位置的 StorageFolder 中的项。 由于该位置在某些平台(如 WebAssembly)上不可用,我们需要对此方法进行更改,使其与所有平台兼容。 为确保兼容性,需要相应地对 ImageFileInfo 类进行一些更改。
首先,对 GetItemsAsync 方法进行所需的更改。 用下面的代码替换 MainPage.xaml.cs 文件中的 GetItemsAsync 方法:
private async Task GetItemsAsync()
{
#if WINDOWS
    StorageFolder appInstalledFolder = Package.Current.InstalledLocation;
    StorageFolder picturesFolder = await appInstalledFolder.GetFolderAsync("UnoSimplePhotos\\Assets\\Samples");

    var result = picturesFolder.CreateFileQueryWithOptions(new QueryOptions());

    IReadOnlyList<StorageFile> imageFiles = await result.GetFilesAsync();
#else
    var imageFileNames = Enumerable.Range(1, 20).Select(i => new Uri($"ms-appx:///UnoSimplePhotos/Assets/Samples/{i}.jpg"));
    var imageFiles = new List<StorageFile>();

    foreach (var file in imageFileNames)
    {
        imageFiles.Add(await StorageFile.GetFileFromApplicationUriAsync(file));
    }
#endif
    foreach (StorageFile file in imageFiles)
    {
        Images.Add(await LoadImageInfoAsync(file));
    }
}
此方法现在使用预处理器指令来根据平台确定执行哪些代码。 在 Windows 上,该方法获取表示已安装的包位置的 StorageFolder,并返回其中的 Samples 文件夹。 在其他平台上,该方法最多计数到 20,从 Samples 文件夹中获取图像文件,使用 Uri 表示图像文件。
接下来,调整 LoadImageInfoAsync 方法以适应我们对 GetItemsAsync 方法所做的更改。 用下面的代码替换 MainPage.xaml.cs 文件中的 LoadImageInfoAsync 方法:
public async static Task<ImageFileInfo> LoadImageInfoAsync(StorageFile file)
{
#if WINDOWS
    var properties = await file.Properties.GetImagePropertiesAsync();
    ImageFileInfo info = new(properties,
                                file, file.DisplayName, $"{file.FileType} file");
#else
    ImageFileInfo info = new(file, file.DisplayName, $"{file.FileType} file");
#endif
    return info;
}
此方法与 GetItemsAsync 方法类似,现在使用预处理器指令来根据平台确定执行哪些代码。 在 Windows 上,该方法从 StorageFile 获取 ImageProperties,并使用它来创建 ImageFileInfo 对象。 在其他平台上,该方法构造一个没有 ImageProperties 参数的 ImageFileInfo 对象。 稍后,将对 ImageFileInfo 类进行修改以适应此更改。
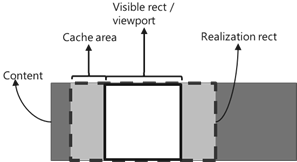
GridView 等控件允许更新的项容器内容在视区中滚动时进行渐进式加载。 此操作使用 ContainerContentChanging 事件完成。 在上一教程的桌面项目中,ImageGridView_ContainerContentChanging 方法使用此事件将图像文件加载到 GridView 中。 由于并非所有平台都支持此事件的某些方面,我们需要对此方法进行更改,使其与所有平台兼容。
例如,ContainerContentChangingEventArgs.Phase 属性目前在 Windows 以外的平台上不受支持。 我们需要对 ImageGridView_ContainerContentChanging 方法进行更改以适应此更改。 用下面的代码替换 MainPage.xaml.cs 文件中的 ImageGridView_ContainerContentChanging 方法:
private void ImageGridView_ContainerContentChanging(
ListViewBase sender,
ContainerContentChangingEventArgs args)
{

    if (args.InRecycleQueue)
    {
        var templateRoot = args.ItemContainer.ContentTemplateRoot as Grid;
        var image = templateRoot?.FindName("ItemImage") as Image;
        if (image is not null)
        {
            image.Source = null;
        }
    }

#if WINDOWS
        if (args.Phase == 0)
        {
            args.RegisterUpdateCallback(ShowImage);
            args.Handled = true;
        }
#else
    ShowImage(sender, args);
#endif
}
现在仅当平台为 Windows 时,才使用 ContainerContentChangingEventArgs.RegisterUpdateCallback() 注册专用回调。 否则直接调用 ShowImage 方法。 我们还需要对 ShowImage 方法进行更改,使其与对 ImageGridView_ContainerContentChanging 方法所做的更改同时进行。 用下面的代码替换 MainPage.xaml.cs 文件中的 ShowImage 方法:
private async void ShowImage(ListViewBase sender, ContainerContentChangingEventArgs args)
{
    if (
#if WINDOWS
            args.Phase == 1
#else
        true
#endif
        )
    {

        // It's phase 1, so show this item's image.
        var templateRoot = args.ItemContainer.ContentTemplateRoot as Grid;
        var image = templateRoot?.FindName("ItemImage") as Image;
        var item = args.Item as ImageFileInfo;
#if WINDOWS
        if (image is not null && item is not null)
        {
            image.Source = await item.GetImageThumbnailAsync();
        }
#else
        if (item is not null)
        {
            await item.GetImageSourceAsync();
        }
#endif
    }
}
同样,预处理器指令可确保 ContainerContentChangingEventArgs.Phase 属性仅在受支持的平台上使用。 在 Windows 以外的平台上,使用之前未使用的 GetImageSourceAsync() 方法将图像文件加载到的 GridView 中。 此时,通过编辑 ImageFileInfo 类来适应上面所做的更改。
为其他平台创建单独的代码路径
更新 ImageFileInfo.cs 以包含一个名为 ImageSource 的新属性,该属性将用于加载图像文件。
public BitmapImage? ImageSource { get; private set; }
由于 Web 等平台不支持 Windows 上可用的高级图像文件属性,我们将添加不需要 ImageProperties 类型化参数的构造函数重载。 使用以下代码将新重载添加到现有重载之后:
public ImageFileInfo(StorageFile imageFile,
    string name,
    string type)
{
    ImageName = name;
    ImageFileType = type;
    ImageFile = imageFile;
}
此构造函数重载用于在 Windows 以外的平台上构造 ImageFileInfo 对象。 由于我们执行了此操作,有必要使 ImageProperties 属性可为 null。 使用以下代码将 ImageProperties 属性更新为可为 null:
public ImageProperties? ImageProperties { get; }
更新 GetImageSourceAsync 方法以使用 ImageSource 属性,而不是仅返回 BitmapImage 对象。 用下面的代码替换 ImageFileInfo.cs 文件中的 GetImageSourceAsync 方法:
public async Task<BitmapImage> GetImageSourceAsync()
{
    using IRandomAccessStream fileStream = await ImageFile.OpenReadAsync();

    // Create a bitmap to be the image source.
    BitmapImage bitmapImage = new();
    bitmapImage.SetSource(fileStream);

    ImageSource = bitmapImage;
    PropertyChanged?.Invoke(this, new PropertyChangedEventArgs(nameof(ImageSource)));

    return bitmapImage;
}
为防止在 ImageProperties 为 null 时值获取它的值,请进行以下更改:
修改
ImageDimensions属性以使用 null 条件运算符:public string ImageDimensions => $"{ImageProperties?.Width} x {ImageProperties?.Height}";更改
ImageTitle属性以使用 null 条件运算符:public string ImageTitle { get => string.IsNullOrEmpty(ImageProperties?.Title) ? ImageName : ImageProperties?.Title; set { if (ImageProperties is not null) { if (ImageProperties.Title != value) { ImageProperties.Title = value; _ = ImageProperties.SavePropertiesAsync(); OnPropertyChanged(); } } } }将
ImageRating更改为不依赖ImageProperties,具体方法是随机生成一个星级评分以用于演示:public int ImageRating { get => (int)((ImageProperties?.Rating == null || ImageProperties.Rating == 0) ? (uint)Random.Shared.Next(1, 5) : ImageProperties.Rating); set { if (ImageProperties is not null) { if (ImageProperties.Rating != value) { ImageProperties.Rating = (uint)value; _ = ImageProperties.SavePropertiesAsync(); OnPropertyChanged(); } } } }更新生成随机整数的构造函数,使其不再执行此操作:
public ImageFileInfo(ImageProperties properties, StorageFile imageFile, string name, string type) { ImageProperties = properties; ImageName = name; ImageFileType = type; ImageFile = imageFile; }
通过这些编辑,ImageFileInfo 类应包含以下代码。 对于 Windows 以外的平台,该类现在有一个新分隔的代码路径:
using Microsoft.UI.Xaml.Media.Imaging;
using System.ComponentModel;
using System.Runtime.CompilerServices;
using Windows.Storage;
using Windows.Storage.FileProperties;
using Windows.Storage.Streams;
using ThumbnailMode = Windows.Storage.FileProperties.ThumbnailMode;
namespace UnoSimplePhotos;
public class ImageFileInfo : INotifyPropertyChanged
{
public BitmapImage? ImageSource { get; private set; }
public ImageFileInfo(ImageProperties properties,
StorageFile imageFile,
string name,
string type)
{
ImageProperties = properties;
ImageName = name;
ImageFileType = type;
ImageFile = imageFile;
}
public ImageFileInfo(StorageFile imageFile,
string name,
string type)
{
ImageName = name;
ImageFileType = type;
ImageFile = imageFile;
}
public StorageFile ImageFile { get; }
public ImageProperties? ImageProperties { get; }
public async Task<BitmapImage> GetImageSourceAsync()
{
using IRandomAccessStream fileStream = await ImageFile.OpenReadAsync();
// Create a bitmap to be the image source.
BitmapImage bitmapImage = new();
bitmapImage.SetSource(fileStream);
ImageSource = bitmapImage;
PropertyChanged?.Invoke(this, new PropertyChangedEventArgs(nameof(ImageSource)));
return bitmapImage;
}
public async Task<BitmapImage> GetImageThumbnailAsync()
{
StorageItemThumbnail thumbnail =
await ImageFile.GetThumbnailAsync(ThumbnailMode.PicturesView);
// Create a bitmap to be the image source.
var bitmapImage = new BitmapImage();
bitmapImage.SetSource(thumbnail);
thumbnail.Dispose();
return bitmapImage;
}
public string ImageName { get; }
public string ImageFileType { get; }
public string ImageDimensions => $"{ImageProperties?.Width} x {ImageProperties?.Height}";
public string ImageTitle
{
get => string.IsNullOrEmpty(ImageProperties?.Title) ? ImageName : ImageProperties.Title;
set
{
if (ImageProperties is not null)
{
if (ImageProperties.Title != value)
{
ImageProperties.Title = value;
_ = ImageProperties.SavePropertiesAsync();
OnPropertyChanged();
}
}
}
}
public int ImageRating
{
    get => (int)((ImageProperties?.Rating == null || ImageProperties.Rating == 0) ? (uint)Random.Shared.Next(1, 5) : ImageProperties.Rating);
    set
    {
        if (ImageProperties is not null)
        {
            if (ImageProperties.Rating != value)
            {
                ImageProperties.Rating = (uint)value;
                _ = ImageProperties.SavePropertiesAsync();
                OnPropertyChanged();
            }
        }
    }
}
public event PropertyChangedEventHandler? PropertyChanged;
protected void OnPropertyChanged([CallerMemberName] string? propertyName = null) =>
PropertyChanged?.Invoke(this, new PropertyChangedEventArgs(propertyName));
}
此 ImageFileInfo 类用于表示 GridView 中的图像文件。 最后,对 MainPage.xaml 文件进行更改以适应对模型的更改。
使用平台特定的 XAML 标记
视图标记中有几个项应该只能在 Windows 上评估。 在 MainPage.xaml 文件的 Page 元素上添加新命名空间,如下所示:
...
xmlns:win="http://schemas.microsoft.com/winfx/2006/xaml/presentation"
现在,在 MainPage.xaml 中,用以下代码替换 GridView 元素上的 ItemsPanel 属性 setter:
win:ItemsPanel="{StaticResource ImageGridView_ItemsPanelTemplate}"
在属性名称前面加上 win: 可确保仅在 Windows 上设置该属性。 在 ImageGridView_ItemTemplate 资源中再次执行此操作。 我们希望在 Windows 上只加载使用 ImageDimensions 属性的元素。 用以下代码替换使用 ImageDimensions 属性的 TextBlock 元素:
<win:TextBlock Text="{x:Bind ImageDimensions}"
               HorizontalAlignment="Center"
               Style="{StaticResource CaptionTextBlockStyle}"
               Margin="8,0,0,0" />
MainPage.xaml 文件现应如下所示:
<Page x:Class="UnoSimplePhotos.MainPage"
      xmlns="http://schemas.microsoft.com/winfx/2006/xaml/presentation"
      xmlns:x="http://schemas.microsoft.com/winfx/2006/xaml"
      xmlns:local="using:UnoSimplePhotos"
      xmlns:d="http://schemas.microsoft.com/expression/blend/2008"
      xmlns:mc="http://schemas.openxmlformats.org/markup-compatibility/2006"
      xmlns:win="http://schemas.microsoft.com/winfx/2006/xaml/presentation"
      mc:Ignorable="d"
      Background="{ThemeResource ApplicationPageBackgroundThemeBrush}">

    <Grid>
        <Grid.Resources>
            <DataTemplate x:Key="ImageGridView_ItemTemplate"
                          x:DataType="local:ImageFileInfo">
                <Grid Height="300"
                      Width="300"
                      Margin="8">
                    <Grid.RowDefinitions>
                        <RowDefinition />
                        <RowDefinition Height="Auto" />
                    </Grid.RowDefinitions>

                    <Image x:Name="ItemImage"
                           Source="{x:Bind ImageSource}"
                           Stretch="Uniform" />

                    <StackPanel Orientation="Vertical"
                                Grid.Row="1">
                        <TextBlock Text="{x:Bind ImageTitle}"
                                   HorizontalAlignment="Center"
                                   Style="{StaticResource SubtitleTextBlockStyle}" />
                        <StackPanel Orientation="Horizontal"
                                    HorizontalAlignment="Center">
                            <TextBlock Text="{x:Bind ImageFileType}"
                                       HorizontalAlignment="Center"
                                       Style="{StaticResource CaptionTextBlockStyle}" />
                            <win:TextBlock Text="{x:Bind ImageDimensions}"
                                           HorizontalAlignment="Center"
                                           Style="{StaticResource CaptionTextBlockStyle}"
                                           Margin="8,0,0,0" />
                        </StackPanel>

                        <RatingControl Value="{x:Bind ImageRating}"
                                       IsReadOnly="True" />
                    </StackPanel>
                </Grid>
            </DataTemplate>

            <Style x:Key="ImageGridView_ItemContainerStyle"
                   TargetType="GridViewItem">
                <Setter Property="Background"
                        Value="Gray" />
                <Setter Property="Margin"
                        Value="8"/>
            </Style>

            <ItemsPanelTemplate x:Key="ImageGridView_ItemsPanelTemplate">
                <ItemsWrapGrid Orientation="Horizontal"
                               HorizontalAlignment="Center"/>
            </ItemsPanelTemplate>
        </Grid.Resources>

        <GridView x:Name="ImageGridView"
                  ItemsSource="{x:Bind Images, Mode=OneWay}"
                  win:ItemsPanel="{StaticResource ImageGridView_ItemsPanelTemplate}"
                  ContainerContentChanging="ImageGridView_ContainerContentChanging"
                  ItemContainerStyle="{StaticResource ImageGridView_ItemContainerStyle}"
                  ItemTemplate="{StaticResource ImageGridView_ItemTemplate}" />
    </Grid>
</Page>
运行应用
启动 UnoSimplePhotos.Windows 目标。 请注意,这个 WinUI 应用与上一教程非常相似。
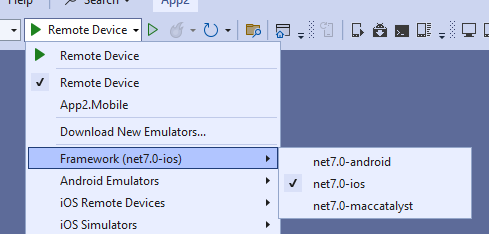
现可在任何支持的平台上生成和运行应用。 为此,可使用调试工具栏下拉列表选择要部署的目标平台:
运行 WebAssembly (Wasm) 头:
- 右键单击
UnoSimplePhotos.Wasm项目,然后选择“设为启动项目” - 按
UnoSimplePhotos.Wasm按钮部署应用 - 如果需要,可添加
UnoSimplePhotos.Server项目并将其用作替代项
- 右键单击
针对 iOS 进行调试:
右键单击
UnoSimplePhotos.Mobile项目,然后选择“设为启动项目”在调试工具栏下拉列表中,选择活动的 iOS 设备或模拟器。 需要与 Mac 配对才能执行此操作。
针对 Mac Catalyst 进行调试:
- 右键单击
UnoSimplePhotos.Mobile项目,然后选择“设为启动项目” - 在调试工具栏下拉列表中,选择远程 macOS 设备。 需要与一个配对才能执行此操作。
- 右键单击
调试 Android 平台:
- 右键单击
UnoSimplePhotos.Mobile项目,然后选择“设为启动项目” - 在调试工具栏下拉列表中,选择活动的 Android 设备或模拟器
- 在“设备”子菜单中选择一个活动设备
- 右键单击
使用 Skia GTK 在 Linux 上进行调试:
- 右键单击
UnoSimplePhotos.Skia.Gtk项目,然后选择“设为启动项目” - 按
UnoSimplePhotos.Skia.Gtk按钮部署应用
- 右键单击
