在 Java 中開始使用轉送混合式連線 HTTP 要求
在本快速入門中,您將建立 Java 傳送者與接收者應用程式,以使用 HTTP 通訊協定來傳送和接收訊息。 應用程式將使用 Azure 轉送的混合式連線功能。 若要對 Azure 轉送有整體上的了解,請參閱 Azure 轉送。
在本快速入門中,您會執行下列步驟:
- 使用 Azure 入口網站建立轉送命名空間。
- 使用 Azure 入口網站,在該命名空間中建立混合式連線。
- 撰寫伺服器 (接聽端) 主控台應用程式來接收訊息。
- 撰寫用戶端 (傳送端) 主控台應用程式來傳送訊息。
- 執行應用程式。
必要條件
- Java。 確定您正使用 JDK 1.8+
- Maven. 確定您已安裝 Maven
- Azure 轉送 SDK。 檢閱 Java SDK
- Azure 訂用帳戶。 如果您沒有 Azure 訂用帳戶,請在開始前建立免費帳戶。
使用 Azure 入口網站建立命名空間
登入 Azure 入口網站。
選取左側功能表上的 [所有服務]。 選取 [整合],並搜尋「轉送」,再將滑鼠移至 [轉送] 上方,然後選取 [建立]。
![顯示選取 [轉寄 -> 建立] 按鈕的螢幕快照。](includes/media/relay-create-namespace-portal/select-relay-create.png)
在 [建立命名空間] 頁面上,遵循下列步驟:
選擇要在其中建立命名空間的 Azure 訂用帳戶。
針對資源群組,選擇將放置命名空間的現有資源群組,或是建立新的資源群組。
輸入轉送命名空間的名稱。
選取要用來裝載命名空間的區域。
選取頁面底部的 [檢閱 + 建立] 。
![顯示 [建立命名空間] 頁面的螢幕快照。](includes/media/relay-create-namespace-portal/create-namespace-page.png)
在 [檢閱 + 建立] 頁面上,選取 [建立]。
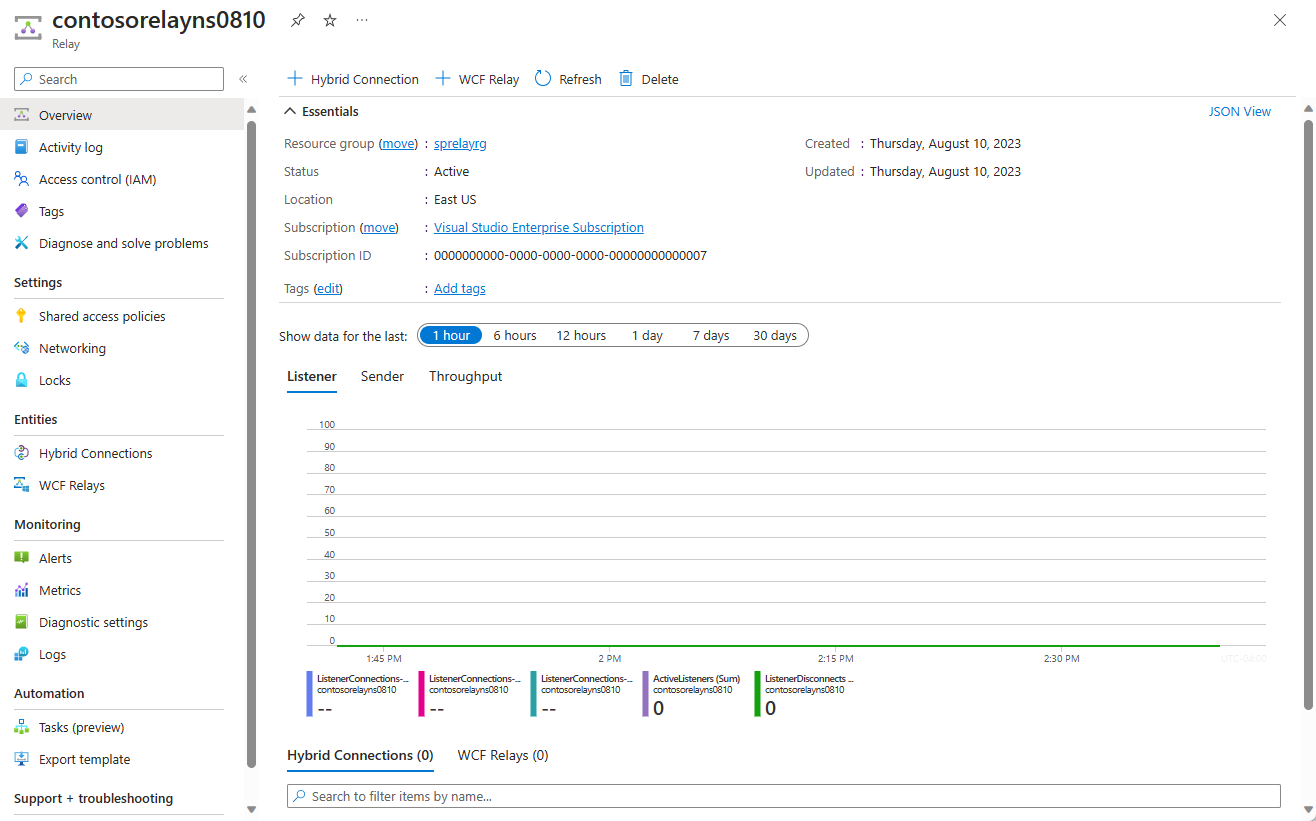
幾分鐘後,您會看到命名空間的 [轉送] 頁面。
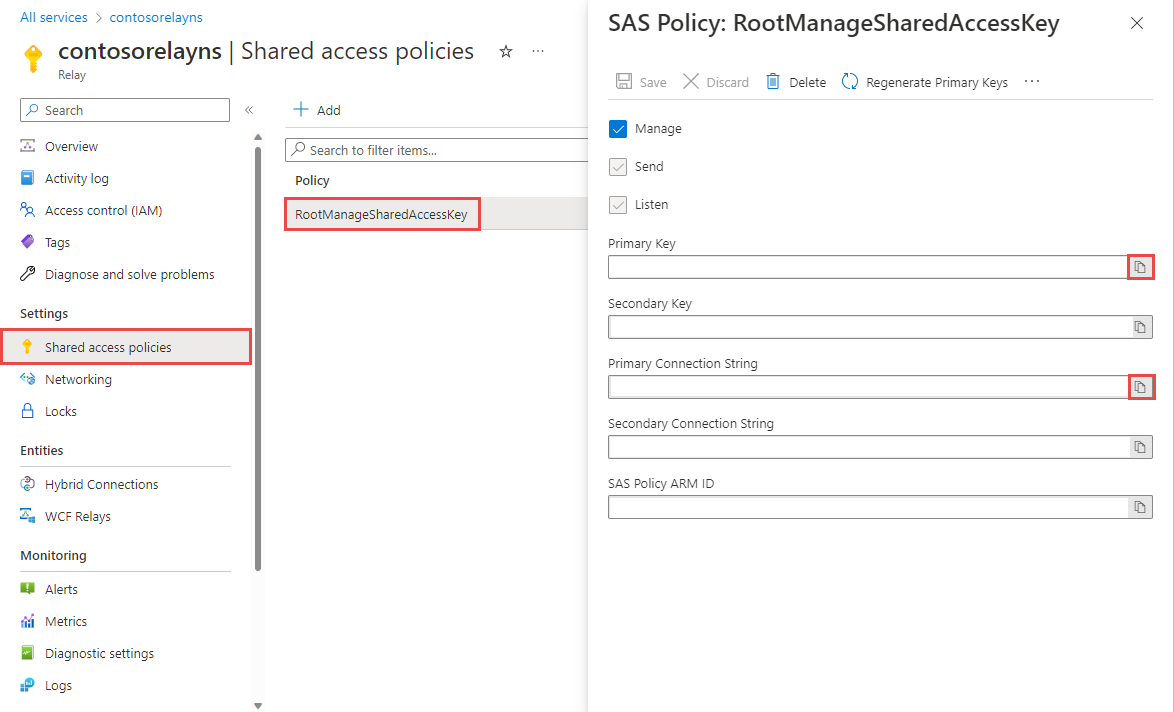
取得管理認證
在 [轉送] 頁面上,選取左側功能表上的 [共用存取原則]。 `
在 [共用存取原則] 頁面上,選取 [RootManageSharedAccessKey]。
在 [SAS 原則: RootManageSharedAccessKey] 下,選取 [主要連接字串] 旁的 [複製] 按鈕。 此動作會將連接字串複製到剪貼簿以供稍後使用。 將此值貼到記事本或一些其他暫存位置。
重複前一個步驟,複製 [主要金鑰] 的值並貼到暫存位置以供稍後使用。
使用 Azure 入口網站建立混合式連線
在命名空間的 [轉送] 頁面上,遵循下列步驟來建立混合式連線。
在左側功能表的 [實體] 下,選取 [混合式連線],然後選取 [+ 混合式連線]。
![顯示 [混合式連線] 頁面的螢幕快照。](includes/media/relay-create-hybrid-connection-portal/create-hc-1.png)
在 [建立混合式連線] 頁面上,輸入混合式連線的名稱,然後選取 [建立]。
![顯示 [建立混合式連線] 頁面的螢幕快照。](includes/media/relay-create-hybrid-connection-portal/create-hc-3.png)
建立伺服器應用程式 (接聽程式)
為了接聽並接收來自轉送的訊息,請撰寫 Java 主控台應用程式。
建立 Java 應用程式
如果您在建立轉送時停用 [需要用戶端授權] 選項,您可以使用任何瀏覽器將要求傳送至混合式連線 URL。 若要存取受保護的端點,您需要建立權杖,並在 ServiceBusAuthorization 標頭中傳遞權杖,如下所示。
以下是簡單的 Maven 項目結構和 Java 類別,示範如何使用 Azure 轉送連結庫將要求傳送至混合式連線 URL 與用戶端授權。
新增轉寄套件
修改 maven 應用程式套件中的pom.xml檔案,以包含 Azure 轉寄套件。
<dependency>
    <groupId>com.microsoft.azure</groupId>
    <artifactId>azure-relay</artifactId>
    <version>0.0.6</version>
</dependency>
在 mvn 專案中執行 mvn dependency:copy-dependencies -DoutputDirectory=lib,以在專案的 lib 目錄中新增相依項目 jar 檔案。 它會匯入mvn套件的所有相依性 azure-relay 。 此套件提供函式來建構轉寄統一資源識別碼 (URI) 和令牌。
撰寫一些程式碼來傳送訊息
將相依項目 jar 檔案新增至
Listener.java檔案的 ClassPath。javac -cp lib/* src/main/java/com/example/listener/Listener.Java將相依項目匯入您的
Listener.java類別。import java.io.BufferedReader; import java.io.IOException; import java.io.InputStreamReader; import java.net.URI; import java.net.URISyntaxException; import java.util.Scanner; import com.microsoft.azure.relay.HybridConnectionListener; import com.microsoft.azure.relay.RelayConnectionStringBuilder; import com.microsoft.azure.relay.RelayedHttpListenerResponse; import com.microsoft.azure.relay.TokenProvider;將下列
constants新增至Listener.java檔案頂端的createConnectionStringjava 函式,提供混合式連線的詳細資料。public static String createConnectionString(){ StringBuilder connectionString = new StringBuilder(); connectionString.append("Endpoint=sb://"); connectionString.append("{namespace}"); connectionString.append(".servicebus.windows.net/;SharedAccessKeyName="); connectionString.append("{keyrule}"); connectionString.append(";SharedAccessKey="); connectionString.append("{key}"); connectionString.append(";EntityPath="); connectionString.append("{path}"); return connectionString.toString(); }將方括號中的預留位置取代為您在建立混合式連線時所取得的值。
namespace- 轉送命名空間。 務必使用完整命名空間名稱;例如,{namespace}.servicebus.windows.net。path- 混合式連線的名稱。keyrule- 預設為共用存取原則金鑰RootManageSharedAccessKey的名稱。nst key- 您稍早儲存之命名空間的主鍵。
將下列程式碼新增至
Listener.java檔案。 main 函式看起來應該像下列程式代碼:public static void main( String[] args ) throws URISyntaxException { String CONNECTION_STRING_ENV_VARIABLE_NAME = createConnectionString(); RelayConnectionStringBuilder connectionParams = new RelayConnectionStringBuilder(CONNECTION_STRING_ENV_VARIABLE_NAME); TokenProvider tokenProvider = TokenProvider.createSharedAccessSignatureTokenProvider( connectionParams.getSharedAccessKeyName(), connectionParams.getSharedAccessKey()); HybridConnectionListener listener = new HybridConnectionListener(new URI(connectionParams.getEndpoint().toString() + connectionParams.getEntityPath()), tokenProvider); // The "context" object encapsulates both the incoming request and the outgoing response listener.setRequestHandler((context) -> { String receivedText = ""; if (context.getRequest().getInputStream() != null) { try (BufferedReader reader = new BufferedReader(new InputStreamReader(context.getRequest().getInputStream(), "UTF8"))) { StringBuilder builder = new StringBuilder(); String inputLine; while ((inputLine = reader.readLine()) != null) { builder.append(inputLine); } receivedText = builder.toString(); } catch (IOException e) { System.out.println(e.getMessage()); } } System.out.println("requestHandler received " + receivedText); RelayedHttpListenerResponse response = context.getResponse(); response.setStatusCode(202); response.setStatusDescription("OK"); try { response.getOutputStream().write(("Echo: " + receivedText).getBytes()); } catch (IOException e) { e.printStackTrace(); } // The context MUST be closed for the message to be sent response.close(); }); listener.openAsync().join(); Scanner in = new Scanner(System.in); System.out.println("Press ENTER to terminate this program."); in.nextLine(); listener.close(); in.close(); }您的
Listener.java檔案看起來應該像下面這樣:package com.example.listener; import java.io.BufferedReader; import java.io.IOException; import java.io.InputStreamReader; import java.net.URI; import java.net.URISyntaxException; import java.util.Scanner; import com.microsoft.azure.relay.HybridConnectionListener; import com.microsoft.azure.relay.RelayConnectionStringBuilder; import com.microsoft.azure.relay.RelayedHttpListenerResponse; import com.microsoft.azure.relay.TokenProvider; public class Listener { public static String createConnectionString(){ StringBuilder connectionString = new StringBuilder(); connectionString.append("Endpoint=sb://"); connectionString.append("{namespace}"); connectionString.append(".servicebus.windows.net/;SharedAccessKeyName="); connectionString.append("{keyrule}"); connectionString.append(";SharedAccessKey="); connectionString.append("{key}"); connectionString.append(";EntityPath="); connectionString.append("{path}"); return connectionString.toString(); } public static void main( String[] args ) throws URISyntaxException { String CONNECTION_STRING_ENV_VARIABLE_NAME = createConnectionString(); RelayConnectionStringBuilder connectionParams = new RelayConnectionStringBuilder(CONNECTION_STRING_ENV_VARIABLE_NAME); TokenProvider tokenProvider = TokenProvider.createSharedAccessSignatureTokenProvider( connectionParams.getSharedAccessKeyName(), connectionParams.getSharedAccessKey()); HybridConnectionListener listener = new HybridConnectionListener(new URI(connectionParams.getEndpoint().toString() + connectionParams.getEntityPath()), tokenProvider); // The "context" object encapsulates both the incoming request and the outgoing response listener.setRequestHandler((context) -> { String receivedText = ""; if (context.getRequest().getInputStream() != null) { try (BufferedReader reader = new BufferedReader(new InputStreamReader(context.getRequest().getInputStream(), "UTF8"))) { StringBuilder builder = new StringBuilder(); String inputLine; while ((inputLine = reader.readLine()) != null) { builder.append(inputLine); } receivedText = builder.toString(); } catch (IOException e) { System.out.println(e.getMessage()); } } System.out.println("requestHandler received " + receivedText); RelayedHttpListenerResponse response = context.getResponse(); response.setStatusCode(202); response.setStatusDescription("OK"); try { response.getOutputStream().write(("Echo: " + receivedText).getBytes()); } catch (IOException e) { e.printStackTrace(); } // The context MUST be closed for the message to be sent response.close(); }); listener.openAsync().join(); Scanner in = new Scanner(System.in); System.out.println("Press ENTER to terminate this program."); in.nextLine(); listener.close(); in.close(); } }
建立用戶端應用程式 (傳送者)
為了傳送訊息到轉送,您可以使用任何 HTTP 用戶端或撰寫 Java 主控台應用程式。
建立 Java 應用程式
如果您在建立轉送時停用 [需要用戶端授權] 選項,您可以使用任何瀏覽器將要求傳送至混合式連線 URL。 若要存取受保護的端點,您需要建立權杖,並在 ServiceBusAuthorization 標頭中傳遞權杖,如下所示。
以下是簡單的 Maven 項目結構和 Java 類別,示範如何使用 Azure 轉送連結庫將要求傳送至混合式連線 URL 與用戶端授權。
新增轉寄套件
修改 maven 應用程式套件中的pom.xml檔案,以包含 Azure 轉寄套件。
<dependency>
	<groupId>com.microsoft.azure</groupId>
	<artifactId>azure-relay</artifactId>
	<version>0.0.6</version>
</dependency>
在 mvn 專案中執行 mvn dependency:copy-dependencies -DoutputDirectory=lib,以在專案的 lib 目錄中新增相依項目 jar 檔案。 它也會匯入mvn套件的所有相依性 azure-relay 。 此套件提供函式來建構轉寄統一資源識別碼 (URI) 和令牌。
撰寫一些程式碼來傳送訊息
將相依項目 jar 檔案新增至
Sender.java檔案的 ClassPath。javac -cp lib/* src/main/java/com/example/sender/Sender.Java將相依項目匯入您的
Sender.java類別。import java.io.BufferedReader; import java.io.IOException; import java.io.InputStream; import java.io.InputStreamReader; import java.io.OutputStreamWriter; import java.net.HttpURLConnection; import java.net.MalformedURLException; import java.net.URL; import java.time.Duration; import java.util.Scanner; import com.microsoft.azure.relay.RelayConnectionStringBuilder; import com.microsoft.azure.relay.TokenProvider;將下列
constants新增至Sender.java檔案頂端的createConnectionStringjava 函式,提供混合式連線的詳細資料。public static String createConnectionString(){ StringBuilder connectionString = new StringBuilder(); connectionString.append("Endpoint=sb://"); connectionString.append("{namespace}"); connectionString.append(".servicebus.windows.net/;SharedAccessKeyName="); connectionString.append("{keyrule}"); connectionString.append(";SharedAccessKey="); connectionString.append("{key}"); connectionString.append(";EntityPath="); connectionString.append("{path}"); return connectionString.toString(); }將方括號中的預留位置取代為您在建立混合式連線時所取得的值。
namespace- 轉送命名空間。 務必使用完整命名空間名稱;例如,{namespace}.servicebus.windows.net。path- 混合式連線的名稱。keyrule- 預設為共用存取原則金鑰RootManageSharedAccessKey的名稱。nst key- 您稍早儲存之命名空間的主鍵。
將下列程式碼新增至
Sender.java檔案。 main 函式看起來應該像下列程序代碼。public static void main(String[] args) throws IOException { String CONNECTION_STRING_ENV_VARIABLE_NAME = createConnectionString(); if (CONNECTION_STRING_ENV_VARIABLE_NAME == null || CONNECTION_STRING_ENV_VARIABLE_NAME.isEmpty()){ System.err.println("Connection string is null or empty. Please check your createConnectionString method."); return; } RelayConnectionStringBuilder connectionParams = new RelayConnectionStringBuilder(CONNECTION_STRING_ENV_VARIABLE_NAME); TokenProvider tokenProvider = TokenProvider.createSharedAccessSignatureTokenProvider( connectionParams.getSharedAccessKeyName(), connectionParams.getSharedAccessKey()); URL url = buildHttpConnectionURL(connectionParams.getEndpoint().toString(), connectionParams.getEntityPath()); String tokenString = tokenProvider.getTokenAsync(url.toString(), Duration.ofHours(1)).join().getToken(); Scanner in = new Scanner(System.in); while (true) { System.out.println("Press ENTER to terminate this program."); String message = in.nextLine(); int value = System.in.read(); if (value == '\n' || value == '\r') { System.out.println("Terminating the program..."); break;} // Starting a HTTP connection to the listener HttpURLConnection conn = (HttpURLConnection) url.openConnection(); // Sending an HTTP request to the listener // To send a message body, use POST conn.setRequestMethod((message == null || message.length() == 0) ? "GET" : "POST"); conn.setRequestProperty("ServiceBusAuthorization", tokenString); conn.setDoOutput(true); OutputStreamWriter out = new OutputStreamWriter(conn.getOutputStream()); out.write(message, 0, message.length()); out.flush(); out.close(); // Reading the HTTP response String inputLine; BufferedReader reader = null; StringBuilder responseBuilder = new StringBuilder(); try { InputStream inputStream = conn.getInputStream(); reader = new BufferedReader(new InputStreamReader(inputStream)); System.out.println("status code: " + conn.getResponseCode()); while ((inputLine = reader.readLine()) != null) { responseBuilder.append(inputLine); } System.out.println("received back " + responseBuilder.toString()); } catch (IOException e) { System.out.println("The listener is offline or could not be reached."); break; } finally { if (reader != null) { reader.close(); } } } in.close(); } static URL buildHttpConnectionURL(String endpoint, String entity) throws MalformedURLException { StringBuilder urlBuilder = new StringBuilder(endpoint + entity); // For HTTP connections, the scheme must be https:// int schemeIndex = urlBuilder.indexOf("://"); if (schemeIndex < 0) { throw new IllegalArgumentException("Invalid scheme from the given endpoint."); } urlBuilder.replace(0, schemeIndex, "https"); return new URL(urlBuilder.toString()); }您的
Sender.java檔案看起來應該像下面這樣:package com.example.sender; import java.io.BufferedReader; import java.io.IOException; import java.io.InputStream; import java.io.InputStreamReader; import java.io.OutputStreamWriter; import java.net.HttpURLConnection; import java.net.MalformedURLException; import java.net.URL; import java.time.Duration; import java.util.Scanner; import com.microsoft.azure.relay.RelayConnectionStringBuilder; import com.microsoft.azure.relay.TokenProvider; public class Sender { public static String createConnectionString(){ StringBuilder connectionString = new StringBuilder(); connectionString.append("Endpoint=sb://"); connectionString.append("{namespace}"); connectionString.append(".servicebus.windows.net/;SharedAccessKeyName="); connectionString.append("{keyrule}"); connectionString.append(";SharedAccessKey="); connectionString.append("{key}"); connectionString.append(";EntityPath="); connectionString.append("{path}"); return connectionString.toString(); } public static void main(String[] args) throws IOException { String CONNECTION_STRING_ENV_VARIABLE_NAME = createConnectionString(); if (CONNECTION_STRING_ENV_VARIABLE_NAME == null || CONNECTION_STRING_ENV_VARIABLE_NAME.isEmpty()){ System.err.println("Connection string is null or empty. Please check your createConnectionString method."); return; } RelayConnectionStringBuilder connectionParams = new RelayConnectionStringBuilder(CONNECTION_STRING_ENV_VARIABLE_NAME); TokenProvider tokenProvider = TokenProvider.createSharedAccessSignatureTokenProvider( connectionParams.getSharedAccessKeyName(), connectionParams.getSharedAccessKey()); URL url = buildHttpConnectionURL(connectionParams.getEndpoint().toString(), connectionParams.getEntityPath()); String tokenString = tokenProvider.getTokenAsync(url.toString(), Duration.ofHours(1)).join().getToken(); Scanner in = new Scanner(System.in); while (true) { System.out.println("Press ENTER to terminate this program."); String message = in.nextLine(); int value = System.in.read(); if (value == '\n' || value == '\r') { System.out.println("Terminating the program..."); break;} // Starting a HTTP connection to the listener HttpURLConnection conn = (HttpURLConnection) url.openConnection(); // Sending an HTTP request to the listener // To send a message body, use POST conn.setRequestMethod((message == null || message.length() == 0) ? "GET" : "POST"); conn.setRequestProperty("ServiceBusAuthorization", tokenString); conn.setDoOutput(true); OutputStreamWriter out = new OutputStreamWriter(conn.getOutputStream()); out.write(message, 0, message.length()); out.flush(); out.close(); // Reading the HTTP response String inputLine; BufferedReader reader = null; StringBuilder responseBuilder = new StringBuilder(); try { InputStream inputStream = conn.getInputStream(); reader = new BufferedReader(new InputStreamReader(inputStream)); System.out.println("status code: " + conn.getResponseCode()); while ((inputLine = reader.readLine()) != null) { responseBuilder.append(inputLine); } System.out.println("received back " + responseBuilder.toString()); } catch (IOException e) { System.out.println("The listener is offline or could not be reached."); break; } finally { if (reader != null) { reader.close(); } } } in.close(); } static URL buildHttpConnectionURL(String endpoint, String entity) throws MalformedURLException { StringBuilder urlBuilder = new StringBuilder(endpoint + entity); // For HTTP connections, the scheme must be https:// int schemeIndex = urlBuilder.indexOf("://"); if (schemeIndex < 0) { throw new IllegalArgumentException("Invalid scheme from the given endpoint."); } urlBuilder.replace(0, schemeIndex, "https"); return new URL(urlBuilder.toString()); } }
注意
本文中的範例程式代碼會使用 連接字串 向 Azure 轉寄命名空間進行驗證,讓教學課程保持簡單。 建議您在生產環境中使用 Microsoft Entra ID 驗證,而不是使用 連接字串 或共用存取簽章,這更容易遭到入侵。 如需使用 Microsoft Entra 識別子驗證的詳細資訊和範例程式代碼,請參閱 使用 Microsoft Entra 識別符來驗證應用程式以存取 Azure 轉寄實體 ,並使用 Microsoft Entra ID 驗證受控識別以存取 Azure 轉寄資源。
執行應用程式
- 執行伺服器應用程式:從 Java 命令提示字元或應用程式類型
java -cp <jar_dependency_path> com.example.listener.Listener.java。 - 執行用戶端應用程式:從 Java 命令提示字元或應用程式類型
java -cp <jar_dependency_path> com.example.sender.Sender.java,然後輸入一些文字。 - 確定伺服器應用程式主控台有將用戶端應用程式中所輸入的文字輸出。
恭喜您,您已經使用 Java 建立端對端混合式連線應用程式!
下一步
在本快速入門中,您已建立 Java 用戶端和使用 HTTP 來傳送和接收訊息的伺服器應用程式。 Azure 轉送的混合式連線功能也支援使用 WebSocket 來傳送和接收訊息。 若要了解如何搭配使用 WebSocket 和 Azure 轉送混合式連線,請參閱 WebSocket 快速入門。
在本快速入門中,您已使用 Java 來建立用戶端和伺服器應用程式。 若要了解如何使用 .NET Framework 撰寫用戶端和伺服器應用程式,請參閱 .NET WebSocket 快速入門或 .NET HTTP 快速入門。