建立 Defender EASM Azure 資源
本文說明如何使用 Azure 入口網站來建立 Microsoft Defender 外部受攻擊面管理 (Defender EASM) Azure 資源。 使用者可以透過 30 天免費試用來開始使用 Defender EASM。 一旦試用即將到期,您會透過橫幅和推播通知收到通知。
建立 Defender EASM Azure 資源牽涉到兩個步驟:
- 建立資源群組。
- 在資源群組中建立 Defender EASM 資源。
必要條件
在建立 Defender EASM 資源群組之前,請先熟悉如何存取和使用 Azure 入口網站。 也請閱讀 Defender EASM 概觀文章,以了解該產品的主要內容。 您需要:
- 有效的 Azure 訂用帳戶或免費的 Defender EASM 試用版帳戶。 如果您沒有 Azure 訂用帳戶,請在開始前建立一個免費的 Azure 帳戶。
- 指派給您以建立資源的參與者角色。 若要將此角色指派給您的帳戶,請遵循指派角色文件中的步驟。 或者,您也可以連絡系統管理員。
建立資源群組
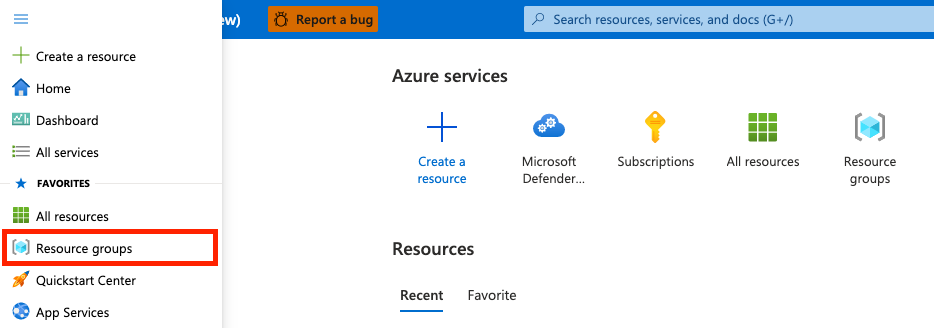
若要建立新的資源群組,請在 Azure 入口網站中選取 [資源群組]。
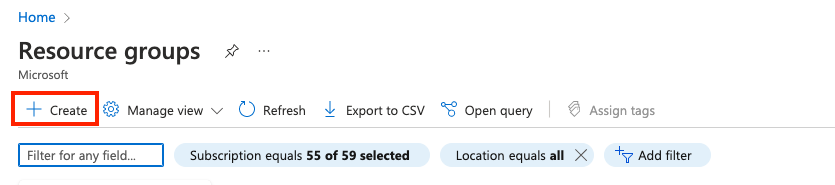
在 [資源群組] 底下,選取 [建立]。
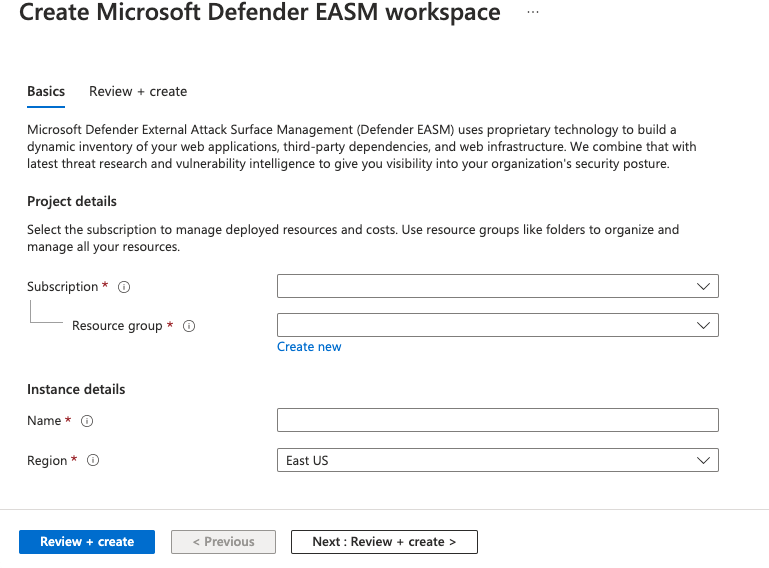
選取或輸入下列屬性值:
- 訂用帳戶:選取 Azure 訂用帳戶。
- 資源群組:為資源群組提供名稱。
- 區域:指定 Azure 位置。 此位置即資源群組儲存資源相關中繼資料的位置。 為了符合法規,您可能會想要指定中繼資料的儲存位置。 一般情況下,我們建議您指定大部分資源所在的位置。 使用相同位置可簡化範本。 目前支援下列區域:
- southcentralus
- eastus
- australiaeast
- westus3
- swedencentral
- eastasia
- japaneast
- westeurope
- northeurope
- switzerlandnorth
- canadacentral
- centralus
- norwayeast
- francecentral

選取 [檢閱 + 建立]。
檢閱這些值,然後選取 [建立]。
選取 [重新整理] 以檢視清單中的新資源群組。
在資源群組中建立資源
建立資源群組之後,您可以在 Azure 入口網站中搜尋 Defender EASM,以在群組中建立 Defender EASM 資源。
在搜尋方塊中,輸入 Microsoft Defender EASM,然後選取 Enter。
選取 [建立] 以建立 Defender EASM 資源。

選取或輸入下列屬性值:
- 訂用帳戶:選取 Azure 訂用帳戶。
- 資源群組:選取在先前步驟中所建立的資源群組。 您也可以在建立此資源的過程中建立新的資源。
- 名稱:為 Defender EASM 工作區命名。
- 區域:選取 Azure 位置。 請參閱上一節中所列的支援區域。
選取 [檢閱 + 建立]。
檢閱這些值,然後選取 [建立]。
選取 [重新整理] 以查看資源建立的狀態。 現在您可以移至資源以開始。