教學課程:從 iOS 或 macOS 應用程式登入使用者並呼叫 Microsoft Graph
在本教學課程中,您會建置與 Microsoft 身分識別平台整合的 iOS 或 macOS 應用程式,將使用者登入,並取得存取權杖以呼叫 Microsoft Graph API。
完成教學課程後,您的應用程式會接受使用個人 Microsoft 帳戶 (包括 outlook.com、live.com 和其他帳戶),以及採用 Microsoft Entra ID 的公司或組織所提供的公司或學校帳戶登入。 本教學課程適用於 iOS 和 macOS 應用程式。 這兩個平台間有一些的不同步驟。
在本教學課程中:
- 在「Xcode」中建立 iOS 或 macOS 應用程式保護
- 在 Microsoft Entra 系統管理中心註冊應用程式
- 新增程式碼以支援使用者登入和登出
- 新增程式碼以呼叫 Microsoft Graph API
- 測試應用程式
必要條件
教學課程應用程式的運作方式

本教學課程中的應用程式可以登入使用者,並且代表他們從 Microsoft Graph 取得資料。 此資料會透過需要授權的受保護 API 來存取 (在此案例中為 Microsoft Graph API),並會受到 Microsoft 身分識別平台保護。
更明確地說:
- 您的應用程式會透過瀏覽器或 Microsoft Authenticator 來登入使用者。
- 終端使用者會接受您應用程式已要求的權限。
- 您的應用程式會對 Microsoft Graph API 發出存取權杖。
- 此存取權杖會包含在 Web API 的 HTTP 要求中。
- 處理 Microsoft Graph 回應。
此範例會使用 Microsoft 驗證程式庫 (MSAL) 來實作驗證。 MSAL 會自動更新權杖、提供裝置上其他應用程式之間的 SSO,以及管理帳戶。
如果您想要下載您在本教學課程中所建置應用程式的完整版本,您可以在 GitHub 上找到以下兩個版本:
- iOS 程式碼範例 (GitHub)
- macOS 程式碼範例 (GitHub)
建立新專案
- 開啟 Xcode,然後選取 [Create a new Xcode project] \(建立新的 Xcode 專案\)。
- 針對 iOS 應用程式,選取 [iOS]>[單一檢視應用程式],然後選取 [下一步]。
- 針對 macOS 應用程式,選取 [macOS]>[Cocoa 應用程式],然後選取 [下一步]。
- 提供產品名稱。
- 將 [語言] 設定為 [Swift],然後選取 [下一步]。
- 選取資料夾來建立應用程式,然後選取 [建立]。
註冊應用程式
提示
根據您開始使用的入口網站,本文中的步驟可能略有不同。
- 至少以應用程式開發人員的身分登入 Microsoft Entra 系統管理中心。
- 如有多個租用戶的存取權,請使用頂端功能表中的 [設定] 圖示
 ,從 [目錄 + 訂用帳戶] 功能表來切換要在其中註冊應用程式的租用戶。
 - 瀏覽至 [身分識別] > [應用程式] > [應用程式註冊]。
- 選取新增註冊。
- 輸入應用程式的名稱。 您的應用程式使用者可能會看到此名稱,而且您稍後可以加以變更。
- 在 [支援的帳戶類型] 下,選取 [任何組織目錄中的帳戶 (任何 Microsoft Entra 目錄 - 多租用戶) 和個人 Microsoft 帳戶 (例如 Skype、Xbox)]。
- 選取註冊。
- 在 [管理] 底下,選取 [驗證]>[新增平台]>[iOS/macOS]。
- 輸入您專案的組合識別碼。 如果下載程式代碼範例,搭售方案組合識別碼為
com.microsoft.identitysample.MSALiOS。 如果您要建立自己的專案,請在 Xcode 中選取您的專案,然後開啟 [一般] 索引標籤。[身分識別] 區段中會出現組合識別碼。 - 選取 [設定] 並儲存出現在 [MSAL 組態] 頁面中的 [MSAL 組態],以便稍後在設定應用程式時可加以輸入。
- 選取完成。
新增 MSAL
選擇下列其中一種方式,在您的應用程式中安裝 MSAL 程式庫:
CocoaPods \(英文\)
如果您使用 CocoaPods,請先在專案中 .xcodeproj 檔案所在的資料夾內,建立名為podfile 的空白檔案,然後再安裝
MSAL。 將下列內容加入至 podfile:use_frameworks! target '<your-target-here>' do pod 'MSAL' end將
<your-target-here>取代為您的專案名稱。在終端視窗中,瀏覽至您建立的 podfile 包含在其中的資料夾,然後執行
pod install來安裝 MSAL 程式庫。關閉 Xcode 並開啟
<your project name>.xcworkspace來重新載入 Xcode 中的專案。
Carthage
如果您使用 Carthage 來安裝 MSAL,可將其新增到 Cartfile:
github "AzureAD/microsoft-authentication-library-for-objc" "master"
從終端機視窗中,在與更新後的 Cartfile 相同目錄中執行下列命令,讓 Carthage 更新專案中的相依性。
iOS:
carthage update --platform iOS
macOS:
carthage update --platform macOS
手動
您也可以使用 Git 子模組或簽出最新版本來作為應用程式中的架構使用。
新增應用程式註冊
接下來,我們會將您的應用程式註冊新增到您的程式碼。
首先,將下列 import 陳述式新增至 ViewController.swift 檔案頂端,並且新增至 AppDelegate.swift 或 SceneDelegate.swift:
import MSAL
接下來,將下列程式碼新增至 ViewController.swift,再新增至 viewDidLoad():
// Update the below to your client ID. The below is for running the demo only
let kClientID = "Your_Application_Id_Here"
let kGraphEndpoint = "https://graph.microsoft.com/" // the Microsoft Graph endpoint
let kAuthority = "https://login.microsoftonline.com/common" // this authority allows a personal Microsoft account and a work or school account in any organization's Azure AD tenant to sign in

let kScopes: [String] = ["user.read"] // request permission to read the profile of the signed-in user

var accessToken = String()
var applicationContext : MSALPublicClientApplication?
var webViewParameters : MSALWebviewParameters?
var currentAccount: MSALAccount?
唯一修改的值是指派給 kClientID 的值,應修改為您的應用程式識別碼。 此值是 MSAL 設定資料的一部分,也就是本教學課程一開始以步驟引導註冊應用程式時,您所儲存的資料。
進行 Xcode 專案設定
將新的金鑰鏈群組新增至您的專案簽署和功能。 在 iOS 上金鑰鏈群組應為 com.microsoft.adalcache,而在 macOS 上應為 com.microsoft.identity.universalstorage。
(僅適用於 iOS) 設定 URL 配置
您將在此步驟中註冊 CFBundleURLSchemes,讓使用者可以在登入之後重新導回應用程式。 順便一提,LSApplicationQueriesSchemes也可讓您的應用程式使用 Microsoft Authenticator。
在 Xcode 中,以原始檔的形式開啟 Info.plist,並在 <dict> 區段內新增下列程式碼。 將 [BUNDLE_ID] 取代為您先前使用的值。 如果您已下載程式碼,則套件組合識別碼為 com.microsoft.identitysample.MSALiOS。 如果您要建立自己的專案,請在 Xcode 中選取您的專案,然後開啟 [一般] 索引標籤。[身分識別] 區段中會出現組合識別碼。
<key>CFBundleURLTypes</key>
<array>
    <dict>
        <key>CFBundleURLSchemes</key>
        <array>
            <string>msauth.[BUNDLE_ID]</string>
        </array>
    </dict>
</array>
<key>LSApplicationQueriesSchemes</key>
<array>
    <string>msauthv2</string>
    <string>msauthv3</string>
</array>
(僅適用於 macOS) 設定應用程式沙箱
- 移至您的 [Xcode 專案設定] [功能索引標籤]> >[應用程式沙箱]
- 選取 [傳出連線 (用戶端)] 核取方塊。
建立您應用程式的 UI
現在,請建立 UI 來包含一個可呼叫 Microsoft Graph API 的按鈕,以及另一個用來登出的按鈕,並且藉由將下列程式碼新增至ViewController類別來包含可查看部分輸出的文字檢視:
iOS UI
var loggingText: UITextView!
var signOutButton: UIButton!
var callGraphButton: UIButton!
var usernameLabel: UILabel!

func initUI() {

    usernameLabel = UILabel()
    usernameLabel.translatesAutoresizingMaskIntoConstraints = false
    usernameLabel.text = ""
    usernameLabel.textColor = .darkGray
    usernameLabel.textAlignment = .right

    self.view.addSubview(usernameLabel)

    usernameLabel.topAnchor.constraint(equalTo: view.topAnchor, constant: 50.0).isActive = true
    usernameLabel.rightAnchor.constraint(equalTo: view.rightAnchor, constant: -10.0).isActive = true
    usernameLabel.widthAnchor.constraint(equalToConstant: 300.0).isActive = true
    usernameLabel.heightAnchor.constraint(equalToConstant: 50.0).isActive = true

    // Add call Graph button
    callGraphButton  = UIButton()
    callGraphButton.translatesAutoresizingMaskIntoConstraints = false
    callGraphButton.setTitle("Call Microsoft Graph API", for: .normal)
    callGraphButton.setTitleColor(.blue, for: .normal)
    callGraphButton.addTarget(self, action: #selector(callGraphAPI(_:)), for: .touchUpInside)
    self.view.addSubview(callGraphButton)

    callGraphButton.centerXAnchor.constraint(equalTo: view.centerXAnchor).isActive = true
    callGraphButton.topAnchor.constraint(equalTo: view.topAnchor, constant: 120.0).isActive = true
    callGraphButton.widthAnchor.constraint(equalToConstant: 300.0).isActive = true
    callGraphButton.heightAnchor.constraint(equalToConstant: 50.0).isActive = true

    // Add sign out button
    signOutButton = UIButton()
    signOutButton.translatesAutoresizingMaskIntoConstraints = false
    signOutButton.setTitle("Sign Out", for: .normal)
    signOutButton.setTitleColor(.blue, for: .normal)
    signOutButton.setTitleColor(.gray, for: .disabled)
    signOutButton.addTarget(self, action: #selector(signOut(_:)), for: .touchUpInside)
    self.view.addSubview(signOutButton)

    signOutButton.centerXAnchor.constraint(equalTo: view.centerXAnchor).isActive = true
    signOutButton.topAnchor.constraint(equalTo: callGraphButton.bottomAnchor, constant: 10.0).isActive = true
    signOutButton.widthAnchor.constraint(equalToConstant: 150.0).isActive = true
    signOutButton.heightAnchor.constraint(equalToConstant: 50.0).isActive = true

    let deviceModeButton = UIButton()
    deviceModeButton.translatesAutoresizingMaskIntoConstraints = false
    deviceModeButton.setTitle("Get device info", for: .normal);
    deviceModeButton.setTitleColor(.blue, for: .normal);
    deviceModeButton.addTarget(self, action: #selector(getDeviceMode(_:)), for: .touchUpInside)
    self.view.addSubview(deviceModeButton)

    deviceModeButton.centerXAnchor.constraint(equalTo: view.centerXAnchor).isActive = true
    deviceModeButton.topAnchor.constraint(equalTo: signOutButton.bottomAnchor, constant: 10.0).isActive = true
    deviceModeButton.widthAnchor.constraint(equalToConstant: 150.0).isActive = true
    deviceModeButton.heightAnchor.constraint(equalToConstant: 50.0).isActive = true

    // Add logging textfield
    loggingText = UITextView()
    loggingText.isUserInteractionEnabled = false
    loggingText.translatesAutoresizingMaskIntoConstraints = false

    self.view.addSubview(loggingText)

    loggingText.topAnchor.constraint(equalTo: deviceModeButton.bottomAnchor, constant: 10.0).isActive = true
    loggingText.leftAnchor.constraint(equalTo: self.view.leftAnchor, constant: 10.0).isActive = true
    loggingText.rightAnchor.constraint(equalTo: self.view.rightAnchor, constant: -10.0).isActive = true
    loggingText.bottomAnchor.constraint(equalTo: self.view.bottomAnchor, constant: 10.0).isActive = true
}

func platformViewDidLoadSetup() {

    NotificationCenter.default.addObserver(self,
                        selector: #selector(appCameToForeGround(notification:)),
                        name: UIApplication.willEnterForegroundNotification,
                        object: nil)

}

@objc func appCameToForeGround(notification: Notification) {
    self.loadCurrentAccount()
}
macOS UI
var callGraphButton: NSButton!
var loggingText: NSTextView!
var signOutButton: NSButton!

var usernameLabel: NSTextField!

func initUI() {

    usernameLabel = NSTextField()
    usernameLabel.translatesAutoresizingMaskIntoConstraints = false
    usernameLabel.stringValue = ""
    usernameLabel.isEditable = false
    usernameLabel.isBezeled = false
    self.view.addSubview(usernameLabel)

    usernameLabel.topAnchor.constraint(equalTo: view.topAnchor, constant: 30.0).isActive = true
    usernameLabel.rightAnchor.constraint(equalTo: view.rightAnchor, constant: -10.0).isActive = true

    // Add call Graph button
    callGraphButton  = NSButton()
    callGraphButton.translatesAutoresizingMaskIntoConstraints = false
    callGraphButton.title = "Call Microsoft Graph API"
    callGraphButton.target = self
    callGraphButton.action = #selector(callGraphAPI(_:))
    callGraphButton.bezelStyle = .rounded
    self.view.addSubview(callGraphButton)

    callGraphButton.centerXAnchor.constraint(equalTo: view.centerXAnchor).isActive = true
    callGraphButton.topAnchor.constraint(equalTo: view.topAnchor, constant: 50.0).isActive = true
    callGraphButton.heightAnchor.constraint(equalToConstant: 34.0).isActive = true

    // Add sign out button
    signOutButton = NSButton()
    signOutButton.translatesAutoresizingMaskIntoConstraints = false
    signOutButton.title = "Sign Out"
    signOutButton.target = self
    signOutButton.action = #selector(signOut(_:))
    signOutButton.bezelStyle = .texturedRounded
    self.view.addSubview(signOutButton)

    signOutButton.centerXAnchor.constraint(equalTo: view.centerXAnchor).isActive = true
    signOutButton.topAnchor.constraint(equalTo: callGraphButton.bottomAnchor, constant: 10.0).isActive = true
    signOutButton.heightAnchor.constraint(equalToConstant: 34.0).isActive = true
    signOutButton.isEnabled = false

    // Add logging textfield
    loggingText = NSTextView()
    loggingText.translatesAutoresizingMaskIntoConstraints = false

    self.view.addSubview(loggingText)

    loggingText.topAnchor.constraint(equalTo: signOutButton.bottomAnchor, constant: 10.0).isActive = true
    loggingText.leftAnchor.constraint(equalTo: self.view.leftAnchor, constant: 10.0).isActive = true
    loggingText.rightAnchor.constraint(equalTo: self.view.rightAnchor, constant: -10.0).isActive = true
    loggingText.bottomAnchor.constraint(equalTo: self.view.bottomAnchor, constant: -10.0).isActive = true
    loggingText.widthAnchor.constraint(equalToConstant: 500.0).isActive = true
    loggingText.heightAnchor.constraint(equalToConstant: 300.0).isActive = true
}

func platformViewDidLoadSetup() {}
接下來,也是在 ViewController 類別內,將 viewDidLoad() 方法取代為:
    override func viewDidLoad() {

        super.viewDidLoad()

        initUI()

        do {
            try self.initMSAL()
        } catch let error {
            self.updateLogging(text: "Unable to create Application Context \(error)")
        }

        self.loadCurrentAccount()
        self.platformViewDidLoadSetup()
    }
使用 MSAL
將 MSAL 初始化
對於 ViewController 類別,新增 initMSAL 方法:
    func initMSAL() throws {

        guard let authorityURL = URL(string: kAuthority) else {
            self.updateLogging(text: "Unable to create authority URL")
            return
        }

        let authority = try MSALAADAuthority(url: authorityURL)

        let msalConfiguration = MSALPublicClientApplicationConfig(clientId: kClientID, redirectUri: nil, authority: authority)
        self.applicationContext = try MSALPublicClientApplication(configuration: msalConfiguration)
        self.initWebViewParams()
    }
繼續在 ViewController 類別和 initMSAL 方法之後,新增 initWebViewParams 方法:
iOS 程式碼:
func initWebViewParams() {
        self.webViewParameters = MSALWebviewParameters(authPresentationViewController: self)
    }
macOS 程式碼:
func initWebViewParams() {
        self.webViewParameters = MSALWebviewParameters()
    }
處理登入回呼 (僅適用於 iOS)
開啟 AppDelegate.swift 檔案。 若要在登入之後處理回呼,請在 appDelegate 類別中新增 MSALPublicClientApplication.handleMSALResponse,如下所示:
// Inside AppDelegate...
func application(_ app: UIApplication, open url: URL, options: [UIApplication.OpenURLOptionsKey : Any] = [:]) -> Bool {

        return MSALPublicClientApplication.handleMSALResponse(url, sourceApplication: options[UIApplication.OpenURLOptionsKey.sourceApplication] as? String)
}
如果您使用的是 Xcode 11,則應將 MSAL 回呼放入 SceneDelegate.swift 檔案。 如果您同時支援 UISceneDelegate 和 UIApplicationDelegate 以便與舊版 iOS 相容,則必須將 MSAL 回呼放入這兩個檔案。
func scene(_ scene: UIScene, openURLContexts URLContexts: Set<UIOpenURLContext>) {

        guard let urlContext = URLContexts.first else {
            return
        }

        let url = urlContext.url
        let sourceApp = urlContext.options.sourceApplication

        MSALPublicClientApplication.handleMSALResponse(url, sourceApplication: sourceApp)
    }
取得權杖
現在,我們可以實作應用程式的 UI 處理邏輯,並以互動方式透過 MSAL 取得權杖。
MSAL 會公開兩個主要方法來取得權杖:acquireTokenSilently() 和 acquireTokenInteractively()。
只要帳戶存在,
acquireTokenSilently()就會嘗試登入使用者並取得權杖,並且不會與使用者有互動。acquireTokenSilently()需要有效的MSALAccount,可以使用其中一個 MSAL 帳戶列舉 API 來擷取。 本教學課程使用applicationContext.getCurrentAccount(with: msalParameters, completionBlock: {})擷取目前的帳戶。acquireTokenInteractively()在嘗試登入使用者時,一律會顯示 UI。 它可能會使用瀏覽器中的工作階段 Cookie 或 Microsoft 驗證器中的帳戶,以提供互動式 SSO 體驗。
將下列程式碼新增至 ViewController 類別:
    func getGraphEndpoint() -> String {
        return kGraphEndpoint.hasSuffix("/") ? (kGraphEndpoint + "v1.0/me/") : (kGraphEndpoint + "/v1.0/me/");
    }

    @objc func callGraphAPI(_ sender: AnyObject) {

        self.loadCurrentAccount { (account) in

            guard let currentAccount = account else {

                // We check to see if we have a current logged in account.
                // If we don't, then we need to sign someone in.
                self.acquireTokenInteractively()
                return
            }

            self.acquireTokenSilently(currentAccount)
        }
    }

    typealias AccountCompletion = (MSALAccount?) -> Void

    func loadCurrentAccount(completion: AccountCompletion? = nil) {

        guard let applicationContext = self.applicationContext else { return }

        let msalParameters = MSALParameters()
        msalParameters.completionBlockQueue = DispatchQueue.main

        applicationContext.getCurrentAccount(with: msalParameters, completionBlock: { (currentAccount, previousAccount, error) in

            if let error = error {
                self.updateLogging(text: "Couldn't query current account with error: \(error)")
                return
            }

            if let currentAccount = currentAccount {

                self.updateLogging(text: "Found a signed in account \(String(describing: currentAccount.username)). Updating data for that account...")

                self.updateCurrentAccount(account: currentAccount)

                if let completion = completion {
                    completion(self.currentAccount)
                }

                return
            }

            self.updateLogging(text: "Account signed out. Updating UX")
            self.accessToken = ""
            self.updateCurrentAccount(account: nil)

            if let completion = completion {
                completion(nil)
            }
        })
    }
以互動方式取得權杖
以下程式碼片段第一次取得權杖的方式是建立 MSALInteractiveTokenParameters 物件並呼叫 acquireToken。 接下來,您會新增程式碼來執行下列作業:
- 以範圍建立
MSALInteractiveTokenParameters。 - 使用已建立的參數呼叫
acquireToken()。 - 處理錯誤。 如需詳細資訊,請參閱適用於 iOS 和 macOS 的 MSAL 錯誤處理指南。
- 處理成功的情況。
將下列程式碼加入 ViewController 類別。
func acquireTokenInteractively() {

    guard let applicationContext = self.applicationContext else { return }
    guard let webViewParameters = self.webViewParameters else { return }

    // #1
    let parameters = MSALInteractiveTokenParameters(scopes: kScopes, webviewParameters: webViewParameters)
    parameters.promptType = .selectAccount

    // #2
    applicationContext.acquireToken(with: parameters) { (result, error) in

        // #3
        if let error = error {

            self.updateLogging(text: "Could not acquire token: \(error)")
            return
        }

        guard let result = result else {

            self.updateLogging(text: "Could not acquire token: No result returned")
            return
        }

        // #4
        self.accessToken = result.accessToken
        self.updateLogging(text: "Access token is \(self.accessToken)")
        self.updateCurrentAccount(account: result.account)
        self.getContentWithToken()
    }
}
MSALInteractiveTokenParameters 的 promptType 屬性會設定驗證和同意提示行為。 支援下列值:
.promptIfNecessary(預設值) - 只有在必要時才會提示使用者。 SSO 體驗取決於 Web 檢視中是否存在 Cookie,以及帳戶類型。 如果有多個使用者登入,則會顯示帳戶選取體驗。 此為預設行為。.selectAccount- 如果未指定任何使用者,驗證 Web 檢視會顯示目前已登入的帳戶清單,供使用者選取。.login- 需要使用者在 Web 檢視中進行驗證。 如果指定此值,一次只能有一個帳戶登入。.consent- 需要使用者同意要求的目前範圍集。
以無訊息方式取得權杖
若要以無訊息方式取得更新的權杖,請將下列程式碼新增至 ViewController 類別。 此動作會建立 MSALSilentTokenParameters 物件並呼叫 acquireTokenSilent():
    func acquireTokenSilently(_ account : MSALAccount!) {

        guard let applicationContext = self.applicationContext else { return }

        /**

         Acquire a token for an existing account silently

         - forScopes:           Permissions you want included in the access token received
         in the result in the completionBlock. Not all scopes are
         guaranteed to be included in the access token returned.
         - account:             An account object that we retrieved from the application object before that the
         authentication flow will be locked down to.
         - completionBlock:     The completion block that will be called when the authentication
         flow completes, or encounters an error.
         */

        let parameters = MSALSilentTokenParameters(scopes: kScopes, account: account)

        applicationContext.acquireTokenSilent(with: parameters) { (result, error) in

            if let error = error {

                let nsError = error as NSError

                // interactionRequired means we need to ask the user to sign-in. This usually happens
                // when the user's Refresh Token is expired or if the user has changed their password
                // among other possible reasons.

                if (nsError.domain == MSALErrorDomain) {

                    if (nsError.code == MSALError.interactionRequired.rawValue) {

                        DispatchQueue.main.async {
                            self.acquireTokenInteractively()
                        }
                        return
                    }
                }

                self.updateLogging(text: "Could not acquire token silently: \(error)")
                return
            }

            guard let result = result else {

                self.updateLogging(text: "Could not acquire token: No result returned")
                return
            }

            self.accessToken = result.accessToken
            self.updateLogging(text: "Refreshed Access token is \(self.accessToken)")
            self.updateSignOutButton(enabled: true)
            self.getContentWithToken()
        }
    }
呼叫 Microsoft Graph API
一旦您擁有權杖後,您的應用程式就可以在 HTTP 標頭中使用此權杖,進而對 Microsoft Graph 提出已授權的要求:
| 標頭索引鍵 | value |
|---|---|
| 授權 | 持有人<存取驗證權杖> |
將下列程式碼新增至 ViewController 類別:
    func getContentWithToken() {

        // Specify the Graph API endpoint
        let graphURI = getGraphEndpoint()
        let url = URL(string: graphURI)
        var request = URLRequest(url: url!)

        // Set the Authorization header for the request. We use Bearer tokens, so we specify Bearer + the token we got from the result
        request.setValue("Bearer \(self.accessToken)", forHTTPHeaderField: "Authorization")

        URLSession.shared.dataTask(with: request) { data, response, error in

            if let error = error {
                self.updateLogging(text: "Couldn't get graph result: \(error)")
                return
            }

            guard let result = try? JSONSerialization.jsonObject(with: data!, options: []) else {

                self.updateLogging(text: "Couldn't deserialize result JSON")
                return
            }

            self.updateLogging(text: "Result from Graph: \(result))")

            }.resume()
    }
請參閱 Microsoft Graph API 來深入了解 Microsoft Graph API。
使用 MSAL 登出
接著,新增登出的支援。
重要
使用 MSAL 登出會從應用程式中移除關於使用者的所有已知資訊,也會移除裝置上的裝置組態允許的作用中工作階段。 您也可以從瀏覽器選擇性地將使用者登出。
若要新增登出能力,請在 ViewController 類別中新增下列程式碼。
@objc func signOut(_ sender: AnyObject) {

        guard let applicationContext = self.applicationContext else { return }

        guard let account = self.currentAccount else { return }

        do {

            /**
             Removes all tokens from the cache for this application for the provided account

             - account:    The account to remove from the cache
             */

            let signoutParameters = MSALSignoutParameters(webviewParameters: self.webViewParameters!)
            signoutParameters.signoutFromBrowser = false // set this to true if you also want to signout from browser or webview

            applicationContext.signout(with: account, signoutParameters: signoutParameters, completionBlock: {(success, error) in

                if let error = error {
                    self.updateLogging(text: "Couldn't sign out account with error: \(error)")
                    return
                }

                self.updateLogging(text: "Sign out completed successfully")
                self.accessToken = ""
                self.updateCurrentAccount(account: nil)
            })

        }
    }
啟用權杖快取
根據預設,MSAL 會快取 iOS 或 macOS 金鑰鏈中的應用程式權杖。
啟用權杖快取:
- 確定您的應用程式已正確簽署
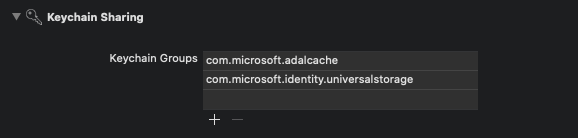
- 移至您的 [Xcode 專案設定] [功能索引標籤]>>[啟用 Keychain 共用]
- 選取 +,並輸入下列其中一個 Keychain 群組:
- iOS:
com.microsoft.adalcache - macOS:
com.microsoft.identity.universalstorage
- iOS:
新增協助程式方法
將下列協助程式方法新增至 ViewController 類別以完成範例。
iOS UI:
    func updateLogging(text : String) {

        if Thread.isMainThread {
            self.loggingText.text = text
        } else {
            DispatchQueue.main.async {
                self.loggingText.text = text
            }
        }
    }

    func updateSignOutButton(enabled : Bool) {
        if Thread.isMainThread {
            self.signOutButton.isEnabled = enabled
        } else {
            DispatchQueue.main.async {
                self.signOutButton.isEnabled = enabled
            }
        }
    }

    func updateAccountLabel() {

        guard let currentAccount = self.currentAccount else {
            self.usernameLabel.text = "Signed out"
            return
        }

        self.usernameLabel.text = currentAccount.username
    }

    func updateCurrentAccount(account: MSALAccount?) {
        self.currentAccount = account
        self.updateAccountLabel()
        self.updateSignOutButton(enabled: account != nil)
    }
macOS UI:
    func updateLogging(text : String) {

        if Thread.isMainThread {
            self.loggingText.string = text
        } else {
            DispatchQueue.main.async {
                self.loggingText.string = text
            }
        }
    }

    func updateSignOutButton(enabled : Bool) {
        if Thread.isMainThread {
            self.signOutButton.isEnabled = enabled
        } else {
            DispatchQueue.main.async {
                self.signOutButton.isEnabled = enabled
            }
        }
    }

     func updateAccountLabel() {

         guard let currentAccount = self.currentAccount else {
            self.usernameLabel.stringValue = "Signed out"
            return
        }

        self.usernameLabel.stringValue = currentAccount.username ?? ""
        self.usernameLabel.sizeToFit()
     }

     func updateCurrentAccount(account: MSALAccount?) {
        self.currentAccount = account
        self.updateAccountLabel()
        self.updateSignOutButton(enabled: account != nil)
    }
僅適用於 iOS:取得額外的裝置資訊
使用下列程式碼來讀取目前的裝置組態,包括裝置是否設定為共用:
    @objc func getDeviceMode(_ sender: AnyObject) {

        if #available(iOS 13.0, *) {
            self.applicationContext?.getDeviceInformation(with: nil, completionBlock: { (deviceInformation, error) in

                guard let deviceInfo = deviceInformation else {
                    self.updateLogging(text: "Device info not returned. Error: \(String(describing: error))")
                    return
                }

                let isSharedDevice = deviceInfo.deviceMode == .shared
                let modeString = isSharedDevice ? "shared" : "private"
                self.updateLogging(text: "Received device info. Device is in the \(modeString) mode.")
            })
        } else {
            self.updateLogging(text: "Running on older iOS. GetDeviceInformation API is unavailable.")
        }
    }
多重帳戶應用程式
此應用程式專為單一帳戶案例所建置。 MSAL 也支援多重帳戶案例,但需要應用程式執行額外的工作。 您必須建立 UI,以協助使用者為每個需要權杖的動作,選取想要使用的帳戶。 或者,您的應用程式可以實作啟發學習法,從 MSAL 查詢所有帳戶來選取要使用的帳戶。 例如,請參閱 accountsFromDeviceForParameters:completionBlock: API
測試您的應用程式
將應用程式建置及部署至測試裝置或模擬器。 您應該已能夠登入 Microsoft Entra ID 或個人 Microsoft 帳戶,並取得權杖。
使用者在初次登入您的應用程式時,Microsoft 身分識別都會提示他們同意所要求的權限。 大部分使用者都能夠親自同意,但某些 Microsoft Entra 租用戶已停用使用者同意,而需要系統管理員代表所有使用者表示同意。 若要支援此案例,請註冊您的應用程式範圍。
在您登入之後,應用程式會顯示從 Microsoft Graph /me 端點傳回的資料。
下一步
深入了解如何建置行動應用程式,以在我們的多部分案例系列中呼叫受保護的 Web API。