Create and manage solutions in Copilot Studio
When you create a copilot in Copilot Studio, it's collected within a Power Platform solution. You can create custom solutions to manage your copilots across multiple environments, or for pipeline deployments and other application lifecycle management (ALM) scenarios.
You can view, export and import solutions, set your preferred or default environment, configure pipelines, and customize and manage your solutions directly in Microsoft Copilot Studio.
Solutions can be useful if you use different environments for different purposes, or you employ ring-deployment methodologies. For example, you might have an environment to test and validate copilots, another environment to test copilots for only a subset of users, and a production environment where you share copilots with customers.
Prerequisites
- The solution explorer in Copilot Studio inherits the security role privileges of the user. This means a user can only perform the solution-management tasks in Copilot Studio that they can perform in the Power Apps admin center. Ensure your users have the correct roles and permissions to manage solutions. Learn more about configuring user security in an environment.
- Familiarity with Power Apps solution concepts.
View solutions in Copilot Studio
A solution acts as a "carrier" for your copilot. When you create a copilot, it's automatically added to a default solution, which you can change.
You can view the solution that contains your copilot in the solution explorer in Copilot Studio.
You can access the solution used by a specific copilot in a couple of ways:
From the copilot's overview page in Copilot Studio:
In Copilot Studio, open the copilot that you want to manage the solution for.
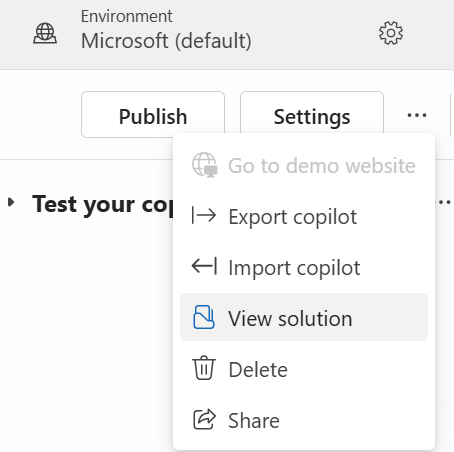
On the copilot's Overview page, select the menu icon (…) just below the environment name, next to Settings, and then select View solution.
From the copilot's settings in Copilot Studio:
In Copilot Studio, open the copilot that you want to manage the solution for.
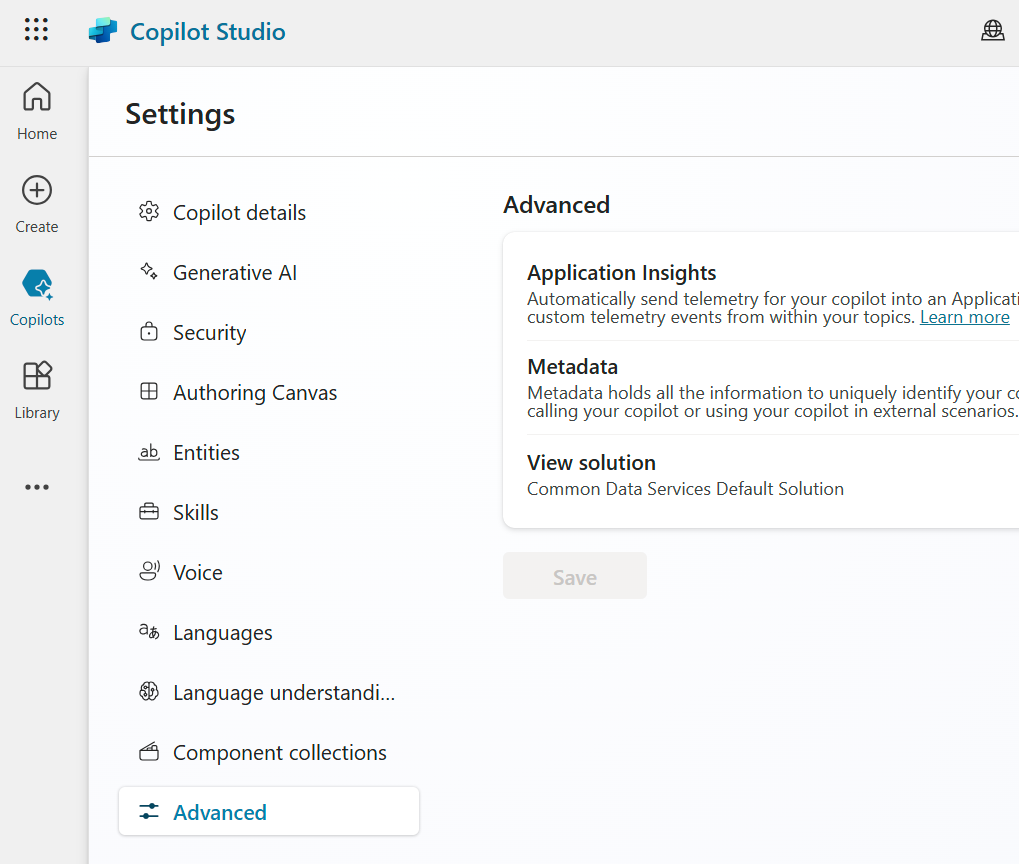
On the copilot's Overview page, select Settings, just below the environment name. You're taken to the settings page for the copilot.
On the Copilot details or Advanced page, select View solution.
To access the solution explorer:
From the side navigation pane in Copilot Studio:
In Copilot Studio, select the menu icon (…) on the side navigation pane, and then select Solutions.
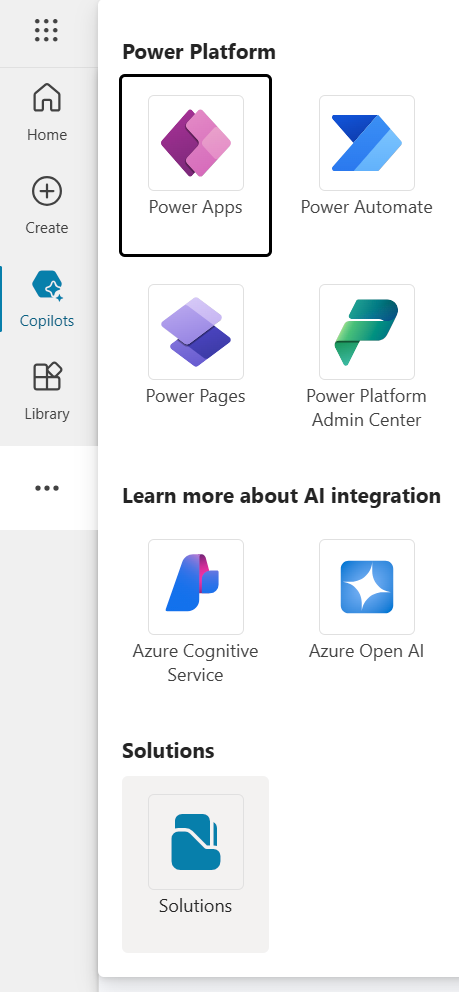
The solution explorer opens in a new browser tab.
Manage solutions in Copilot Studio
You can perform all the usual solution-related tasks directly in Copilot Studio, such as adding or removing components, exporting, and importing solutions:
- Set your preferred solution
- Create a custom solution
- Import and export solutions with your copilot
- Add components to a copilot in a custom solution
- Upgrade or update a solution with a copilot
- View solution layers and remove unmanaged layers from a managed copilot
- Create and manage pipelines for deployment
Tip
Ignore instructions in the Power Apps documentation that tell you to sign in to Power Apps. If you're logged in to Copilot Studio, you don't need to go to Power Apps.
Set your preferred solution
Open the solution explorer in Copilot Studio.
Select Set preferred solution on the top menu bar, above the list of solutions.
Choose the solution you want copilots to be created in by default.
See the Power Apps documentation for more information on setting your preferred solution.
Create a custom solution
Copilots are created in a default solution automatically. To export, import, and manage copilots between environments, you need to create and use a custom solution.
Open the solution explorer in Copilot Studio.
Select New solution, and follow the instructions and requirements in the Power Apps documentation to create a solution.
The solution you created should open automatically. If it doesn't, return to the solution explorer and select your new custom solution.
Import and export solutions
You can export and import the solutions that contain your copilots from one environment to another.
Follow the steps at Export and import solutions in Copilot Studio for more details on how to use solutions to export and import copilots.
Add components to a copilot in a custom solution
You might need to add components to your solution if you want to export a copilot.
Follow the instructions and requirements in the Power Apps documentation to add an existing component to a solution.
Upgrade or update a solution with a copilot
Follow the instructions and requirements in the Power Apps documentation to upgrade or update a solution.
Remove an unmanaged layer from a managed copilot
Managed and unmanaged solutions exist at different levels in a Microsoft Dataverse environment. To learn more, go to the Power Apps documentation for Solution layers.
Open your solution.
Select Copilots, and then select your copilot in the list.
Select Commands (⋮), select Advanced, and then select See solution layers.

In the Solution Layers page, select the unmanaged layer, and then select Remove unmanaged layer.
Create and manage solution pipelines
Solution pipelines are a feature of Power Platform that you can use to automate the deployment of solutions across environments.
Open the solution explorer in Copilot Studio.
Select Pipelines underneath the list of solutions.
Follow the instructions and requirements in the Power Apps documentation for creating and managing pipelines.