Detailed step by step installation guide
In this article, you’ll learn how to install and deploy the Community Training platform on your Azure subscription.
Before you begin
1. Create a pay-as-you-go Azure subscription
Create a pay-as-you-go Azure subscription. To learn more about how to create it, refer this article on Azure documentation.
If you have a free trial Azure subscription, please upgrade to a Pay-as-you-go Azure subscription. See the detailed steps here.
Warning
If you’re a nonprofit organization who wants to use Microsoft Community Training platform, you can apply and avail the Azure grant subject to eligibility. See the detailed steps here.
Note
If you are nonprofit, please make sure you are installing the Microsoft Community Training in the Microsoft Sponsored Subscription
2. Get the right ownership access
Get the owner access to your pay-as-you-go Azure subscription. To learn more about how to get access, refer this article on Azure documentation.
You will require Owner or Contributor role on the subscription to go through these steps.
Along with these,you will need to have:
- "Application Administrator" + "External ID User Flow Administrator" OR "Global Administrator" access - for Azure AD B2C
- "Application Administrator" OR "Global Administrator" - for Microsoft Entra ID
3. Get the required information
Based on the authentication type (Phone/Social login OR Work/School Account), you will need to have the following information handy.
| Key | Phone/Social Login (ADB2C) | Work/School Account (MS Entra ID) |
|---|---|---|
| Global Admin Contact | The emailID /phone number of the Global Admin on the Community Training portal | |
| Tenant Identifier | The tenant id of your Azure Active Directory B2C tenant | The tenant id of your Microsoft Entra ID tenant |
| Client Identifier | Client id of your Azure Active Directory B2C application | Client ID of the Microsoft Entra ID application |
| Client Secret | Client Secret Key of your Azure Active Directory B2C application | Client Secret Key of the Microsoft Entra ID application |
| User Flow Name | Name of the user-flow configured in your Azure Active Directory B2C tenan | N/A |
| Password Resetr Policy (Optional) | The password Reset Policy for the ADB2C Tenant. Please refer to this link | N/A |
| Tenant Name | Tenant name of your Azure Active Directory B2C tenant | Tenant name of your Microsoft EntraID tenant |
4. Create a Google Play Account
Sign up on Google Play console in order to publish your app on the Google Play Store. This is required only if you require mobile app for Microsoft Community Training instance.
Note
This step may be done later after installation.
Steps to deploy platform from Azure portal
Ensure you are completed all the pre-requisites.
Login to Azure portal using your credentials.
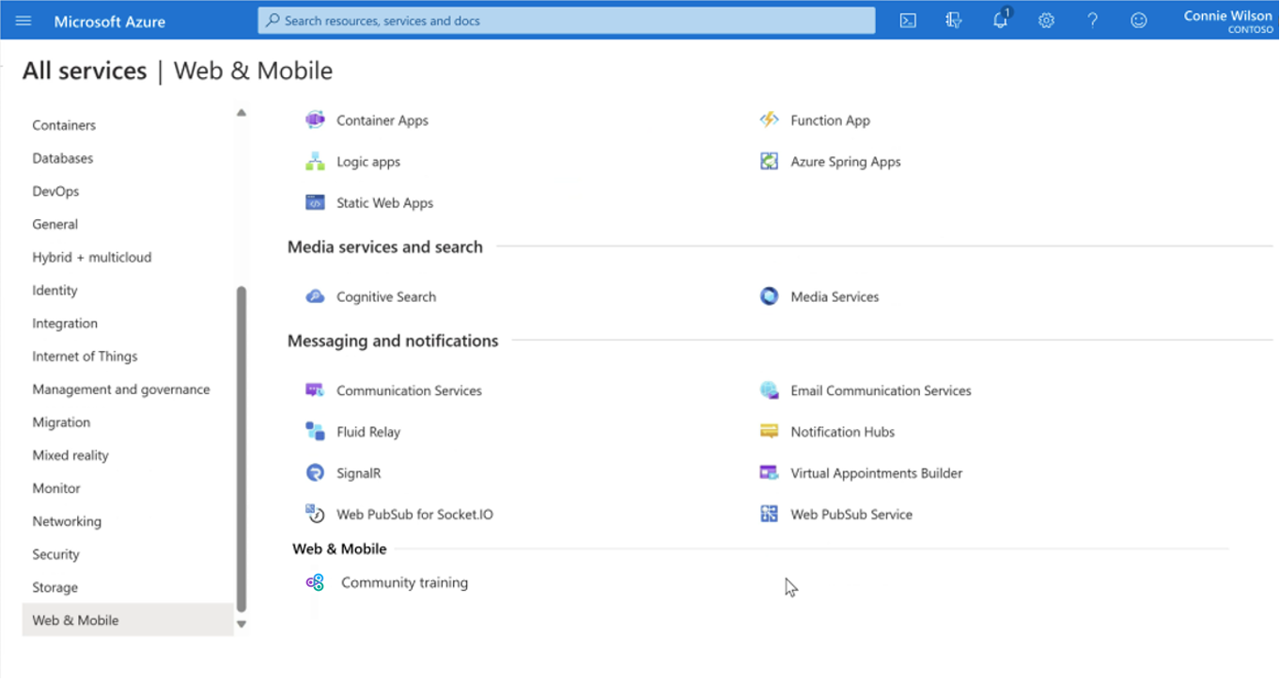
Under "All Services", locate Community Training under Web & Mobile and click on it.
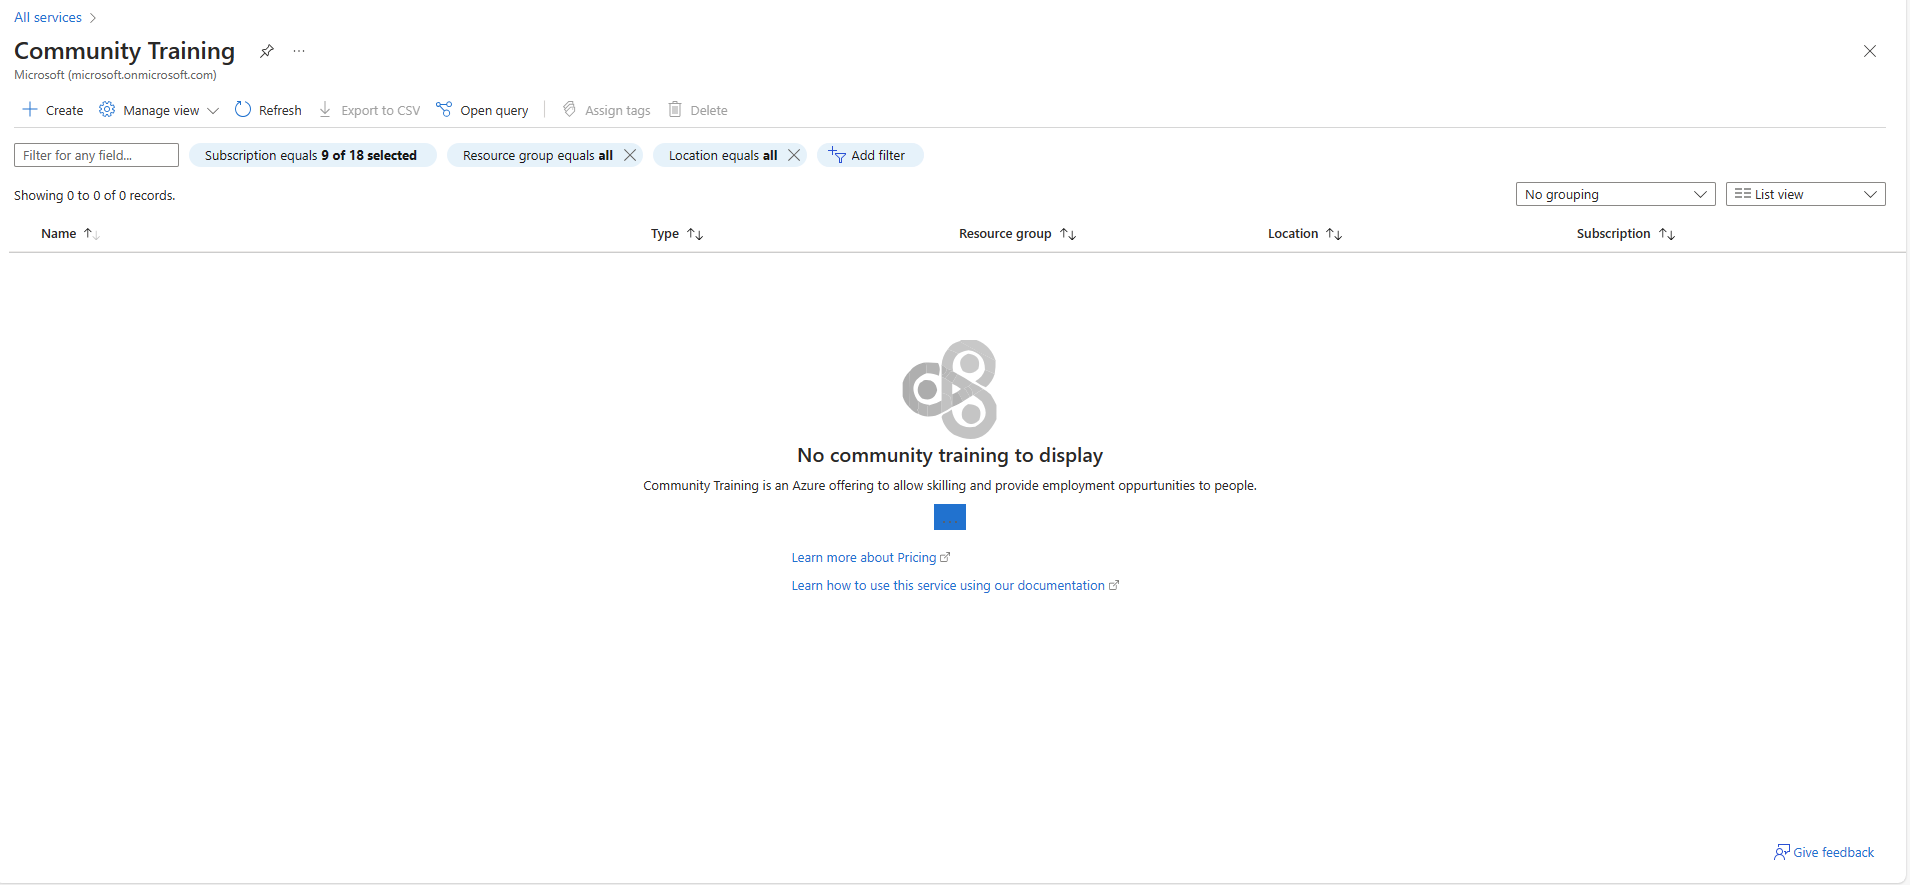
Click on Create Community Training to start the deployment process.
Note
If you already have an instance of the Community Training and would like to create a second one, click on create to the top left of the screen.
Note
Over the next few screens, you will enter the information required to set the platform.
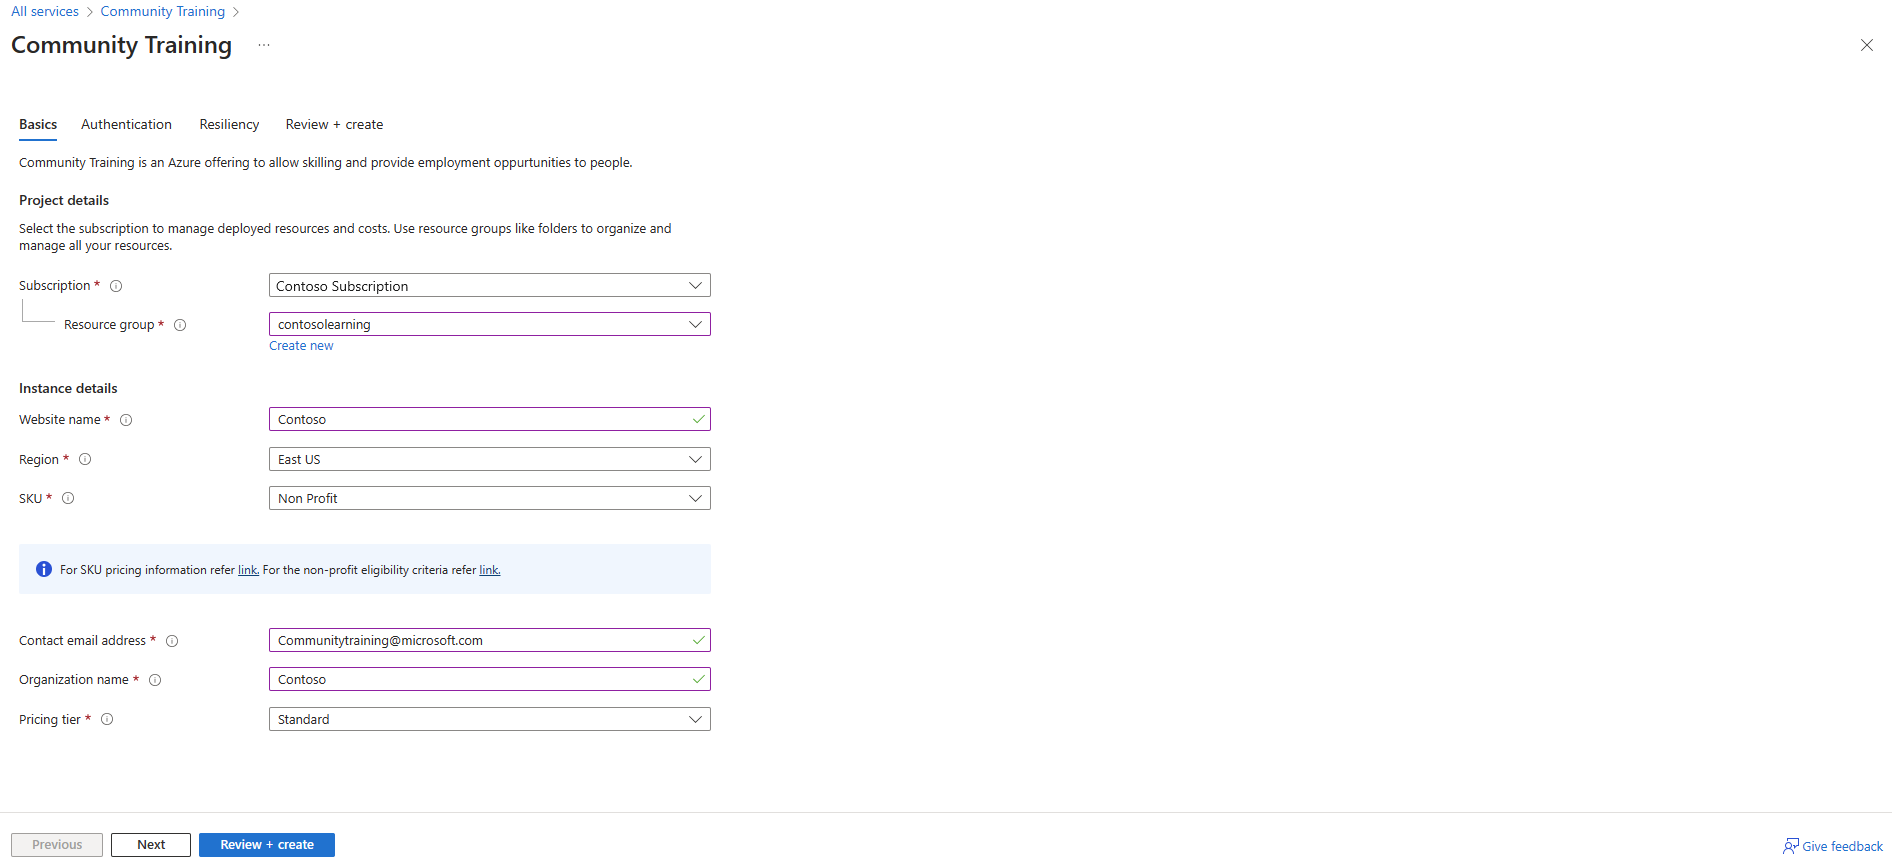
On the Basic information page, select the subscription ID associated with your account. If you have a resource group, please select. OR, click on "Create New" to create a new resouce group. Also select the SKU and the pricing tier.
Note
Community Training offers two SKUs with license fees in addition to an Azure infrastructure fee for cloud services consumers.
- Non-profit
- Commercial
For more information on the pricing, please visit the Pricing and Subscription
Note
Community Training Installations are offered in two pricing tiers.
- Standard
- Premium
For more information on the pricing, please visit the Pricing and Subscription
Once done, click on Next
Slect the type of Authentication you would like to have on your platform. The choices are between:
i. Social or Phone Login
ii. Work or School Accounti. Social or Phone Login
This option allows you to use a Google or Facebook based login to Community Training. For Phone based login, please refer to this link for pricing and setup.
Note
- Please refer to this documentation for social account configuration guide
- Please refer to this documentation for Phone Account Setup Guide
Please refer to this link for pricing information.
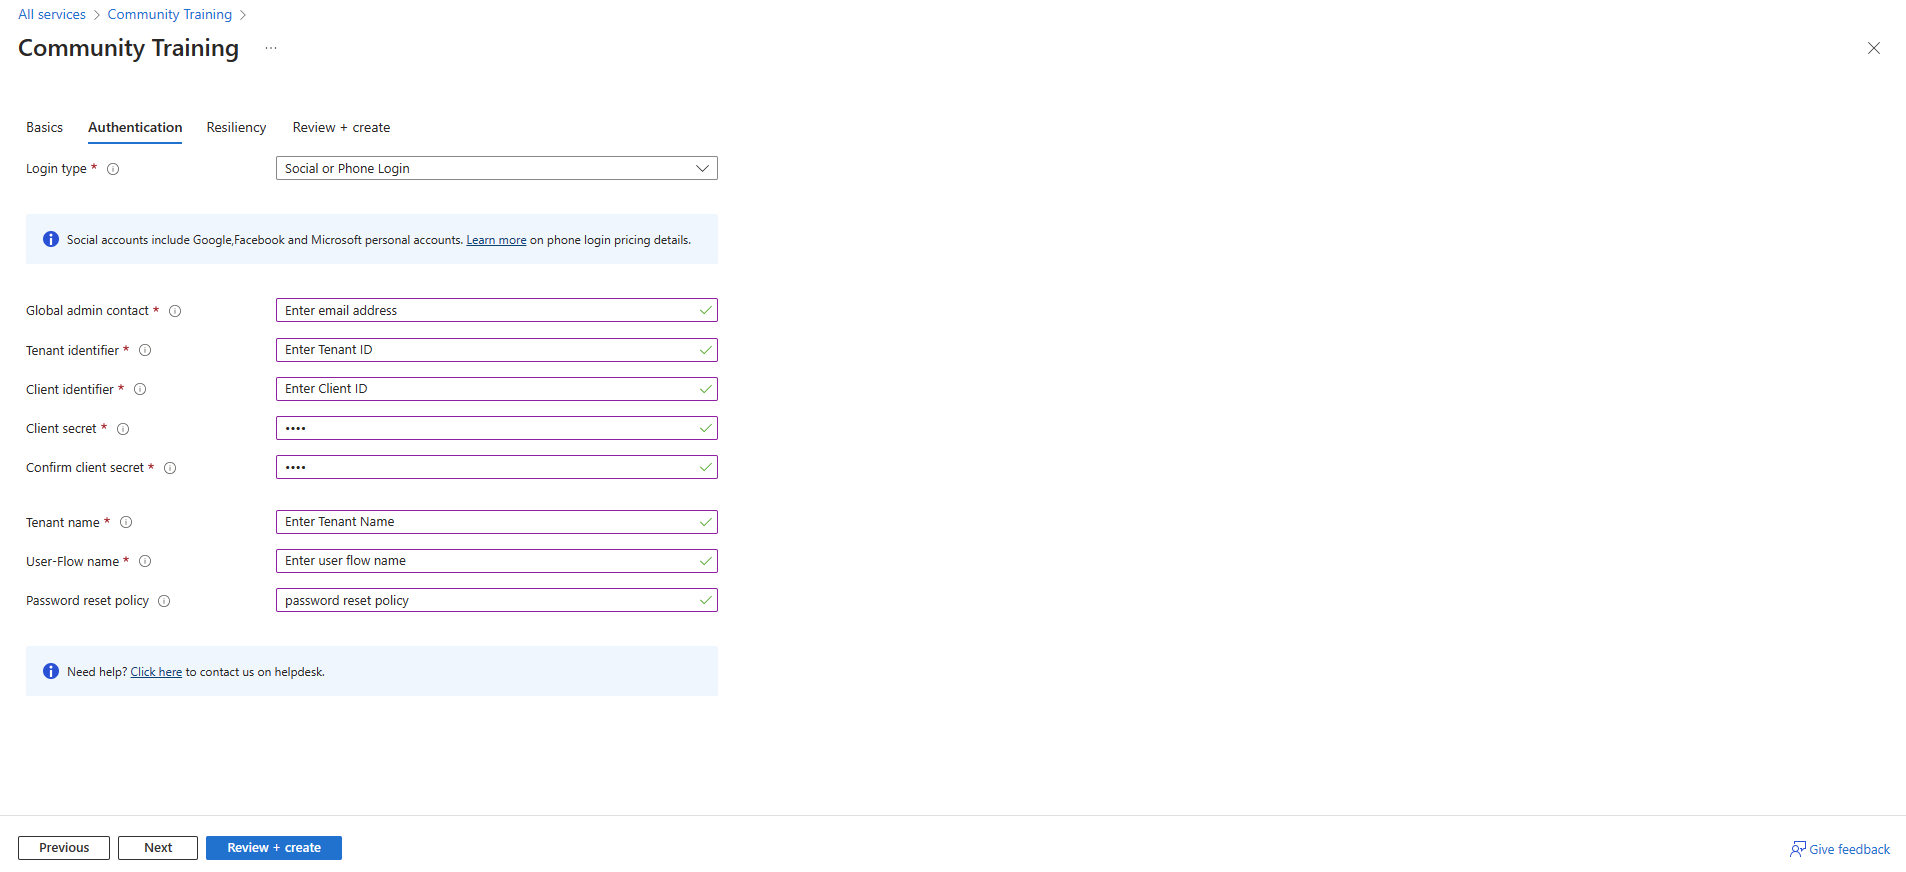
ii. Work or School Account
This option allows you to use existing work or school account lo login to the Community Training. You will need to provide a contact who will act as the Global Admin on the Community Training.
Note
You will need Azure Active Directory , also known as Azure Entra ID to be setup to choose either option.
- Please refer to this link for pricing.
- Please refer to this link work or school account configuration guide for help with setup.
You also have the option to connect your MS Teams subscription to the Community Training instance.
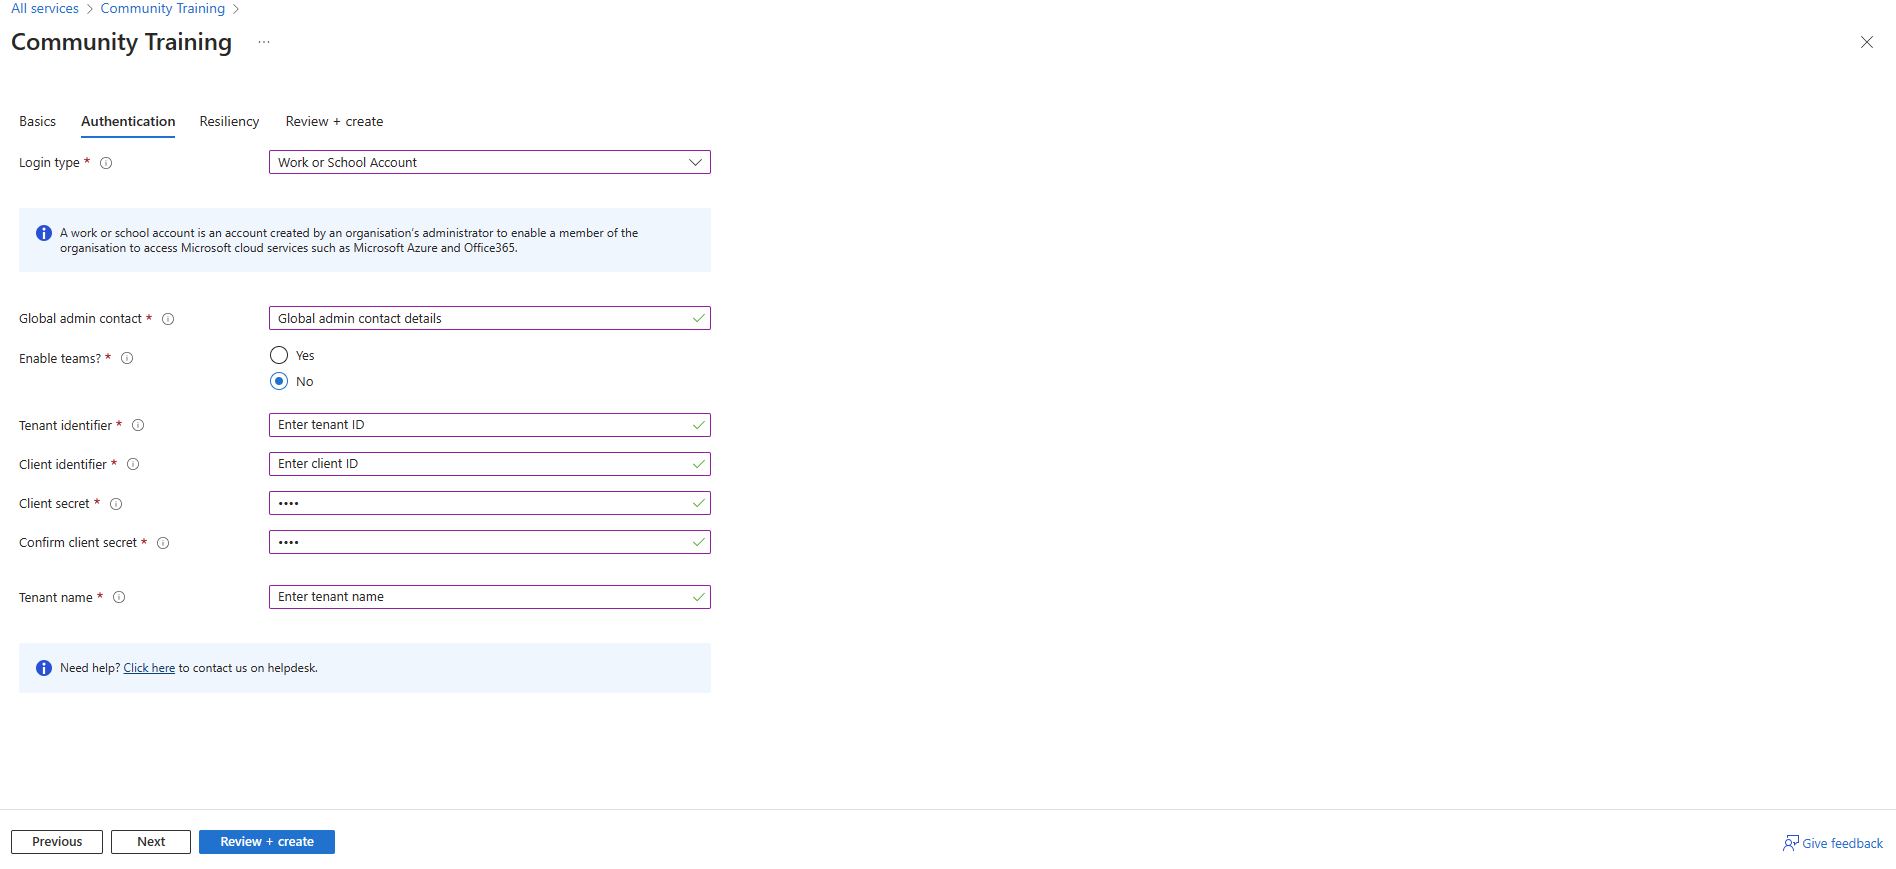
Once you have made a choice of authenticateion for the Learner and entered corresponding information, click on Next
- On this screen, you will select the data resiliency and disaster recovery options.
Note
The Disaster Recovery options come at a cost. Please refer to the pricing Calculator to get an estimate of the cost.
Note
The decision to have a disaster recovery needs to be made at installation. This option can NOT be changed later.
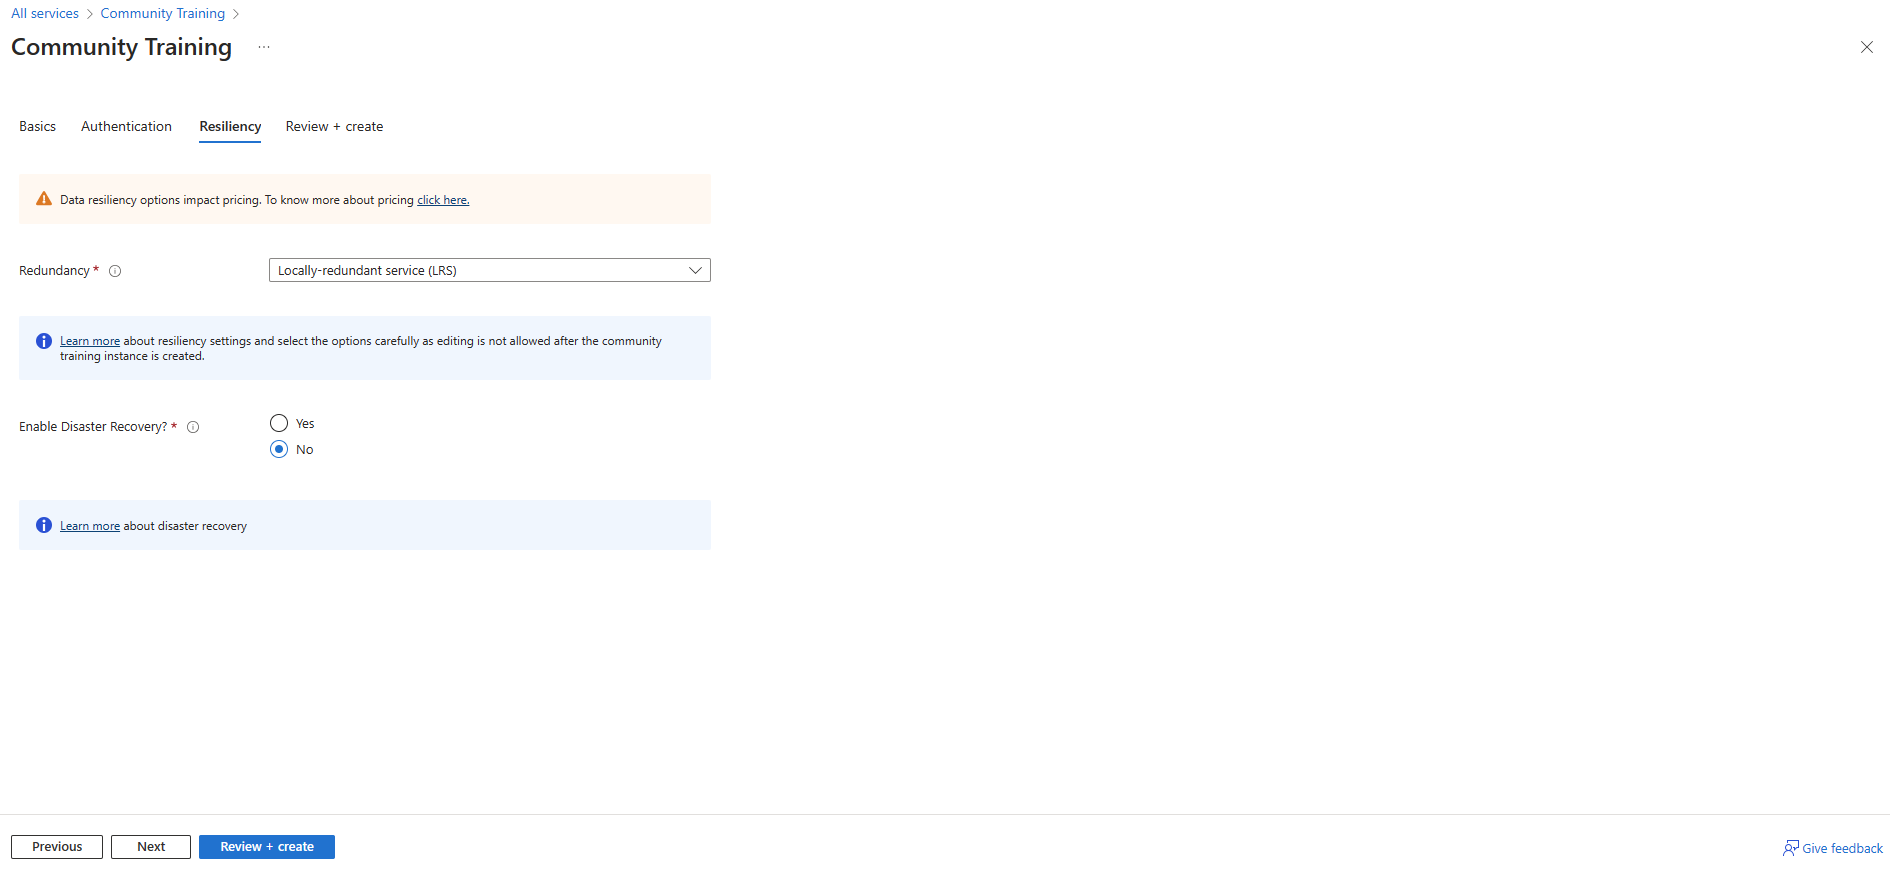
Note
By default, customer data stays within the region the customer deploys the Community Training instance in. However, the customer can choose to replicate data to a paired region (If Available) for Disaster Recovery purposes. For list of available regions, please refer to this link.
Once you have made your selection, click on Next or Review + Create
- On the next screen, verify the values entered are correct and click Create.
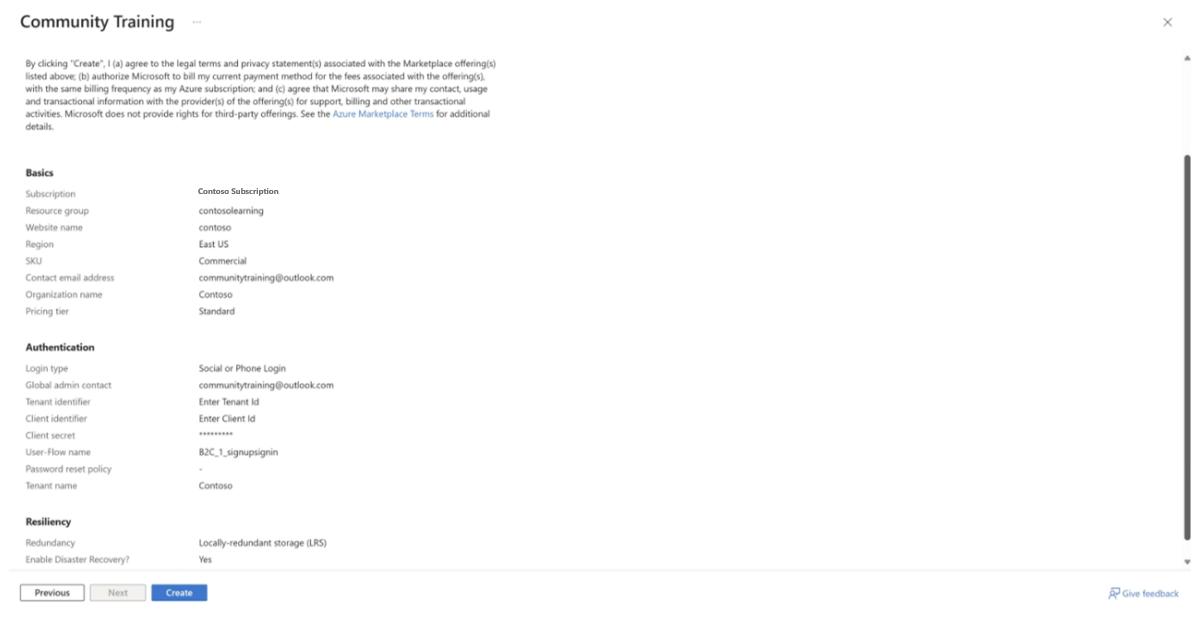
Congratulations, you have configured the installation of the Community Training on your instace.
Once the deployment is complete and the website is up, refer to the getting started guide to start configuring your learning portal.
Below are few additional resources to help you with the setup.
To setup a mobile app for your instance, follow the instructions given in the create and publish your Mobile App article.
To setup Teams for your instance , follow the instructions given in the setup Microsoft Teams as learner's endpoint for the platform article.
Please reach out to us via HelpDesk if you have any further queries.