Migrate from network security group flow logs to virtual network flow logs
Important
On September 30, 2027, network security group (NSG) flow logs will be retired. As part of this retirement, you'll no longer be able to create new NSG flow logs starting June 30, 2025. We recommend migrating to virtual network flow logs, which overcome the limitations of NSG flow logs. After the retirement date, traffic analytics enabled with NSG flow logs will no longer be supported, and existing NSG flow logs resources in your subscriptions will be deleted. However, NSG flow logs records won't be deleted and will continue to follow their respective retention policies. For more information, see the official announcement.
In this article, you learn how to migrate your existing network security group flow logs to virtual network flow logs using a migration script. Virtual network flow logs overcome some of the limitations of network security group flow logs. For more information, see Virtual network flow logs.
Note
Use the migration script:
- when you don't have flow logging enabled on all network interfaces or subnets in a virtual network and you don't want to enable virtual network flow logging on all of them, or
- when your network security group flow logs in a virtual network have different configurations, and you want to create virtual network flow logs with those different configurations as the network security group flow logs.
Use Azure Policy:
- when you have the same network security group applied to all network interfaces or subnets in a virtual network,
- when you have the same network security group flow log configurations for all network interfaces or subnets in a virtual network, or
- when you want to enable virtual network flow logging on the virtual network level.
For more information, see Deploy and configure virtual network flow logs using a built-in policy.
Prerequisites
An Azure account with an active subscription. Create an account for free.
PowerShell installed on your machine. For more information, see Install PowerShell on Windows, Linux, and macOS. This article requires the Az PowerShell module. For more information, see How to install Azure PowerShell. To find the installed version, run
Get-Module -ListAvailable Az.Necessary RBAC permissions for the subscriptions of the flow logs and Log Analytics workspaces (if traffic analytics is enabled for any of the network security group flow logs). For more information, see Network Watcher permissions.
Network security group flow logs in a region or more. For more information, see Create network security group flow logs.
Generate migration script
In this section, you learn how to generate and download the migration files for the network security group flow logs that you want to migrate.
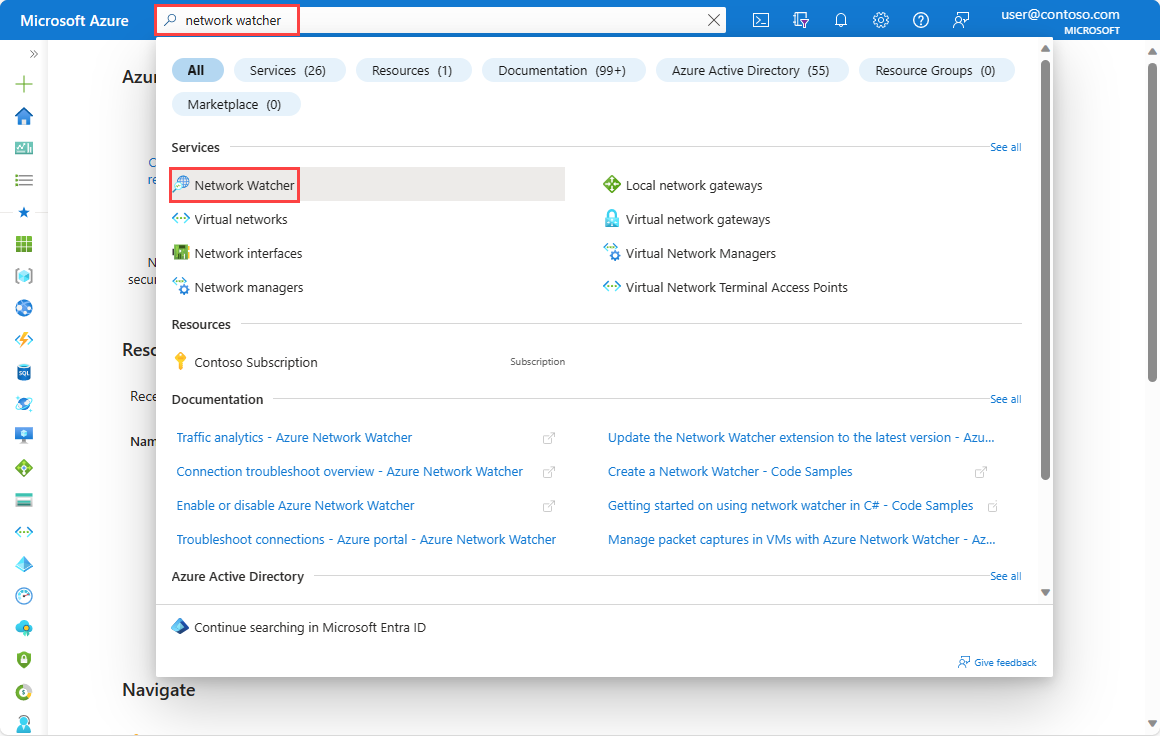
In the search box at the top of the portal, enter network watcher. Select Network Watcher from the search results.
Under Logs, select Migrate flow logs.
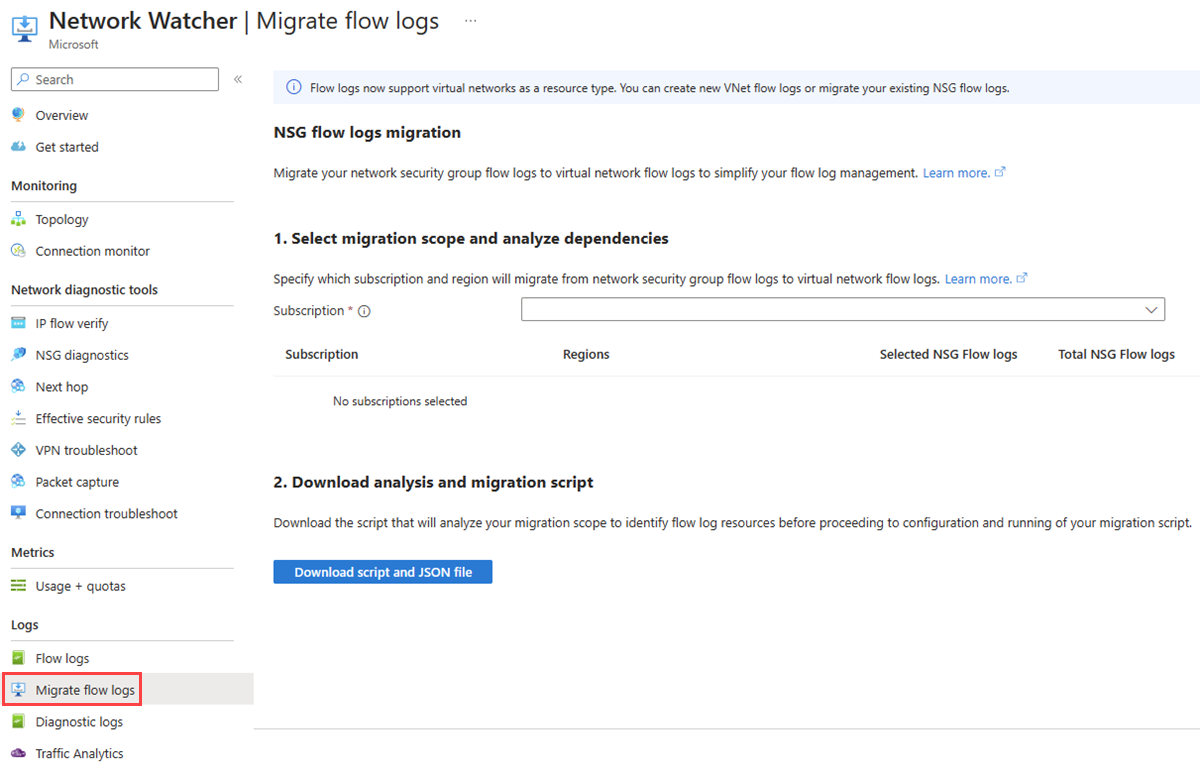
Select the subscriptions that contain the network security group flow logs that you want to migrate.
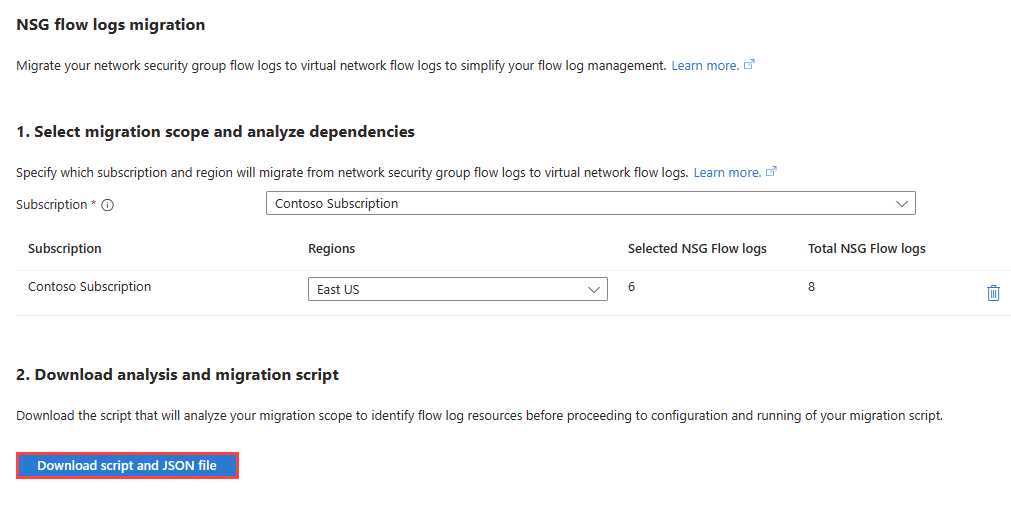
For each subscription, select the regions that contain the flow logs that you want to migrate. Total NSG flow logs shows the total number of flow logs that are in the selected subscriptions. Selected NSG flow logs shows the number of flow logs in the selected regions.
After you chose the subscriptions and regions, select Download script and JSON file to download the migration files as a zip file.
Extract
MigrateFlowLogs.zipfile on your local machine. The zip file contains these two files:- a script file:
MigrationFromNsgToAzureFlowLogging.ps1 - a JSON file:
RegionSubscriptionConfig.json.
- a script file:


Run migration script
In this section, you learn how to use the script file that you downloaded in the previous section to migrate your network security group flow logs.
Important
Once you start running the script, you shouldn't make any changes to the topology in the regions and subscriptions of the flow logs that you're migrating.
Run the script file
MigrationFromNsgToAzureFlowLogging.ps1.Enter 1 for Run analysis option.
.\MigrationFromNsgToAzureFlowLogging.ps1

Select one of the following options for flowlog migration:
1. Run analysis
2. Delete NSG flowlogs
3. Quit
Enter the JSON file name.
Please enter the path to scope selecting config file: .\RegionSubscriptionConfig.jsonEnter the number of threads or leave blank to use the default value of 16.
Please enter the number of threads you would like to use, press enter for using default value of 16:After the analysis is complete, you'll see the analysis report on screen and in an html file in the same directory of the migration files. The report lists the number of network security group flow logs that will be disabled and the number of virtual network flow logs that are created to replace them. The number of virtual network flow logs that are created depends on the type of migration that you choose. For example, if the network security group that you're migrating its flow log is associated with three network interfaces in the same virtual network, then you can choose migration with aggregation to have a single virtual network flow log resource applied to the virtual network. You can also choose migration without aggregation to have three virtual network flow logs (one virtual network flow log resource per network interface).
Note
See
AnalysisReport-<subscriptionId>-<region>-<time>.htmlfile for a full report of the analysis that you performed. The file is available in the same directory of the script.Enter 2 or 3 to choose the type of migration that you want to perform.
Select one of the following options for flowlog migration:
1. Re-Run analysis
2. Proceed with migration with aggregation
3. Proceed with migration without aggregation
4. Quit
After you see the summary of migration on screen, you can cancel the migration and revert changes. To accept and proceed with the migration enter n, otherwise enter y. Once you accept the changes, you can't revert them.
Do you want to rollback? You won't get the option to revert the actions done now again (y/n): nNote
Keep the script and analysis report files for reference in case you have any issues with the migration.
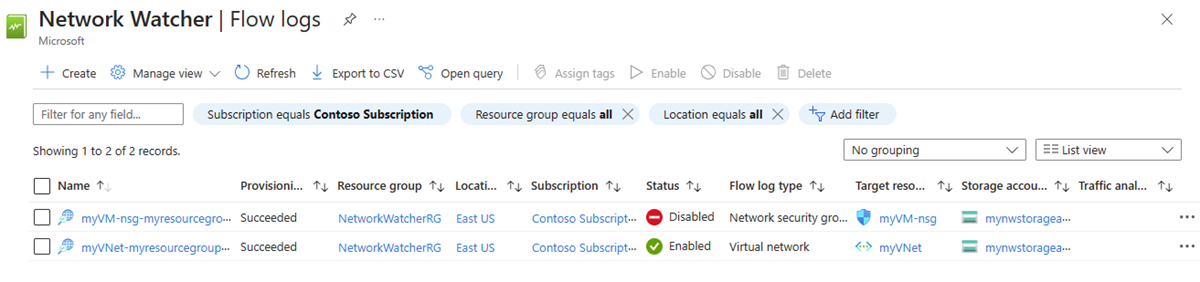
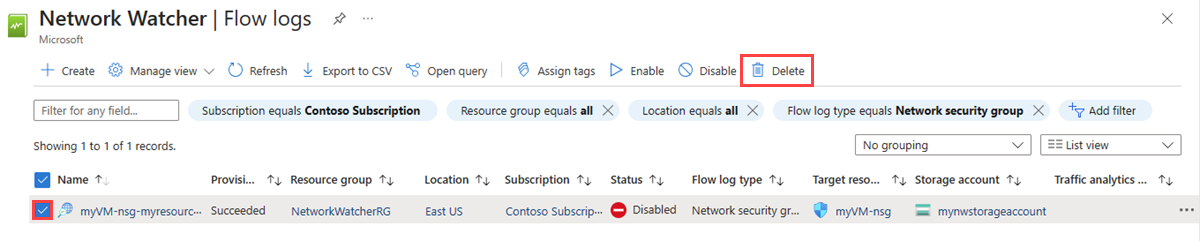
Check the Azure portal to confirm that the status of network security group flow logs that you migrated became disabled. Check also the newly created virtual network flow logs as a result of the migration process.
Add a filter to only list network security group flow logs from the subscriptions and regions that you choose. You can skip this step if you migrated only a few network security group flow logs.

Select the flow logs that you want to delete, and then select Delete
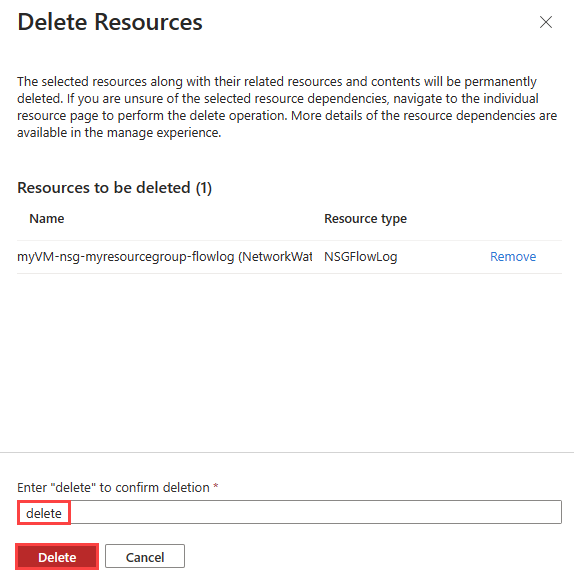
Enter delete and then select Delete to confirm the deletion.


Considerations
Scale set with a load balancer: The migration script enables virtual network flow logging on the subnet that has the scale set virtual machines.
Note
If network security group flow logging is not enabled on all network interfaces of the scale set, or the network interfaces don't share the same network security group flow log, then a virtual network flow log is created on the subnet with the same configurations as one of the network interfaces of the scale set.
PaaS: The migration script doesn't support environments with PaaS solutions that have network security group flow logs in a user's subscription but target resources are in different subscriptions. For such environments, you should manually enable virtual network flow logging on the virtual network or subnet of the PaaS solution.