Configure the performance traffic routing method
The Performance traffic routing method allows you to direct traffic to the endpoint with the lowest latency from the client's network. Typically, the region with the lowest latency is the closest in geographic distance. This traffic routing method can't account for real-time changes in network configuration or load.
Prerequisites
- If you don't have an Azure subscription, create a free account before you begin.
Create a resource group
Create a resource group for the Traffic Manager profile.
- Sign in to the Azure portal.
- On the left pane of the Azure portal, select Resource groups.
- In Resource groups, on the top of the page, select Add.
- In Resource group name, type a name myResourceGroupTM1. For Resource group location, select East US, and then select OK.
Create a Traffic Manager profile with performance routing method
Create a Traffic Manager profile that directs user traffic by sending them to the endpoint with lowest latency from the client's network.
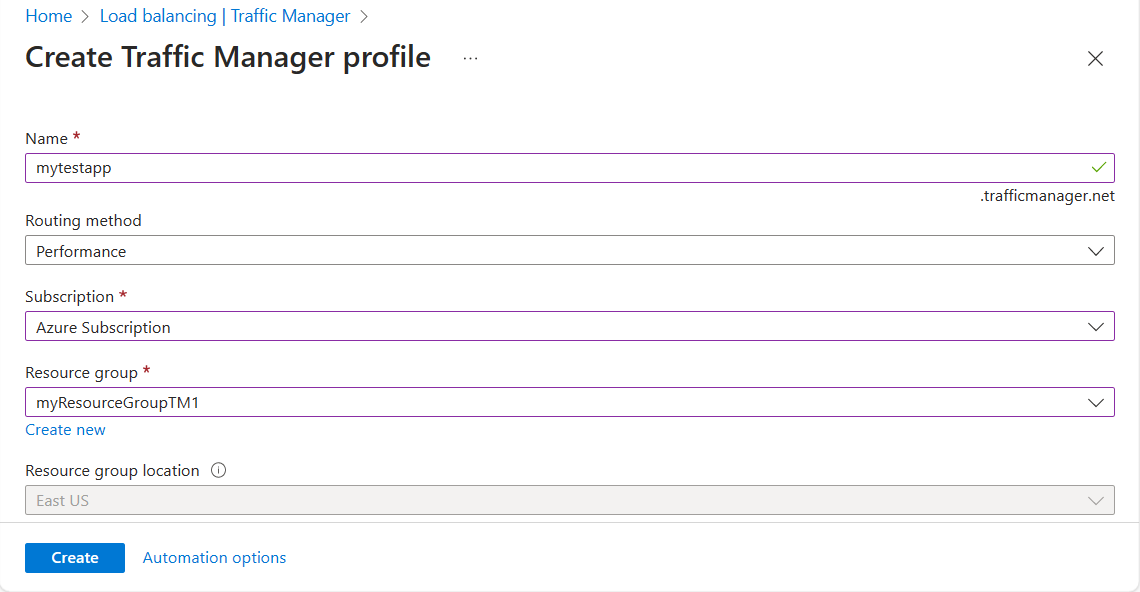
On the top left-hand side of the screen, select Create a resource > Networking > Traffic Manager profile > Create.
In Create Traffic Manager profile, enter or select, the following information, accept the defaults for the remaining settings, and then select Create:
Setting Value Name Enter a unique name for your Traffic Manager profile. Routing method Select the Performance routing method. Subscription Select your subscription. Resource group Select myResourceGroupTM1. Location This setting refers to the location of the resource group, and has no impact on the Traffic Manager profile that will be deployed globally. 
To configure performance routing method on an existing Traffic Manager profile
Sign in to the Azure portal.
In the portal’s search bar, search for the Traffic Manager profiles and then select the profile name that you want to configure the routing method for.
In the Traffic Manager profile overview page, verify that both the cloud services and websites that you want to include in your configuration are present.
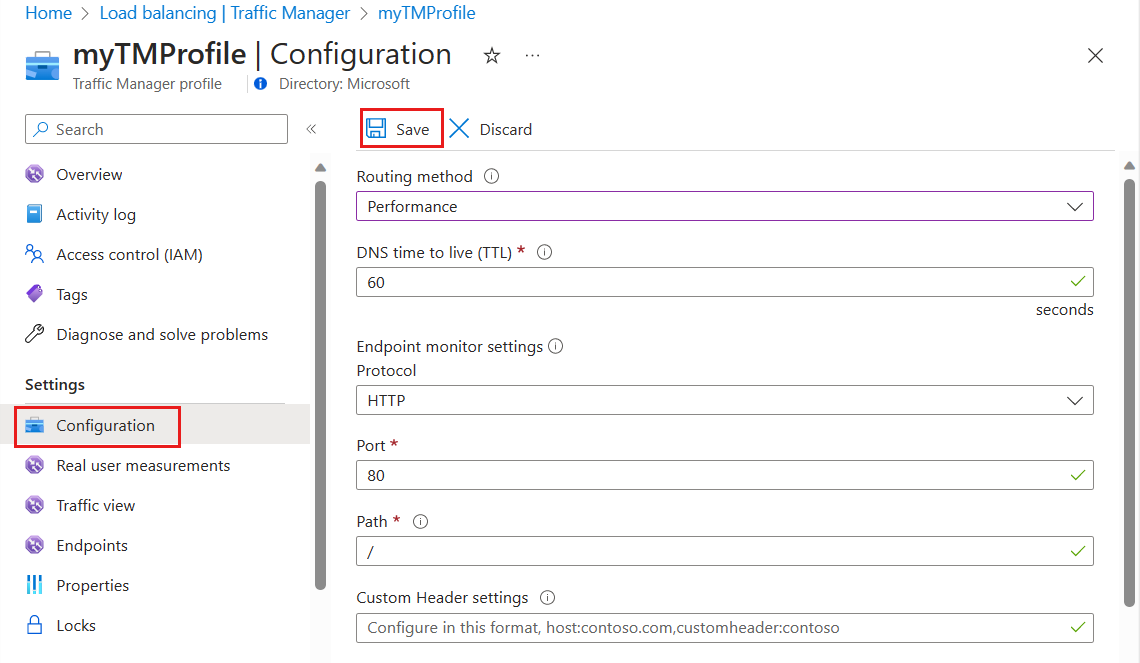
In the Settings section, select Configuration, and in the Configuration blade, complete as follows:
Setting Value Routing method Performance DNS time to live (TTL) This value controls how often the client’s local caching name server will query the Traffic Manager system for updated DNS entries. In this example we chose the default 60 seconds. Endpoint monitor settings Protocol In this example we chose the default HTTP. Port In this example we chose the default port 80. Path For Path type a forward slash /. To monitor endpoints, you must specify a path and filename. A forward slash "/" is a valid entry for the relative path and implies that the file is in the root directory (default). At the top of the page, select Save.

Test the performance routing method
Test the changes in your configuration as follows:
- In the portal’s search bar, search for the Traffic Manager profile name and select the Traffic Manager profile in the results that the displayed.
- The Traffic Manager profile overview displays the DNS name of your newly created Traffic Manager profile. This can be used by any clients (for example, by navigating to it using a web browser) to get routed to the right endpoint as determined by the routing type. In this case all requests are routed to the endpoint with the lowest latency from the client's network.
- Once your Traffic Manager profile is working, edit the DNS record on your authoritative DNS server to point your company domain name to the Traffic Manager domain name.
Next steps
- Learn about weighted traffic routing method.
- Learn about priority routing method.
- Learn about geographic routing method.
- Learn how to test Traffic Manager settings.