Create IoT alerts and convert IoT alerts into work orders
In Dynamics 365 Field Service, Internet of Things (IoT) alerts are a subset of IoT messages that might require attention. For example, a configured sensor in a refrigerator that you service sends an alert that the humidity is above an acceptable threshold. To help with proactive service delivery, you can convert that incoming IoT alert to a work order, which can then be scheduled and assigned to a service technician.
This article explains the following things:
- How IoT alerts are triggered
- How to see IoT alerts in Field Service
- How to create work orders based on the IoT alerts
For a guided walkthrough, see the following video: ![]() Connected Field Service: IoT Alerts.
Connected Field Service: IoT Alerts.
As IoT device information flows into Azure IoT Hub, you can create rules that dictate when IoT alerts should be created based on the IoT messages.
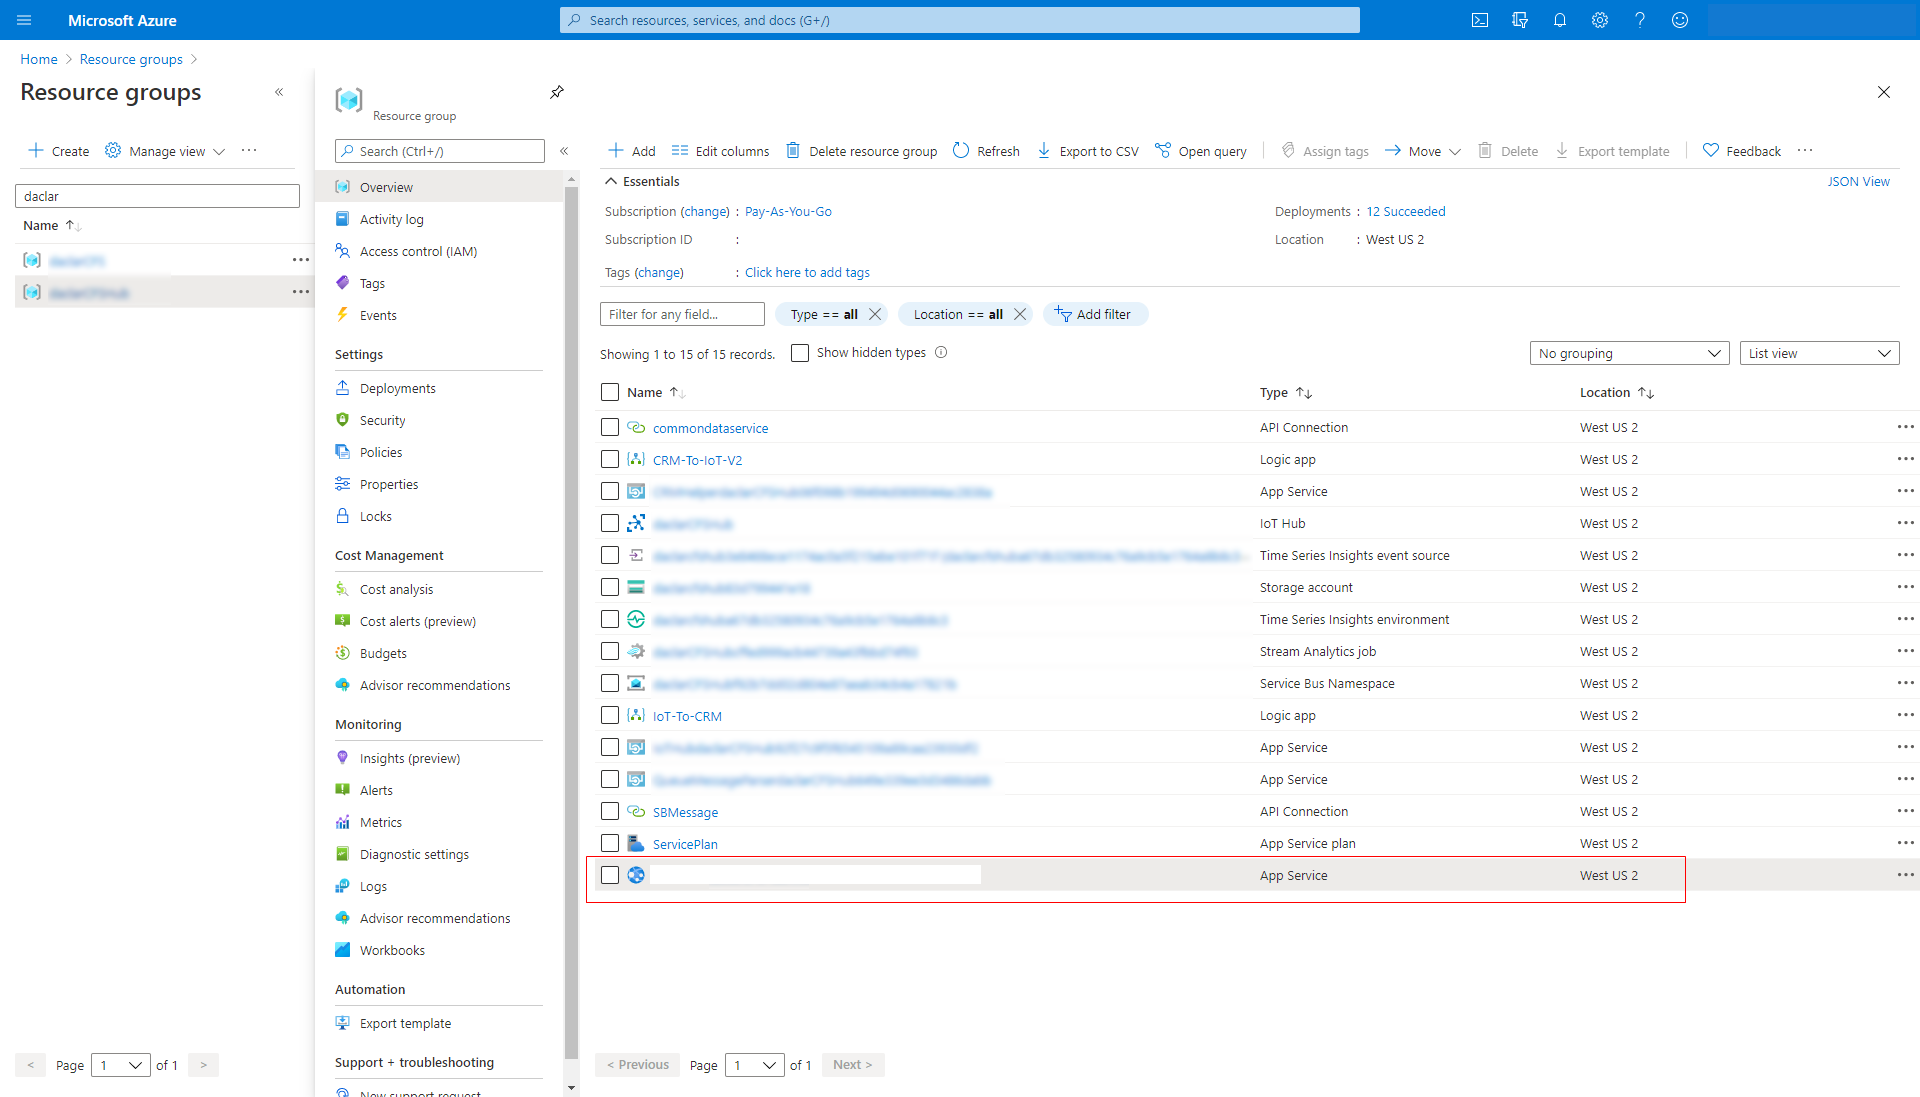
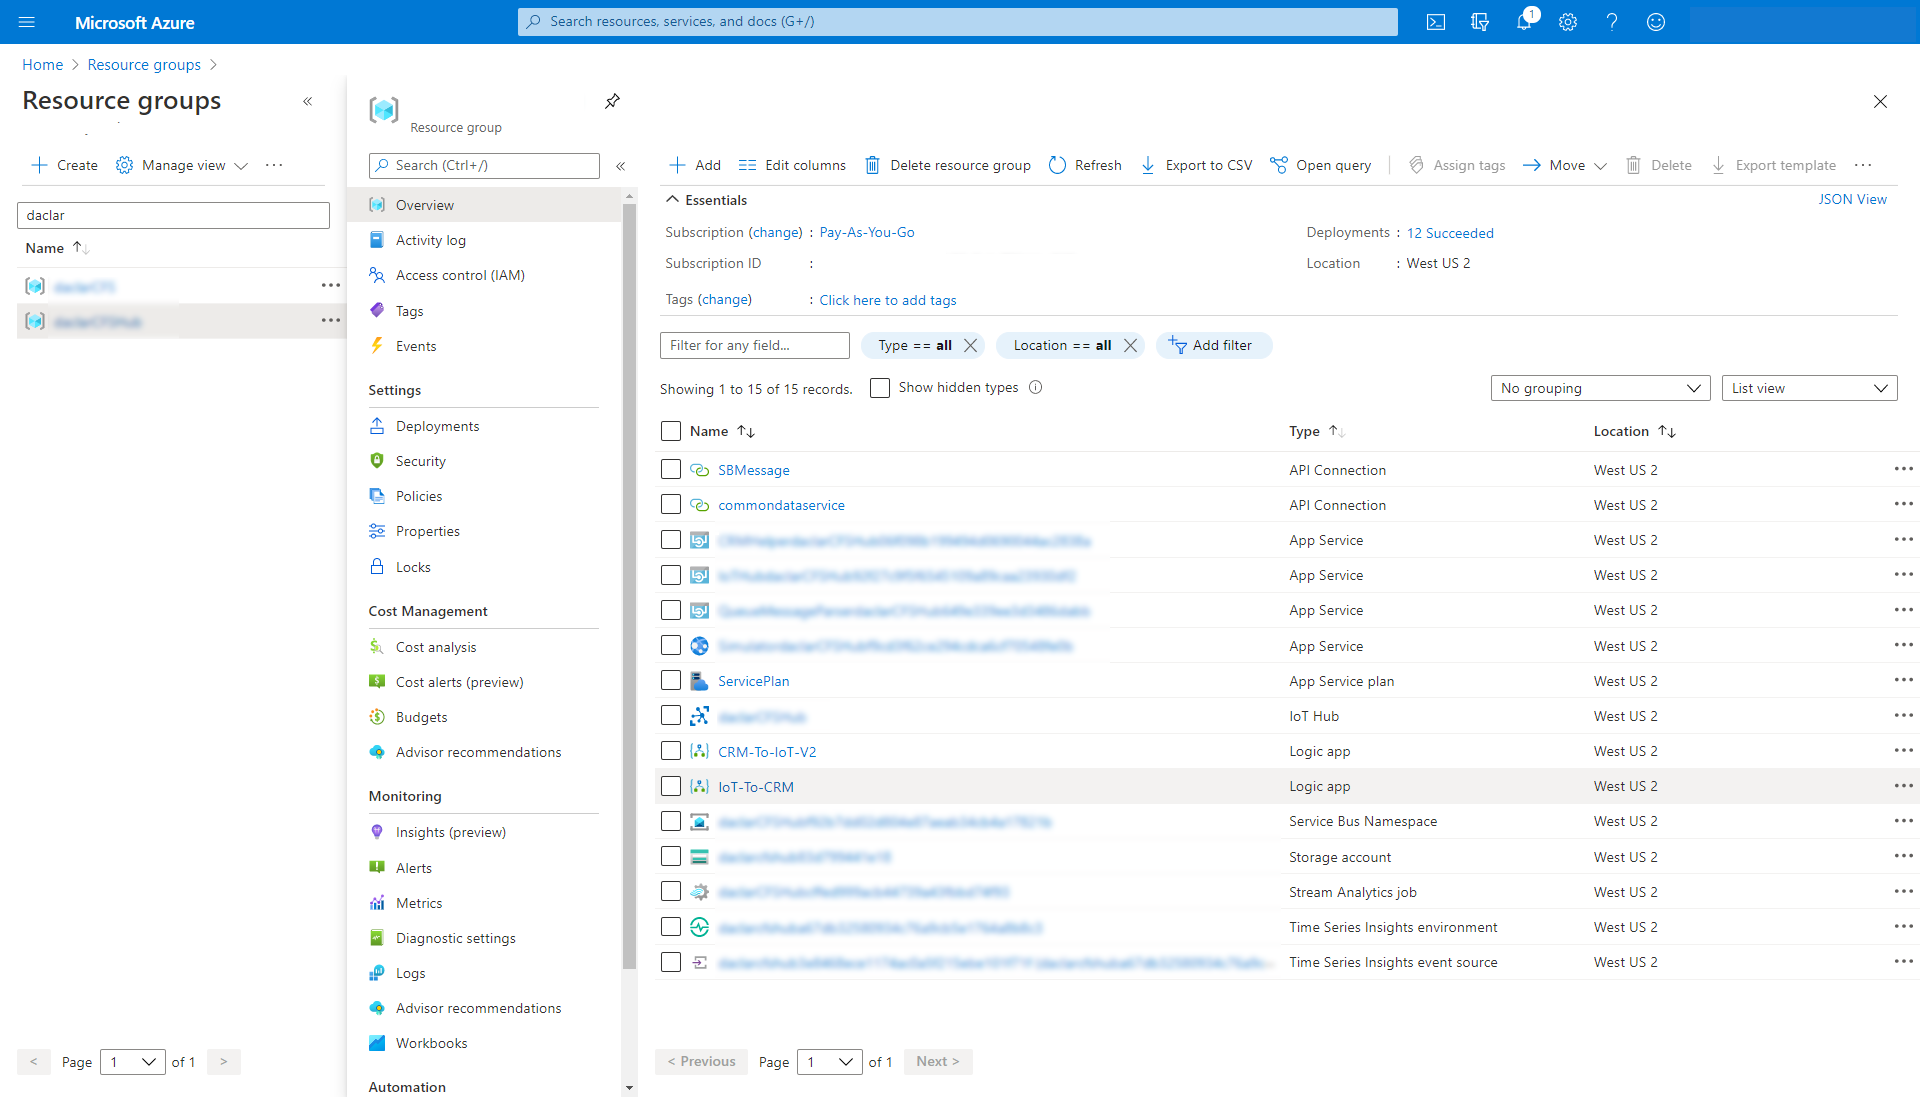
Sign in to Microsoft Azure and select your resource group.
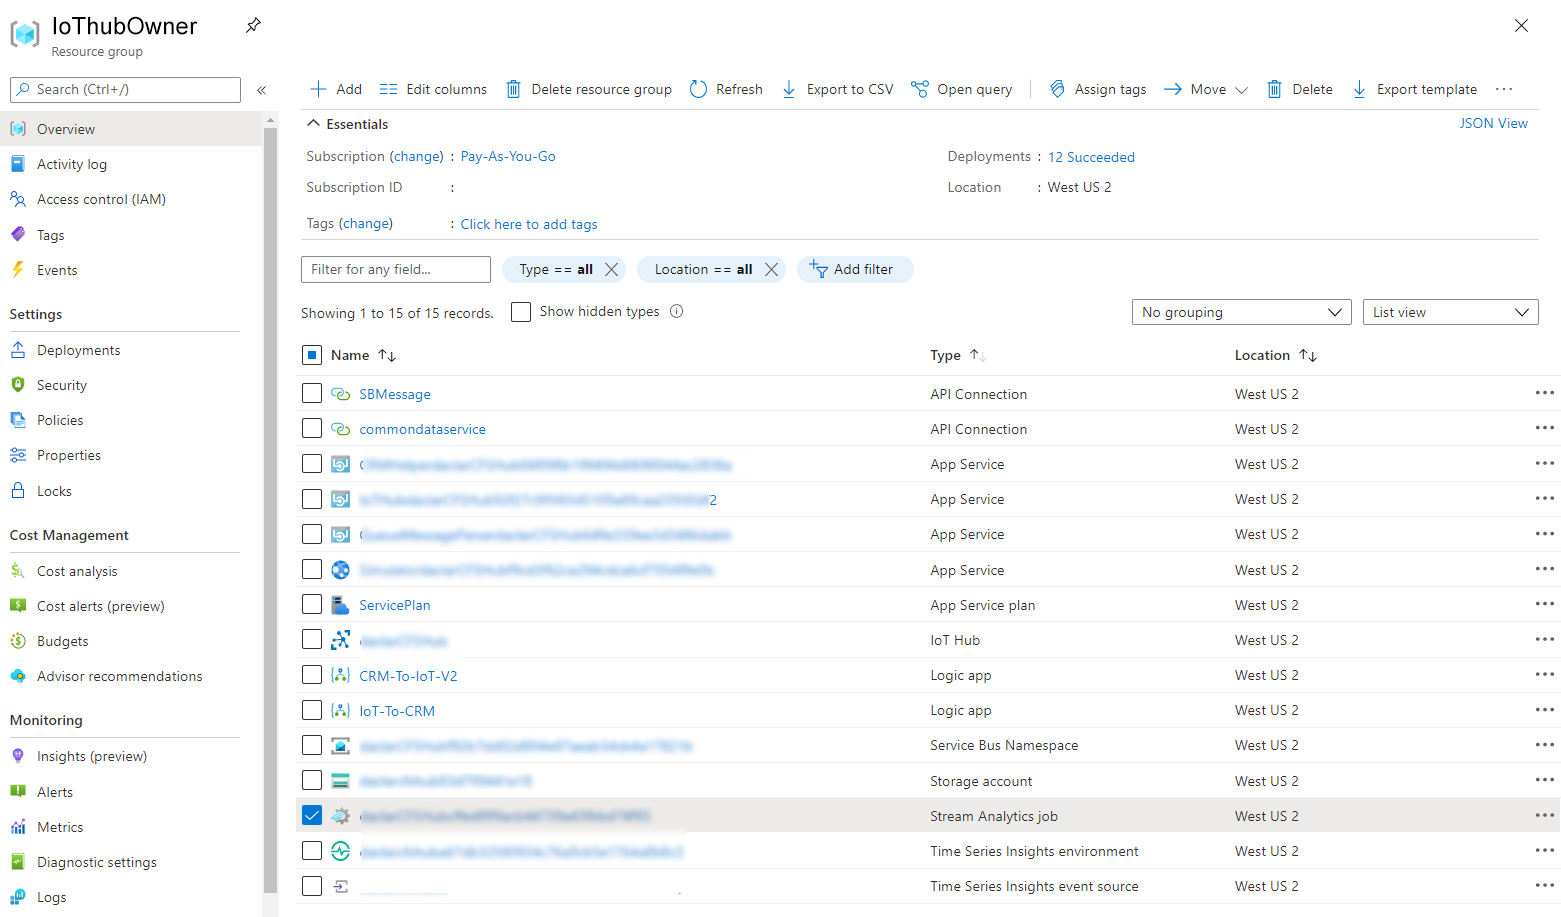
Find and edit the Stream Analytics job.
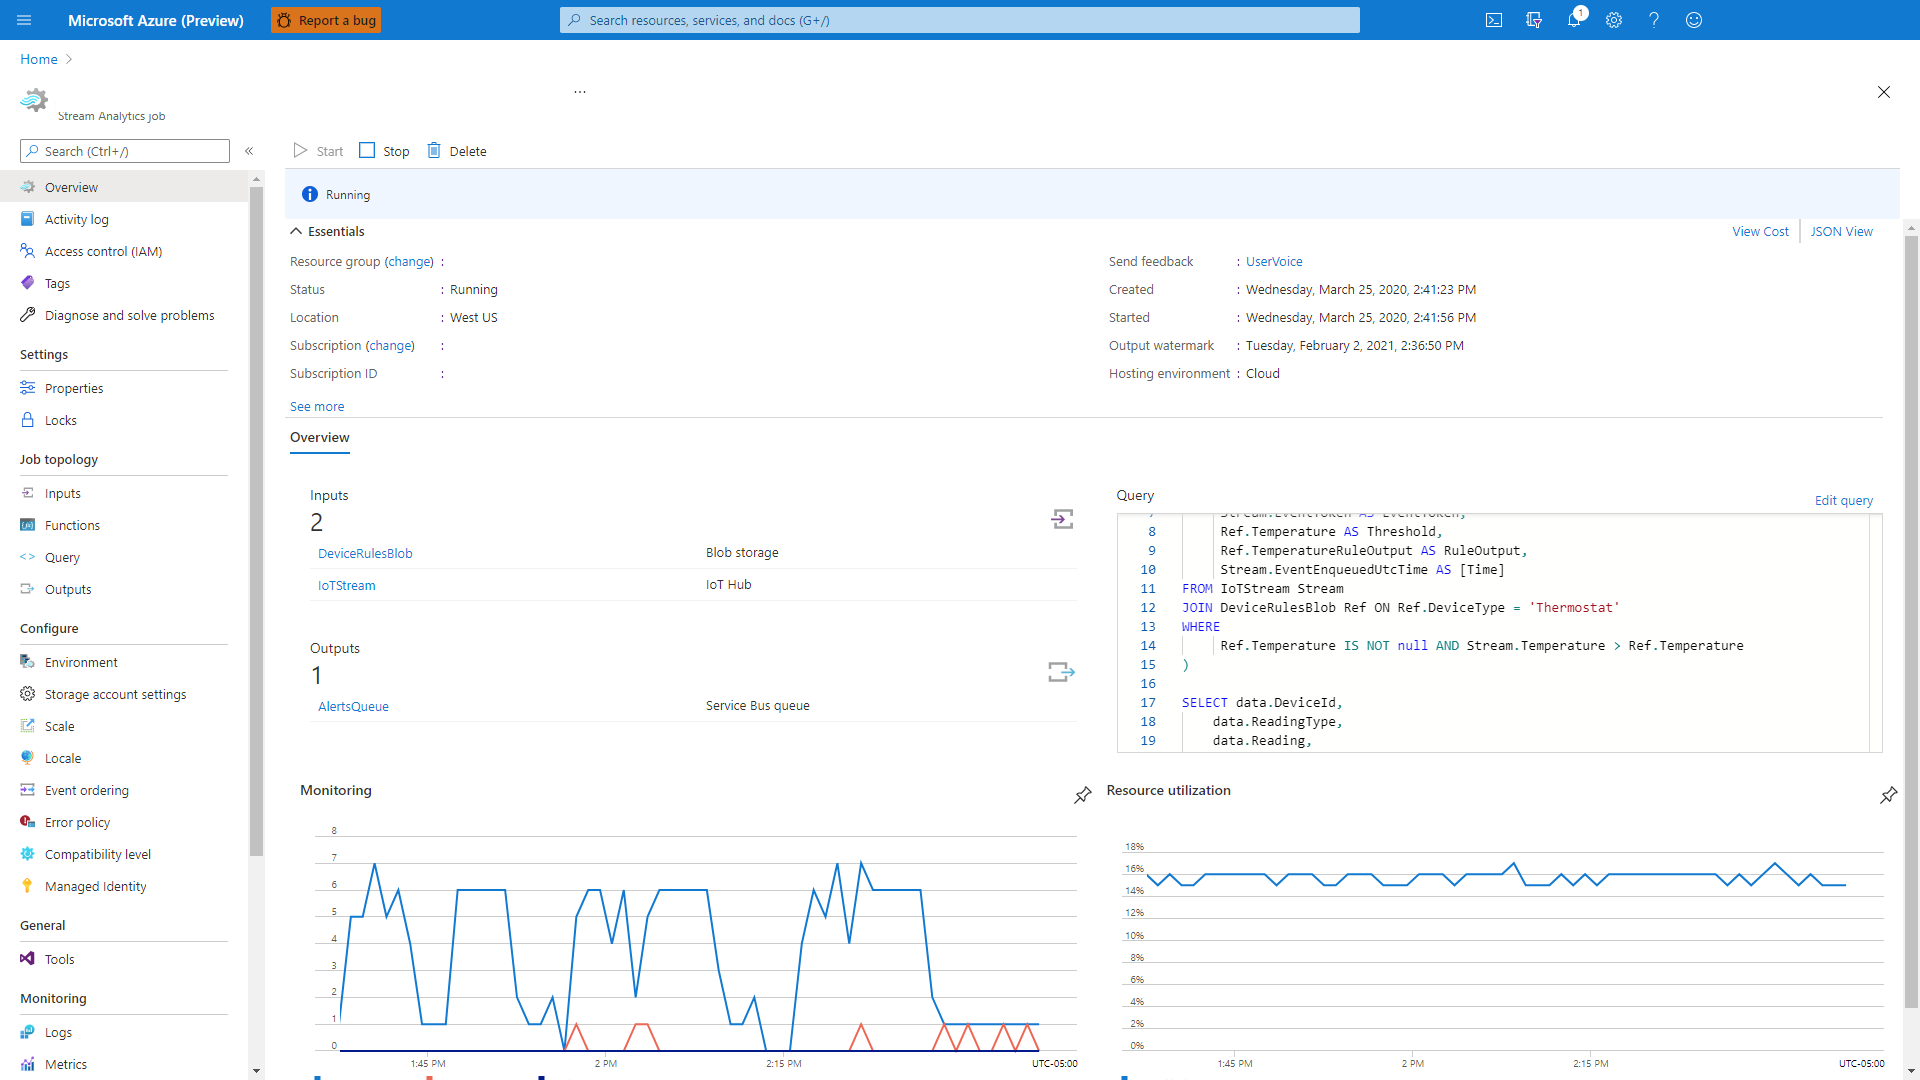
Select Query in the left pane, then select IoTStream.
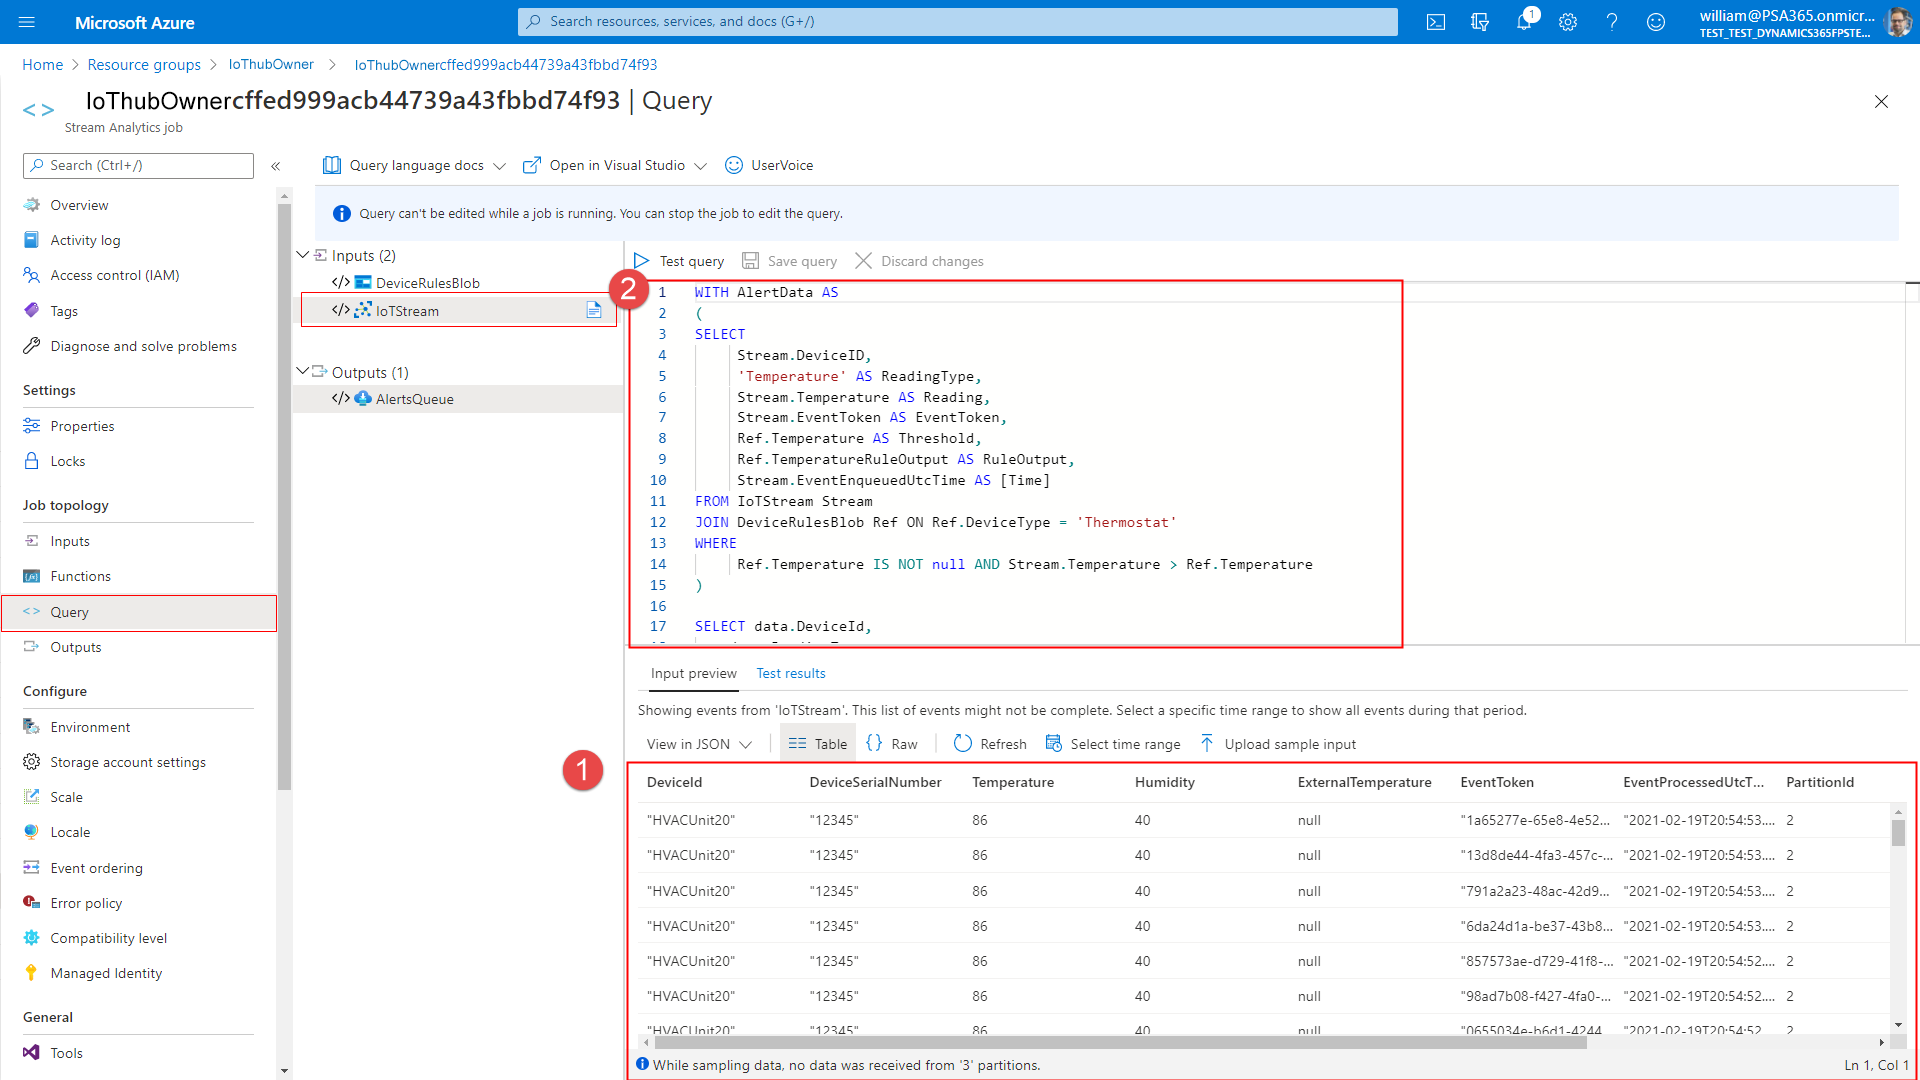
With reference to the callouts in the previous image:
- (1): The bottom pane shows all incoming IoT messages from the connected device.
- (2): The top pane shows the JSON that creates the IoT alerts from the IoT messages.
Set up the simulator to simulate IoT devices and data so that device data is pulled into Field Service.
To find the simulator URL, sign in to your Azure subscription, and then select the app service resource type under the newly created resource group.
The URL appears in the top-right corner. Copy the URL.
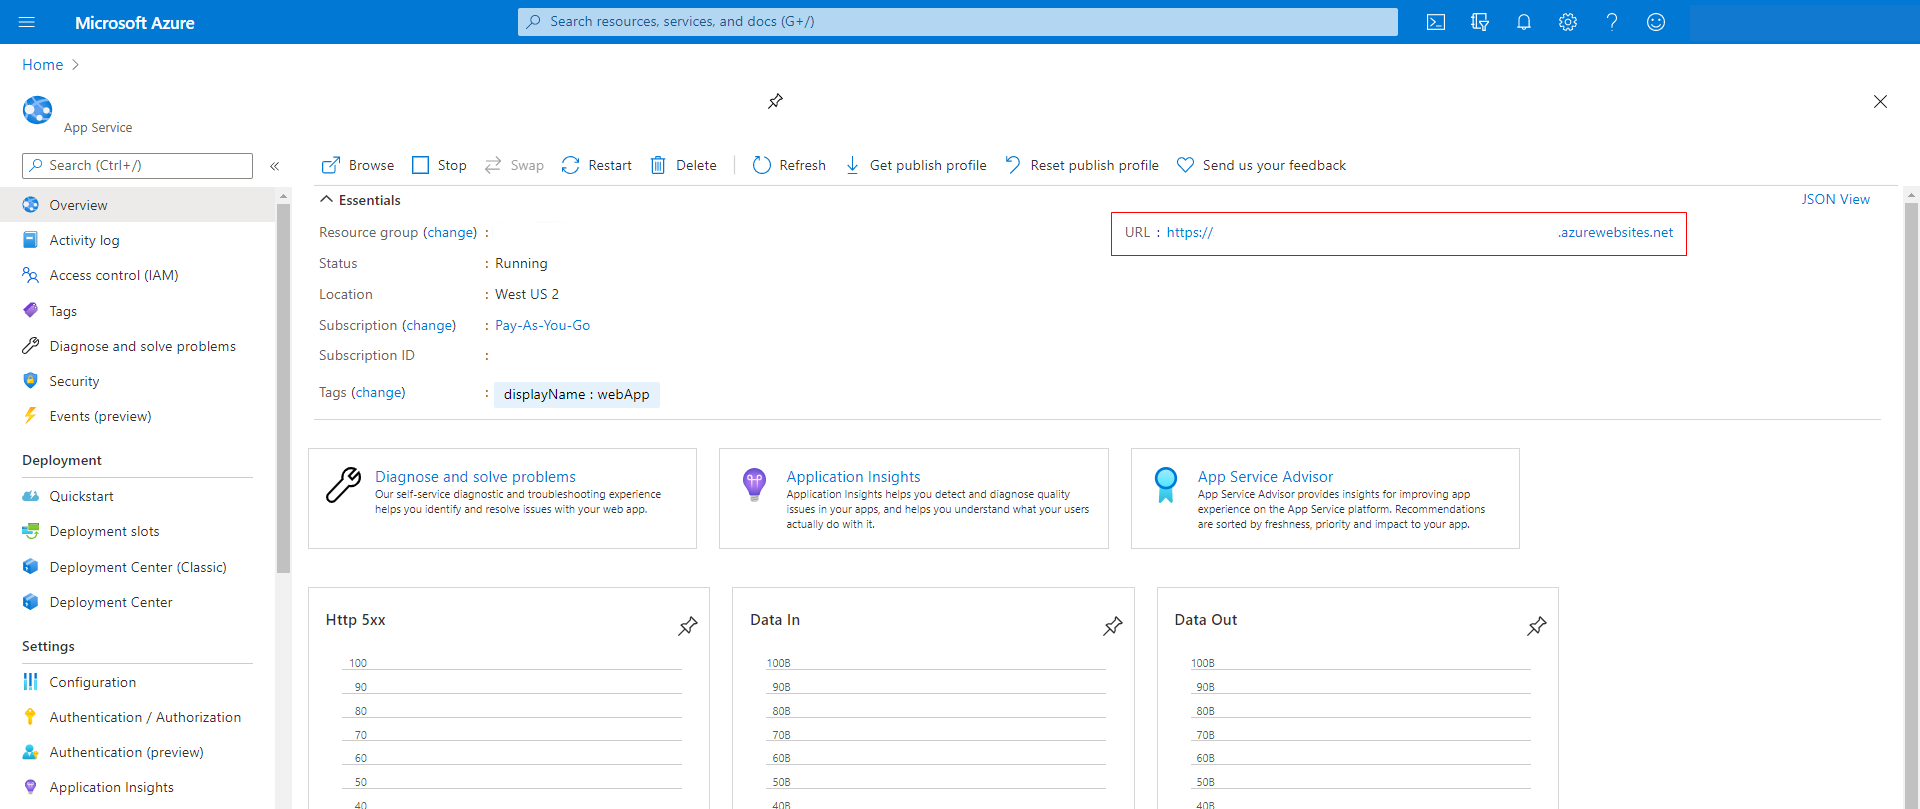
Paste the URL into your browser’s address bar to load the page.
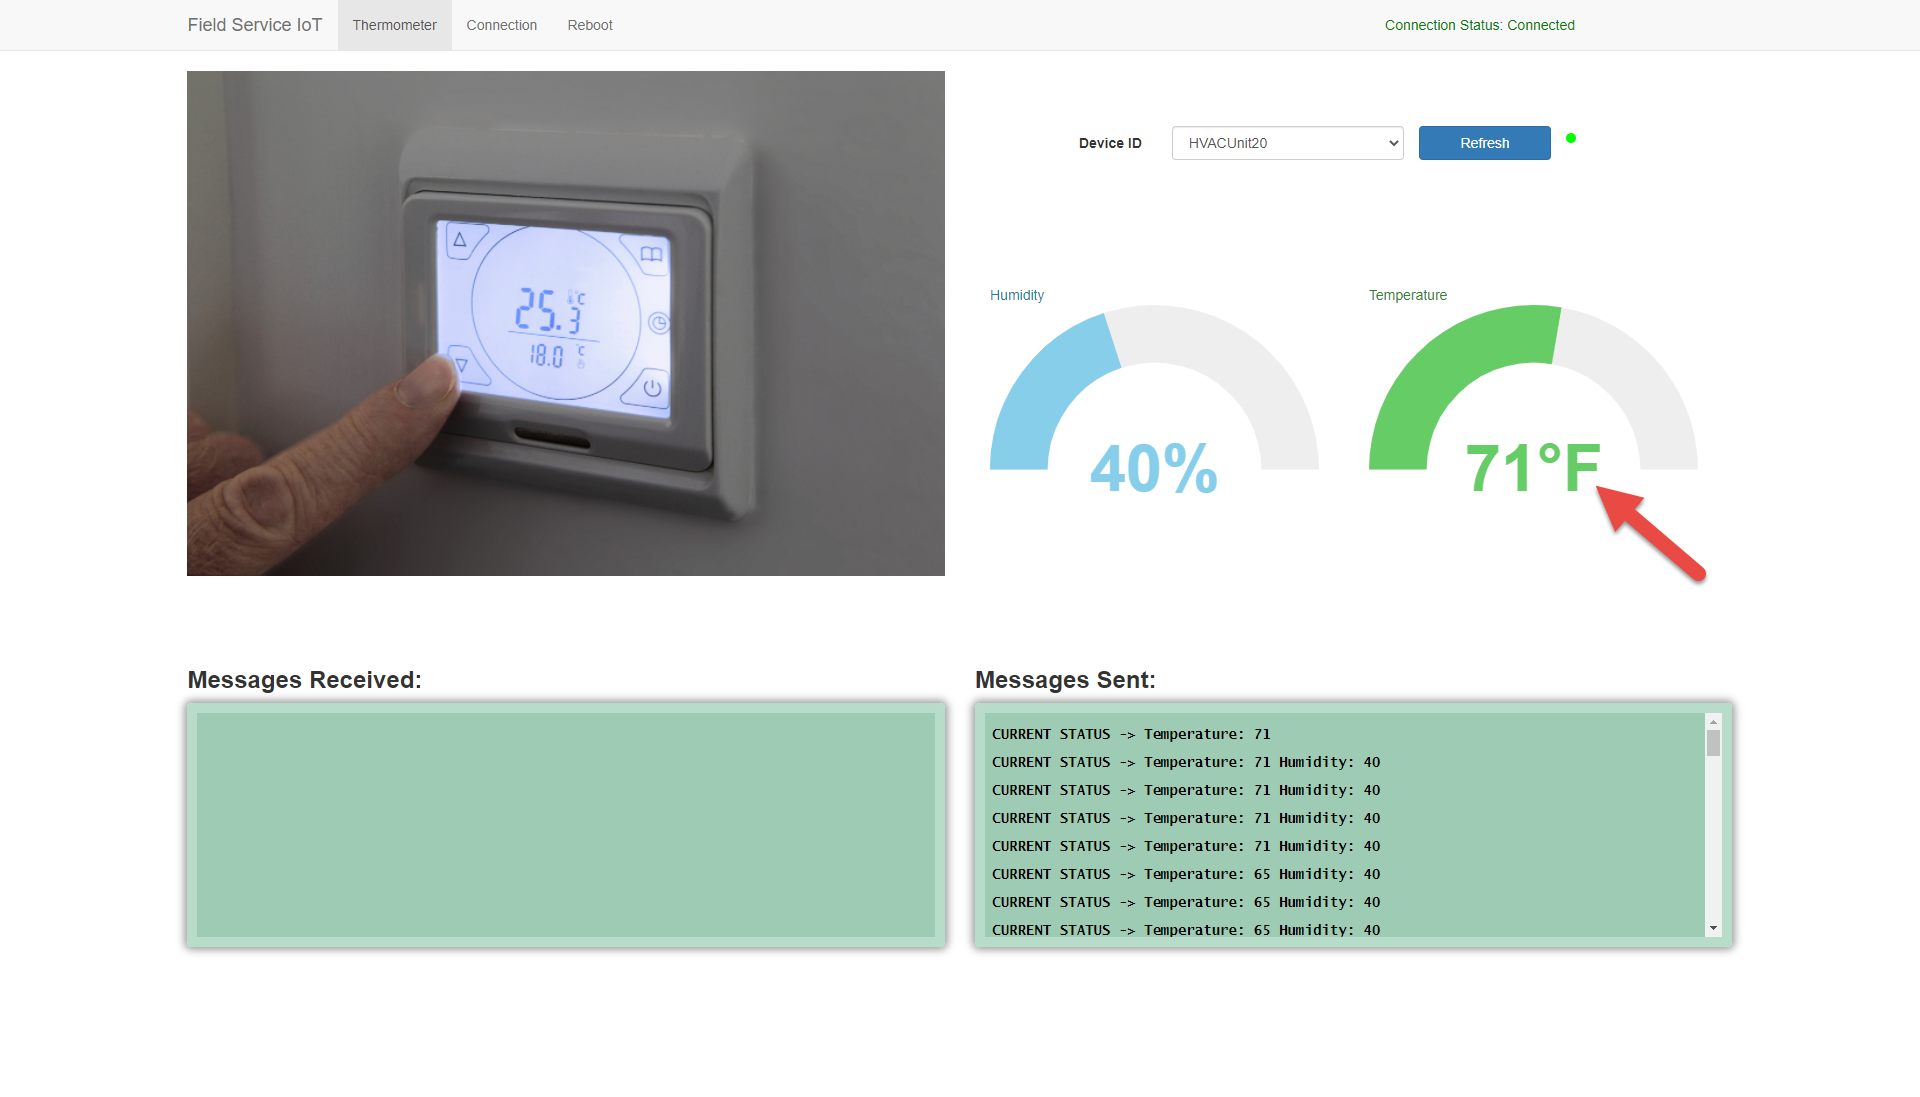
When the simulator page opens, select Connection at the top.
Enter the IoT hub host name and key. The host is the name of the IoT Hub resource in the Azure portal.

To access the key, select the IoT Hub resource and go to the shared access policies. Then, copy the primary key for iothubowner.
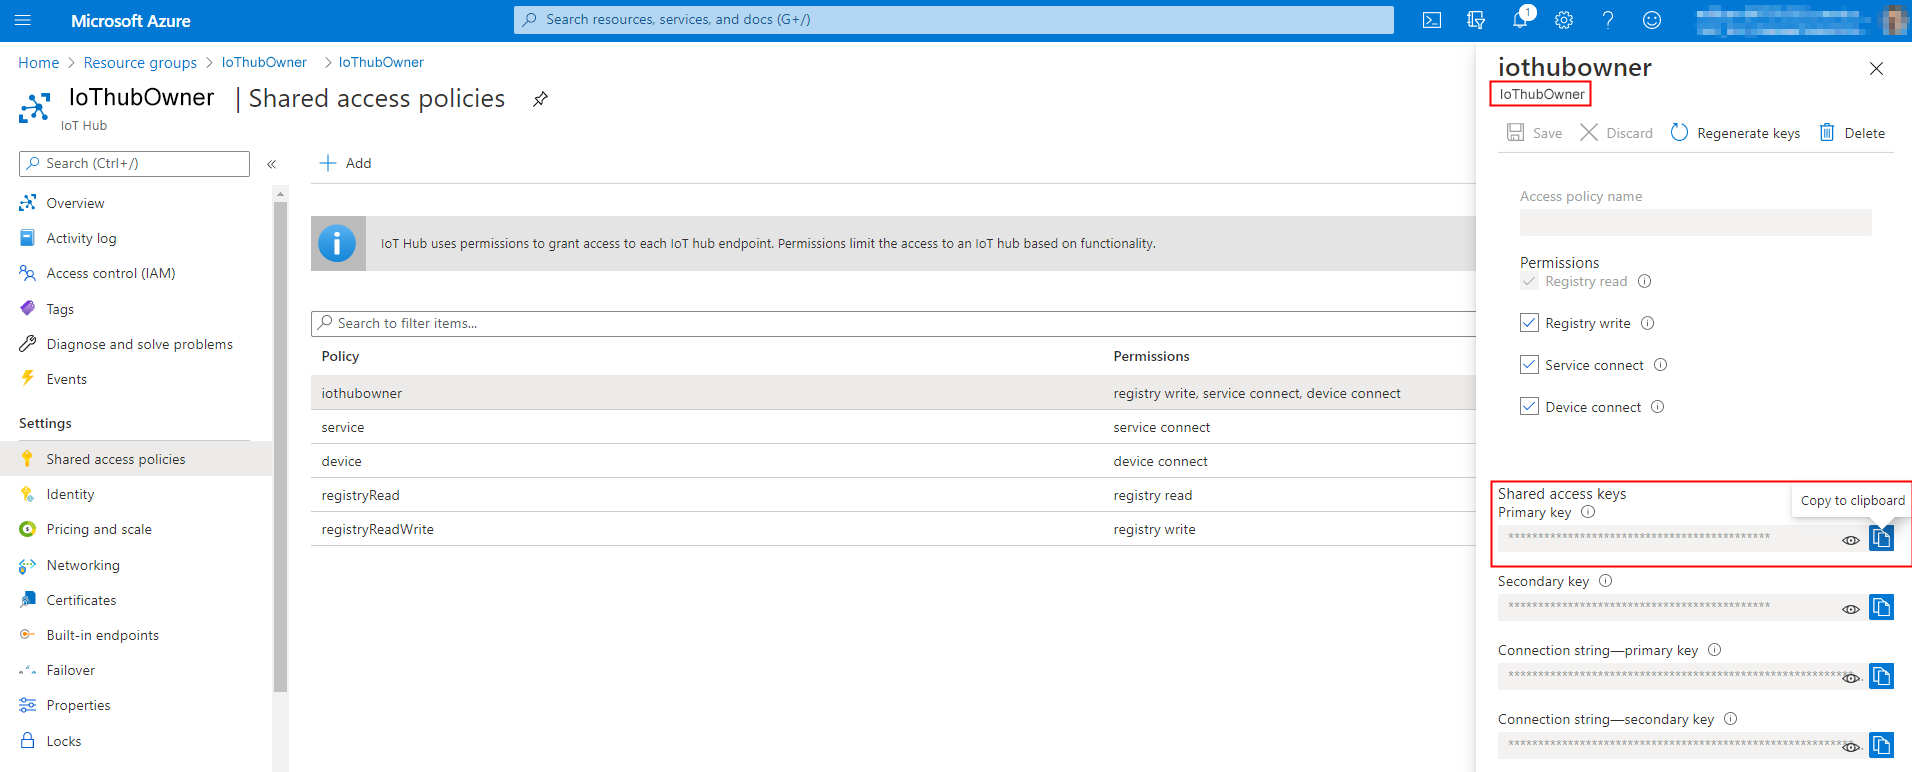
Select the IoT hub in the Resource Group.
On the left under General, select Shared access policies to get the host name and primary key.
Ensure Connection status is marked as Connected and then close the dialog box.
Send a test command by using the sample simulator. For example, select the temperature and increase it to above 70 degrees. The simulator is preprogrammed to create an IoT alert if the temperature is above 70 degrees.
Note
Not using Azure IoT Hub? Creating IoT alerts in Field Service based on IoT messages in your custom IoT provider is supported. For more information, see this article: Extensible IoT data sources for Connected Field Service.
After the rule is created in Stream Analytics, the logic app creates IoT alerts based on the rule criteria.
In our example with the simulator, an IoT alert was created in Field Service because the temperature reading in an IoT message exceeded 70 degrees.
In Dynamics 365 Field Service, under Assets, select IoT Alerts.
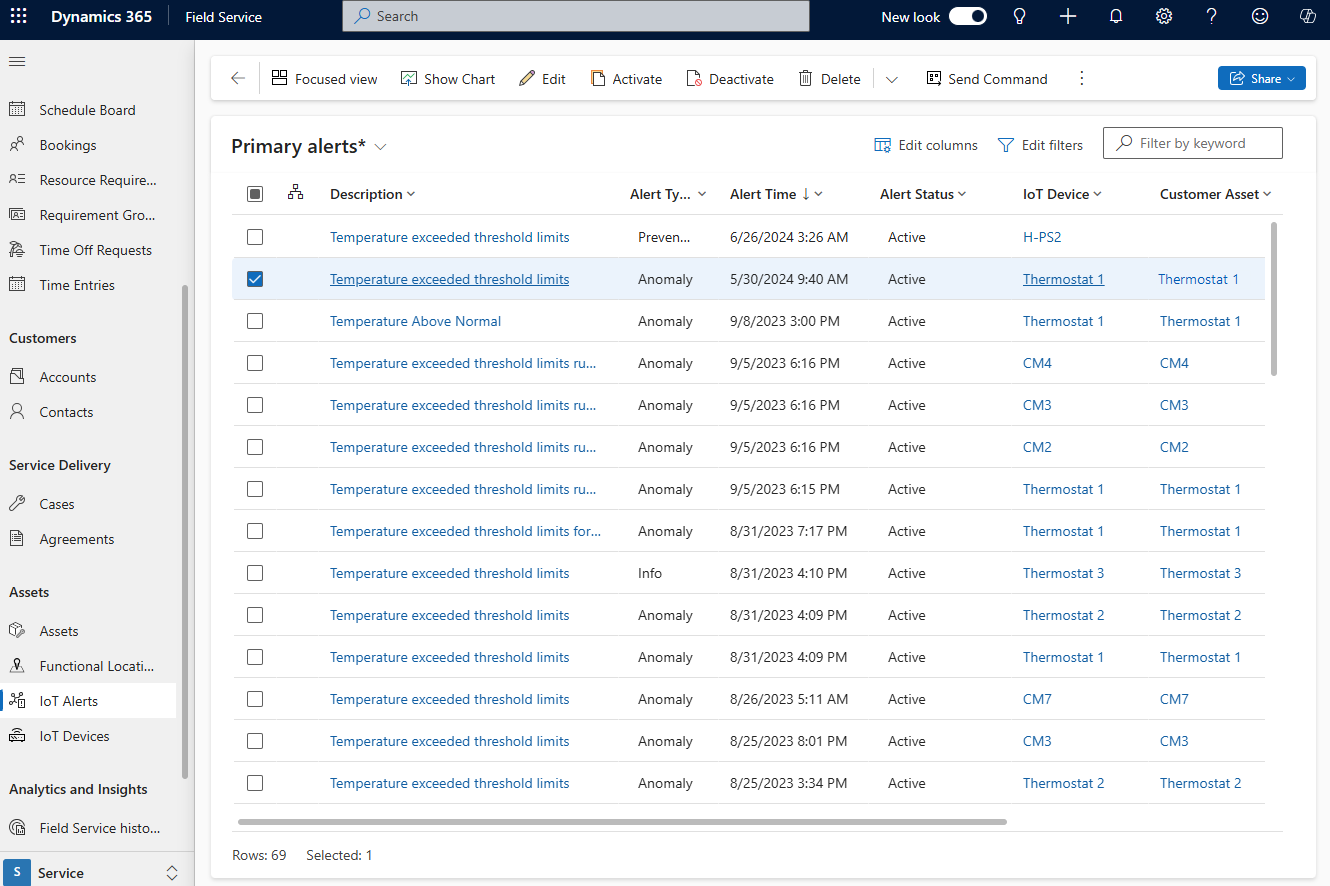
Open an alert. The Alert Data section shows the details in the JSON message.
To take action against the IoT alert, use the business process flow that's built into Field Service.
In Dynamics 365 Field Service, under Assets, select IoT Alerts.
Open an alert. The business process flow appears at the top of the page.
Create a case to investigate remotely. Select Created > Next Stage > Create.
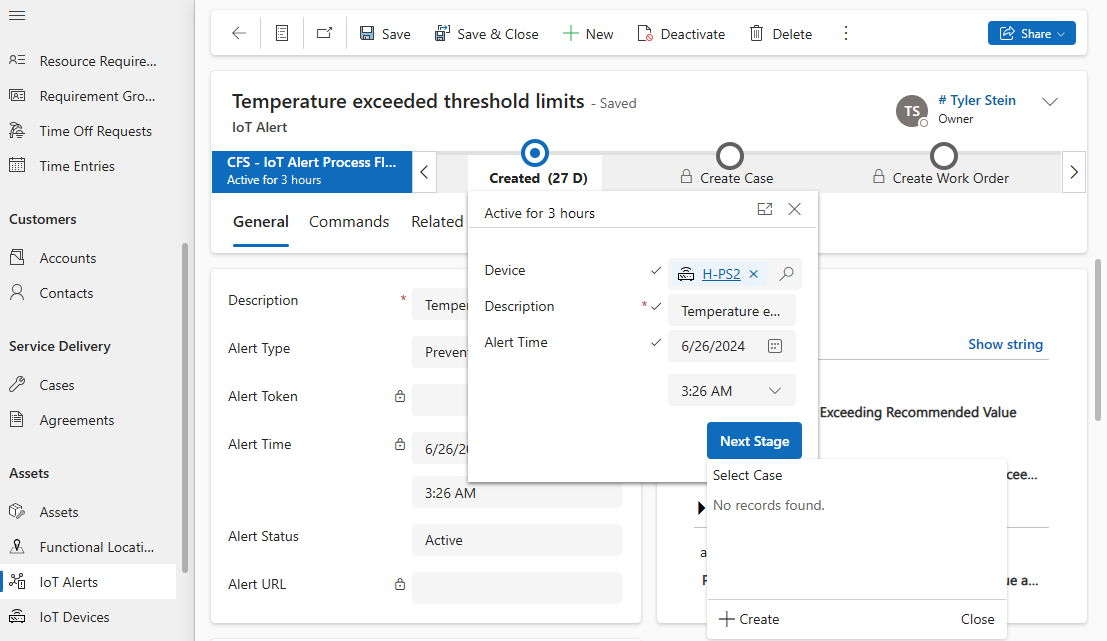
Select Save & Close. The Case page appears.
If the potential issue can't be identified or resolved remotely, advance to the next step in the business process flow to create a work order. Select Create Case > Next Stage > Create.
Enter the information for the work order.
Select Save & Close. The Work Order page appears. The IoT alert is referenced on the work order form. The technician can see it on their mobile device.
If applicable, you can schedule the work order.
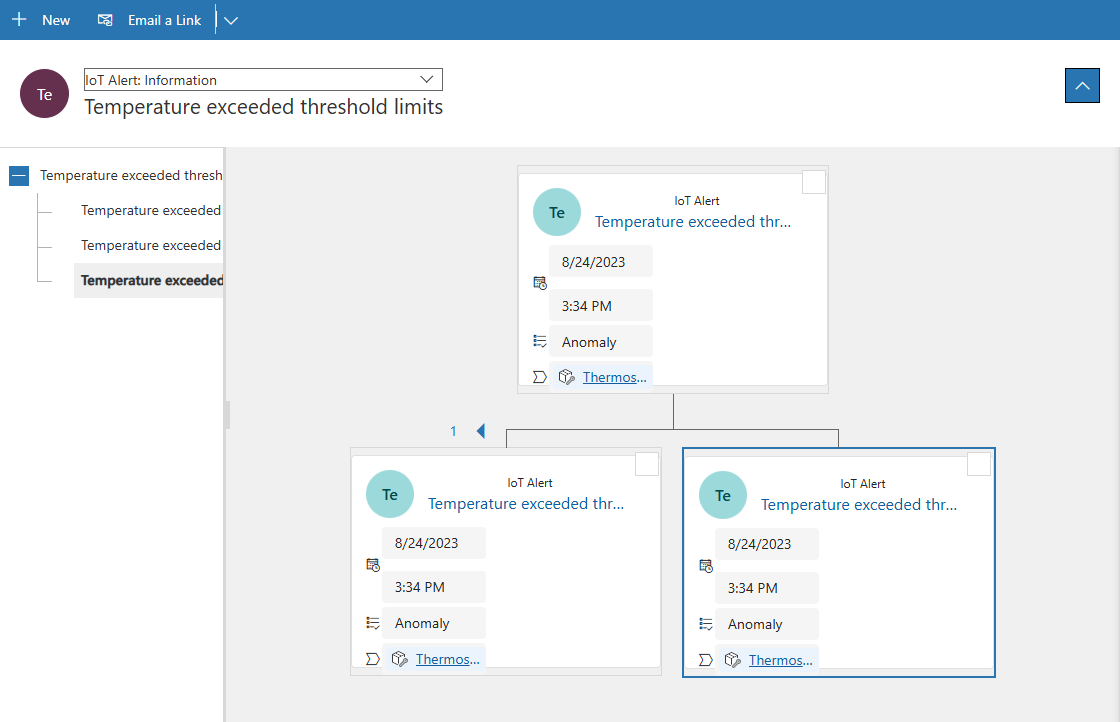
Multiple IoT alerts might be created for the same IoT device for the same issue. The system recognizes similar IoT alerts and groups them together.
In Dynamics 365 Field Service, under Assets, select IoT Alerts. The hierarchy icon identifies a group of similar alerts.
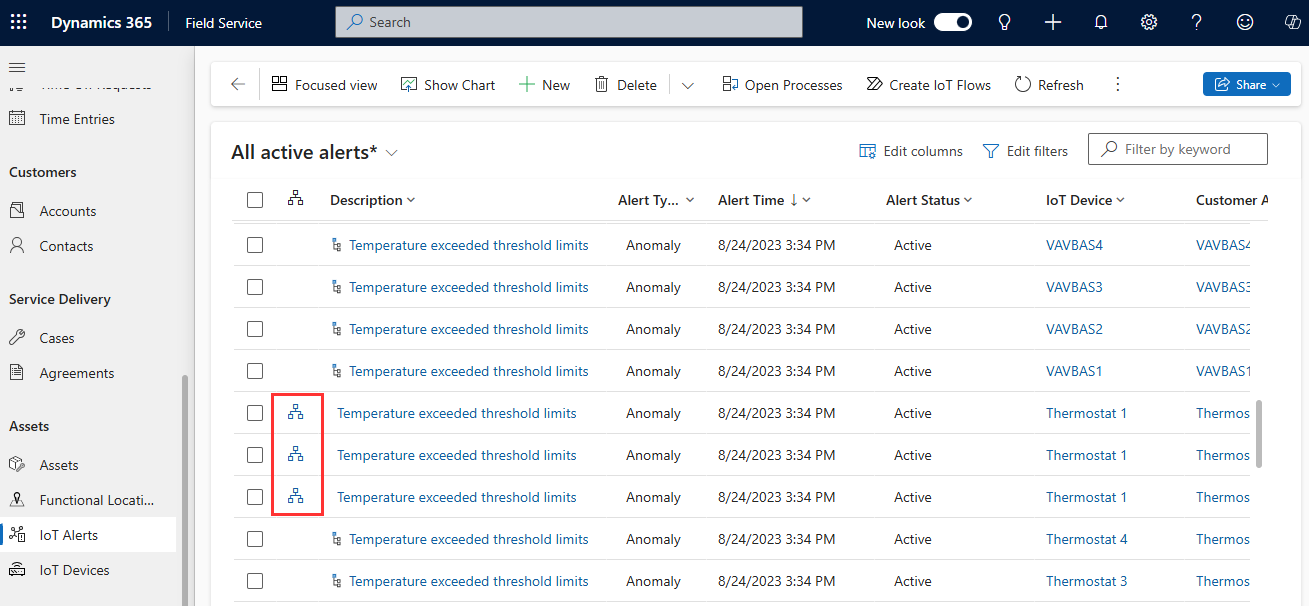
Select the hierarchy icon next to an IoT alert to see similar IoT alerts for the same device around the same time.
When an IoT alert is created in Connected Field Service, aggregation rules decide if the alert should be parented under another existing alert since the alert might be for a device or asset that already has an open alert. With autoparenting, you can avoid overrunning the alert list with many alerts for the same issue.
Under IoT, select Settings > Alert Aggregation Rules.
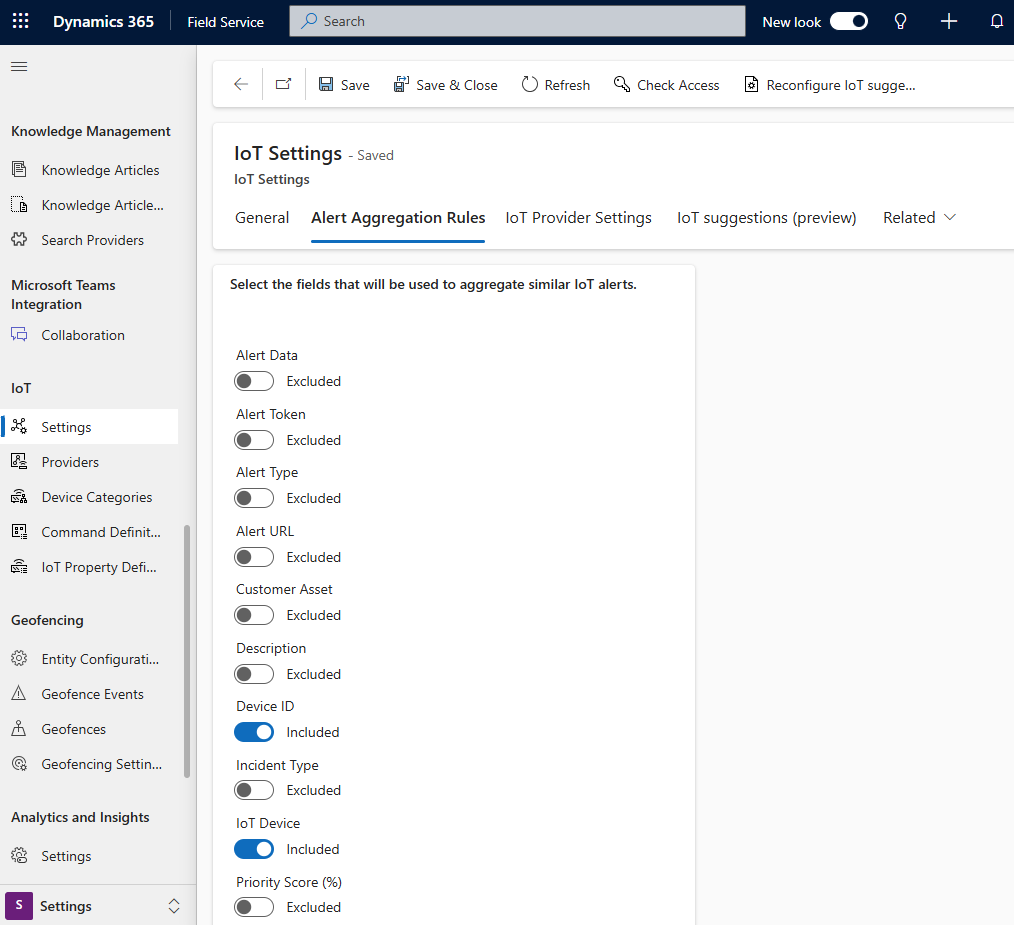
Select the fields to use to group similar IoT alerts, if any.
If an alert matches all the selected fields and the alert time falls within five minutes of the previous alert, the alert is parented. If you disable all the fields, the default setting applies. The default parents an alert if the device ID matches another alert and the alert time falls within five minutes.
If the alert time field doesn't have a value, the system uses the Created On field on the IoT alert record to make sure it falls within five minutes of other matching alerts.
When a parent alert is found, the system checks to see if the matched alert has a parent, in which case the new alert is linked to the existing parent alert. If the matching alert doesn't have a parent, the new alert is linked to the matching alert, which becomes the parent alert.
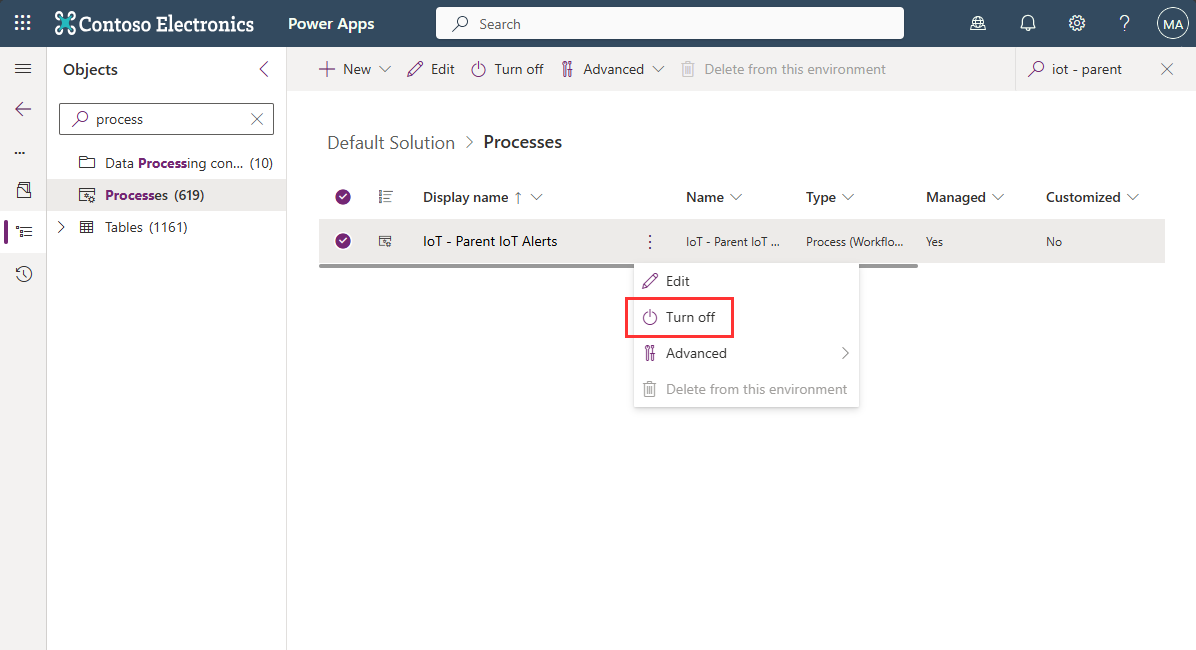
To make the five-minute rule longer or shorter, modify the workflow "debounce" period.
Sign in to Power Apps and select Solutions and your organization's solution.
Under Objects, select Processes.
Search for and open IoT - Parent Iot Alerts.
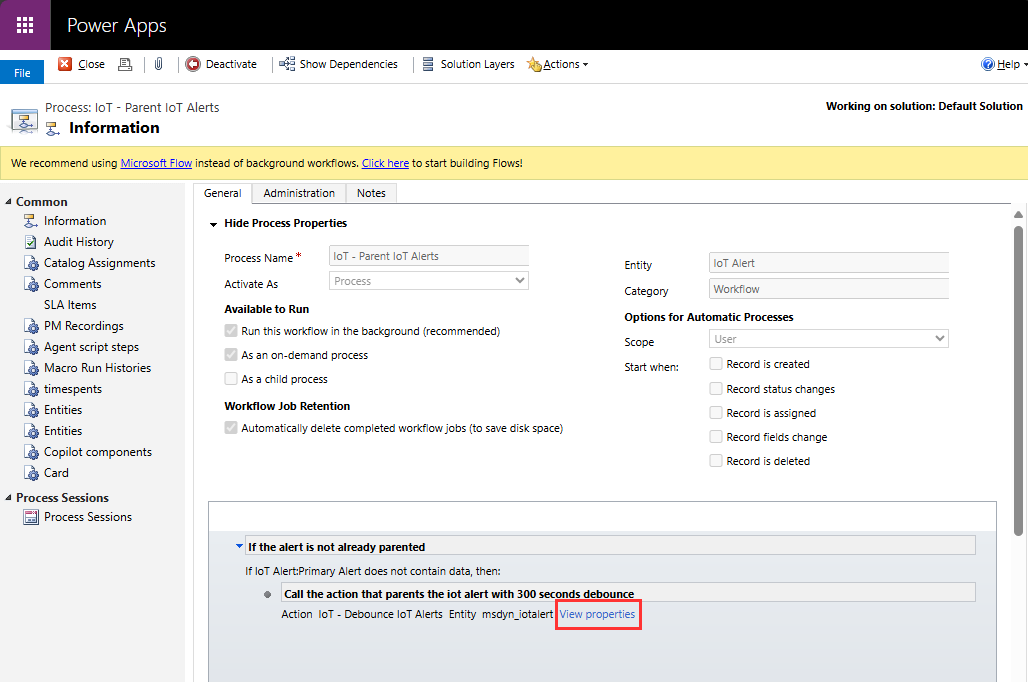
Select View properties.
Change the value based on the number of seconds you want for the debounce period. Then, select Save and Close.
To completely turn off the autoparent feature, disable the workflow or flow depending on whether your organization uses enhanced background processing controlled through Field Service settings. For more information, go to Use Enhanced Background Processing.