Web Service Connector workflow guide for a REST API sample
This article covers the deployment of a sample REST API to walk through the Web Service Configuration tool with a REST API Web Data Source.
Prerequisites
The following prerequisites are required to use the sample:
- The Web Service Configuration Tool is installed.
- REST data source sample service is deployed. Download and install the sample from (see here).
Note
JSON data must contain a single object with a property that contains an array.
{

"EmployeeList":[

{"id":"1","employee_name":"Albano","employee_salary":"22213","employee_age":"37","profile_image":""},{"id":"2","employee_name":"Albano","employee_salary":"22213","employee_age":"37","profile_image":""}

]

}
Configure REST project discovery in the Web Service Configuration Tool
The following steps show you how to create a new project for your data source in the Web Service Configuration Tool.
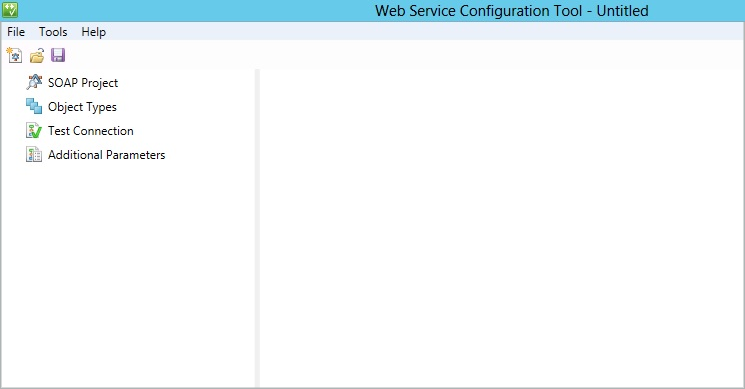
Open Web Service Configuration Tool. It opens a blank SOAP project.
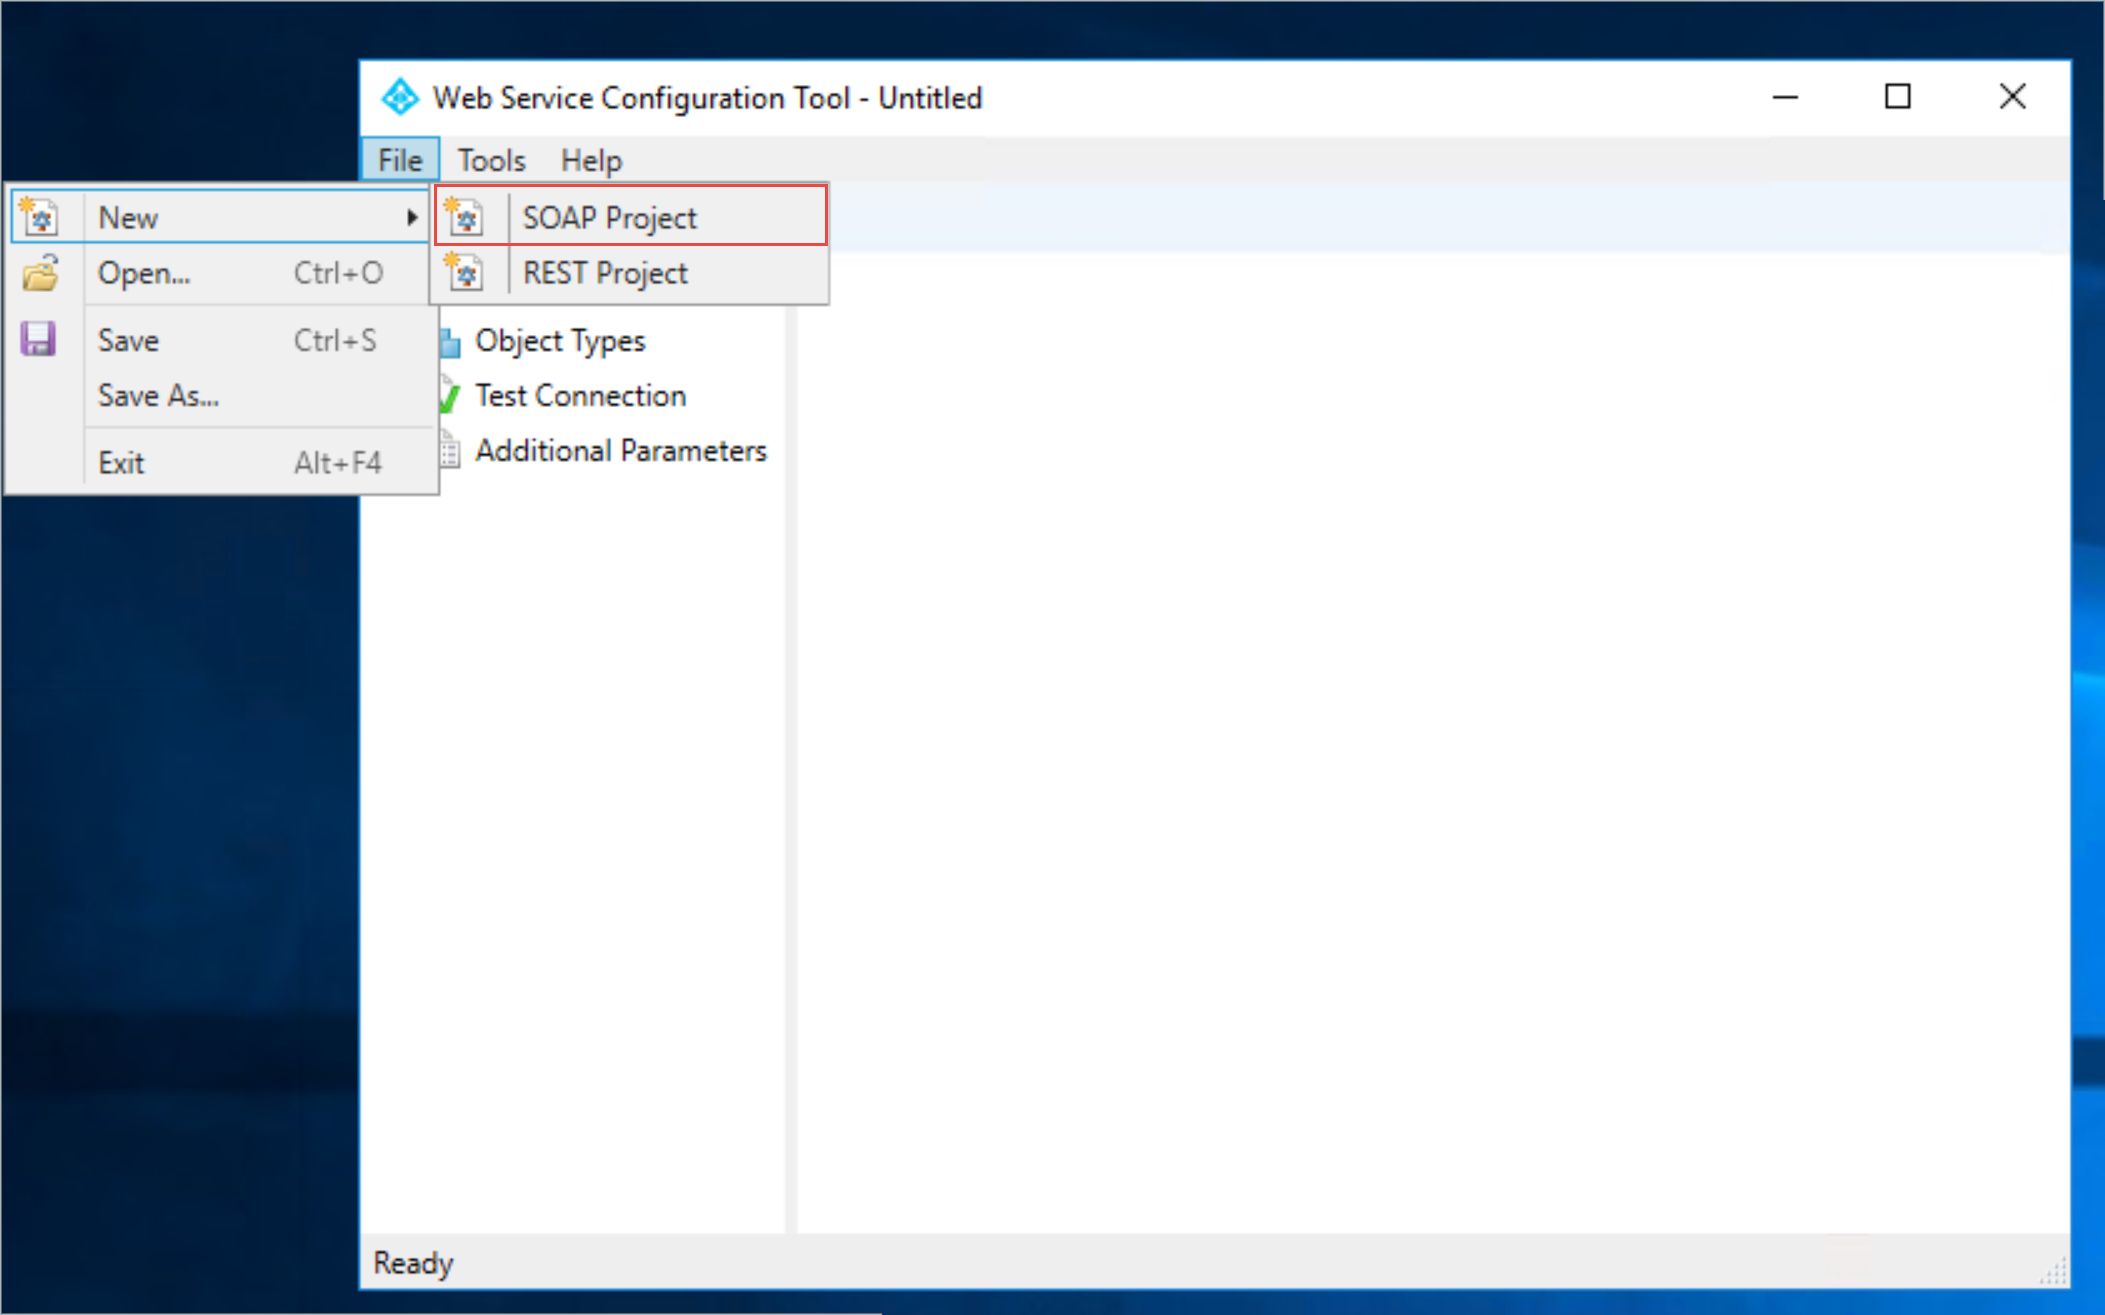
Select File > New > REST Project.
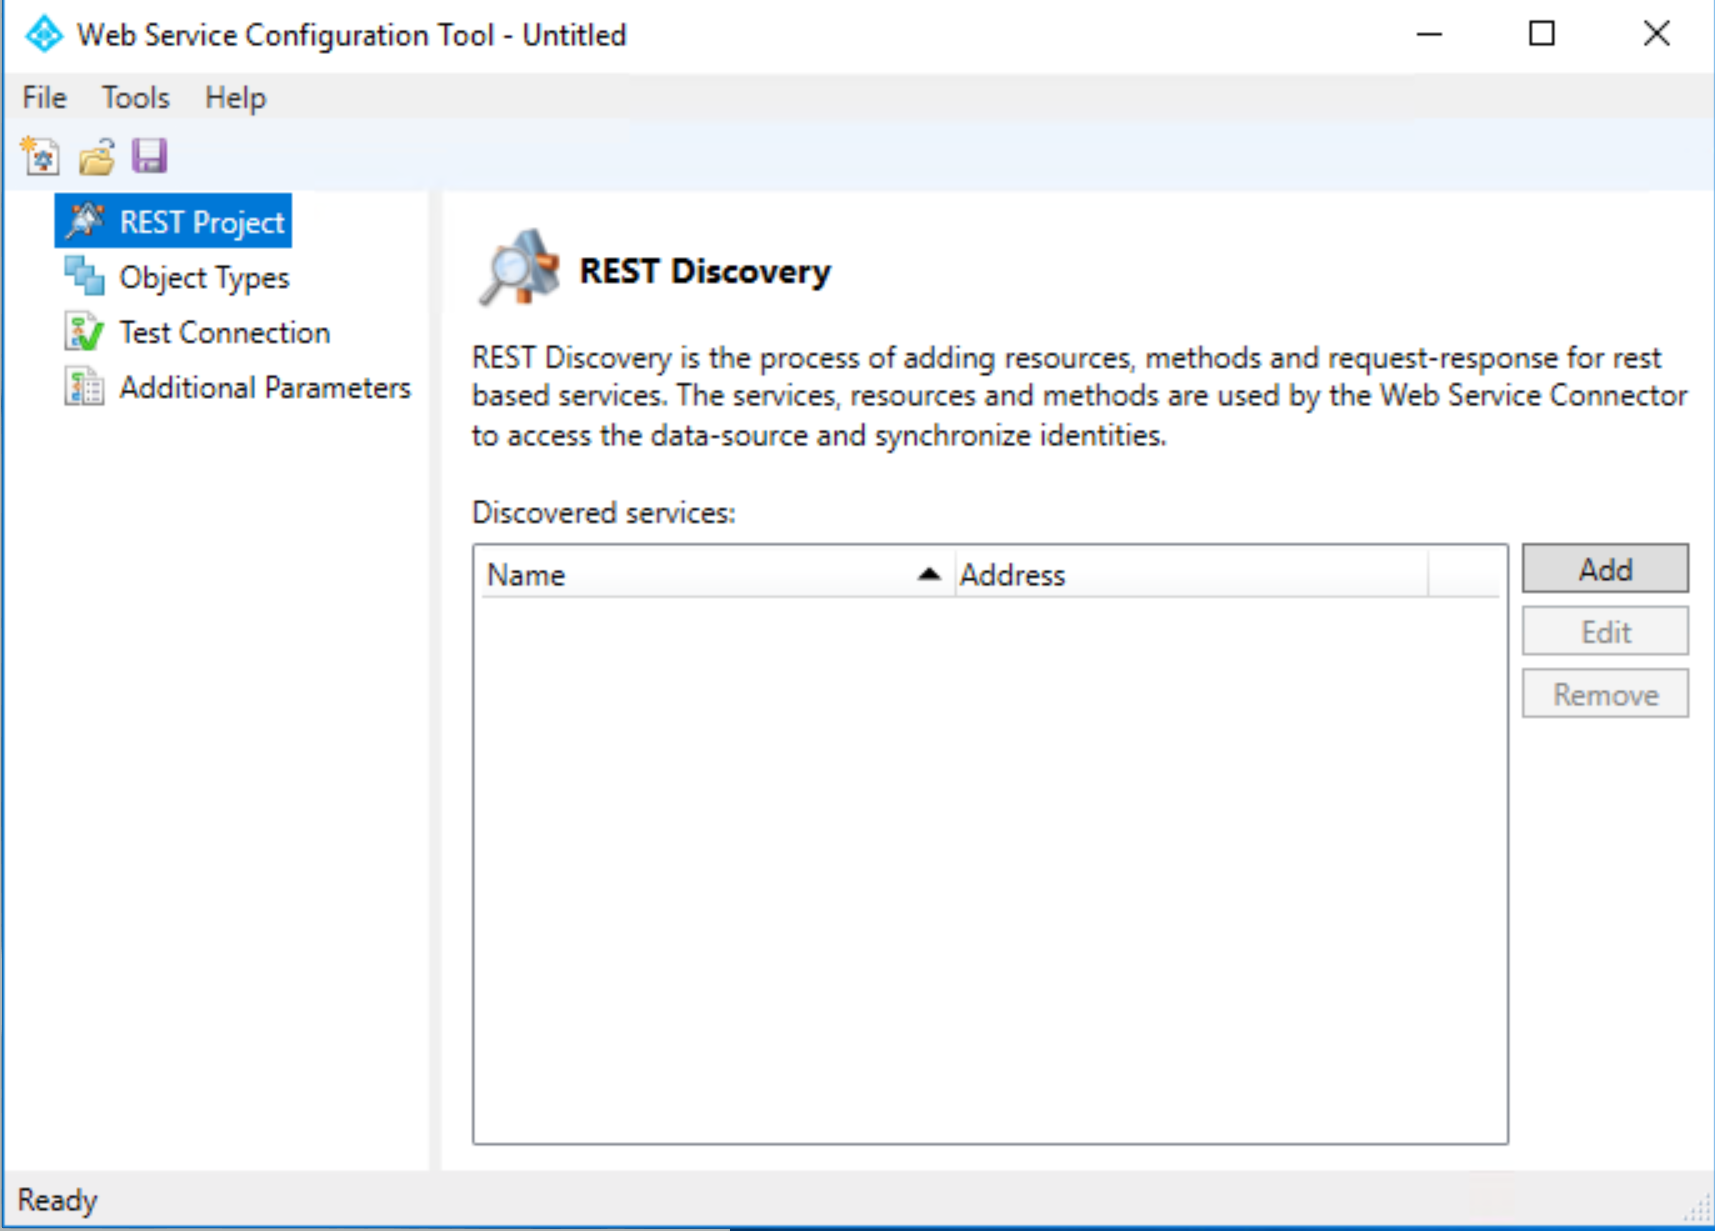
On the left, select REST Project and then select Add.
On the next page, provide the following information:
- The new web service name
- Address (REST API URL path)
- Namespace
- Security mode (authentication type)
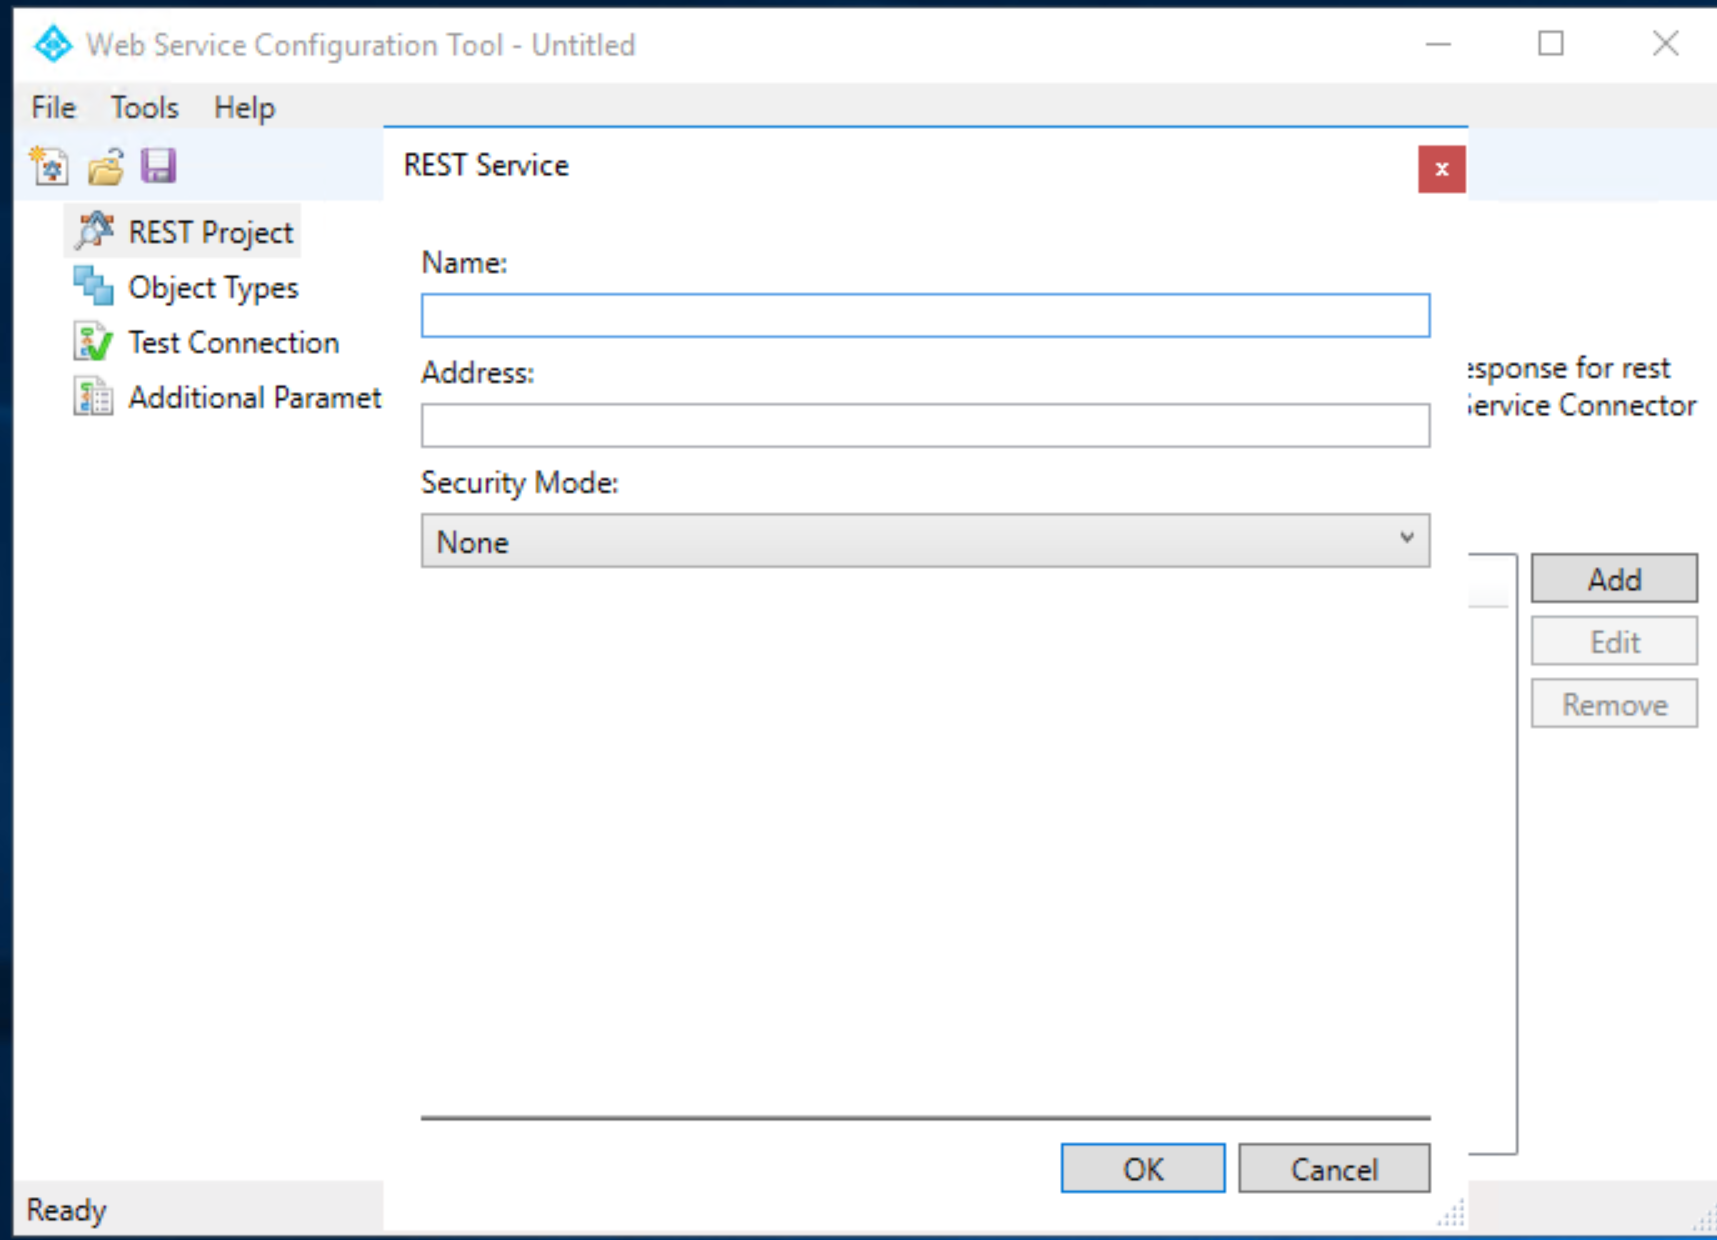
The following screen shows examples for these values:
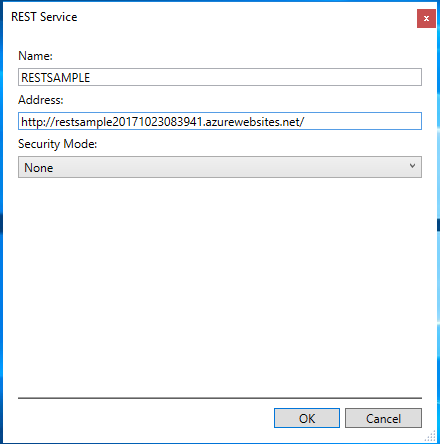
Set the Security Mode to None. Set the Address to the sample JSON Server that's hosted in Azure.
Select OK. The REST project listed in the Web Services Configuration Tool.
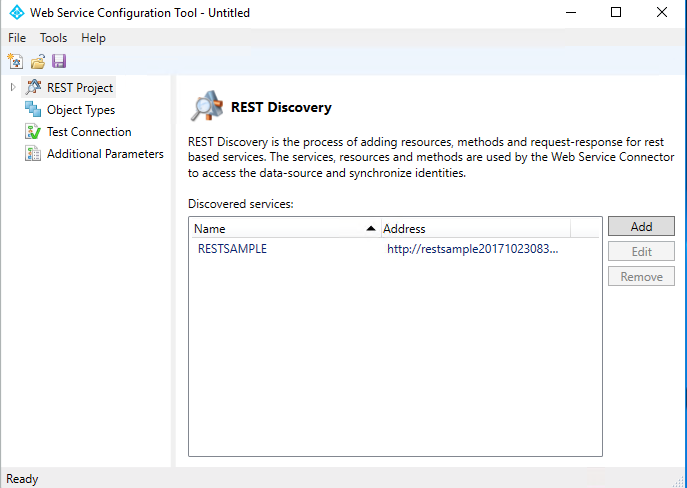
The next step is to define the REST API call and translate the call to the Windows Communication Foundation (WCF) calls.
Expand the REST Project and select the RESTSAMPLE service.
Select Add. You're prompted to add two values:
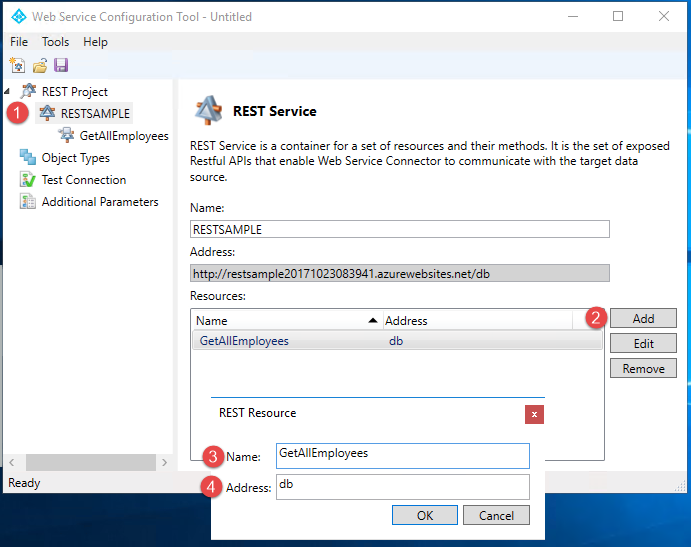
- Enter the Name. This step is labeled as 3 in the screenshot.
- Enter the Address. This step is labeled as 4 in the screenshot.
- Select OK. A REST resource is added to the description for the RESTSAMPLE service.
In the Resources box, select the REST resource that you just added. Add the following method:
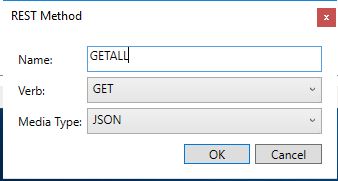
Select the REST method. Notice that it is possible for you to create multiple methods in the same resource and define the queries passed during execution.
For the GETALL method, no queries are required. Leave the parameter values blank. When exporting or importing the REST API, you must define the Sample Request /or Response depending on function. Copy and paste the JSON return when navigating to this sample.

Select Save. Save the project to
C:\Program Files\Microsoft Forefront Identity Manager\2010\Synchronization Service\Extensions.
Note
After the project is saved, the WsConfig file is generated. The configuration file contains multiple files that are defined earlier in the Web Service overview.
Configure object types in the Web Service Configuration Tool
The following steps show you how to configure object types for your data source in the Web Service Configuration Tool.
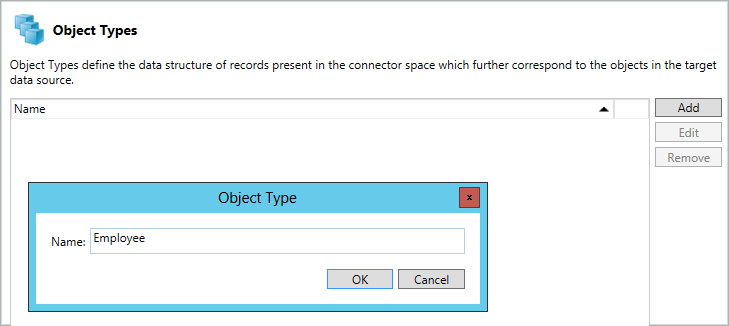
Next step is to define the connector space schema. This is achieved by creating the Object Type and defining their object types. Click Object Types in left pane and click Add button. Doing this opens below screen. Add a new object type and provide a name. Click the OK button.
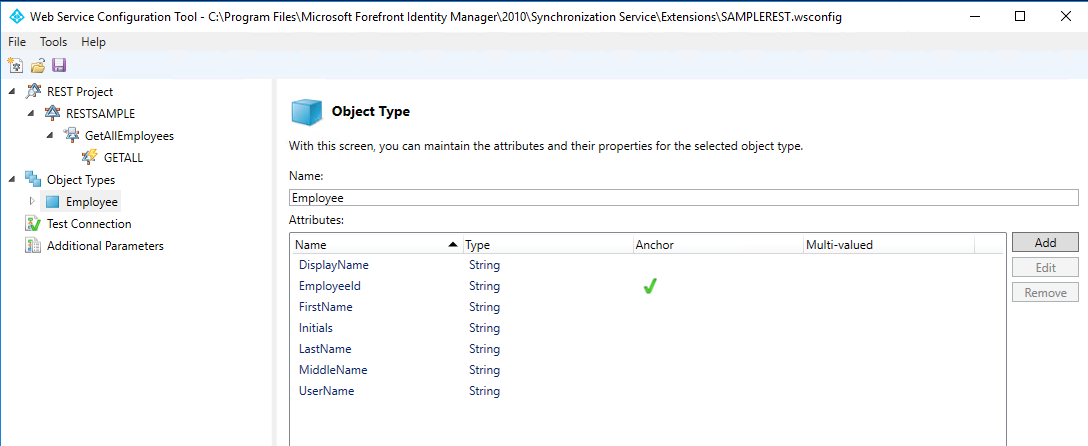
Adding an object type provides below screen.
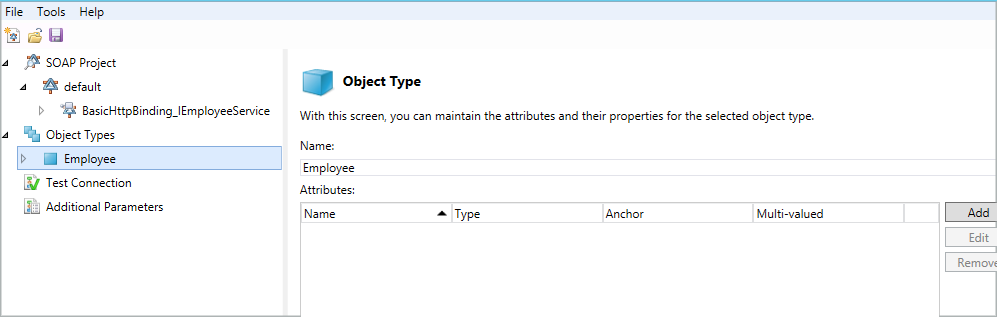
The right pane corresponding to object type allows you to maintain the attributes and their properties for the selected object type. Clicking Add button provides below screen where one can add attributes.
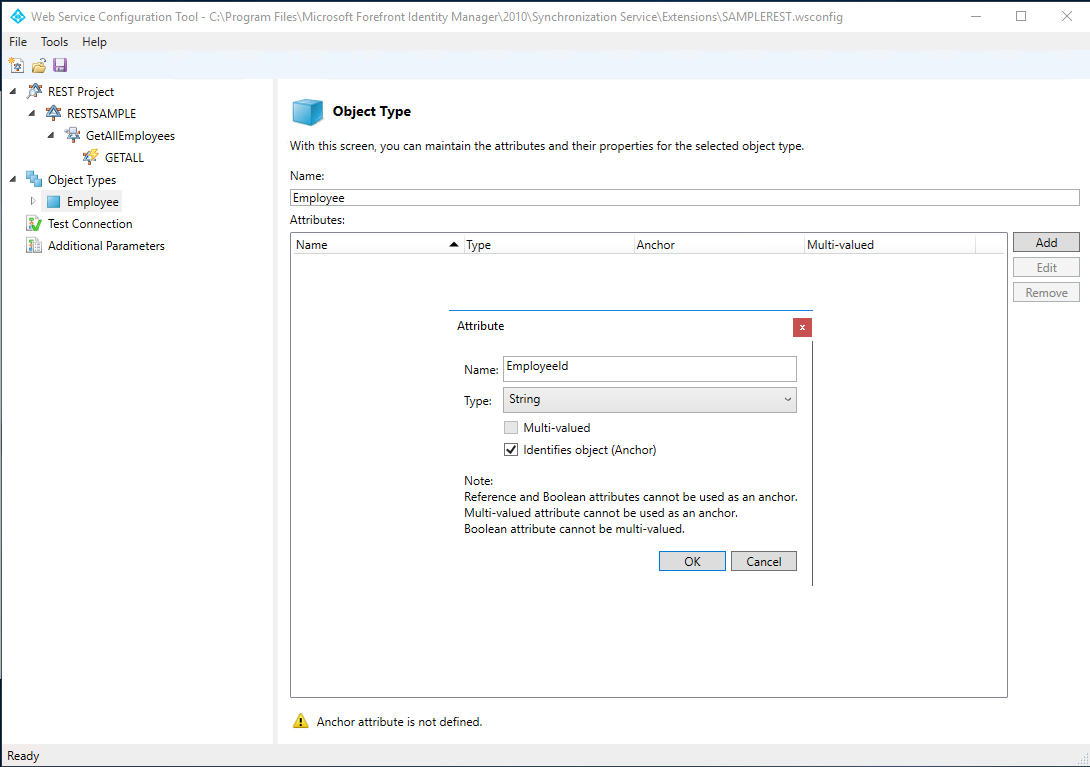
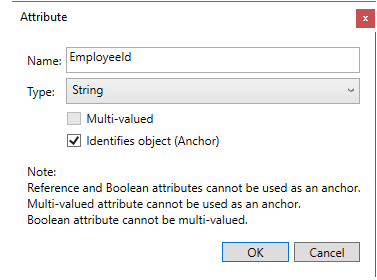
Below screen appears after adding all required attributes.
Object type and attributes once created, provides blank workflows that cater to the operations performed in Microsoft Identity Manager (MIM).
Configure workflows in the Web Service Configuration Tool
The next step is to configure the workflows for your object type. Workflow files are a series of activities that are used by the Web Services Connector at run time. The workflows are used to implement the appropriate MIM operation. The Web Service configuration Tool helps you to create four different workflows:
Import: Import data from a data source for the following two types of workflows:
- Full import: A full import that can be configured.
- Delta import: Not supported by the Web Service Configuration Tool.
Export: Export data from MIM to a connected data source. The following three actions are supported for the operation. You can configure these actions based on your requirements.
- Add
- Delete
- Replace
Password: Perform password management for the user (object type). Two actions are available for this operation:
- Set password
- Change password
Test Connection: Configure a workflow to check if the connection with data source server is successfully established.
Note
You can configure these workflows for your project or download the default project from the Microsoft Download Center.
Workflow Designer
The Workflow Designer opens the work area to configure the workflow as per requirement. For every object type (new /existing), the configuration tool provides the nodes for workflows that are supported by the tool.
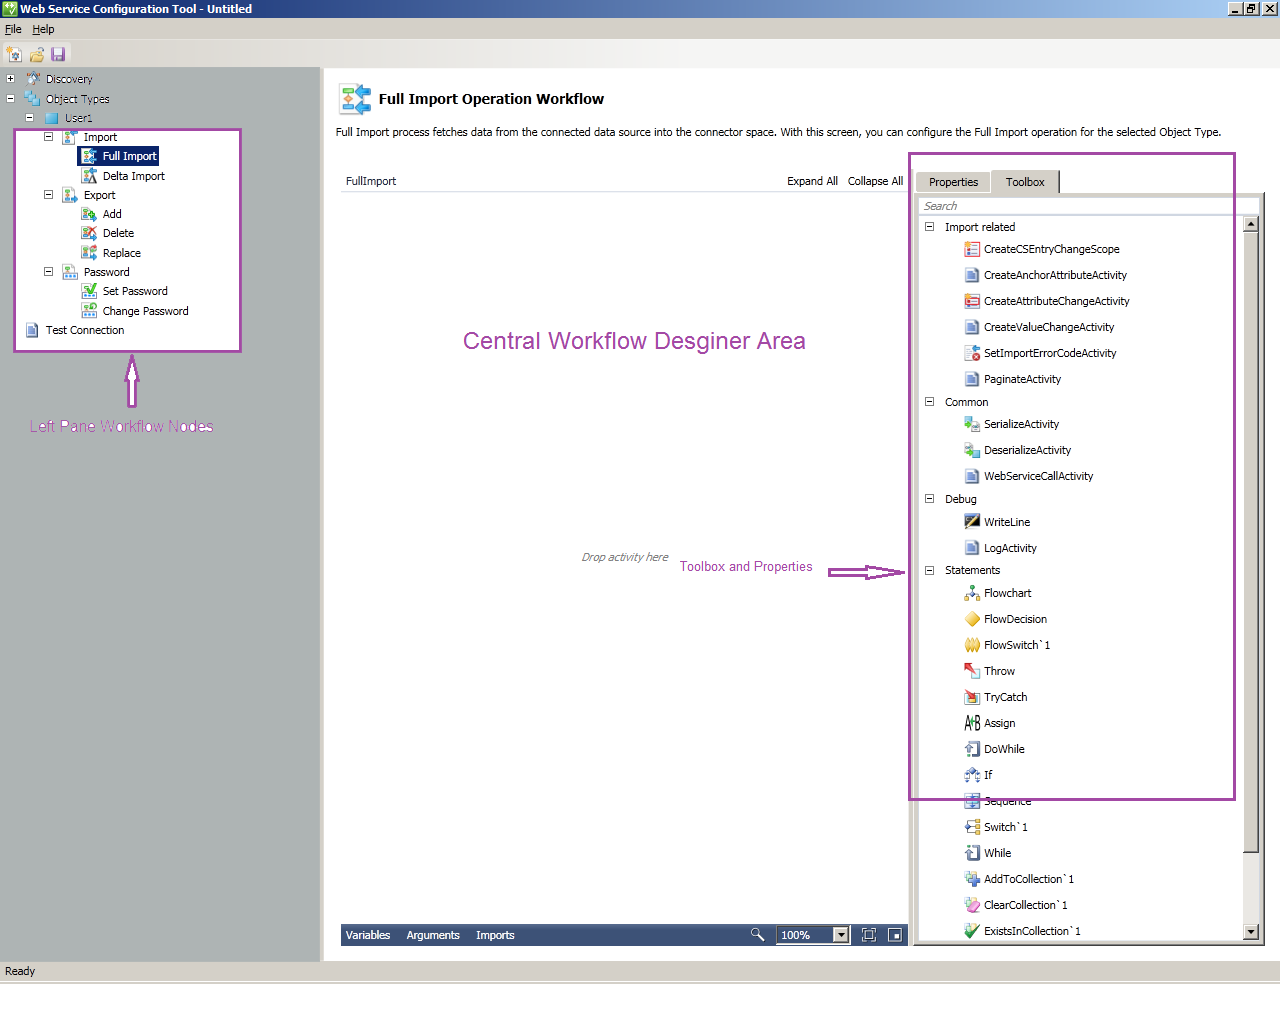
The Workflow Designer is composed of the following UI elements:
Nodes in left pane: These help you to select which you want to design which workflow.
Central Workflow Designer: Here you can drop the activities for configuring the workflows. To accomplish various MIM operations (Export, Import, Password management), you can use the standard and custom workflow activities of .NET Workflow Framework 4. The Web Service Configuration tool uses standard and custom workflow activities. For more information on standard activities, see Using activity designers.
In the Central Workflow Designer, a red circle with exclamation mark beside any activity indicates that the operation dropped and is not defined correctly and completely. Hover over the red circle to find out the exact error. After the activity is defined correctly, the red circle changes to the yellow information mark.
In the Central Workflow Designer, a yellow triangle information mark beside any activity indicates that the activity is defined, but there is more that you can do to complete the activity. Hover over the yellow triangle to see more information.
Toolbox: Packages all the tools including system and custom activities and predefined statements to design the workflow. For more information, see Toolbox.
Toolbox sections: The Toolbox has the following sections and categories:
Description: The header of the Toolbox. One tab accesses the Toolbox and the properties of the selected workflow activity.
Import workflow: Custom activities to configure import workflows.
Export workflow: Custom activities to configure export workflows.
Common: Custom activities to configure any workflow.
Debug: System workflow activities for debugging defined in Workflow 4. These activities allow issue tracking for a workflow.
Statements: System workflow activities defined in Workflow 4. For more information, see Using activity designers.
Properties: The properties tab displays the properties of a particular workflow activity that is dropped in the designer area and selected. The figure on the left shows the properties of Assign activity. For every activity, the properties differ and are used while configuring the custom workflow. This tab allows you to define the attributes of the selected tool that has been dropped into the central workflow designer. For more information, see Properties.
Task Bar: The task bar includes three elements: Variables, Arguments, and Imports. These elements are used together with workflow activities. For more information, see A developer's introduction to Windows Workflow Foundation (WF) in .NET 4.
Configure a full import workflow in the Web Service Configuration Tool
The following steps show how to configure full import workflows for the REST API by using the Web Service Configuration Tool.
Warning
This sample only creates a workflow. Modifications to the workflow, such as to use custom logic in the API, may be required.
Select the Full Import workflow to configure. The Arguments and Imports are already defined and are specific to the activities. See the following screens for more information.

After the reconfiguration of the calls you need to change the names of the attributes that change or add the namespace to variables that refer to the return structure of the API and object types that refer to the old namespace. The toolbox in right pane holds all the custom workflow-specific activities that you require for configuration. Assign the values to the variables that you are going to use for your logic. Go to the bottom section of central workflow designer and declare the variables. Variables are declared in the next step.
Add a Sequence activity. Drag the Sequence activity designer from the Toolbox and drop it on to the Windows Workflow Designer surface. Refer to the following screens. The Sequence activity contains an ordered collection of child activities that it executes in order.
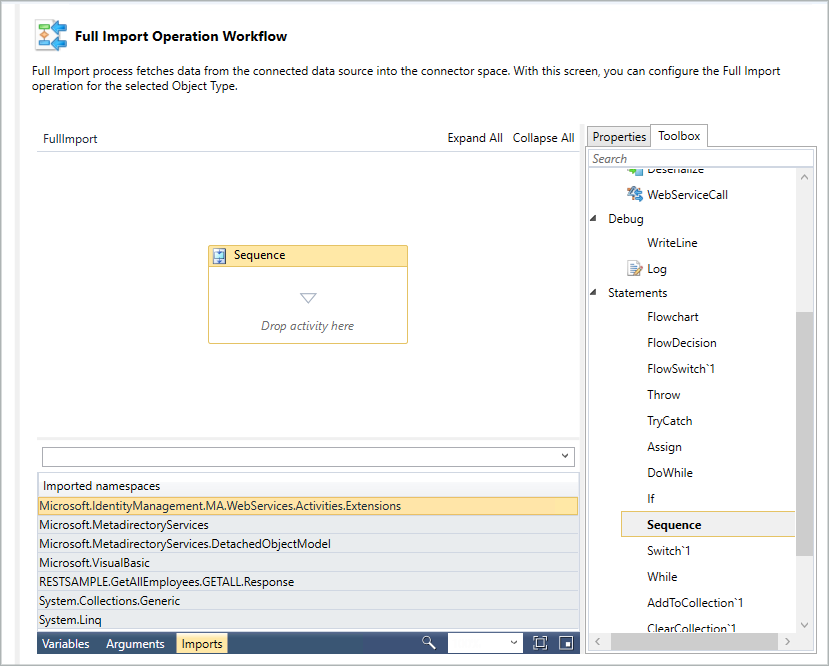
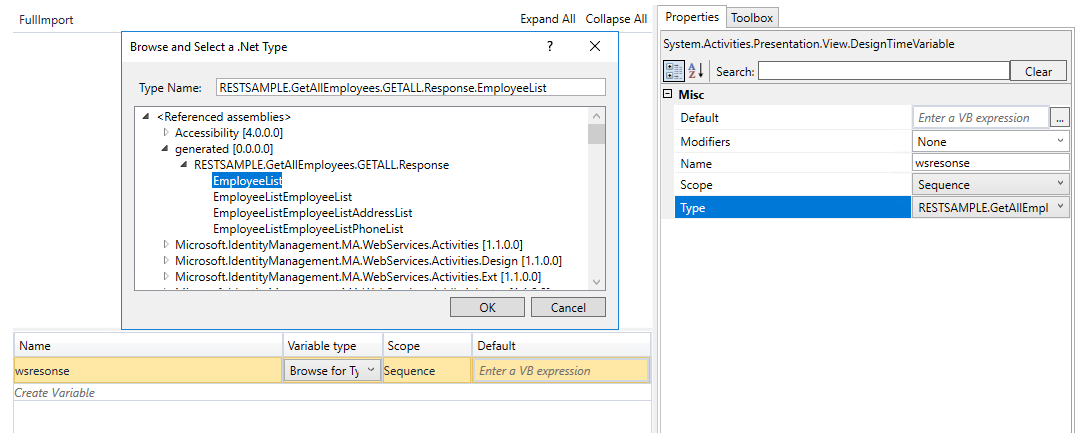
To add a variable, locate Create Variable. Type wsResponse for the Name, select the Variable type drop-down, and then select Browse for Types. A dialog is displayed. Select generated > GETALL > Response. Keep the Scope and Default values unselected. Alternatively, set these values by using the Properties view.
Drag one more Sequence activity designer from the Toolbox within already added Sequence activity.
Drag a WebServiceCallActivity presented under Common. This activity is used to invoke Web service operation available after Discovery. This is a custom activity and is common in different operation scenarios.
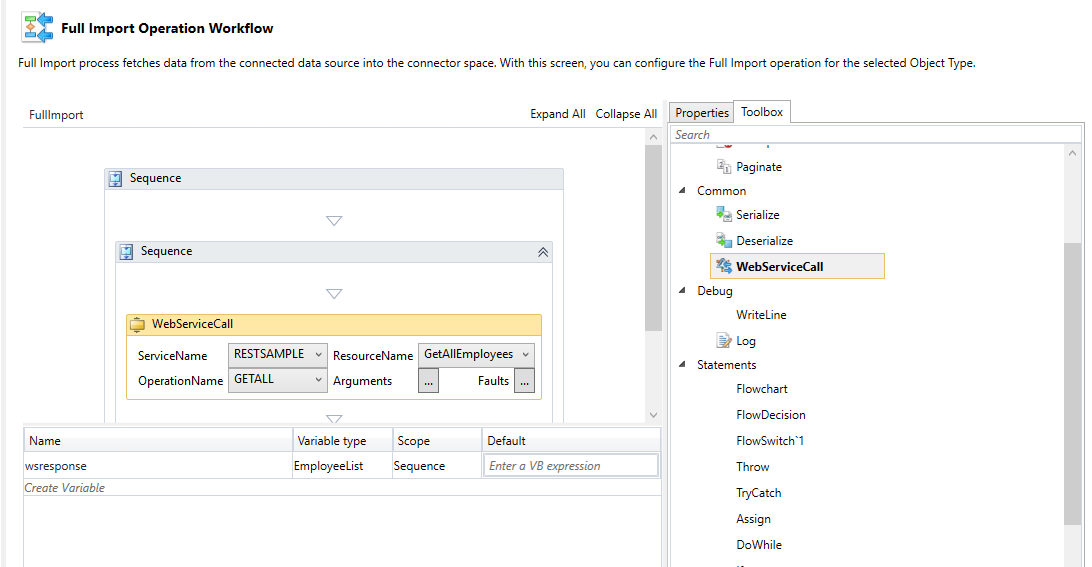
To use the Web service operation, set following properties:
Service Name: Enter a name for the web service.
Endpoint Name: Specify an endpoint name for the selected service.
Operation Name: Specify the respective operation for the service.
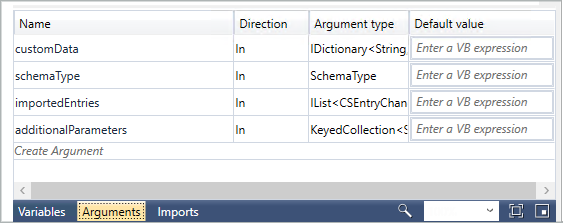
Argument: Select Arguments. In the next dialog, assign the argument values, as shown in the following figure:
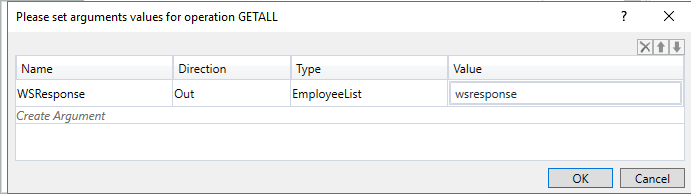
Important
Do not change the Name, Direction, or Type for an argument by using this dialog. If any of these values are changed, the activity becomes invalid. Only set the Value for the argument. As shown in this figure, the value wsResponse is set.
Add a ForEach activity just below WebServiceCallActivity. This activity is used to iterate over all attributes (both anchors and non-anchors) of object type. While dragging this activity into your Workflow Designer surface, it automatically enumerates all attribute names for your object. Set required values as per the following screen:
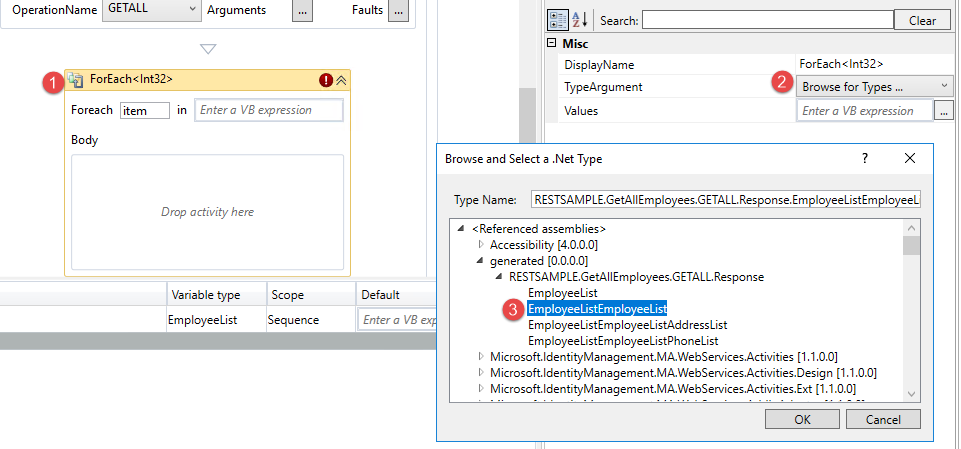
In some cases, you might need to open the generated.dll that's within the WsConfig file. Copy this WsConfig file and rename it with the .zip extension. Open and extract the generated.dll by using your preferred .NET reflector tool.

Identify the public namespace for the EmployeeList:
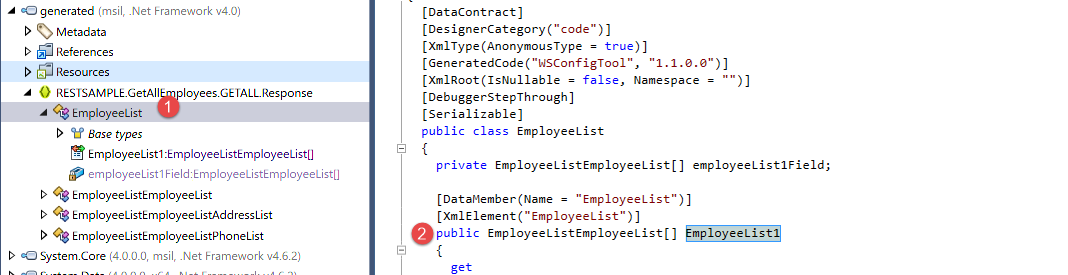
Next, add this return to the workflow ForEach:

Drag a CreateCSEntryChangeScope activity within ForEach body. This activity is used to create an instance of CSEntryChange object in workflow domain for each respective record while retrieving data from target data source. Dragging this activity provides below screen. CreateAnchorAttribute activities are automatically inherited. Update the DN value to your preferred domain name.
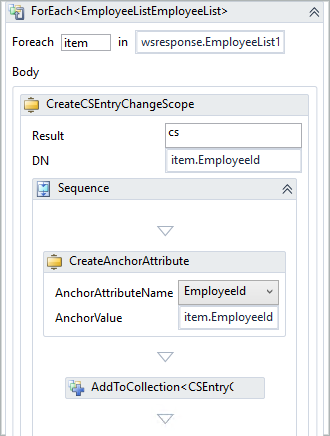
Note
Anchor values and object names vary according to the exposed web service. The figure shows an example.
Drag a CreateAttributeChange activity below the CreateAnchorAttribute activity. The number of activities to drag is equal to the number of non-anchor attributes. See the following figure for reference.
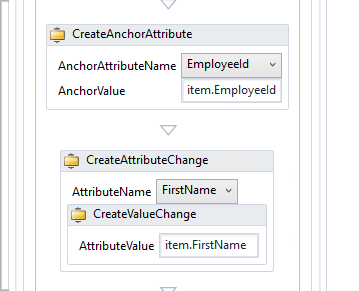
Note
To use this activity, pick and assign the respective fields from the drop-down and assign the values. For multivalued attributes, drop multiple CreateValueChangeActivity activities inside a CreateAttributeChangeActivity activity.
Save this project at the location
%FIM_INSTALL_FOLDER%\Synchronization Service\Extensions. Then configure the Management Agent as described in Web Service MA configuration.
Default projects should be downloaded and saved at the location
%FIM_INSTALL_DIR\2010\Synchronization Service\Extensionson the target system. The projects are then visible in the web service connector wizard.When running the executable file, you're prompted to specify the location for the installation. Enter the save location.
Important
The project file can be saved and opened from any location (with the appropriate access privileges of its executor). Only project files that are saved to the
Synchronization Service\Extensionfolder can be selected in the Web Service connector wizard that's accessed through the MIM Synchronization UI.The user who's running the Web Service Configuration tool requires the following privileges:
- Full Control to the Synchronization Service Extension folder.
- Read access to the registry key
HKLM\System\CurrentControlSet\Services\FIMSynchronizationService\Parametersthrough which, the Extension folder path is located.
Next steps
Feedback
Coming soon: Throughout 2024 we will be phasing out GitHub Issues as the feedback mechanism for content and replacing it with a new feedback system. For more information see: https://aka.ms/ContentUserFeedback.
Submit and view feedback for